Ok. If you never take heed of any of my tips but this one, that would be okay. (Not really, I give awesome tips, so you should definitely listen to them all….but this one is really, really helpful) When starting a Pattern, any pattern, honestly, …
Nope. Nope. Nope!! A Miniature Quilt, in fact, means much more work in a teenier space! Here’s a quick glimpse of a Miniature Quilt I worked on for a Competition Show this May. The Competition was to create a Miniature Quilt that had no pieces …
Here’s another older finish that I thought I’d show you all. Trying to show some of my COVID makes to catch up a bit.
Remember when I showed you the Wedding Quilt Modern Bliss in Blue? And remember how I told you about how this amazing couple had “many new and exciting things have happened for them since that quilt was gifted…..spoiler alert….I’ll get around to showing you their baby quilt from a few year’s ago soon!”? No? Oh Look! A convenient link to that article right here!
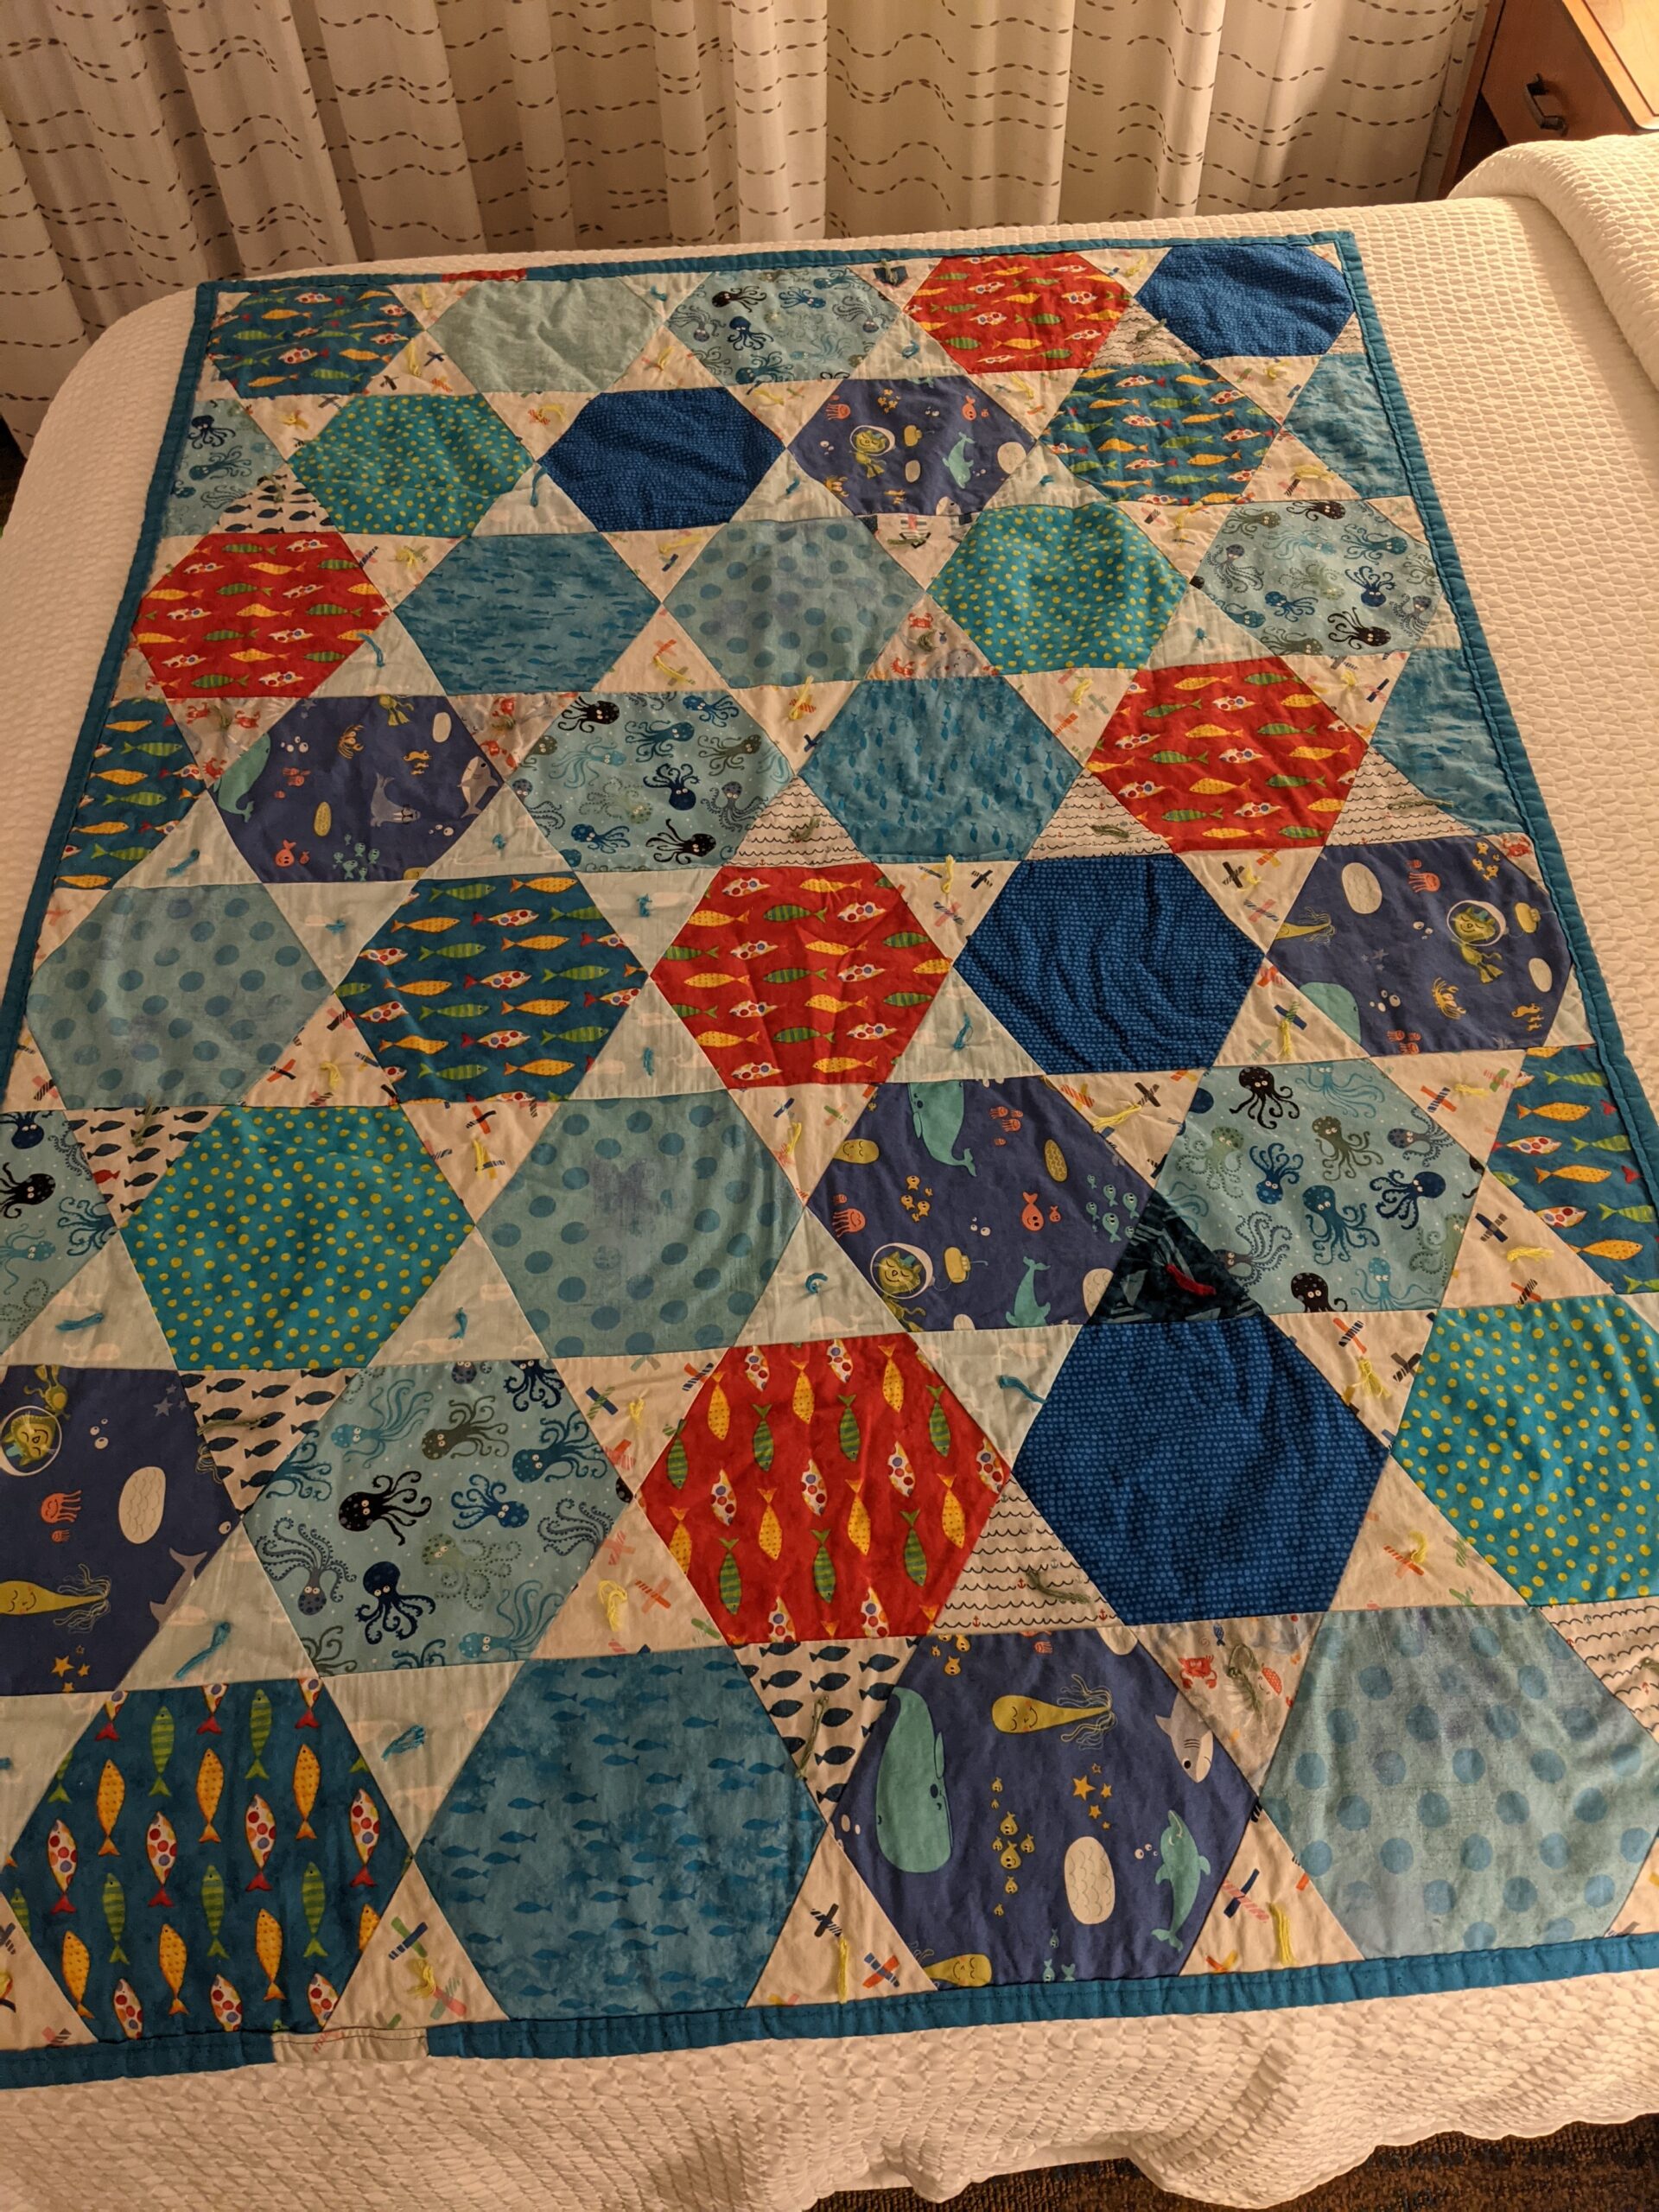
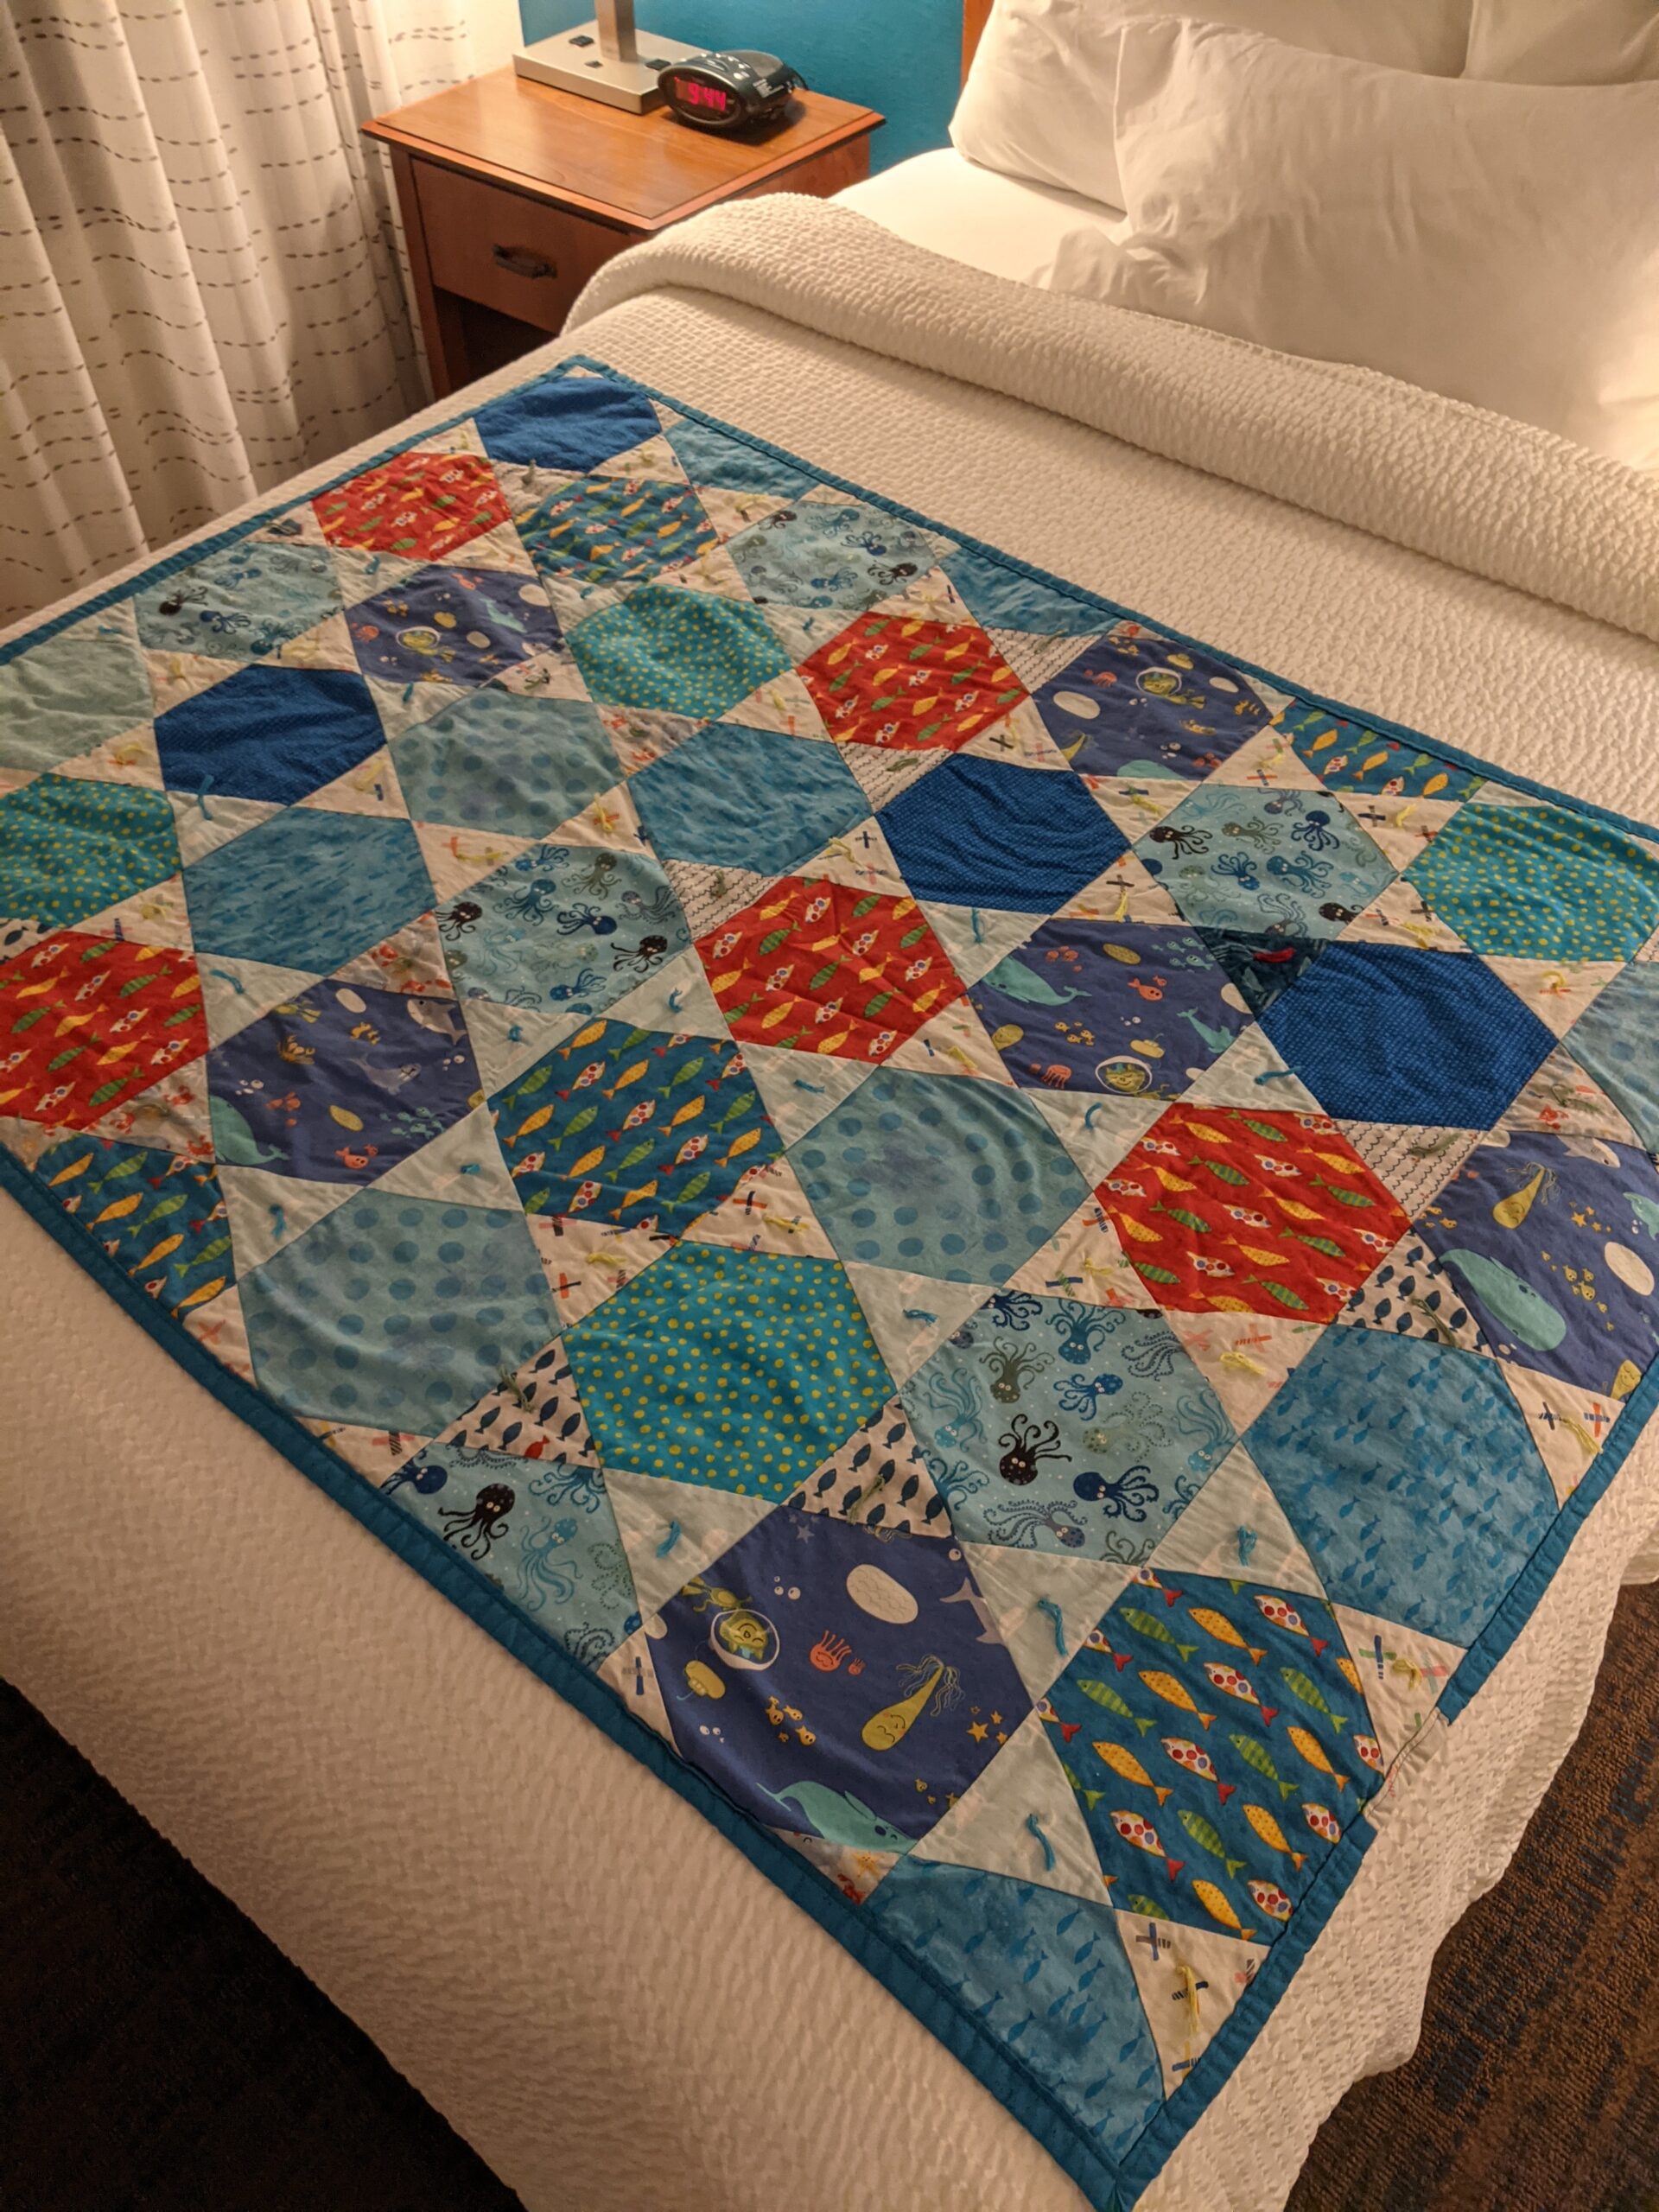
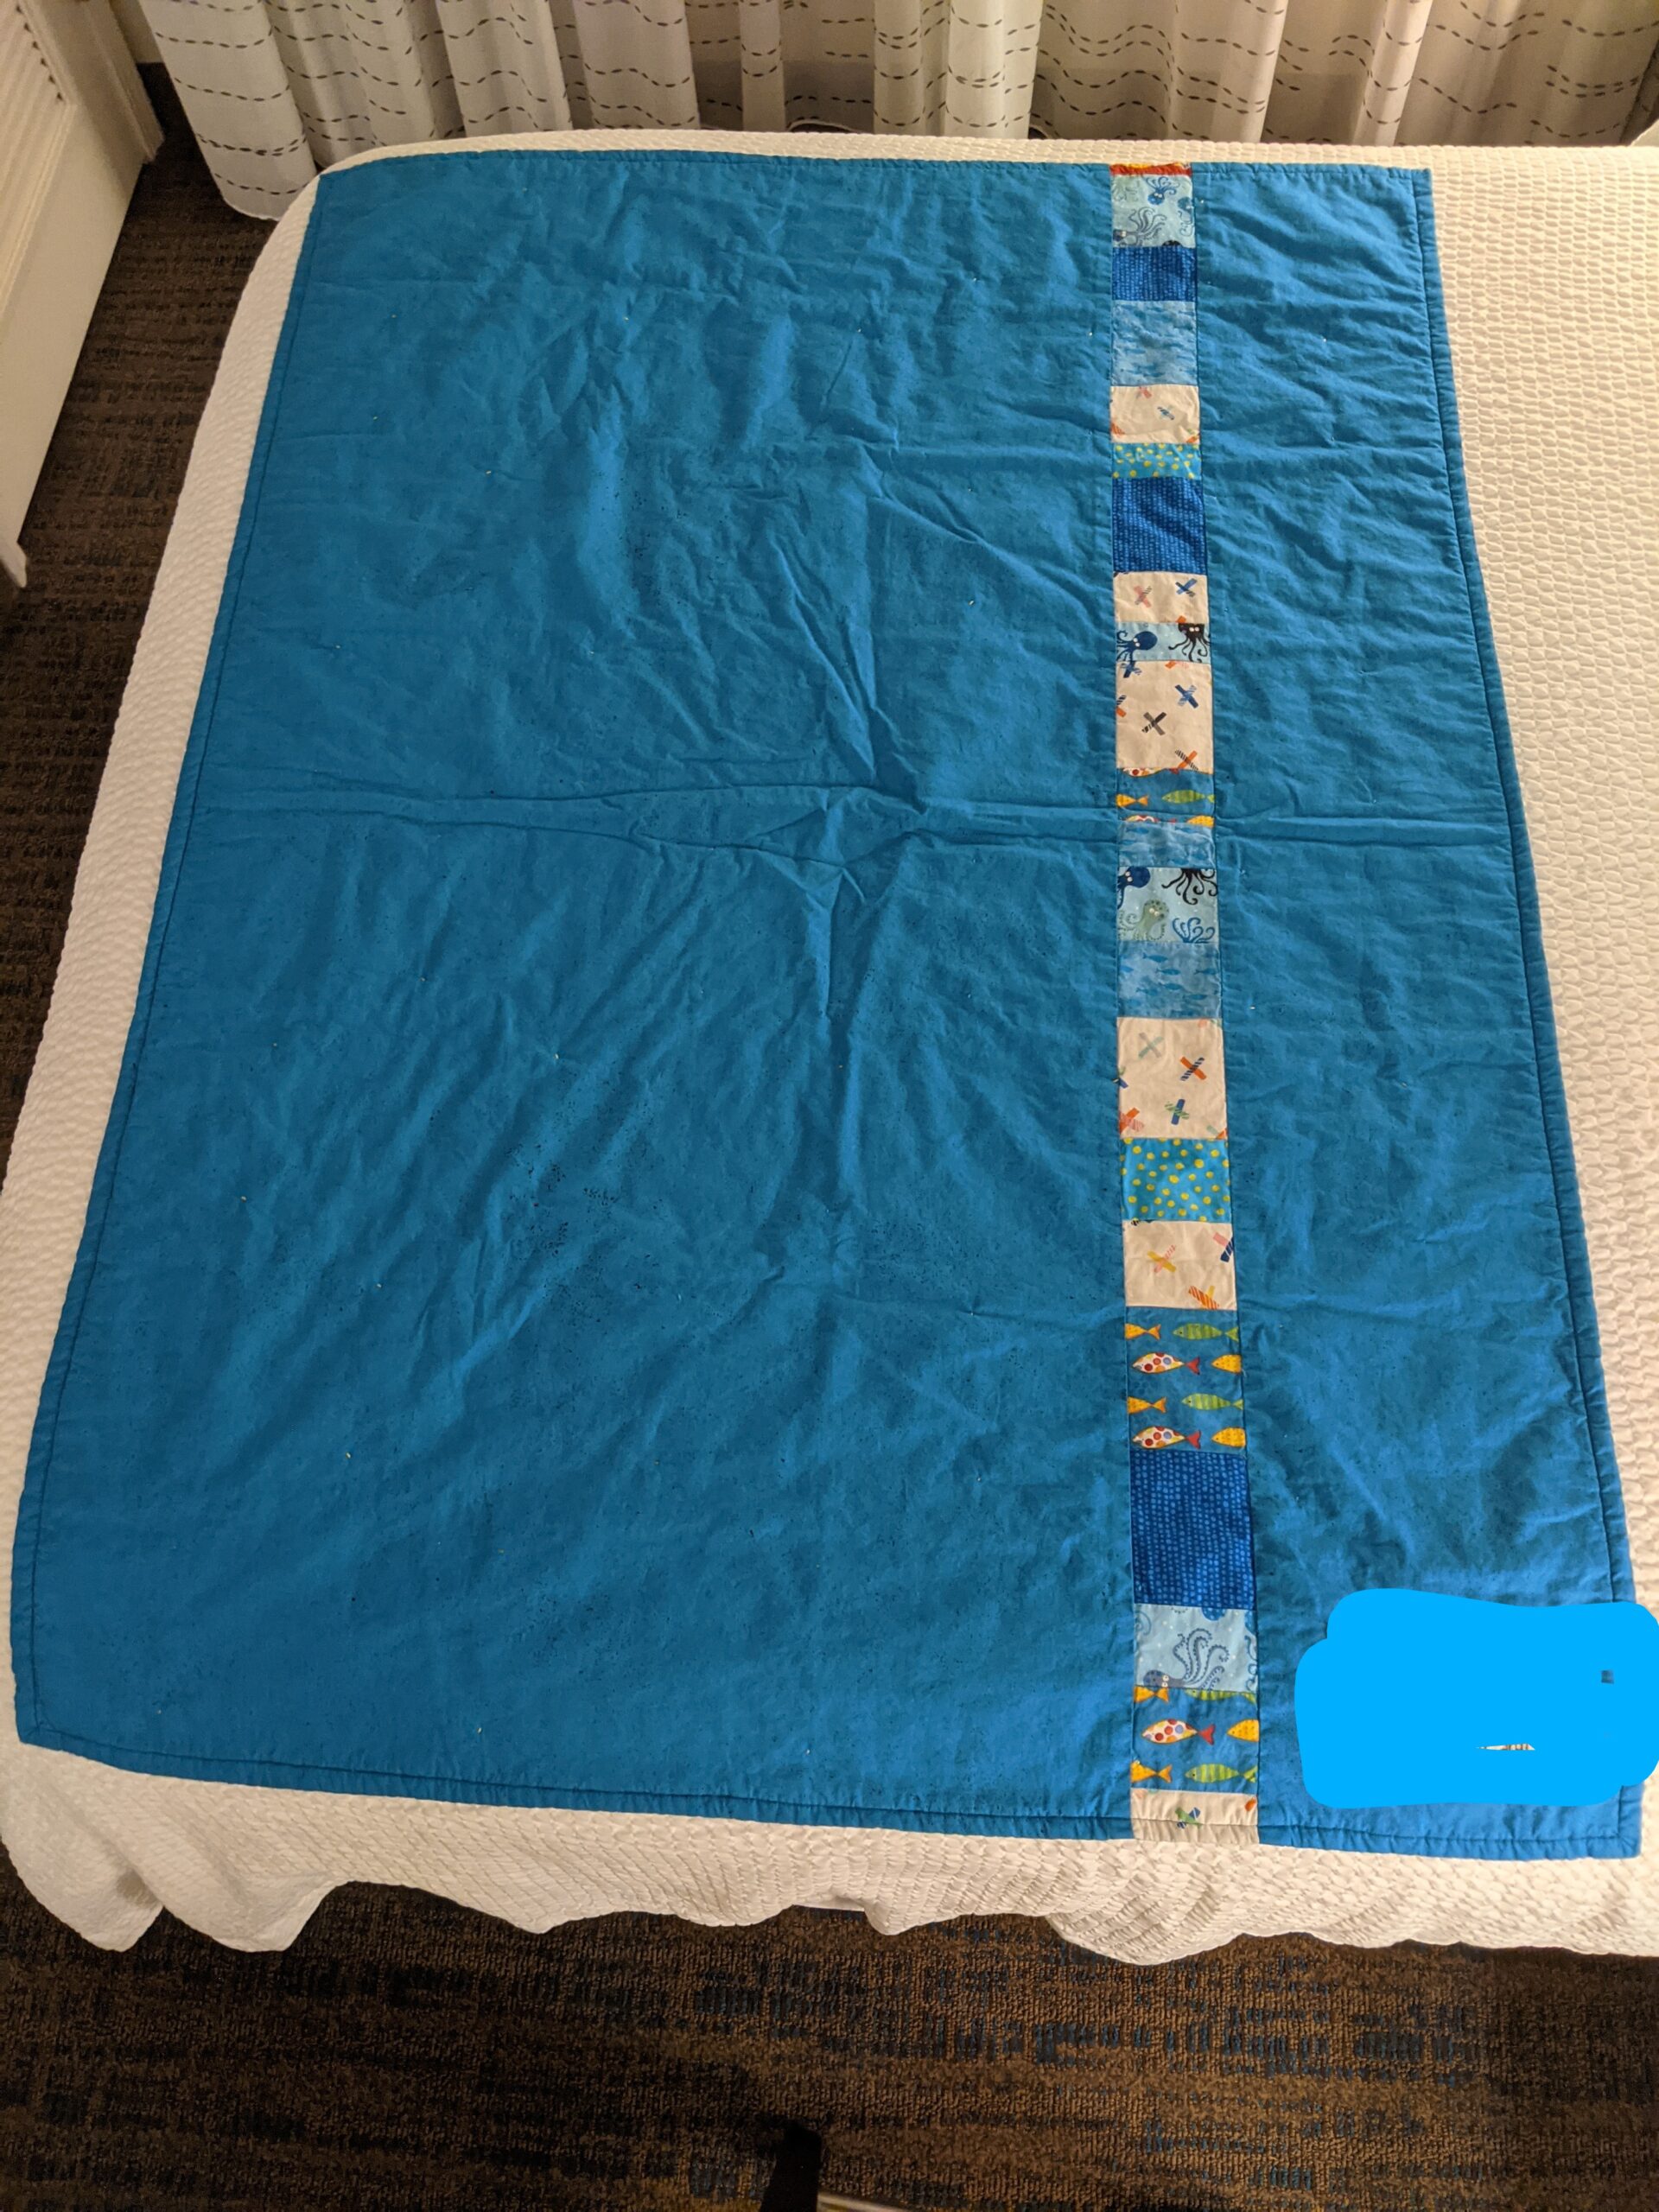
But anyway, here is the Baby Quilt for my wonderful cousin Jonathan and his fantastic wife Amy and their adorable baby, Samuel.
A Quilt for SamuelClose Up!
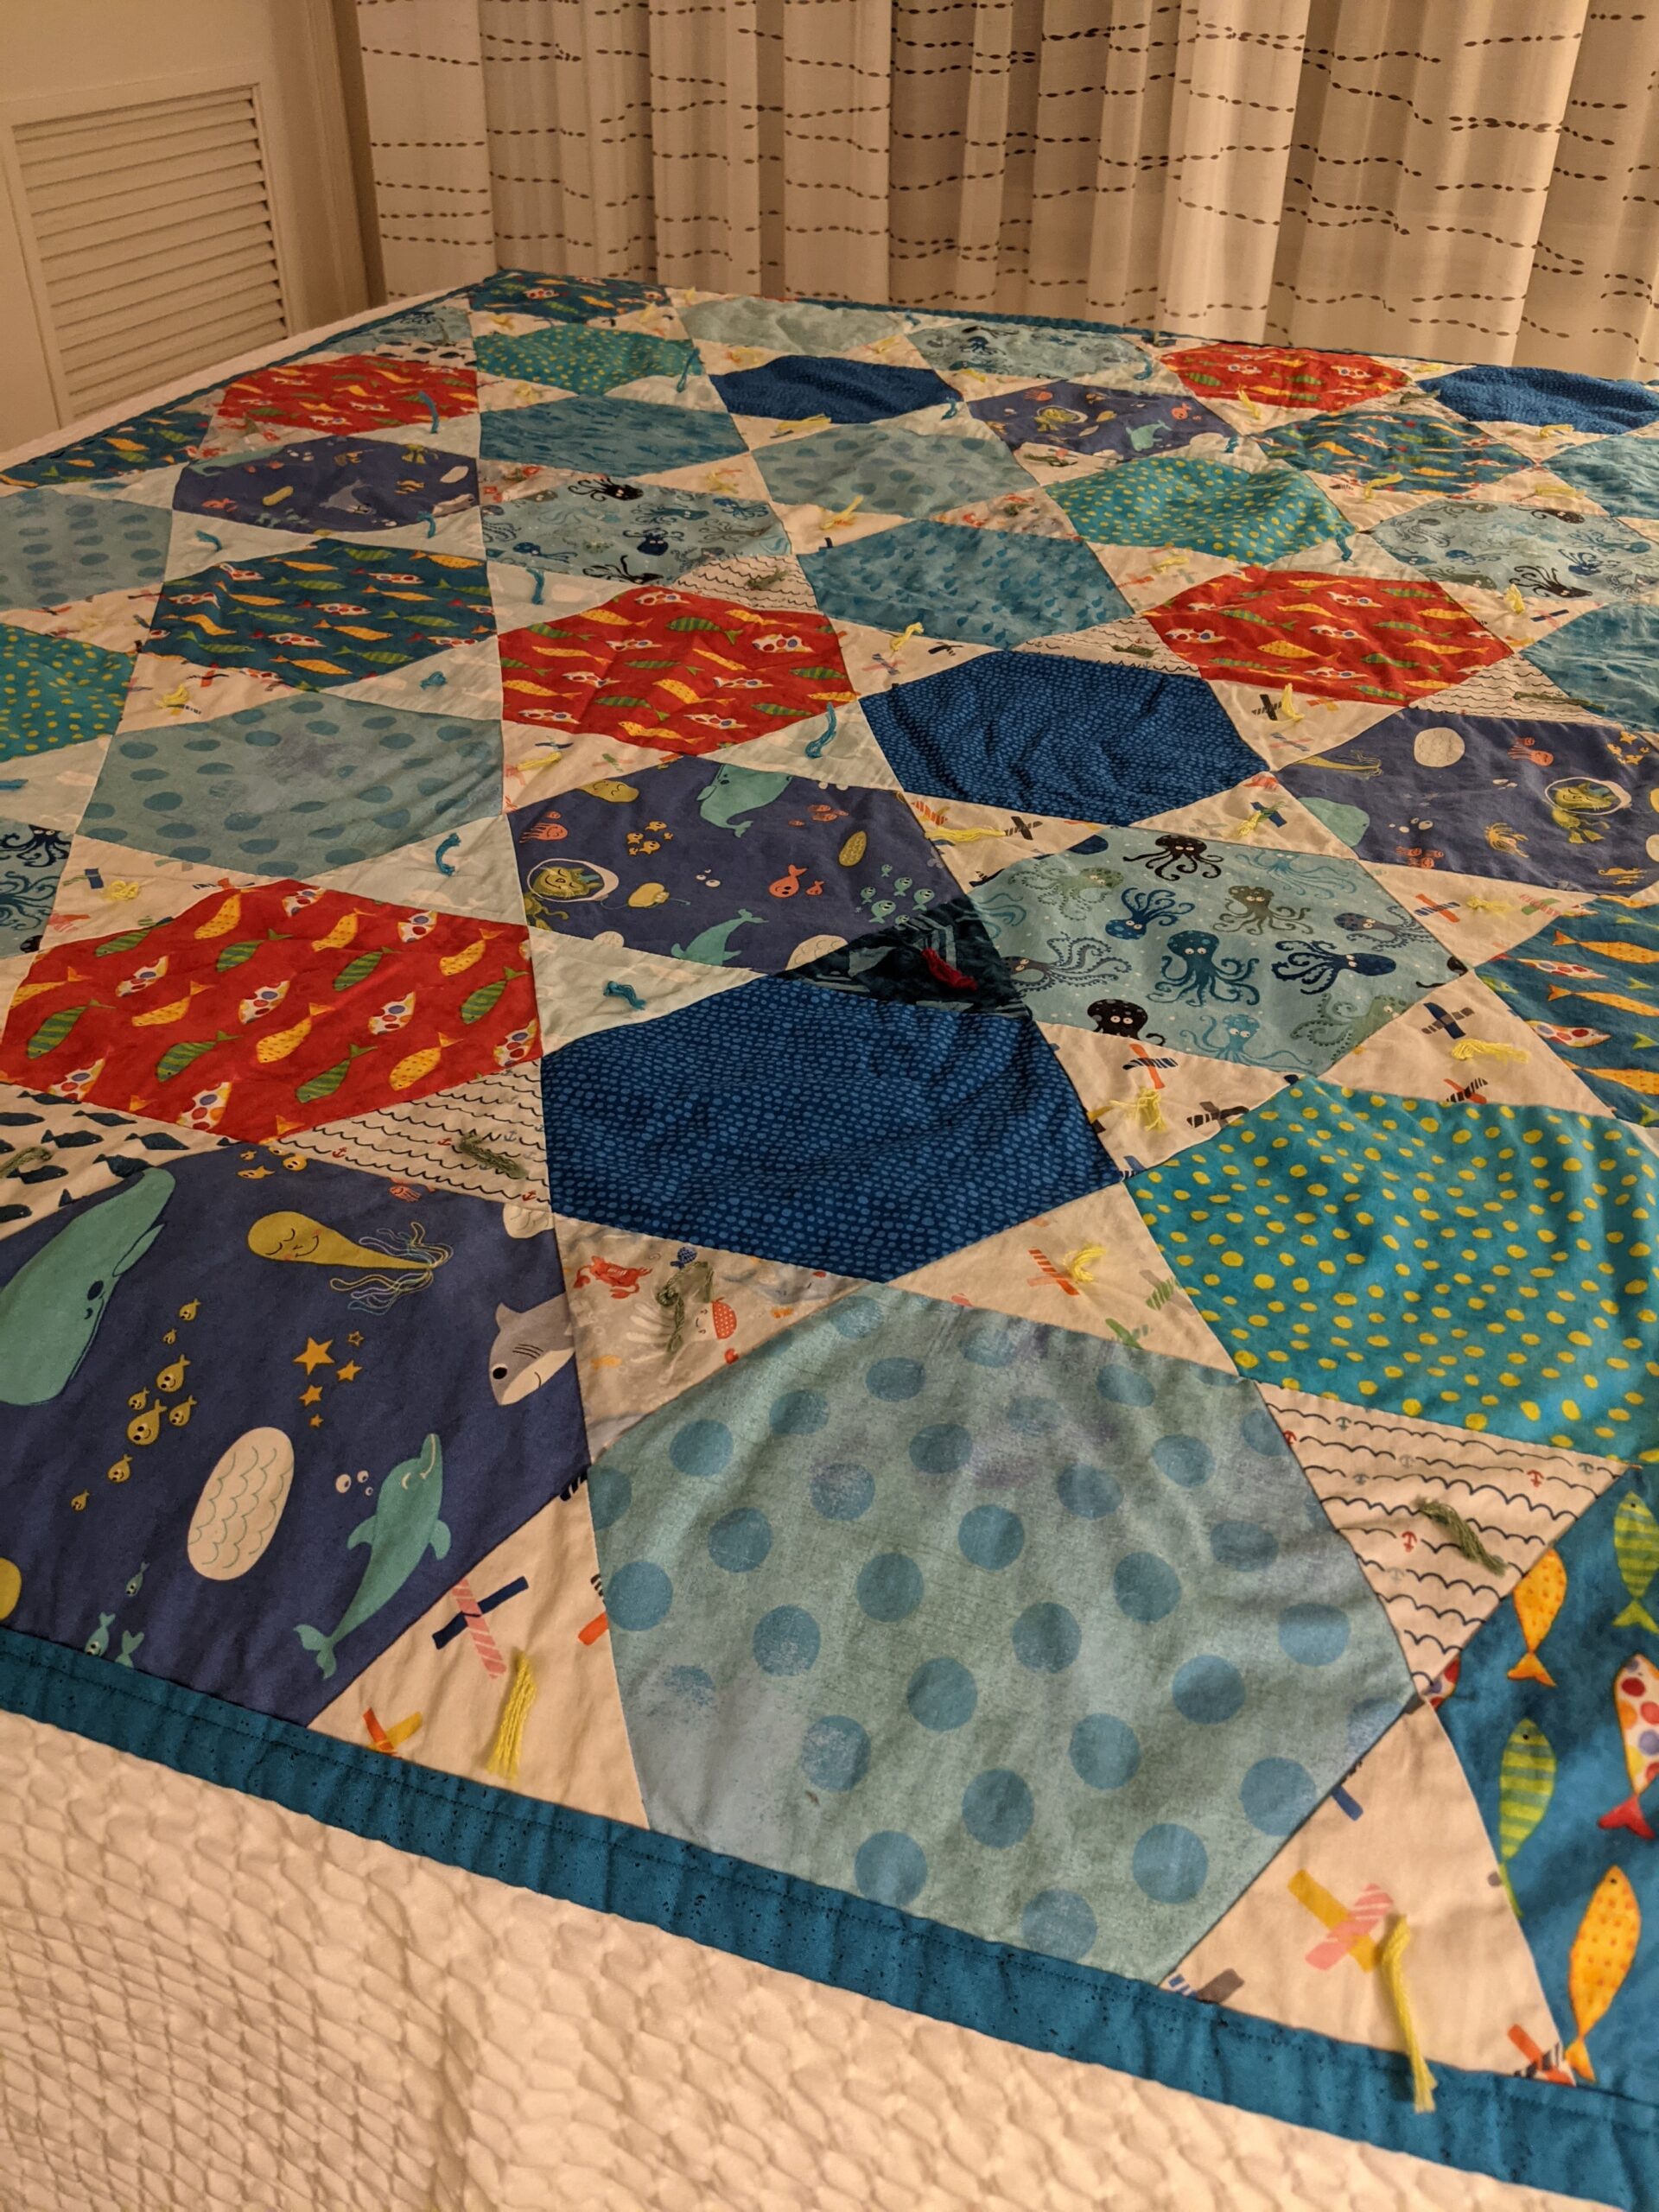
To cut the Hexagons and Triangles, I used my AccuQuilt cutter. I used the 4.5″ Hexagon (this means the length of each of the five sides are 4.5″) and the 4.5″ equilateral triangle die (again, this means each side of the triangle is 4.5″). Using these dies gave me accurate shapes, and although I could cut these using a ruler, I have the AccuQuilt, so I utilized it.
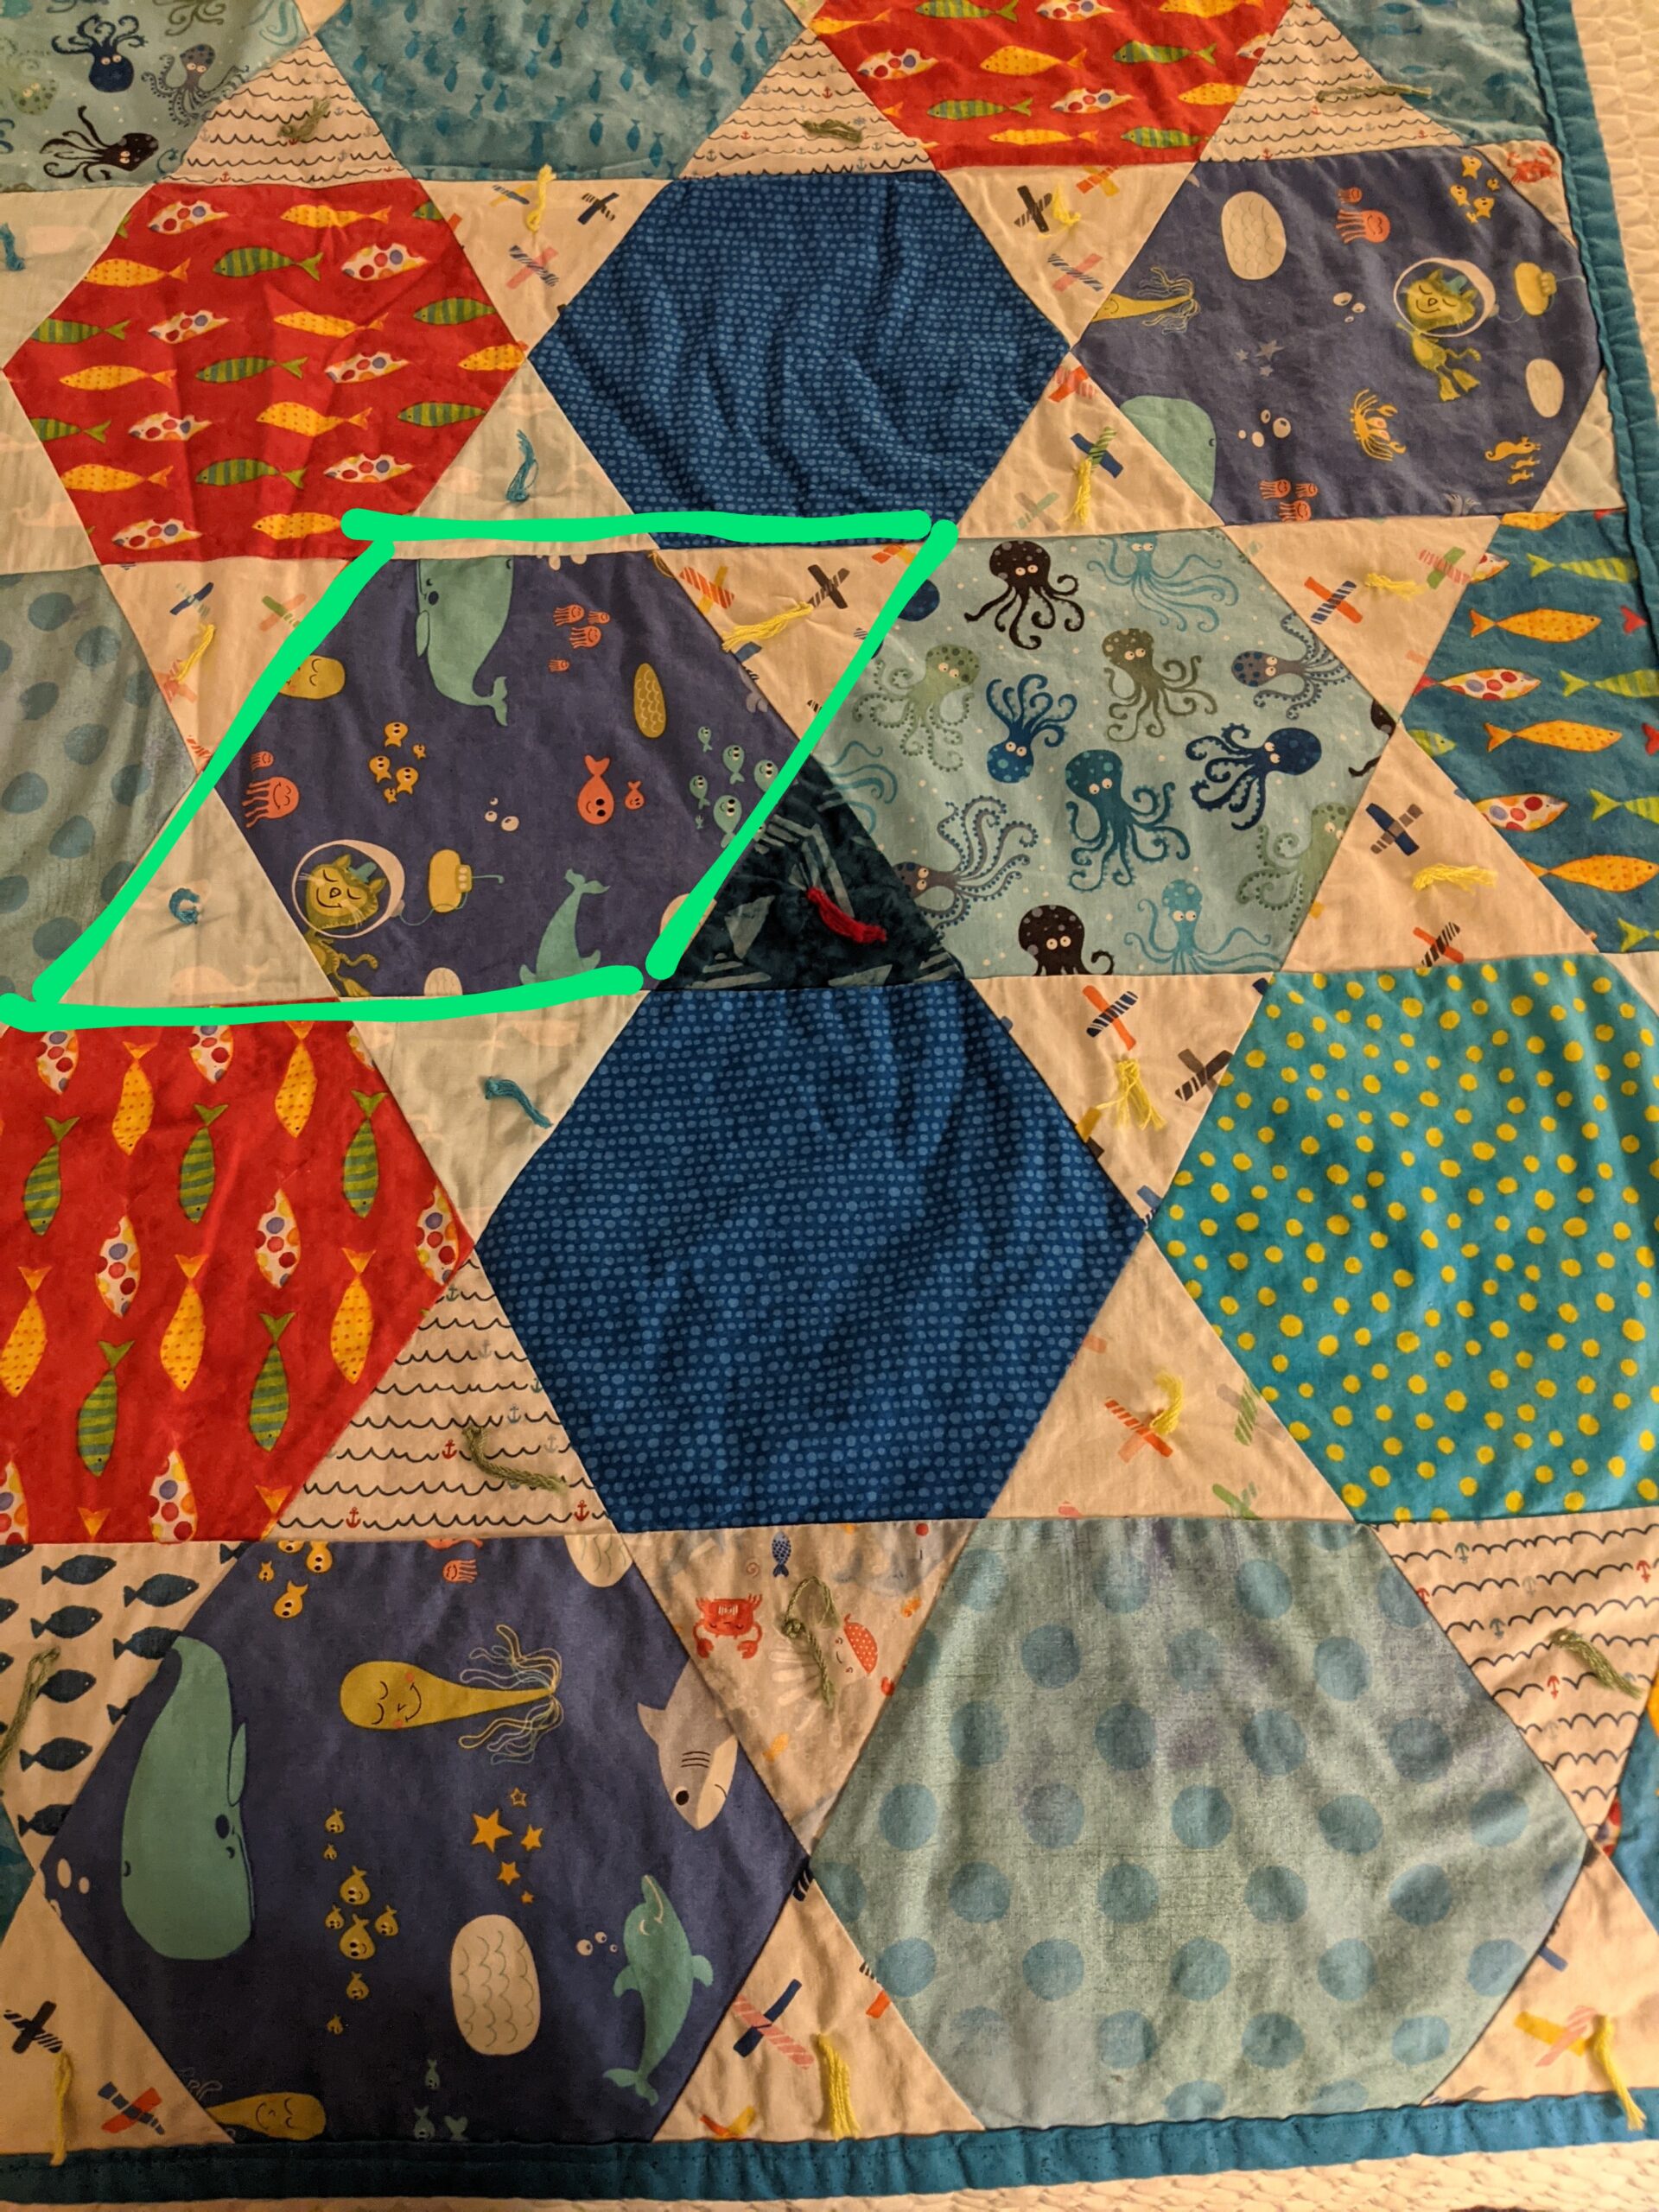
Although this seems like it has Y-seams, in fact, it does not!! (I know, seriously.) When laying out this design, your goal is to make rows. First, you place the hexagon on a flat side, so that the hexagon itself makes the top and bottom of the row. Then you stitch a triangle to the bottom left side of the hexagon and the top right of the hexagon to make one block unit, shown below. Once you do that, you can continue adding more block units until you get the row length you desire. No Y-Seams!!!
Close up: 1 Block Unit (green)Close up: Blocks in rowsPieced Back, Quilt for Samuel
I pieced the back to use up some scraps and add a little fun…..plus the Width of Fabric was just shy of wide enough to fit, so a cute row of fabrics was just enough to do the trick!!! This fabric was the cutest. Below you’ll see a close up of some of the fabrics. They were all nautical themed as my cousins live near the Coast.
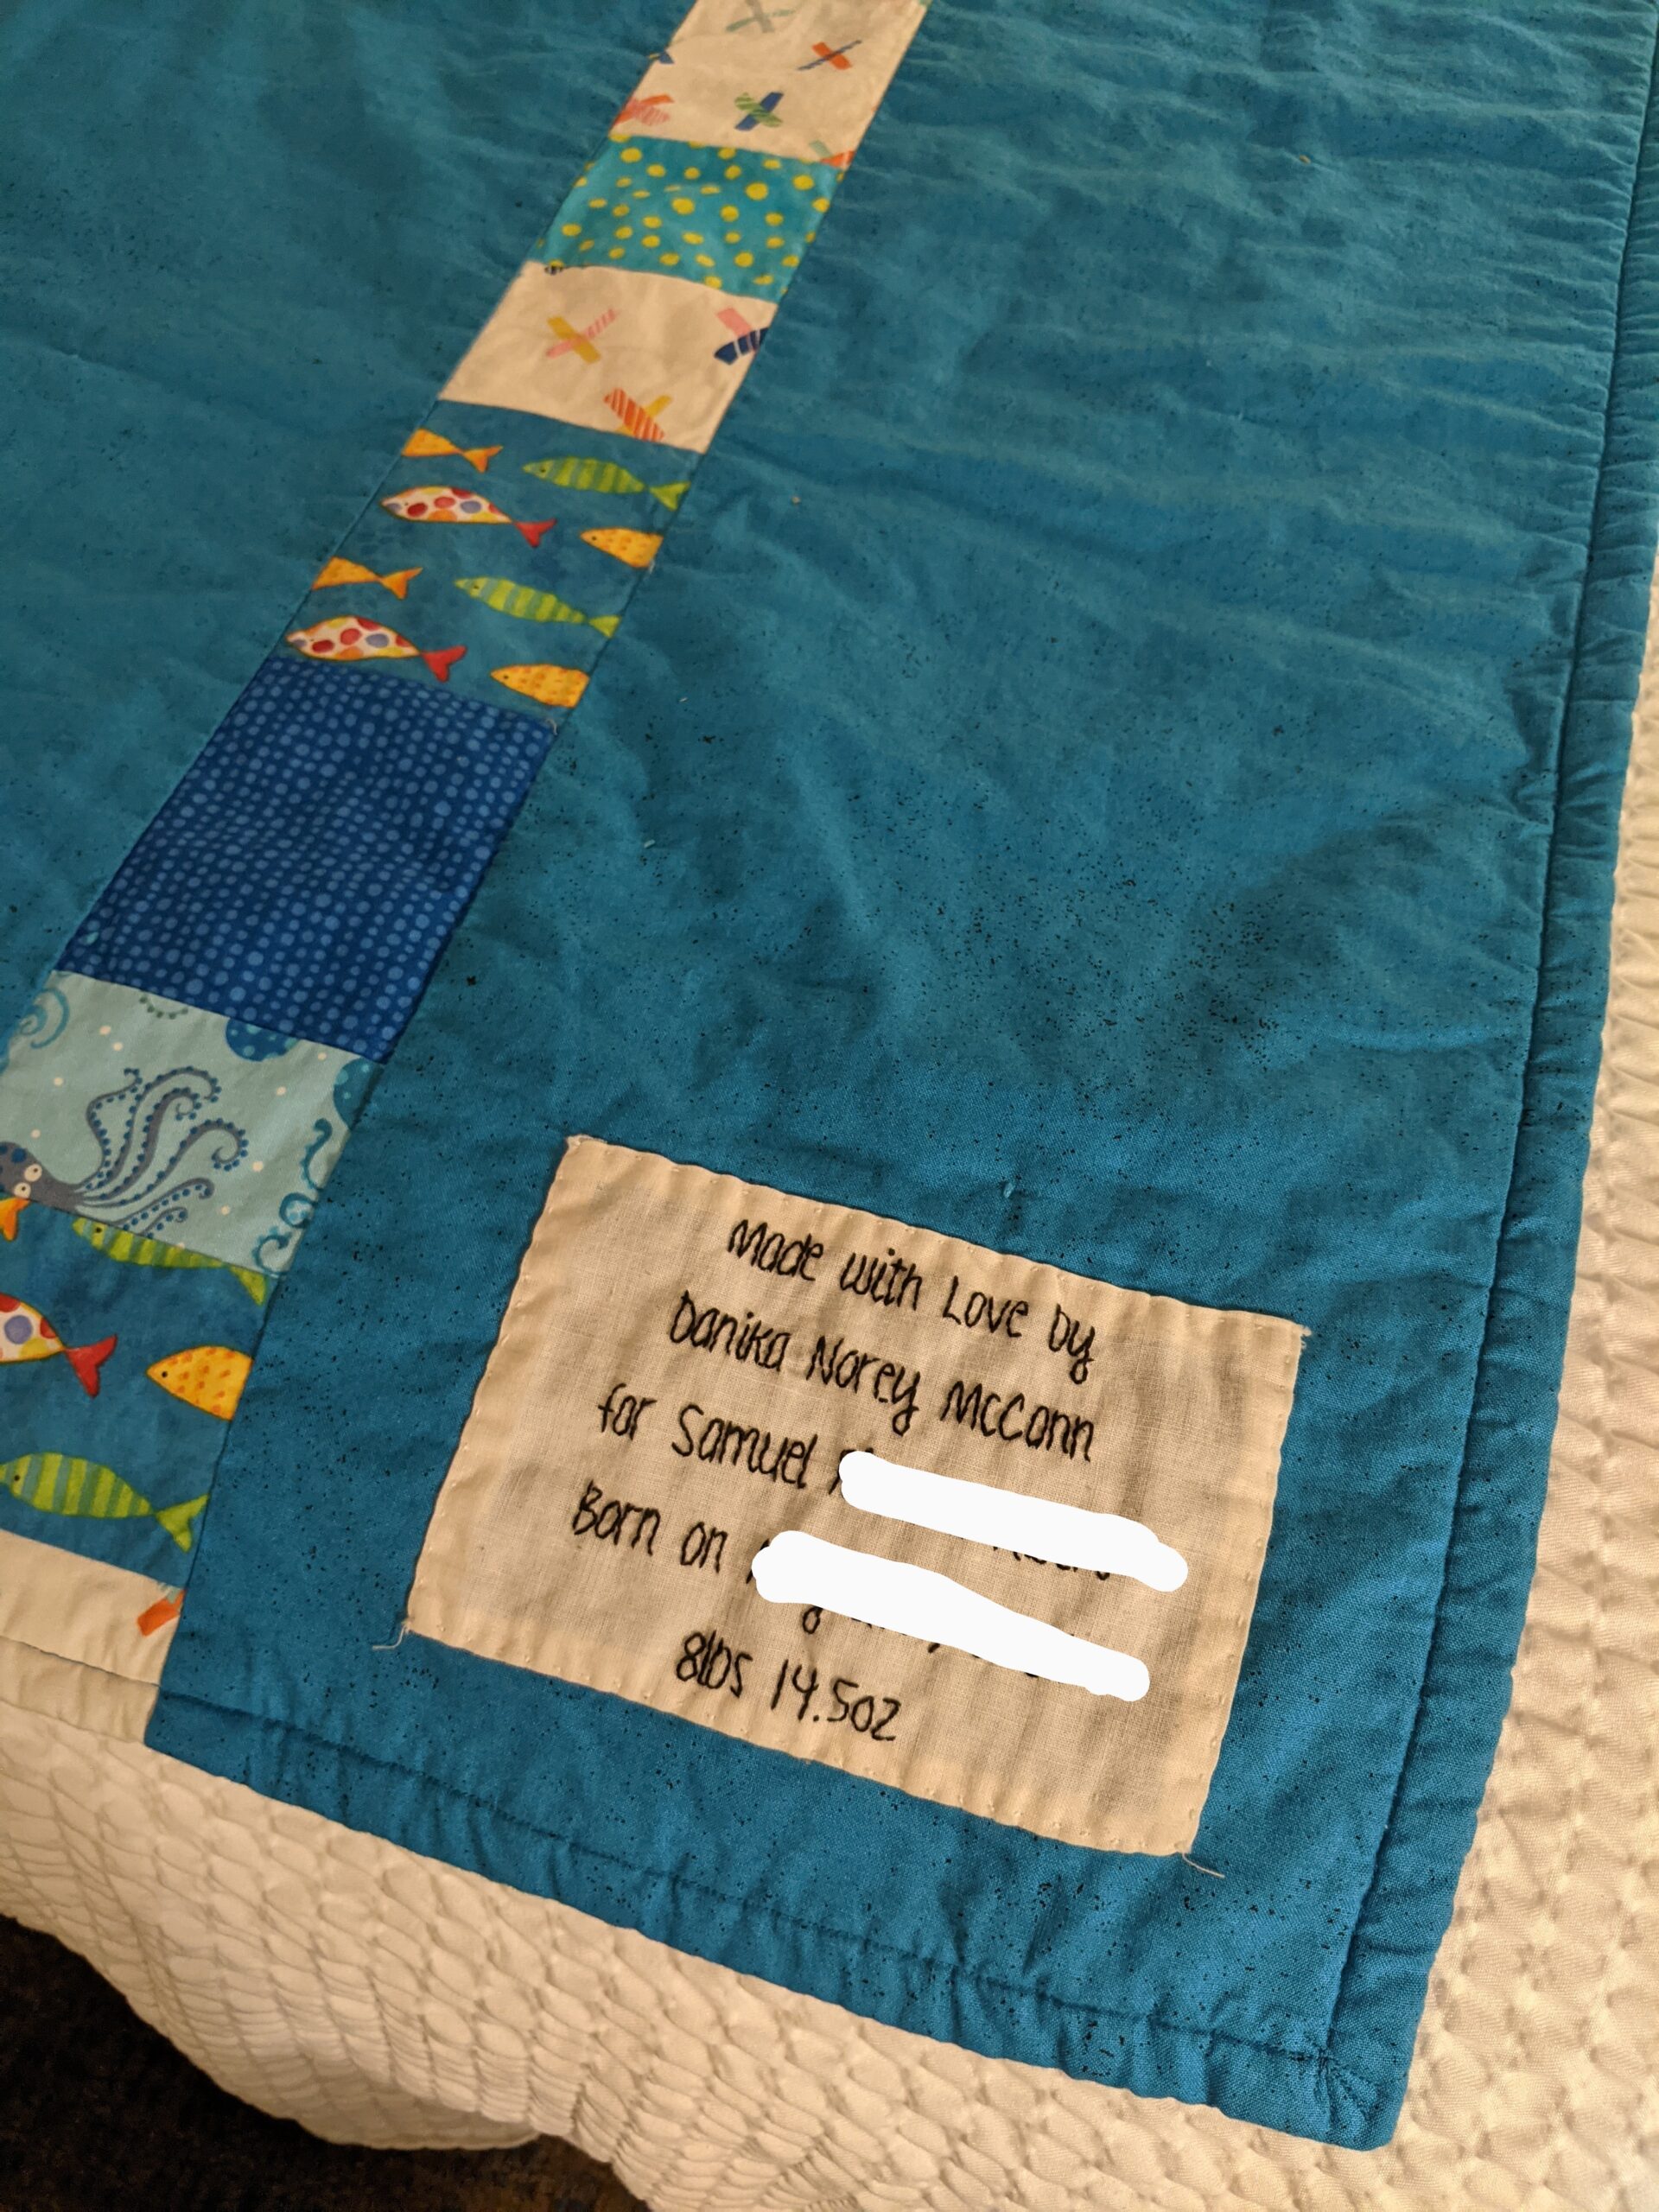
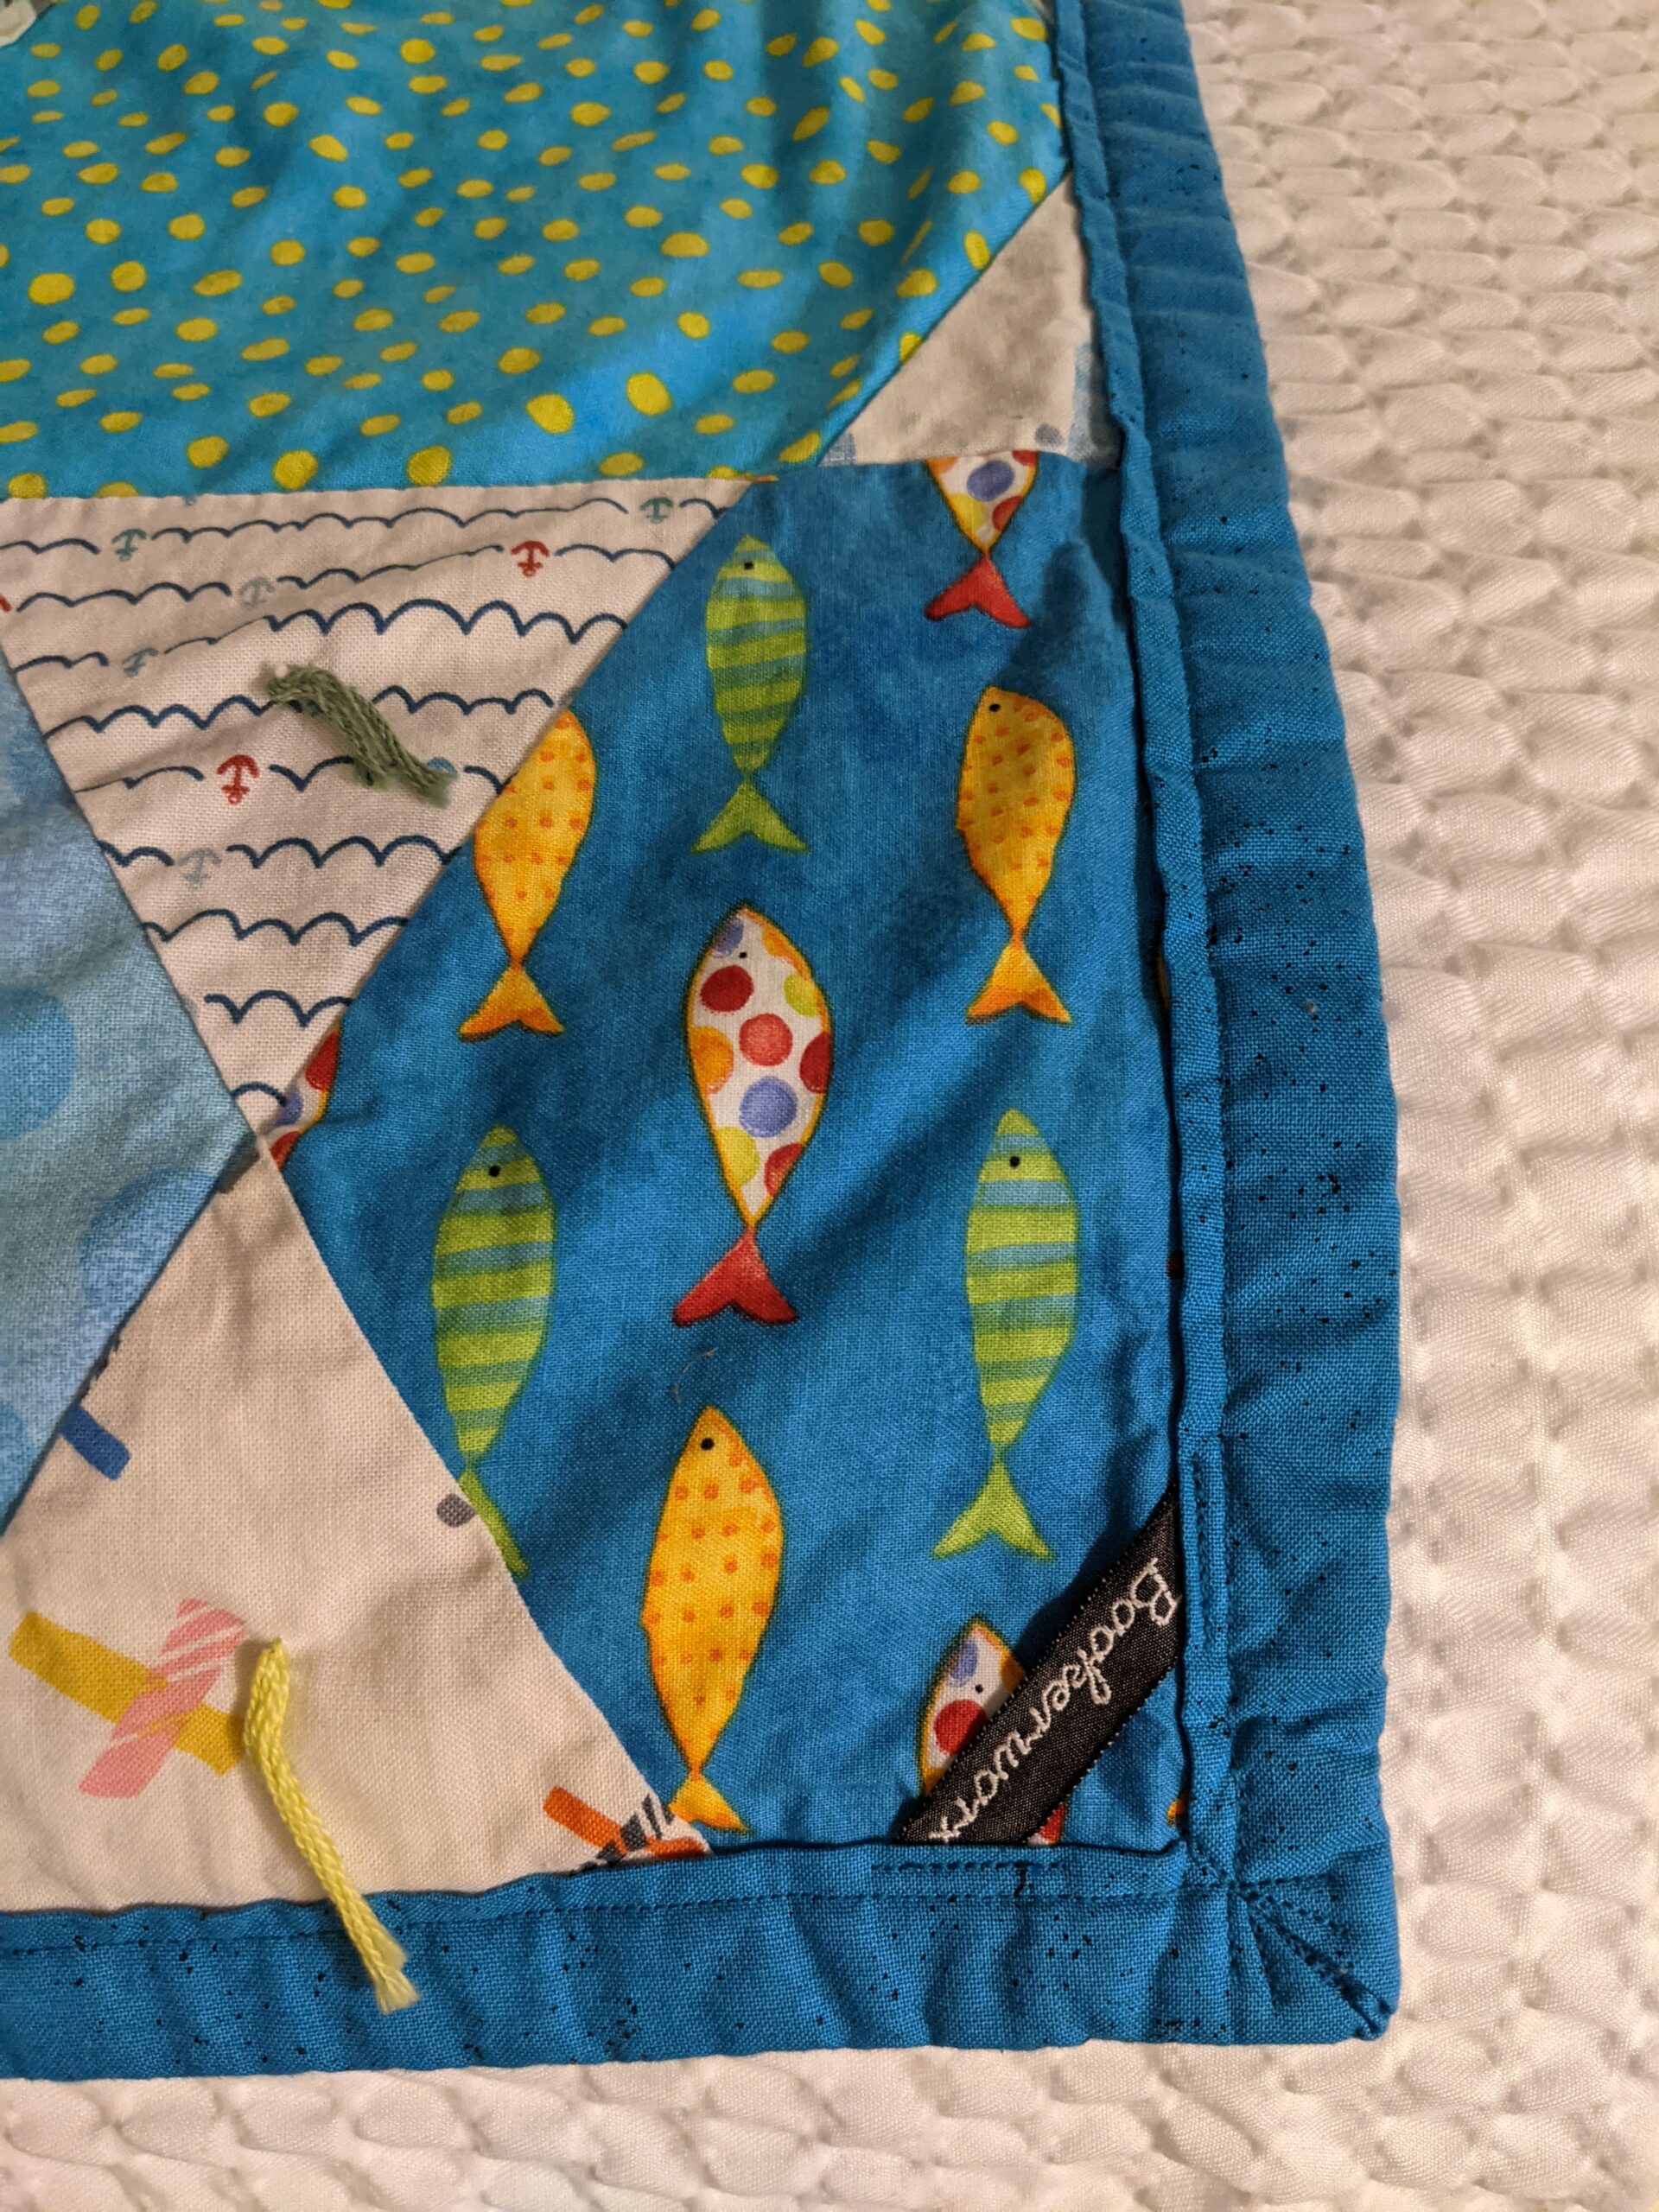
Close up: Pieced Back, LabelCute fish fabric, and Bookerworx Label
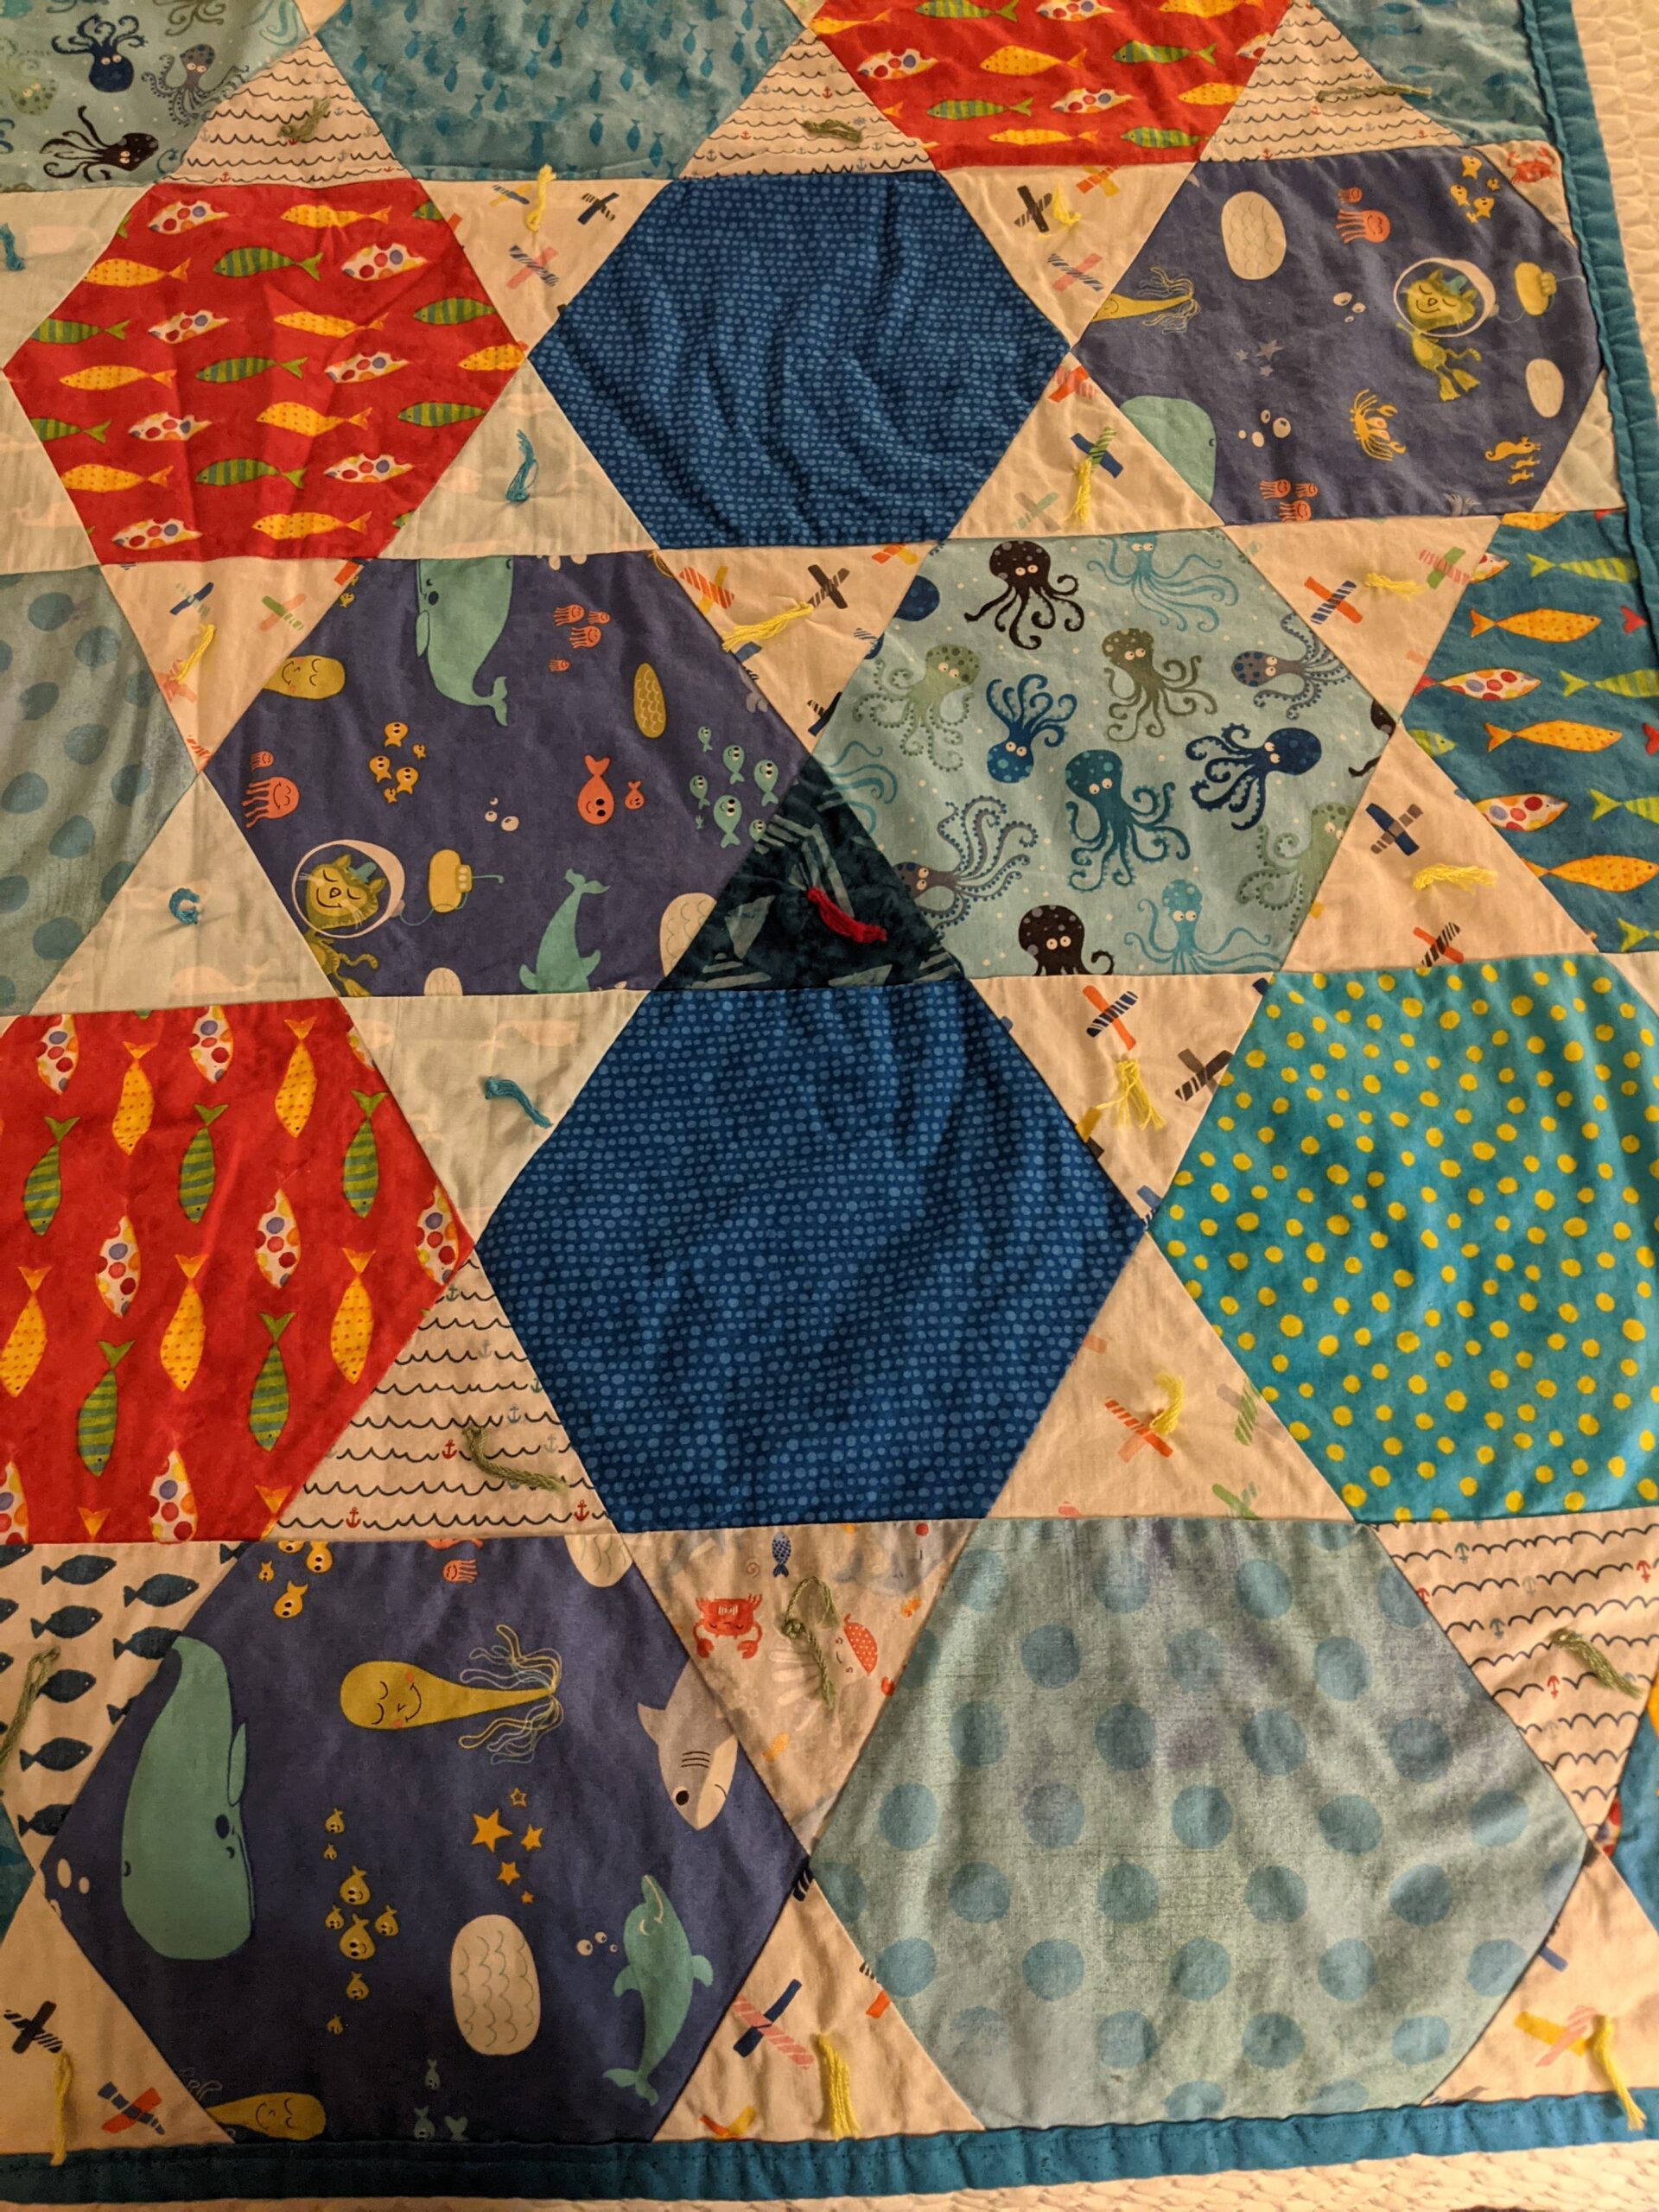
One more fun fact of this quilt: This is the first time I’ve done it, but I have and will continue this tradition if possible, I added one piece of fabric to the baby quilt from the parent’s wedding quilt. Can you find it??
A Quilt for Samuel
Did you find it? The hidden piece from their Wedding Quilt? Yup, it’s the dark blue fabric in the third row from the bottom. I even threw a different colored tie in that fabric to make it stand out. Love this tradition!!!
Here’s the details on A Quilt for Samuel
Title: A Quilt for Samuel Pattern:A Quilt for Samuel is made from the pattern “GO! Island Star Quilt Pattern” from AccuQuilt, although I adjusted the size and layout Size: Baby, finished ~45″ x 60″ Fabric: From the stash! Piecing: Machine stitched on Betsy, the Bernina 560 and Mavis, the Bernina 770 Cutting: AccuQuilt, using 4.5″ Hexagon and 4.5″Equilateral Triangle dies Quilting: Tied with Takhi Cotton Classic, 100% cotton yarn purchased at Cornwall Yarn Shop Backing: pieced Label: Hand Embroidered by Anne Lemin of Quilted Lovelies, hand stitched by Danika to attach to quilt Batting: Warm and Natural, by The Warm Company Finished Date: August 2021 Total Hours: ~42.5 hours
It is so very refreshing to be able to work on Wedding and Baby Quilts!! I love happy occasions! A Quilt for Benjamin was made for my cousin Mary’s baby. He got it a little late (admittedly, after his first birthday…..) but there were a …
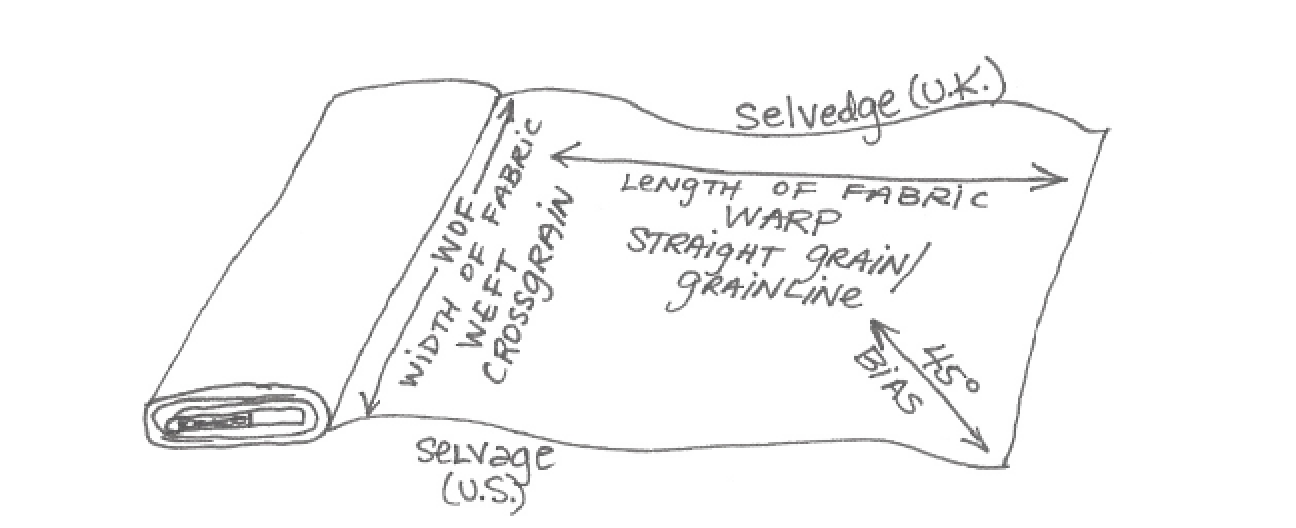
Often, while reading patterns, using die cutters, laying out patterns before cutting, and doing other general sewing and quilting things, fabric anatomy gets brought up. Don’t get too caught up by the lingo, as it seems a bit more complicated than it needs to be. …
Here’s an older finish that I thought I’d show off a bit.
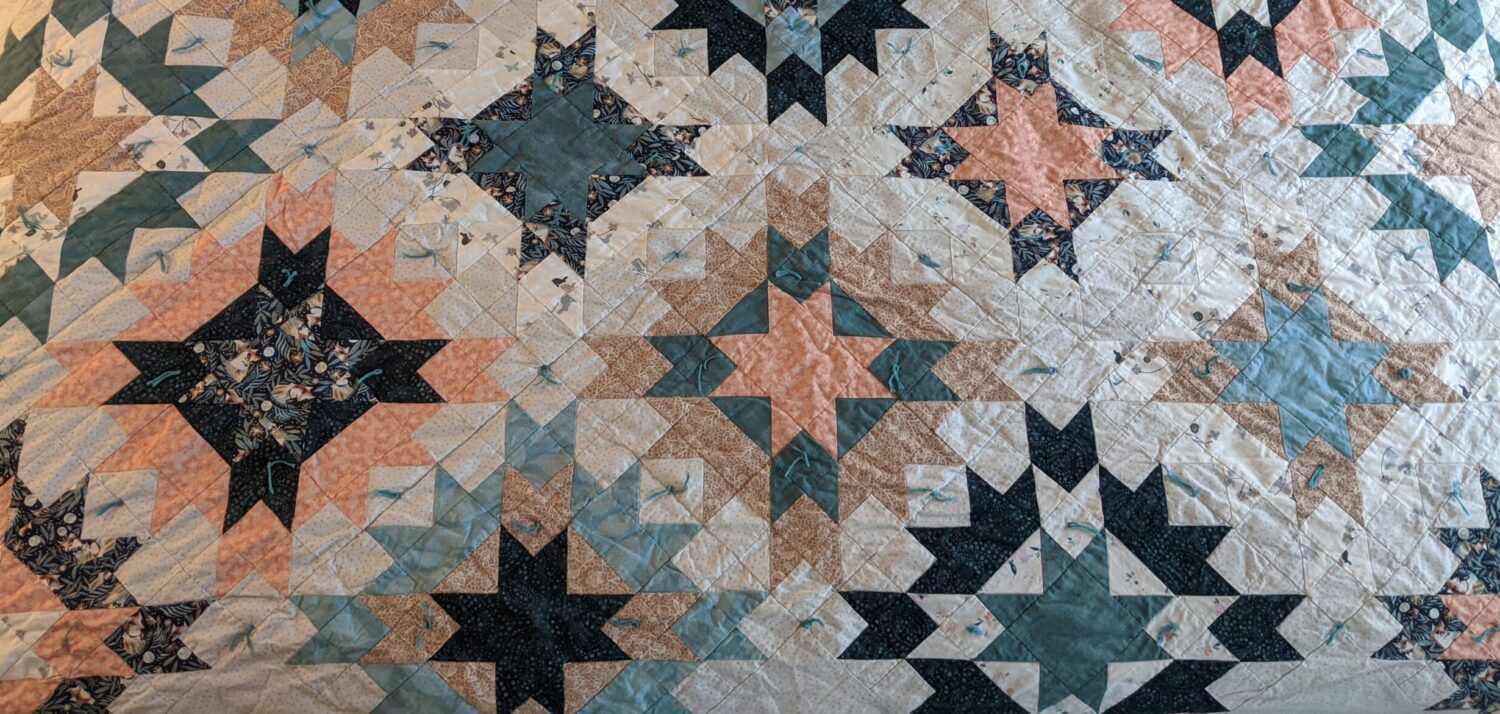
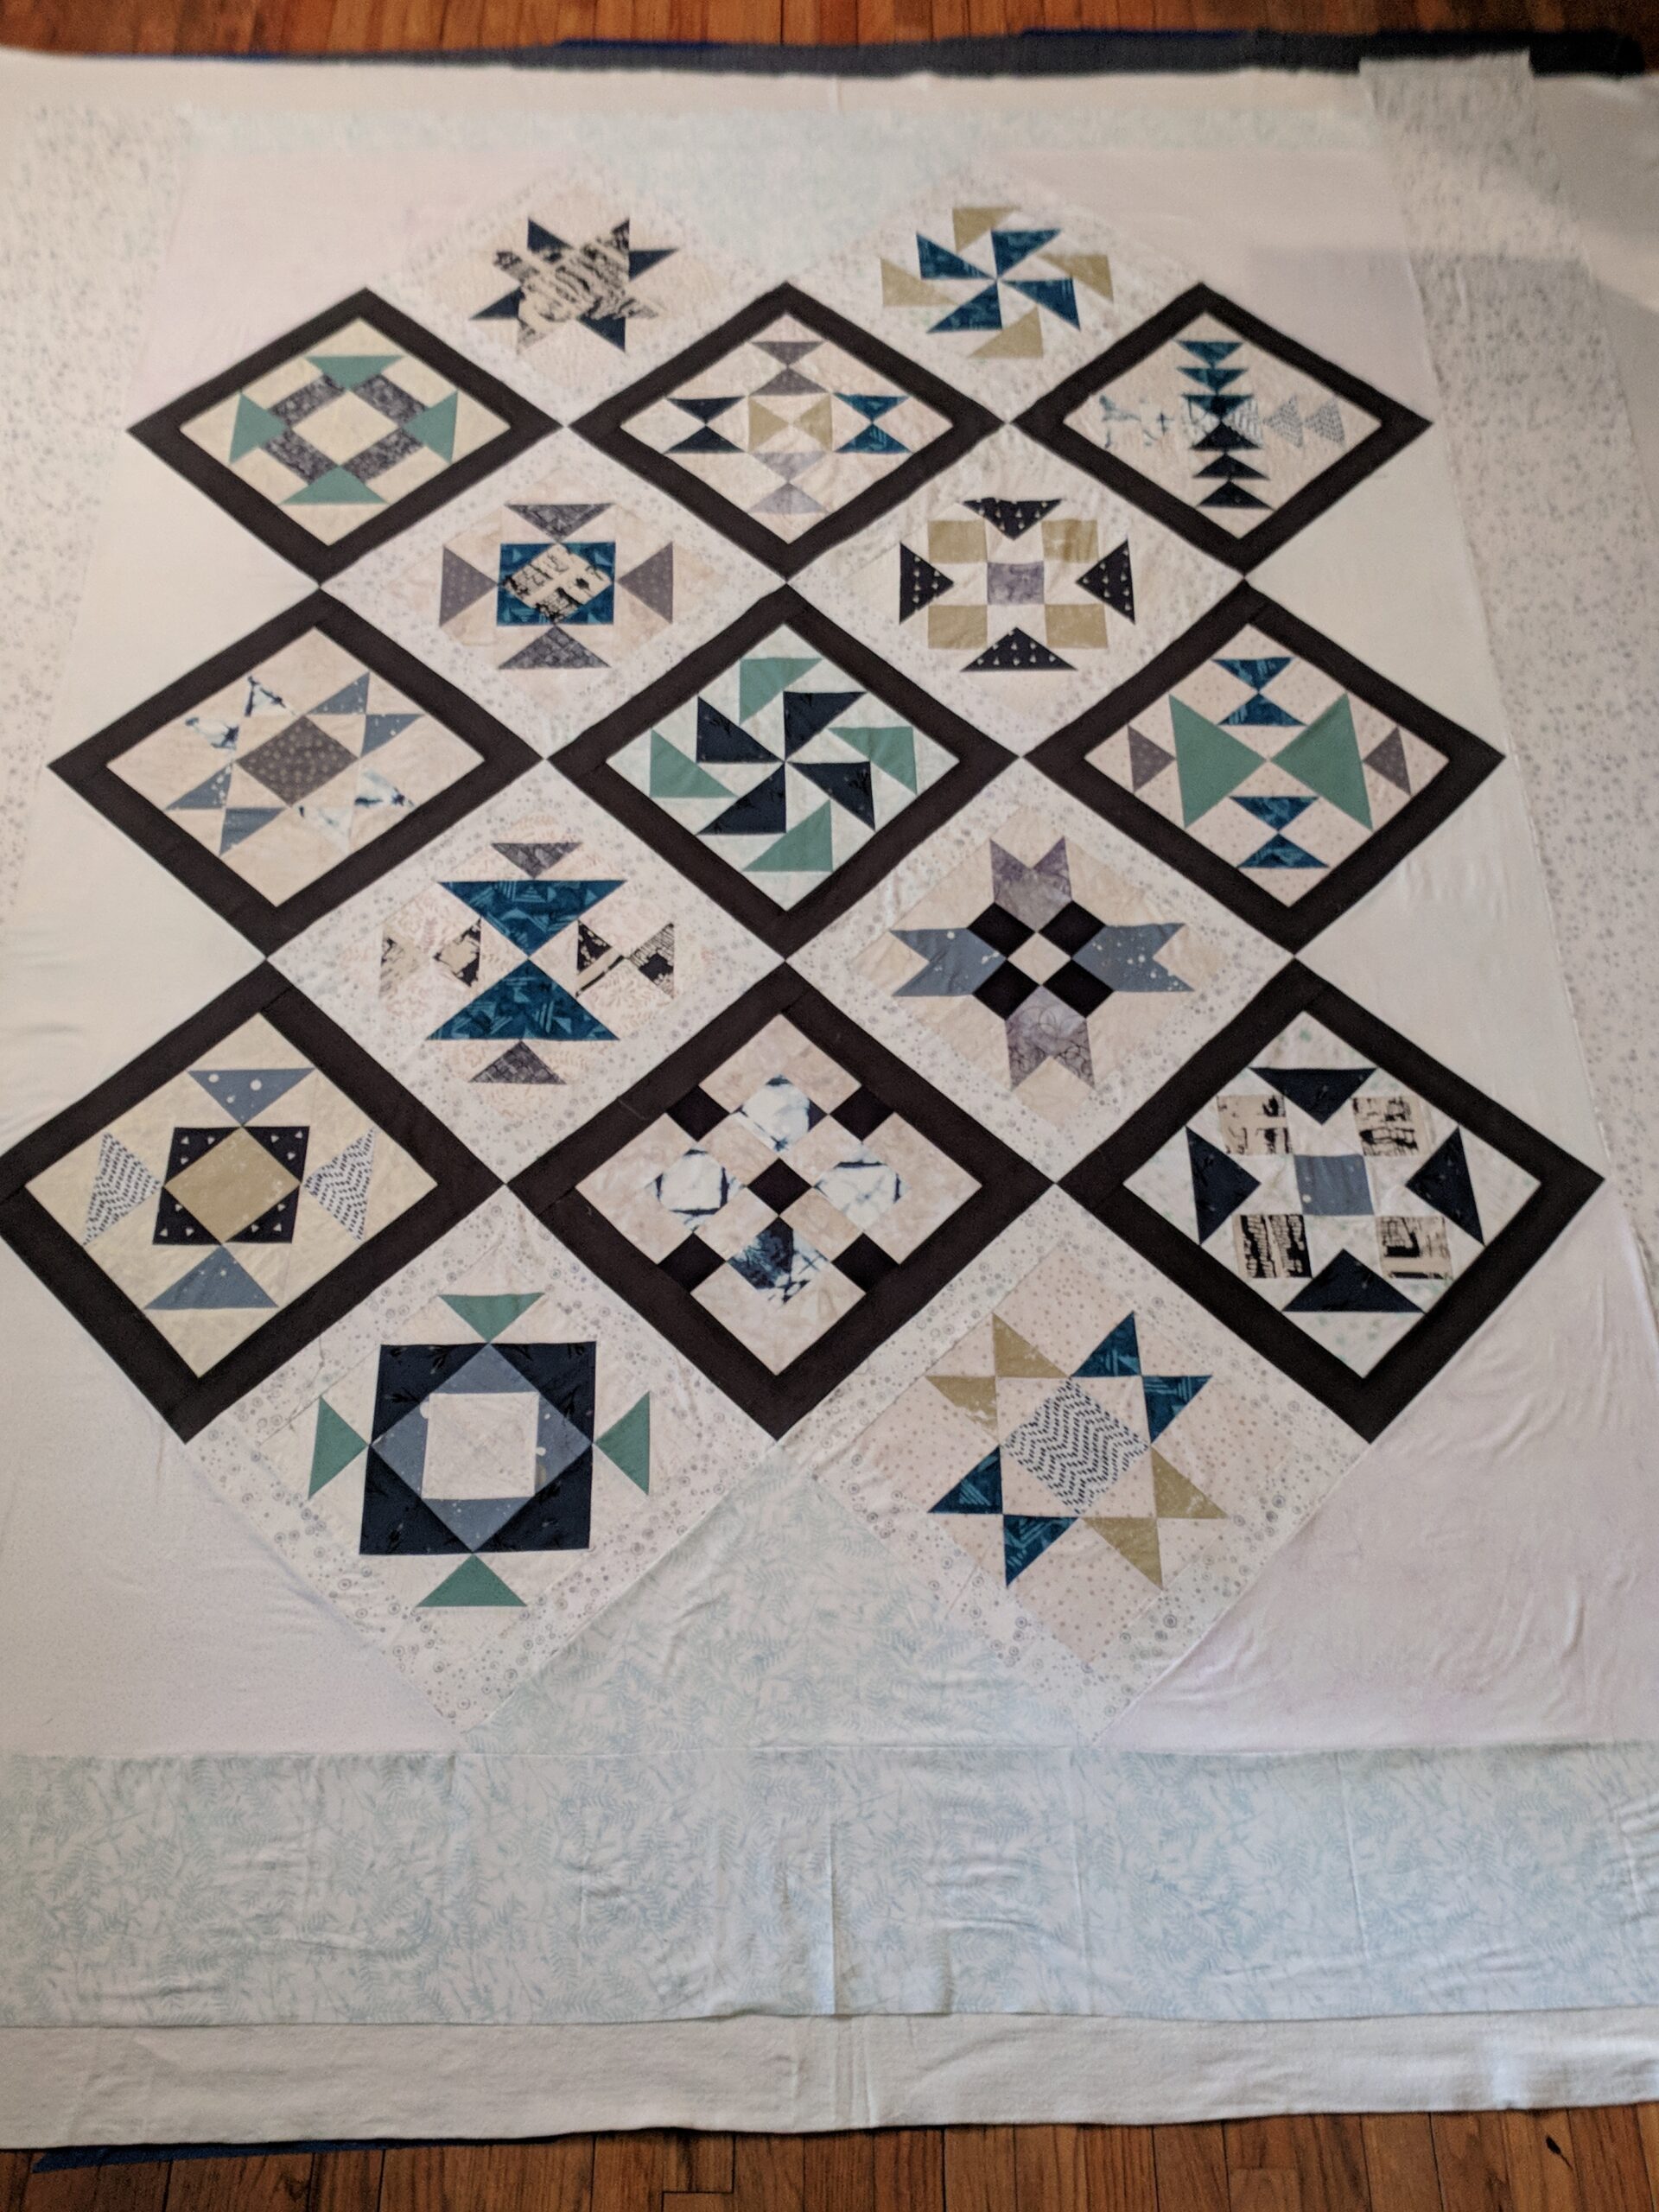
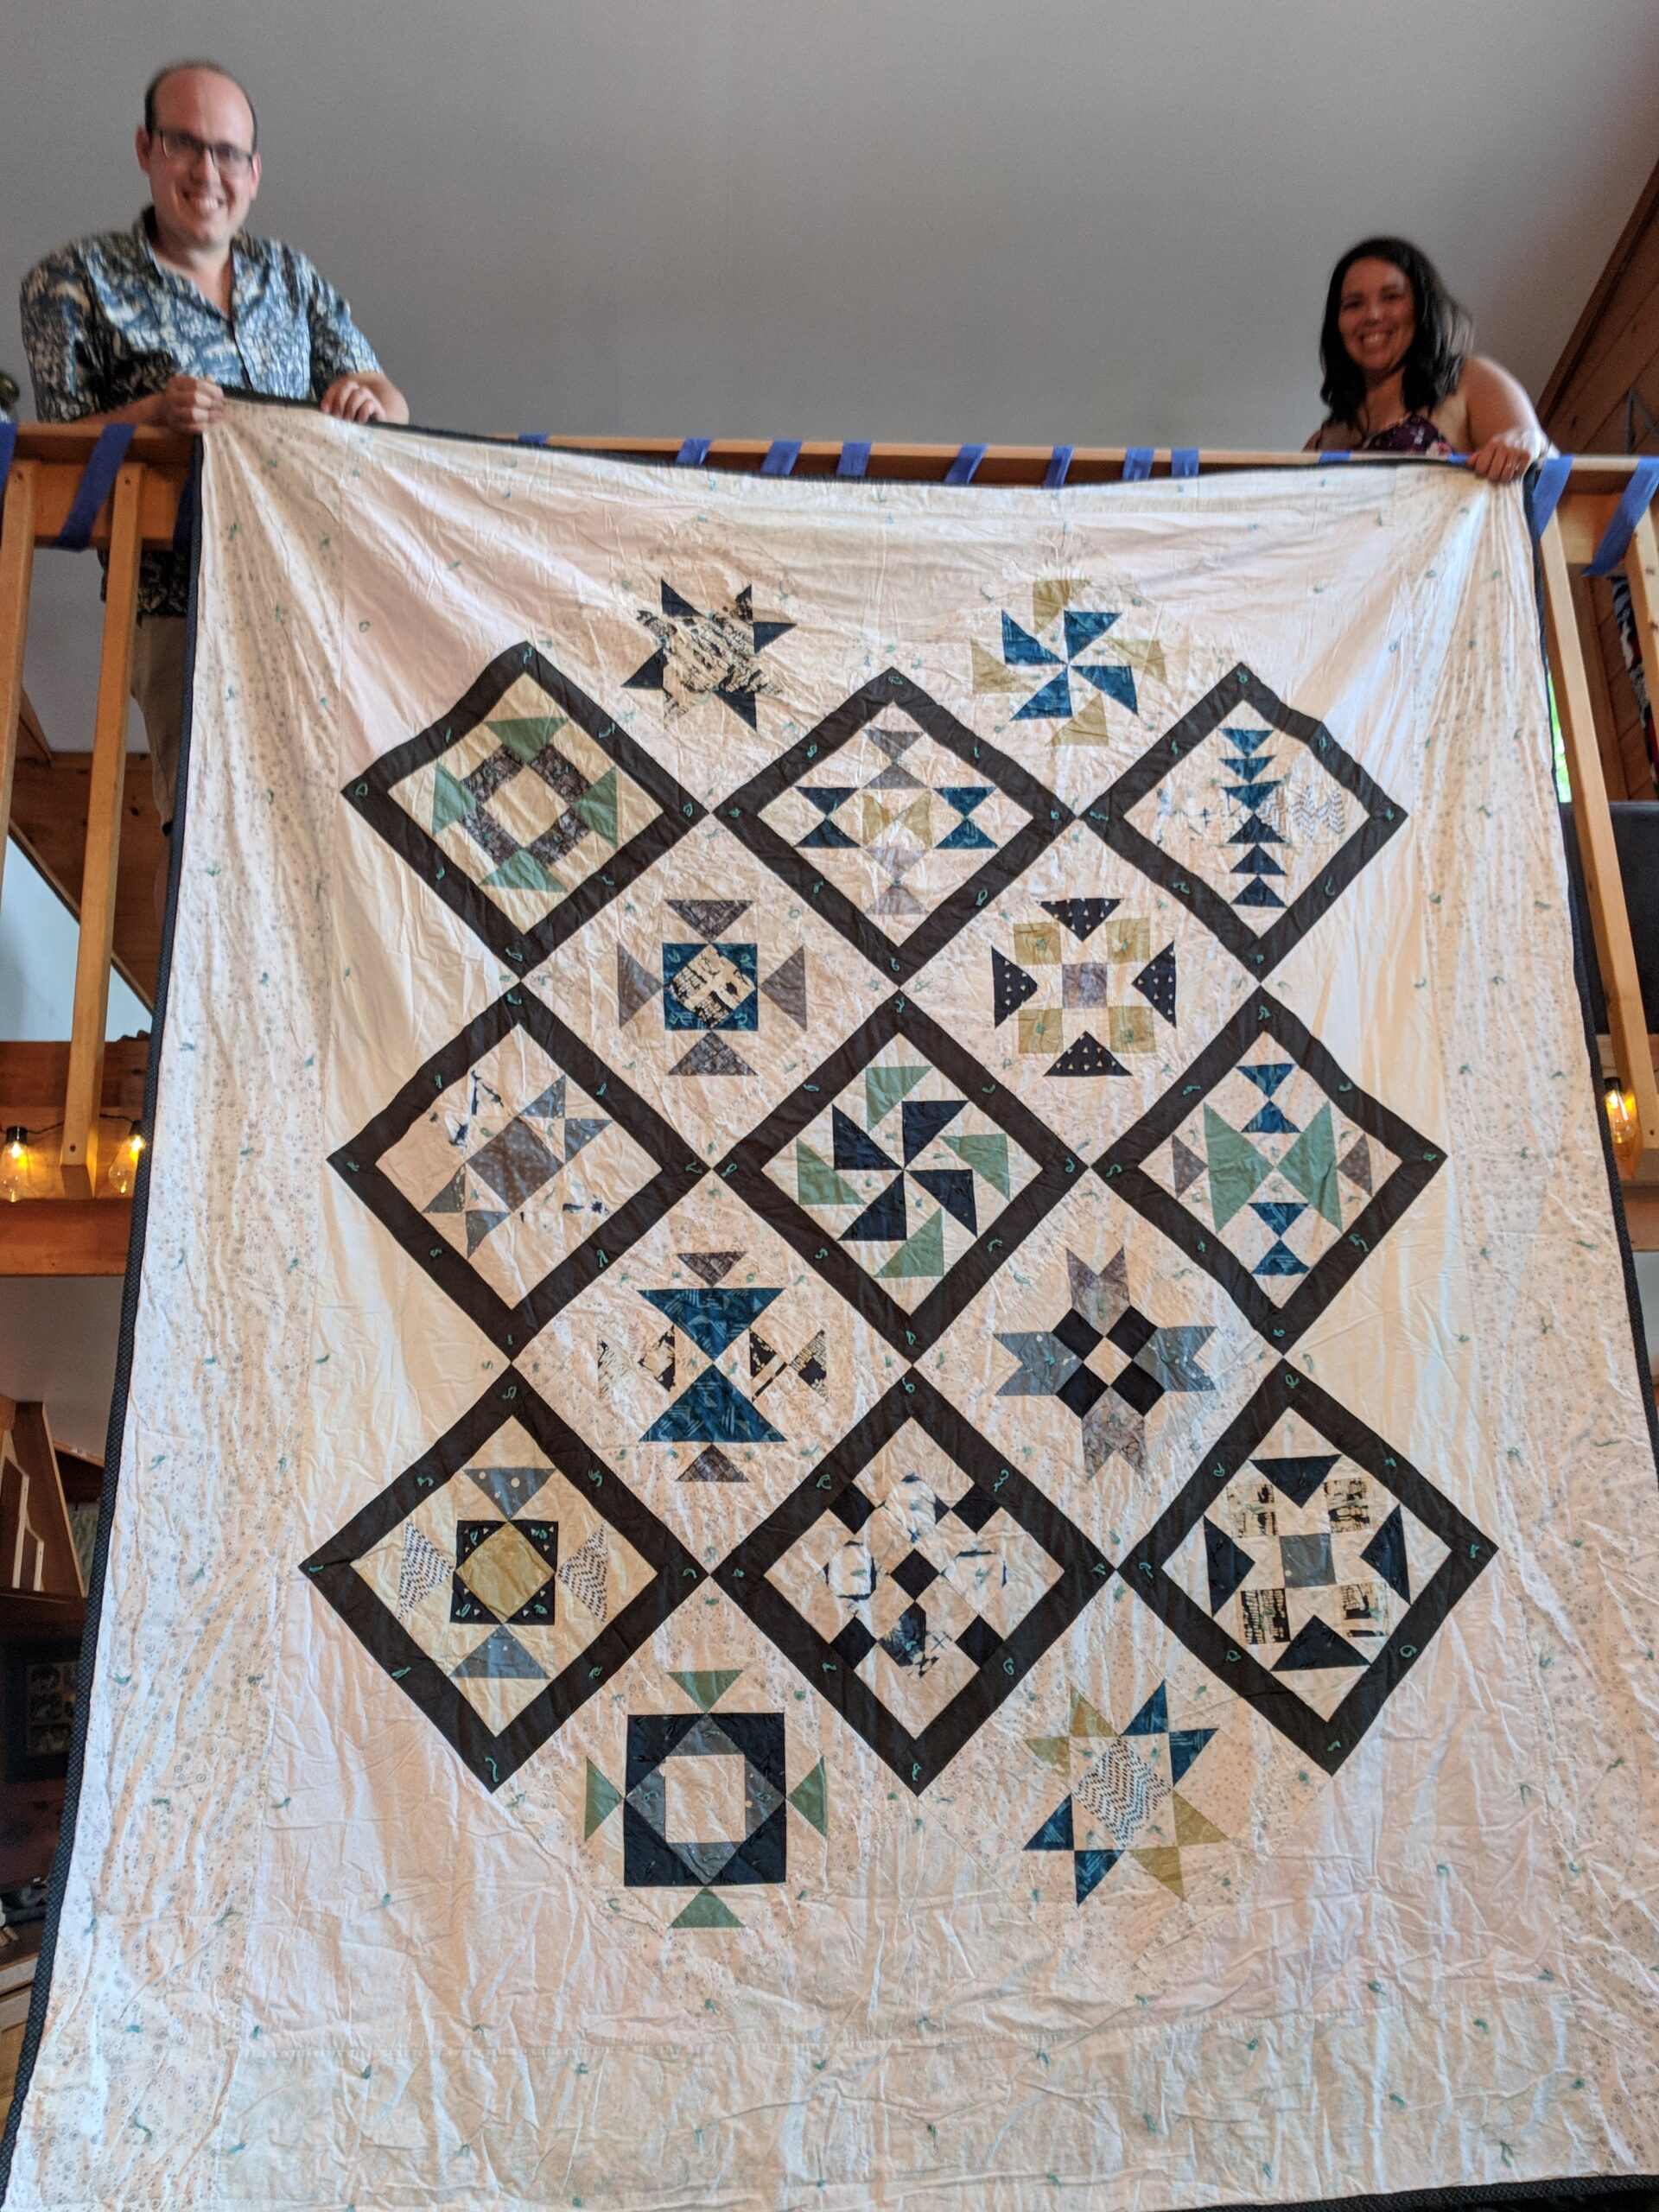
This was yet another Wedding Quilt for a family member gifted in 2018…how have I not posted this here yet?! This was for my cousin Jonathan and his wonderful wife Amy. What was really cool about this quilt, was that it was gifted at a Wedding Shower that happened to be at a Cabin on a lake up in Maine. The Cabin had a large loft area, so we were able to photograph it beautifully from there. It made for a great photo shoot.
Modern Bliss in Blue was made from the pattern “Modern Bliss” featured in the 2018 Edition of the Quilter’s Planner Magazine. Although liberties were taken with Color choices and placement, this Sampler Quilt Pattern was Designed by Cheryl Brickley of Meadow Mist Designs.
The quilt was very intricate with a ton of small pieces, but I’m very happy with how it turned out. I will be writing more about this quilt later, as I want to show off the backs of each block. Your block backs are very important….and keeping them neat and tidy is also very crucial for a good finish.
Alright, let me quit yakking and show this baby off!
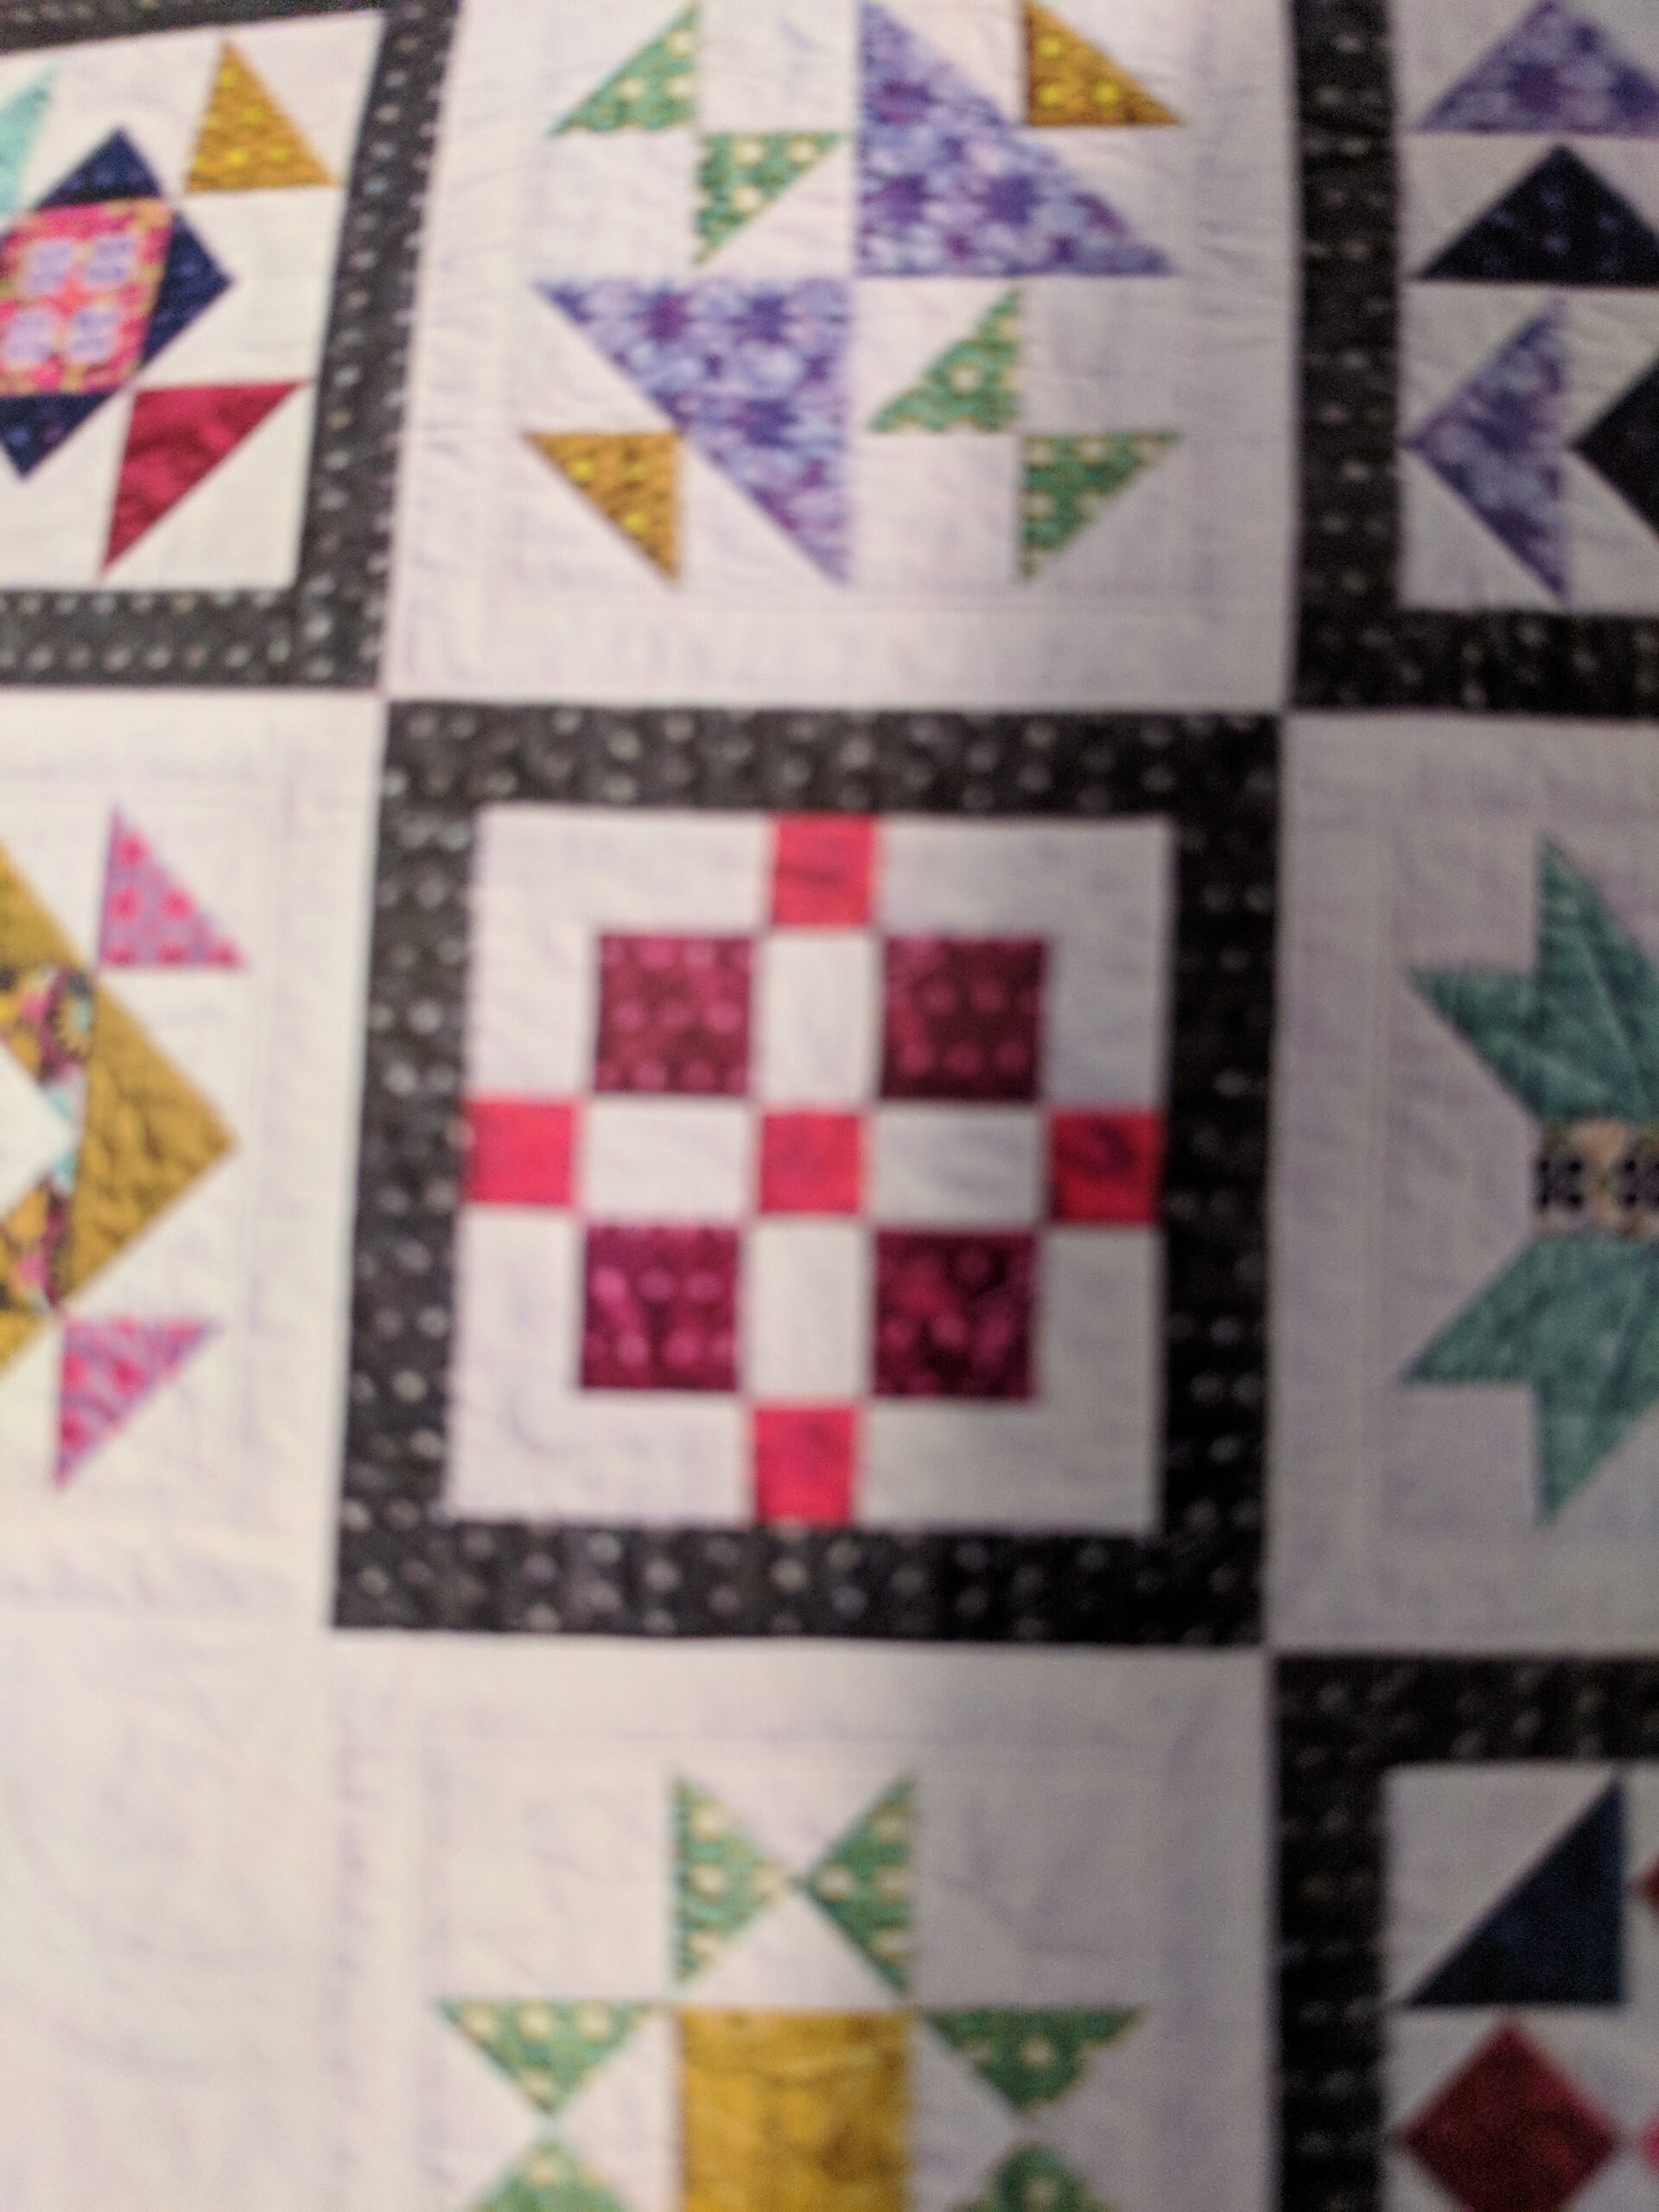
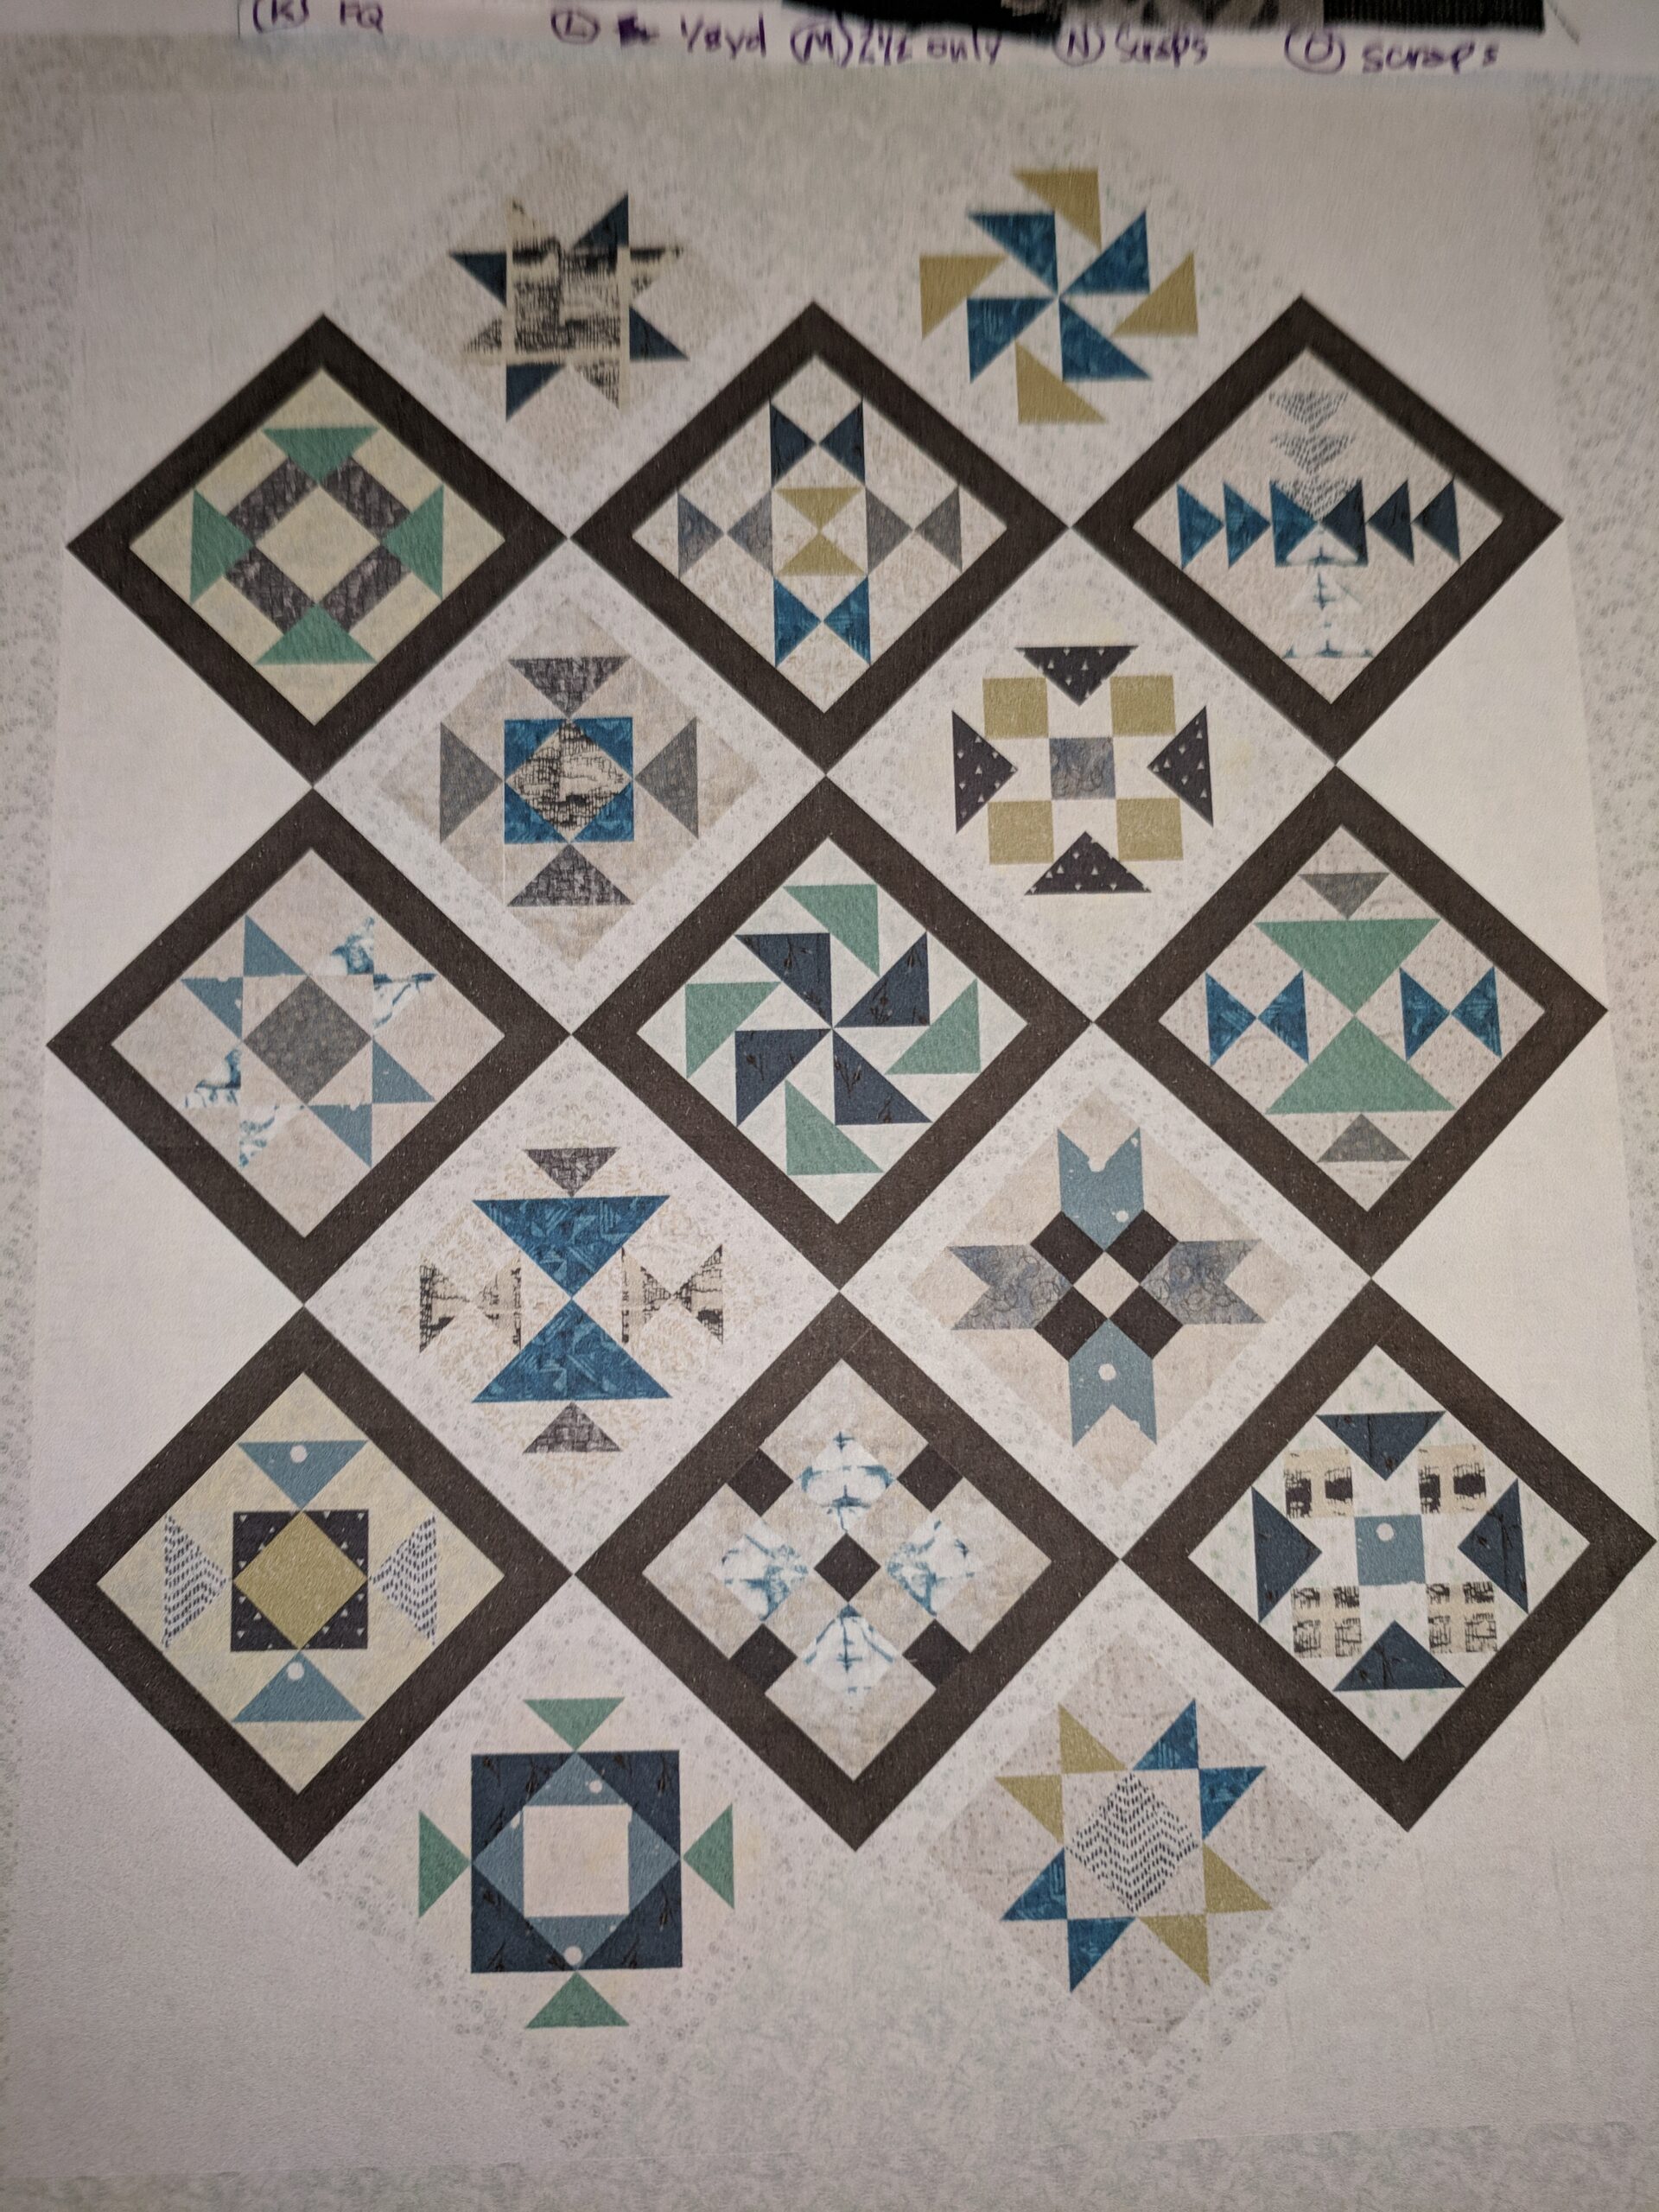
The original Pattern’s color schemeMy version in EQ8Swatching!
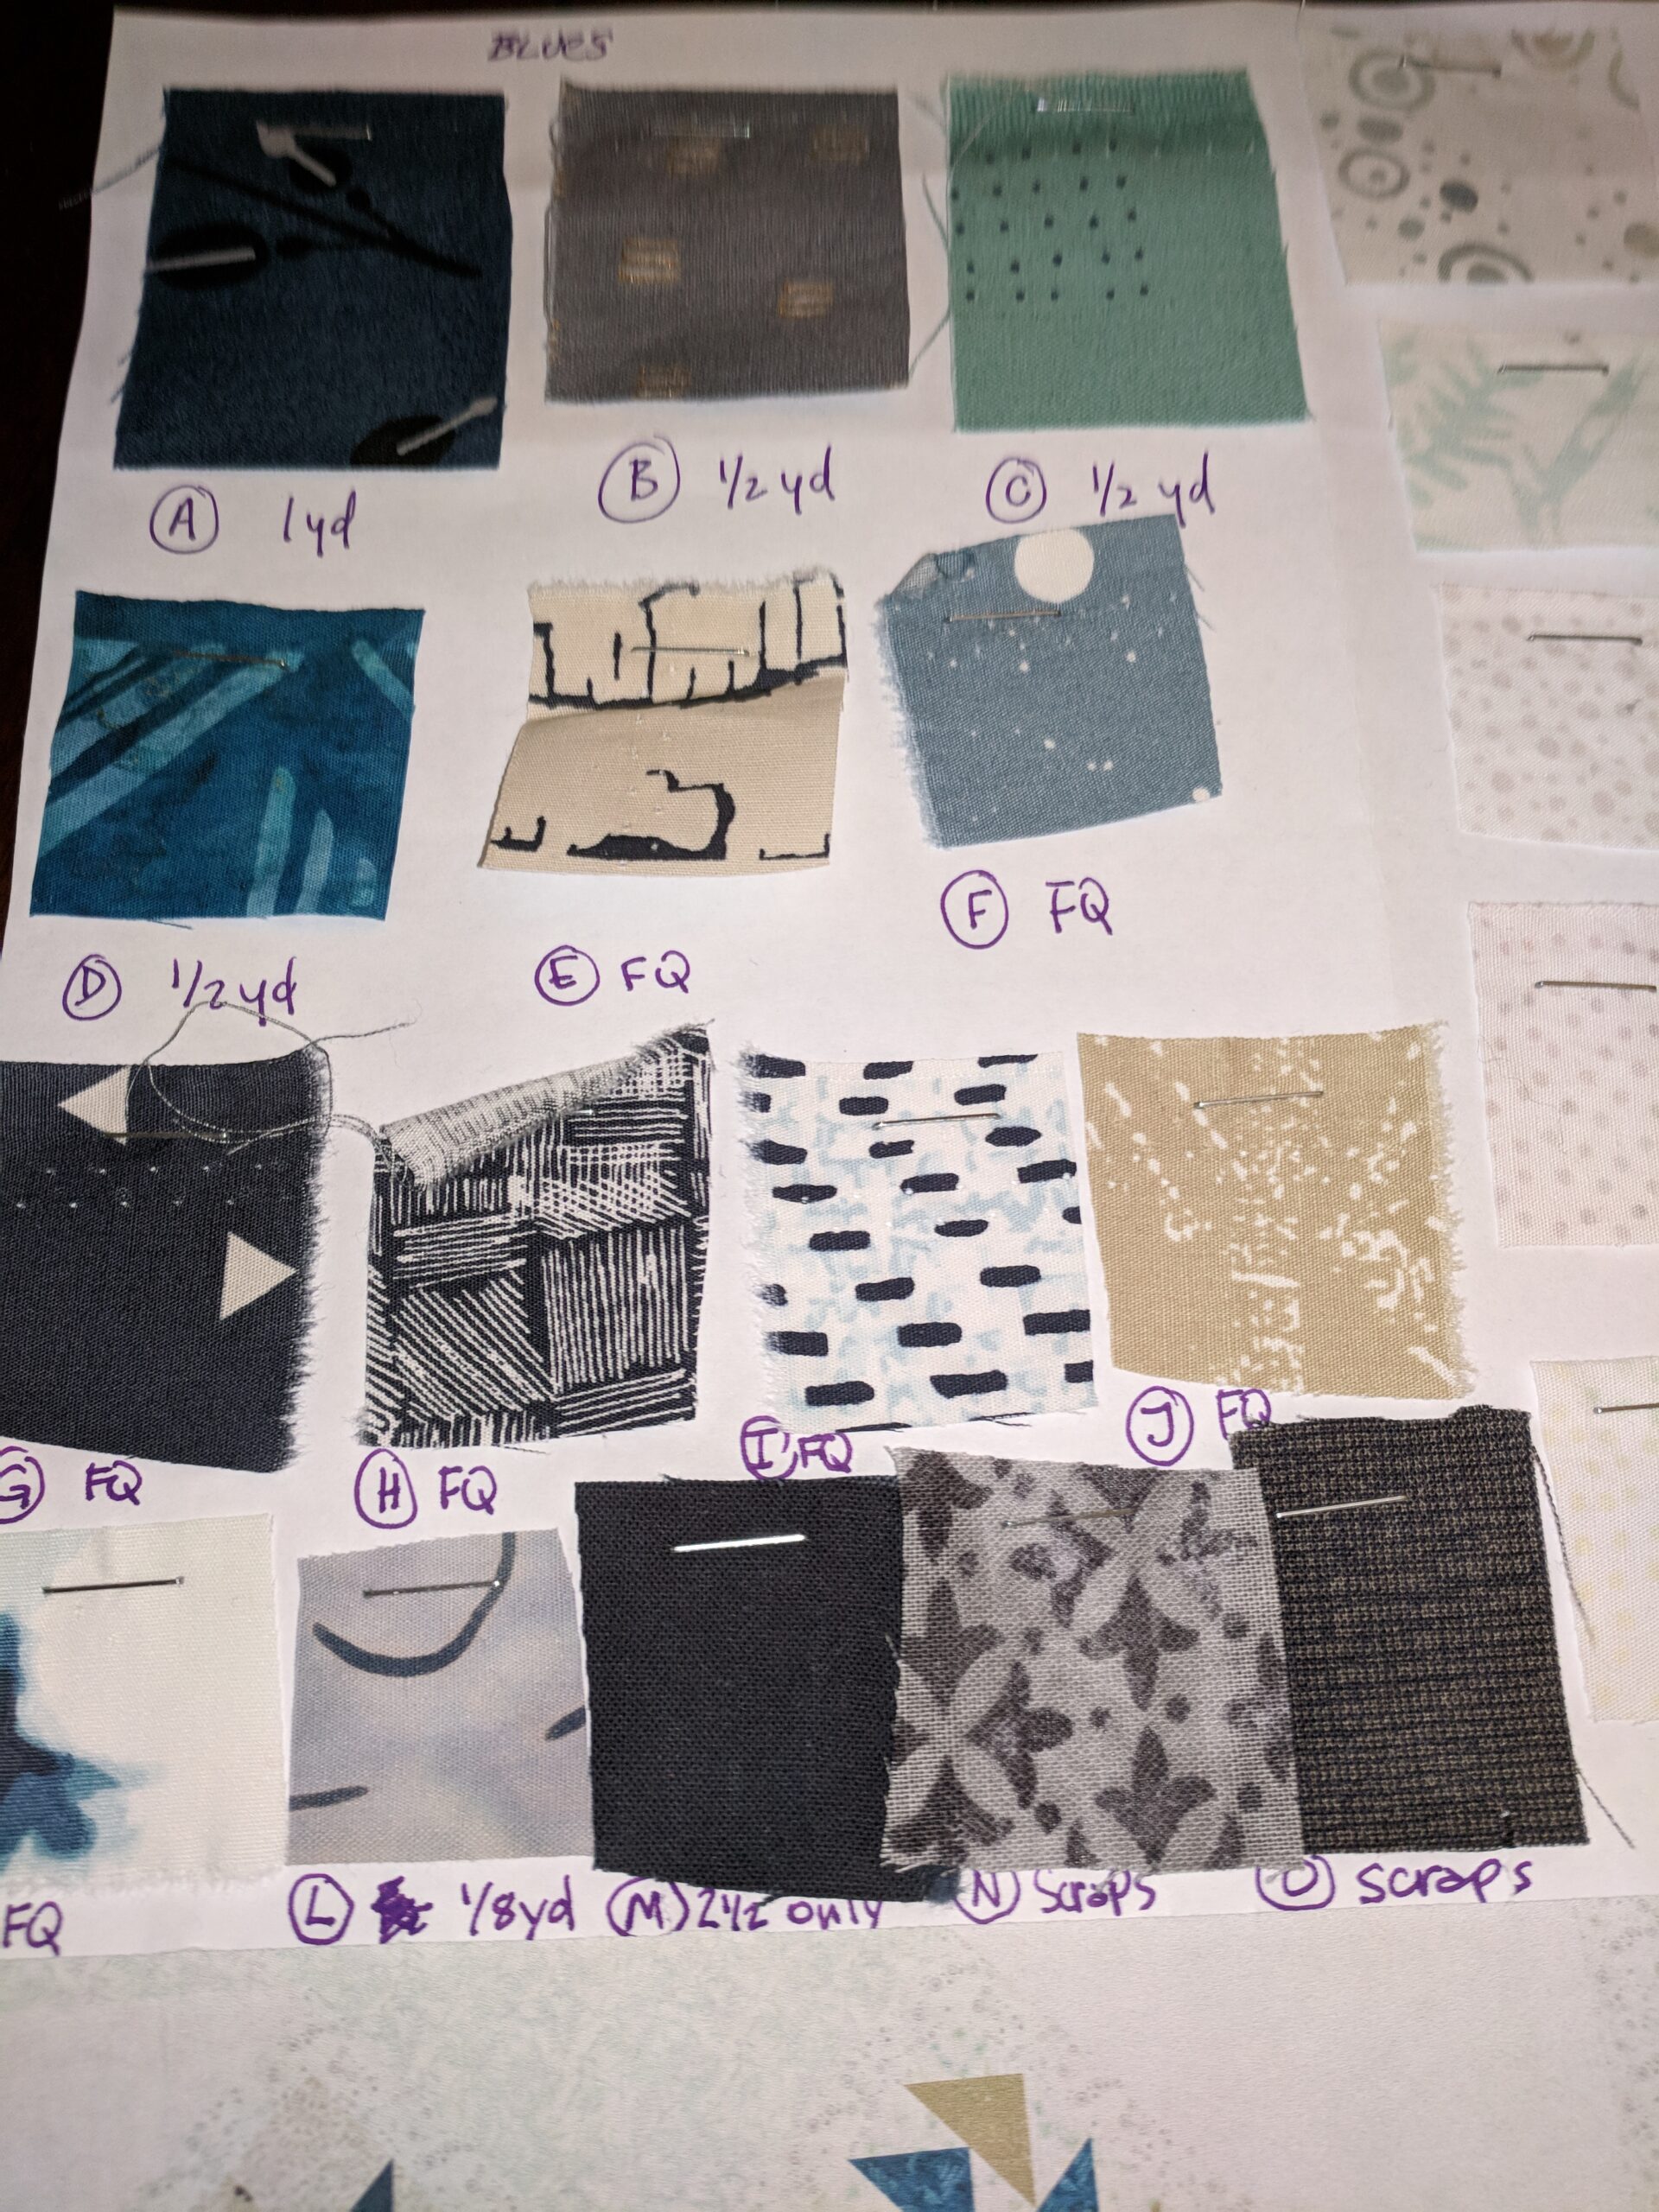
As you can see above, the original color scheme of this quilt was more traditional. I wanted to go a bit more funky with my colors for Jonathan and Amy for lots of reasons, but mostly because I thought they would prefer the Blues and I loved the way the greys and tans blended nicely. I recreated the design in EQ8 and as you can see from my Swatches, there was a LOT of time spent on making sure I had enough of each fabric to make this all work. If you can see any of the notations on my Swatch, you’ll see these were mostly Fat Quarters, half yard cuts and just plain old scraps…..so I needed to make sure it would all work before committing to it.
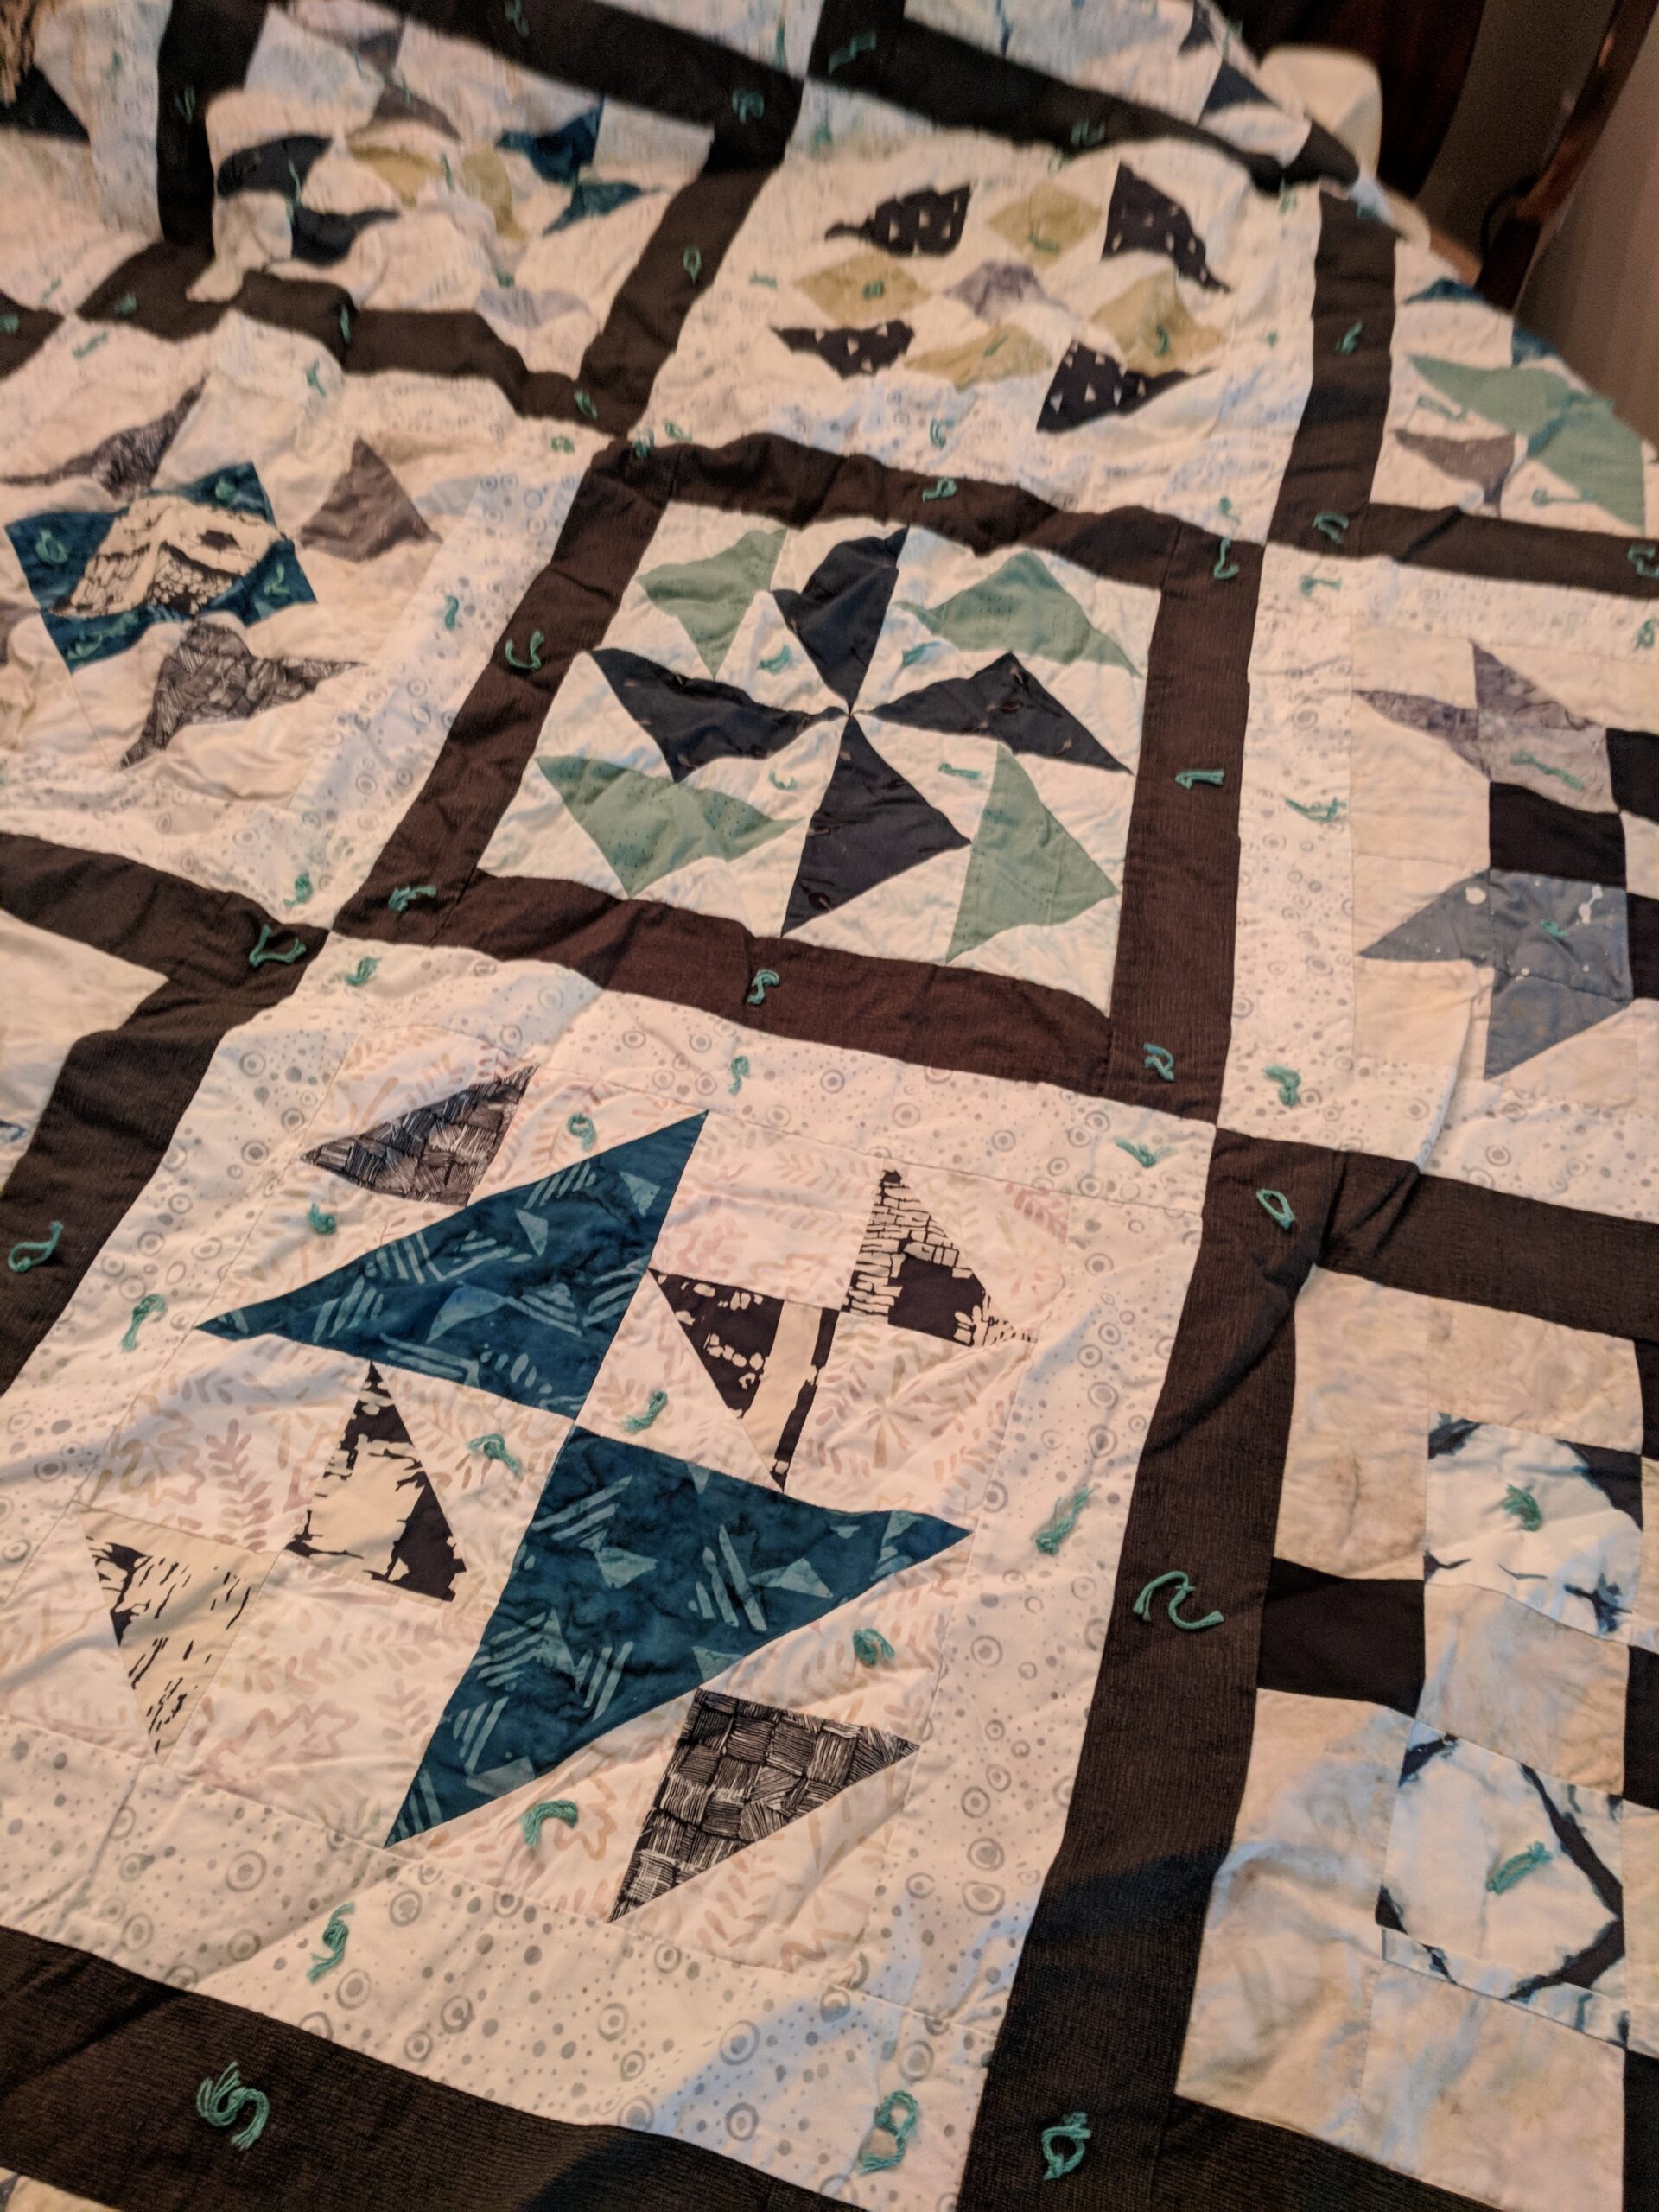
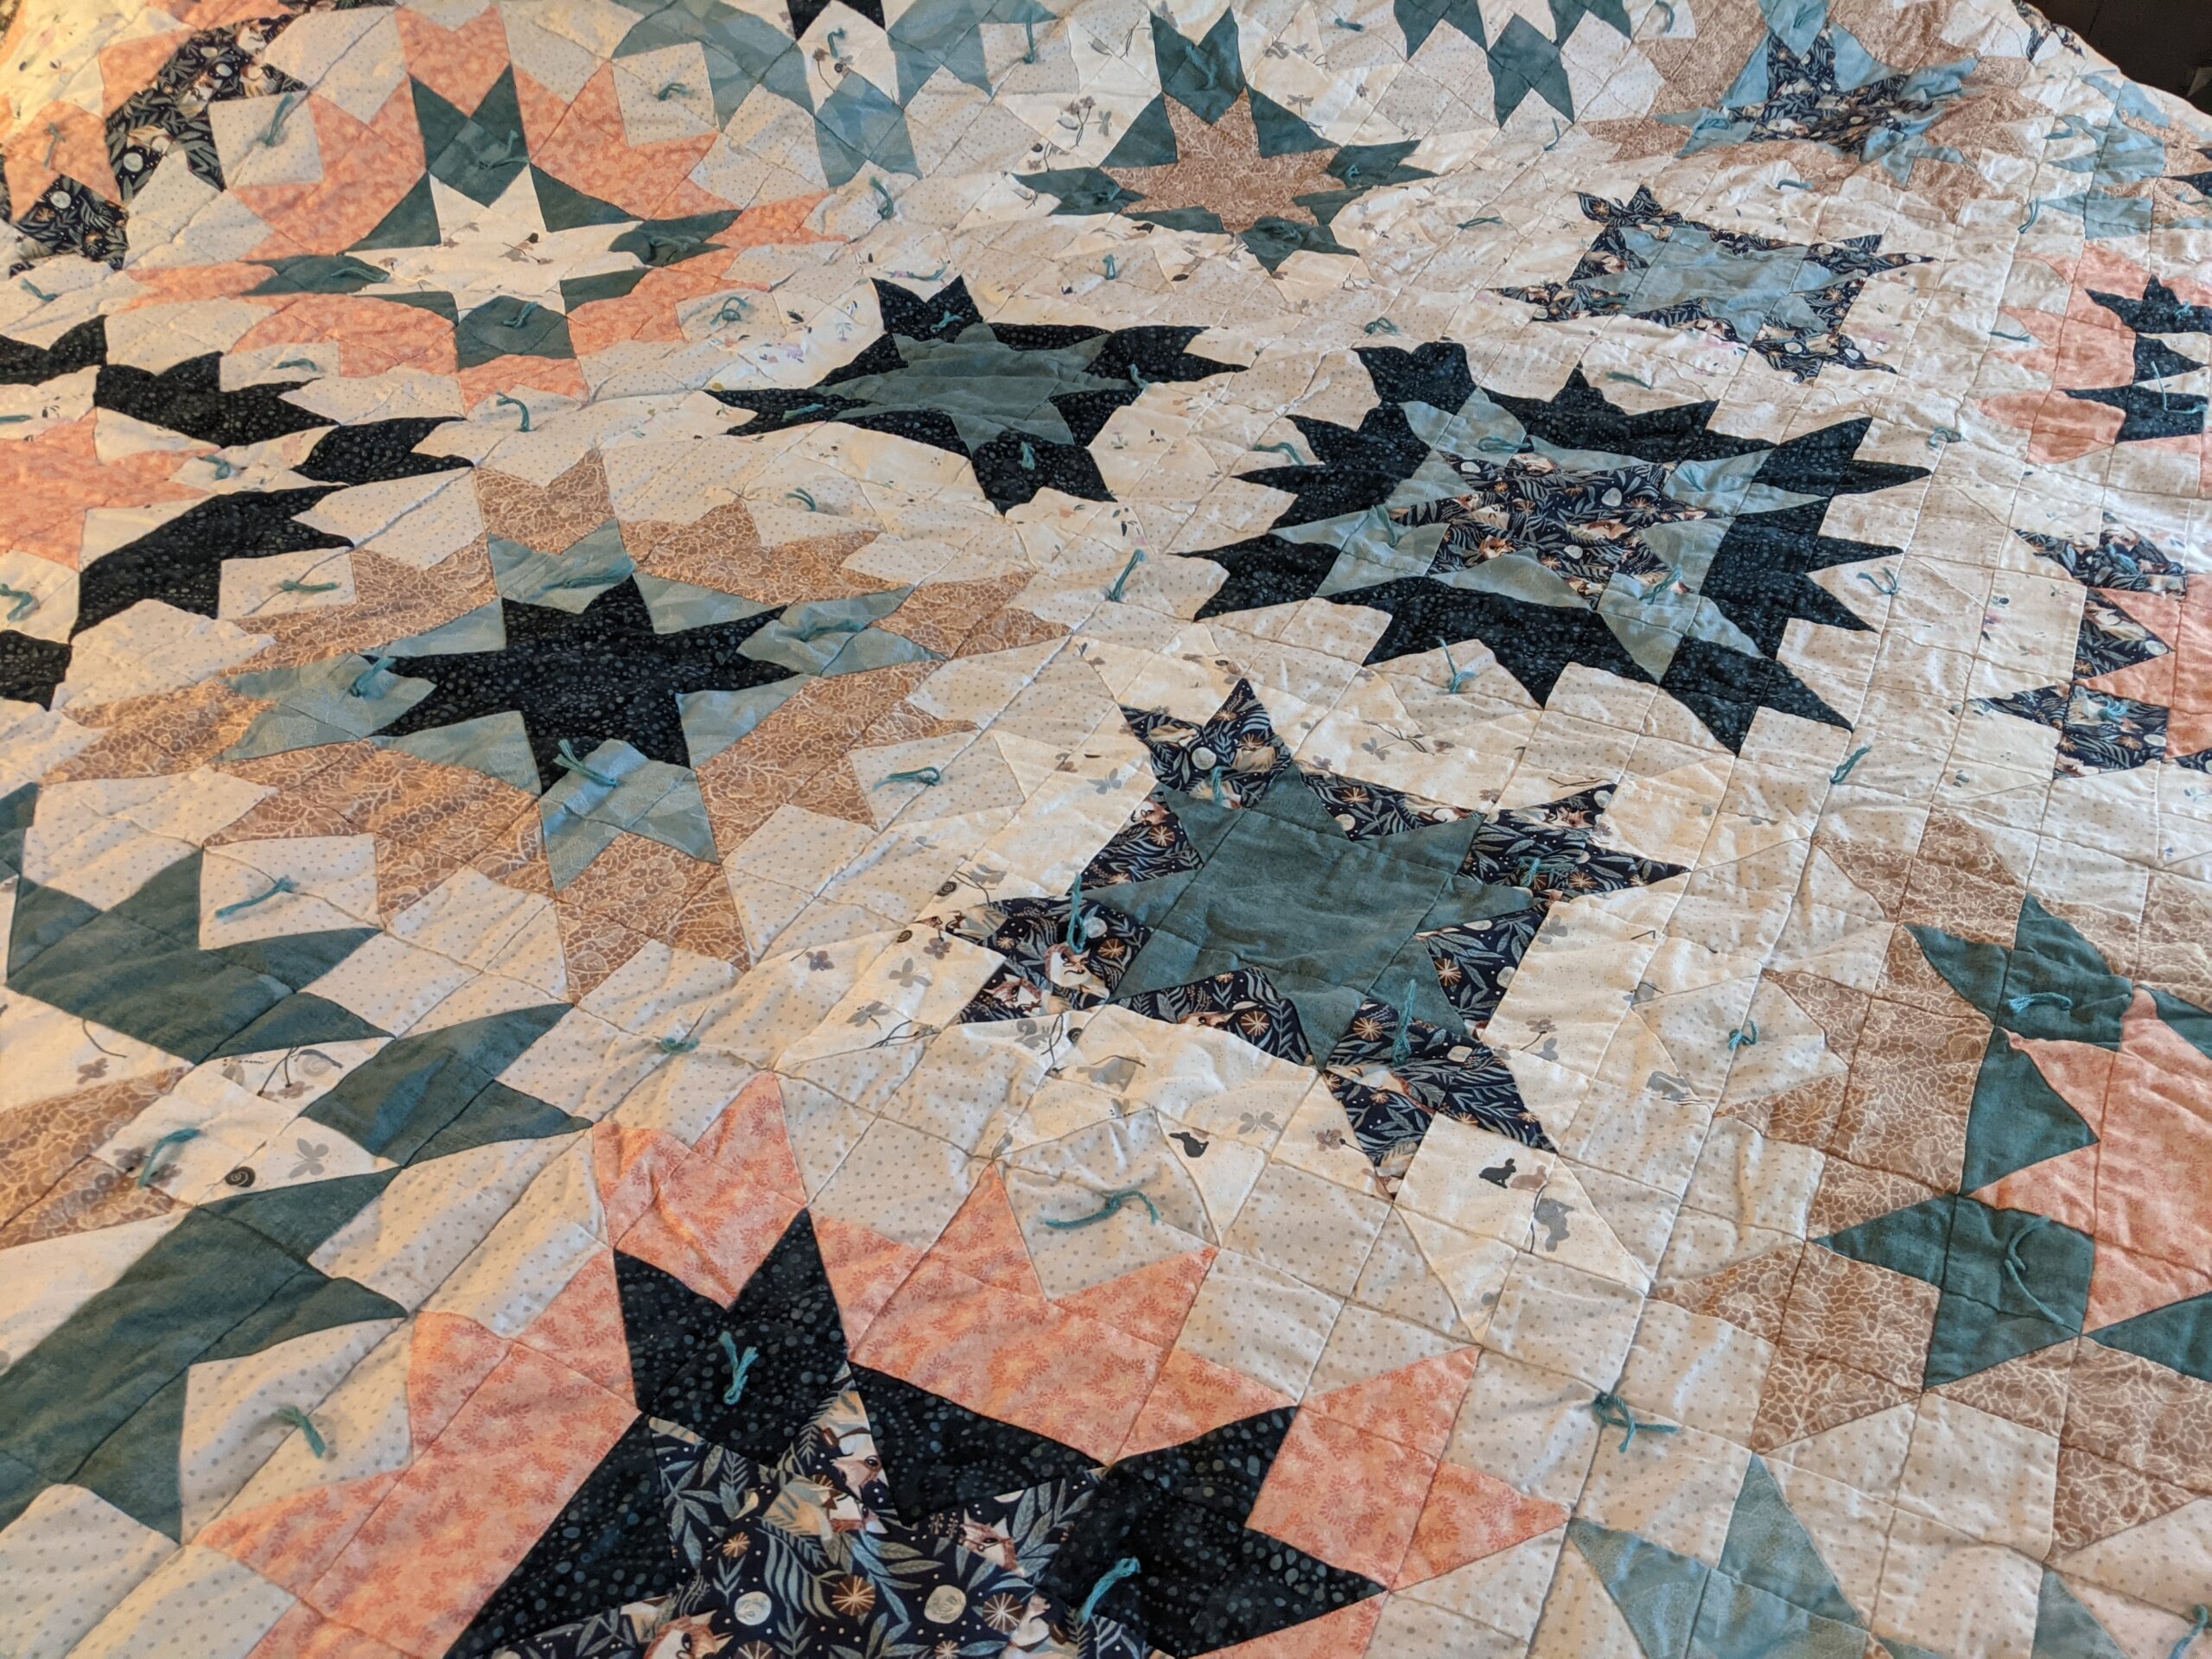
Close up: Modern Bliss in BlueClose up: Blocks from Modern Bliss in BlueClose up: Modern Bliss in Blue
Here are some close up photos of the blocks to show you the detail. I utilized “white on white” batiks….okay, okay, they were more light blue on white, but you get the point….for a scrappy, but unified background fabric. I liked this method a lot. I feel like it gave more dimension than just one white fabric for all of the background.
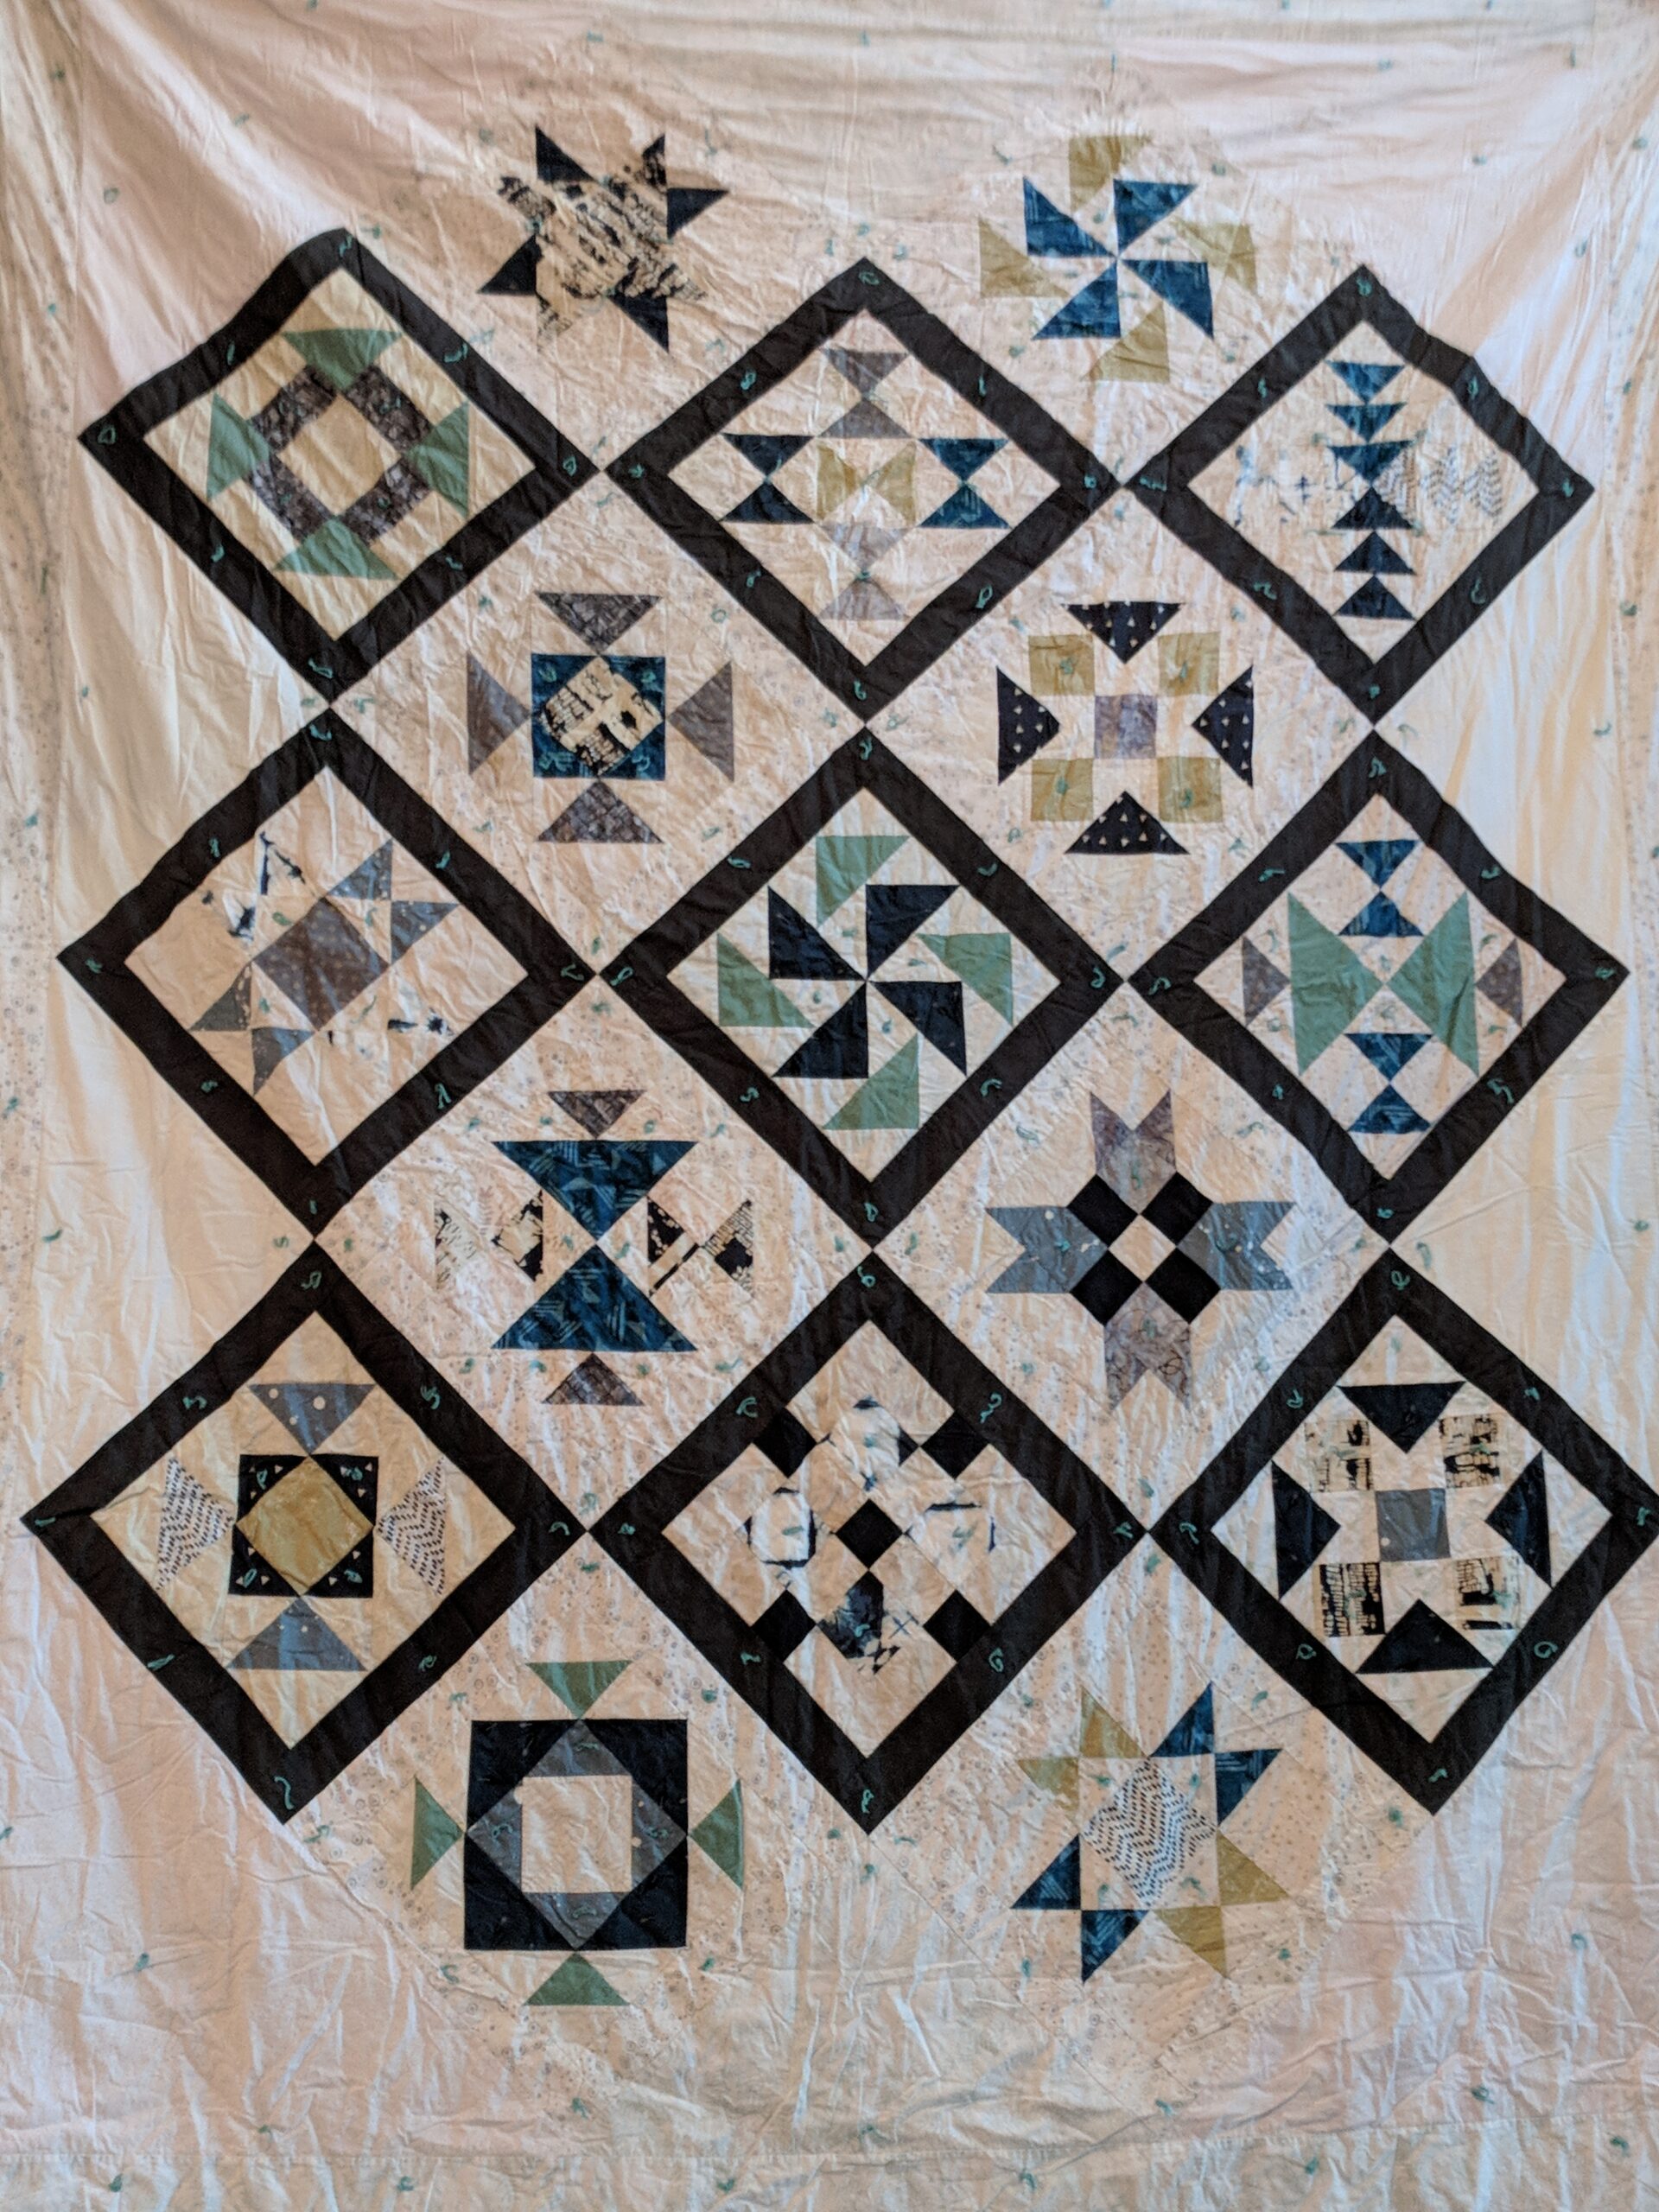
Sandwiching the QuiltModern Bliss in Blue
Here are some shots of the whole quilt being sandwiched and hanging from the Loft mentioned earlier.
More recently, Jonathan has told me a funny story about this quilt that I thought I’d share. They live in Rhode Island and one winter storm they lost power and the house got cold. He went and grabbed this off of their bed and they curled up in it on the couch and kept warm in it. I was thrilled to here this story, because sometimes I worry about using the lower loft cotton batting….but it obviously served their purpose.
Another anecdote he shared with me was that he had a conniption when a friend of his went to change their baby’s diaper on the quilt. He lost it on this kid and went and grabbed a changing mat. This makes me happy on so many levels…..they love this quilt so much and it is such an heirloom to them they don’t want it ruined. I love that they appreciate and love this quilt as much as I loved making it for them. I know I am so blessed with a family that loves and appreciates my work. I know this is not the case for many people….I’ve heard the horror stories of wedding gifts being thrown back in people’s faces or going straight to thrift stores….it’s awful. I know how blessed I am. I love that my family loves my quilts.
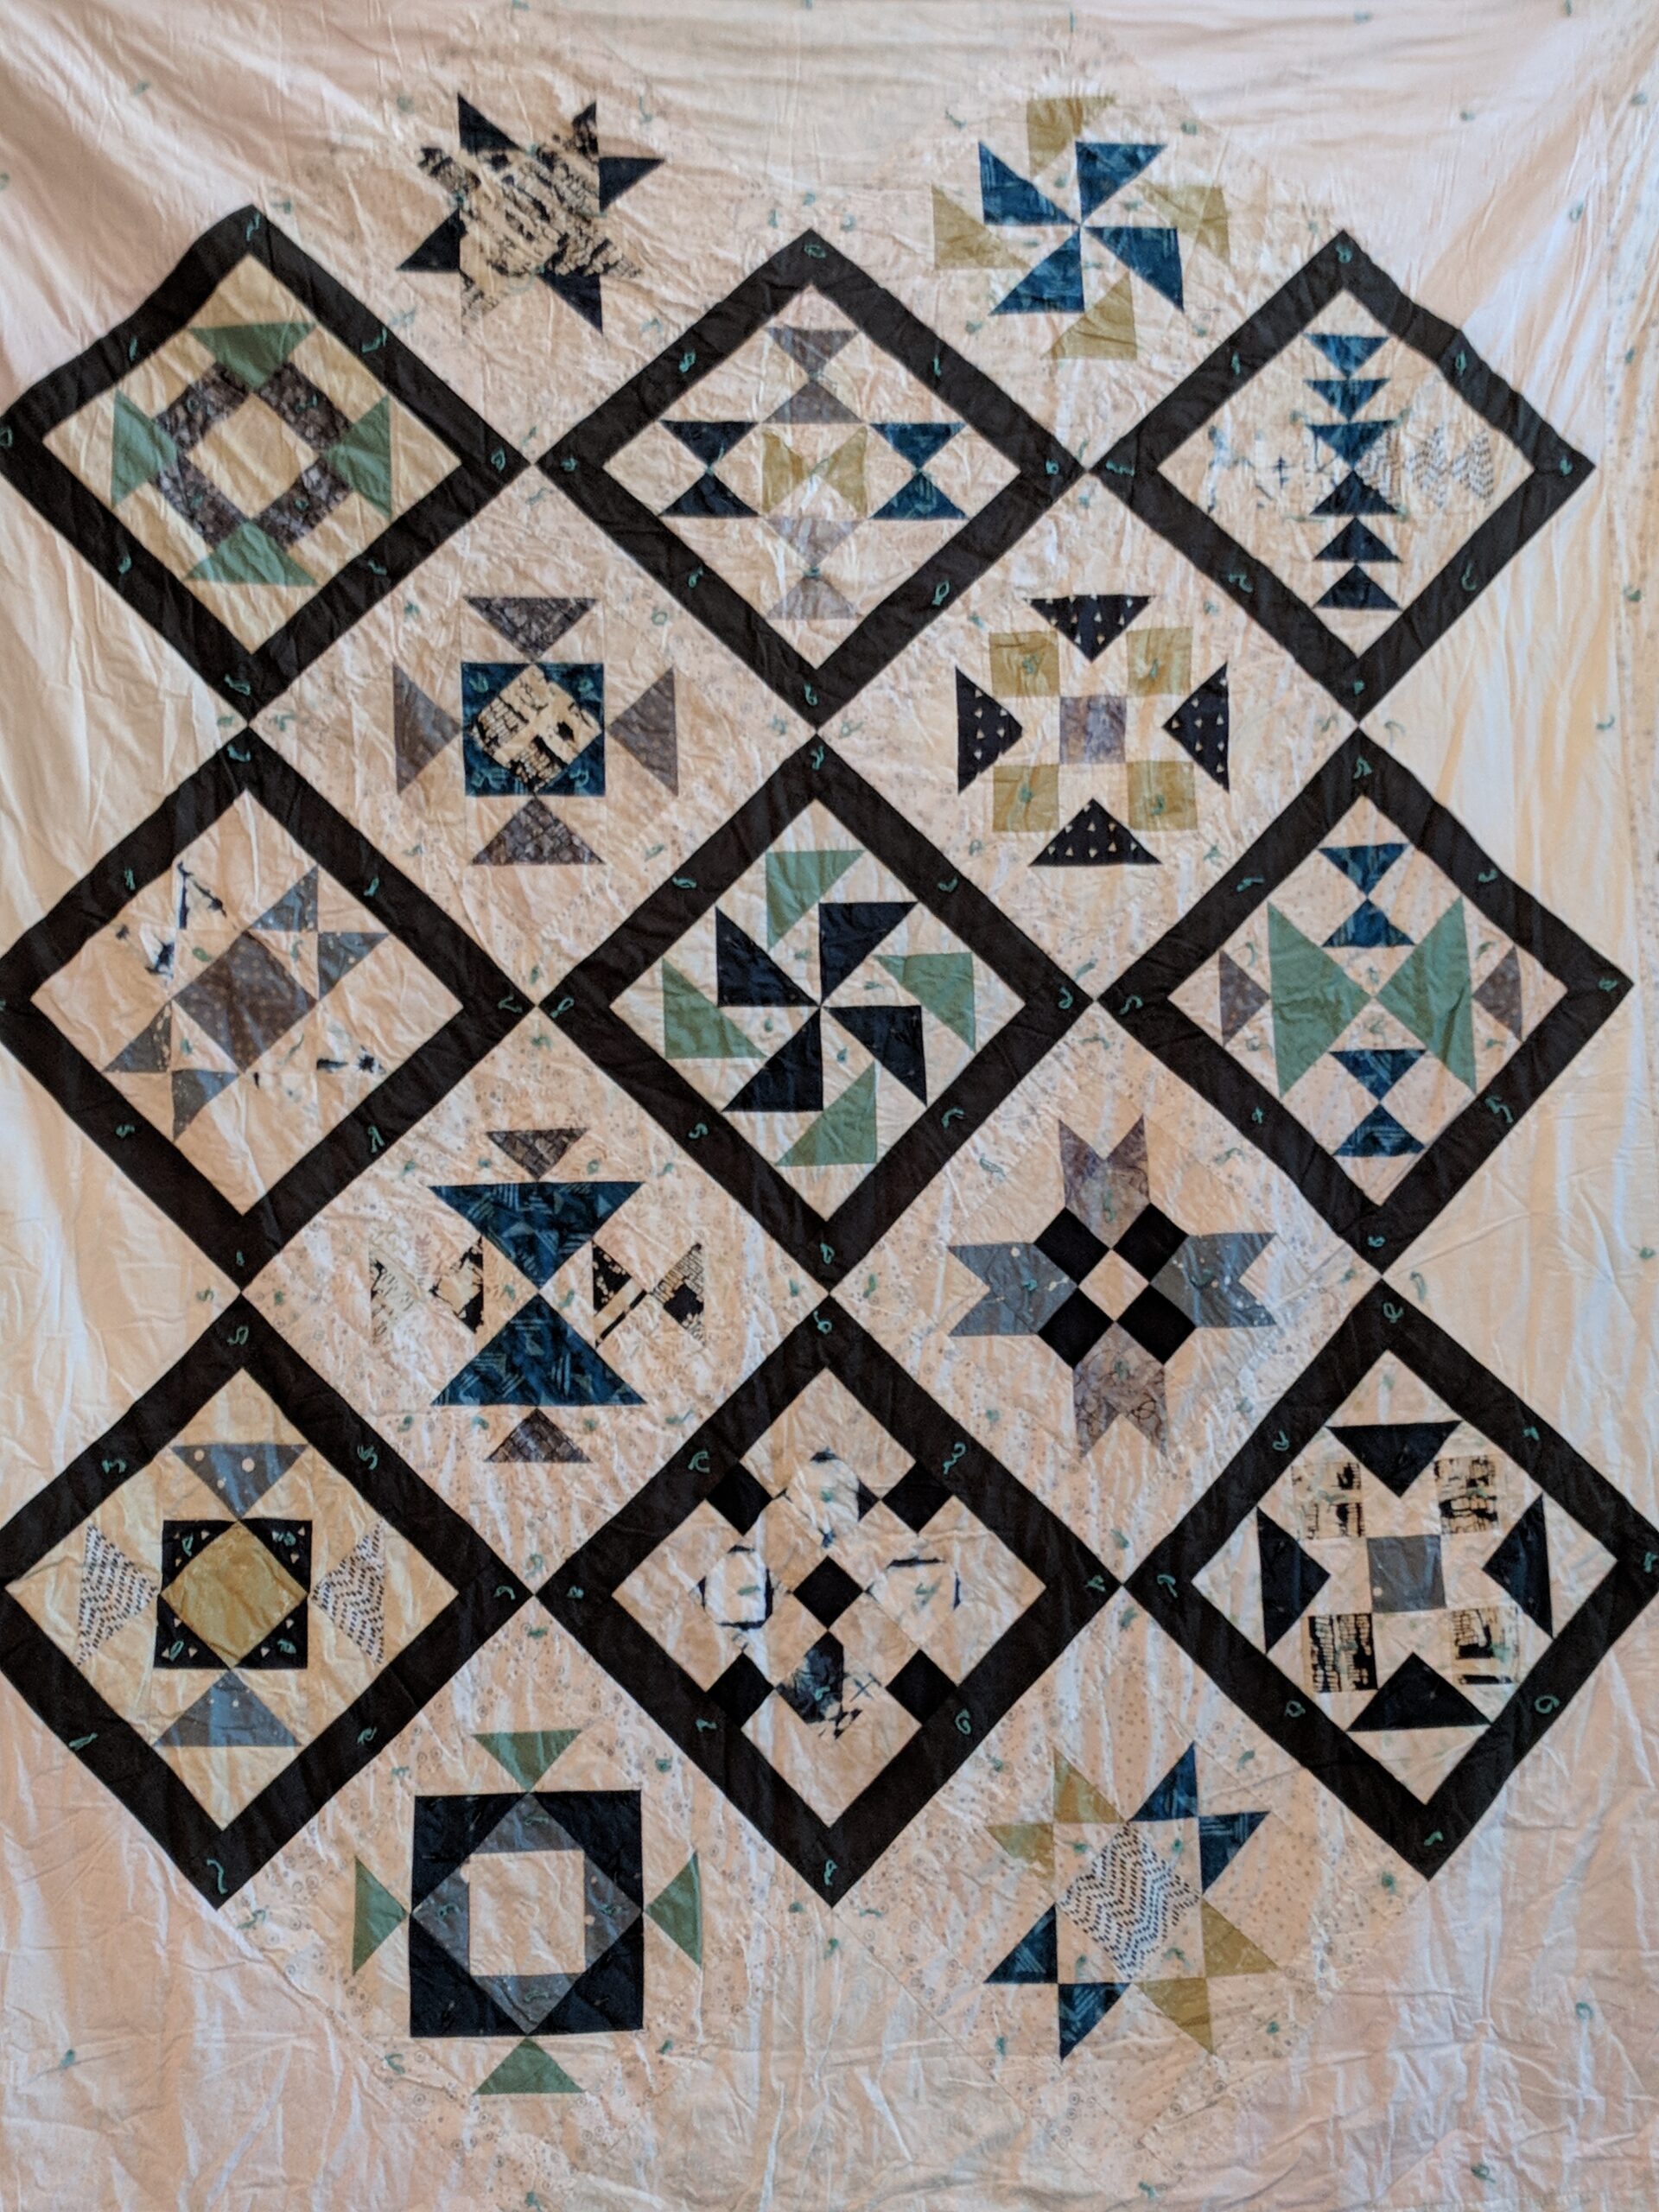
Modern Bliss in Blue
Here are the happy recipients! So many new and exciting things have happened for them since this quilt was gifted…..spoiler alert….I’ll get around to showing you their baby quilt from a few year’s ago soon!
Here’s the details on Modern Bliss in Blue
Title: Modern Bliss in Blue Pattern:Modern Bliss in Blue is made from the pattern “Modern Bliss” featured in the 2018 Edition of the Quilter’s Planner Magazine. Although liberties were taken with Color choices and placement, this Sampler Quilt Pattern was Designed by Cheryl Brickley of Meadow Mist Designs Size: King, finished ~90″ x 102″ Fabric: mostly from the stash, whites for the background were purchased at Quilter’s Attic in Pine Bush, NY Piecing: Machine stitched on Betsy, the Bernina 560 Cutting: by hand with rotary cutter Quilting: Tied with Takhi Cotton Classic, 100% cotton yarn purchased at Cornwall Yarn Shop Backing: I think it was 108, but can’t remember Label: Hand Embroidered by Anne Lemin of Quilted Lovelies, hand stitched by Danika to attach to quilt Batting: Warm and Natural, by The Warm Company (I think) Finished Date: August 2018 Total Hours: ~84 hours
Another Finish for you to see!! This one is an Original Design by me. This is a Baby Quilt made for my cousins who are Parents-To-Be, the baby girl is due in July and the baby shower was mid-May. This was finished along with Wild …
Quilt is sandwiched and tied. Now it’s time to bind it. There are several ways to bind, but for this quilt, I wanted to roll the backing to the front. The reason for this was that I wanted to bring some of the navy fabric …
Ham and Cheese? Peanut Butter and Jelly? Nope! How about a Quilt Sandwich!!
Once the top is finished, you have a few options. If you have time (I definitely did NOT) you could prep your top for a longarmer or quilt the top yourself, either by hand or by machine. I often quilt my own quilts, but this one is larger than Queen sized, so I think Mavis (my Bernina 770QE) would have had a bit of trouble handling this one. I definitely did not have enough time alotted to get this to a longarmer to quilt it for me, so this one had to be sandwiched and tied.
If I was sending it off, the prep would be much different. I would not sandwich it at all but give all three layers (the top, the batting and the backing) to the longarmer. If you are using a longarmer, please make sure you check with your individual longarmer to ensure you prep the quilt exactly how they like it. Everyone has different methods and preferences and you’ll want to make sure you’ve given it to them the way they prefer.
Some of the prep, however, is exactly the same. You will always want your finished top to be well pressed, free of any pins and square. You also want to ensure that it lays flat. If it doesn’t lay flat before it’s quilted, it won’t lay flat afterwards.
If this quilt was going to be quilted by me, either by hand or on Mavis, I would sandwich as I will describe below. However, I will not be quilting this, but tying it. I love a tied quilt. It could almost be called my signature. I think it’s a charming way to bring back the original, utilitarian, folky way of finishing a heirloom and I love it. I also think it adds a wonderful textured and dimensional layer.
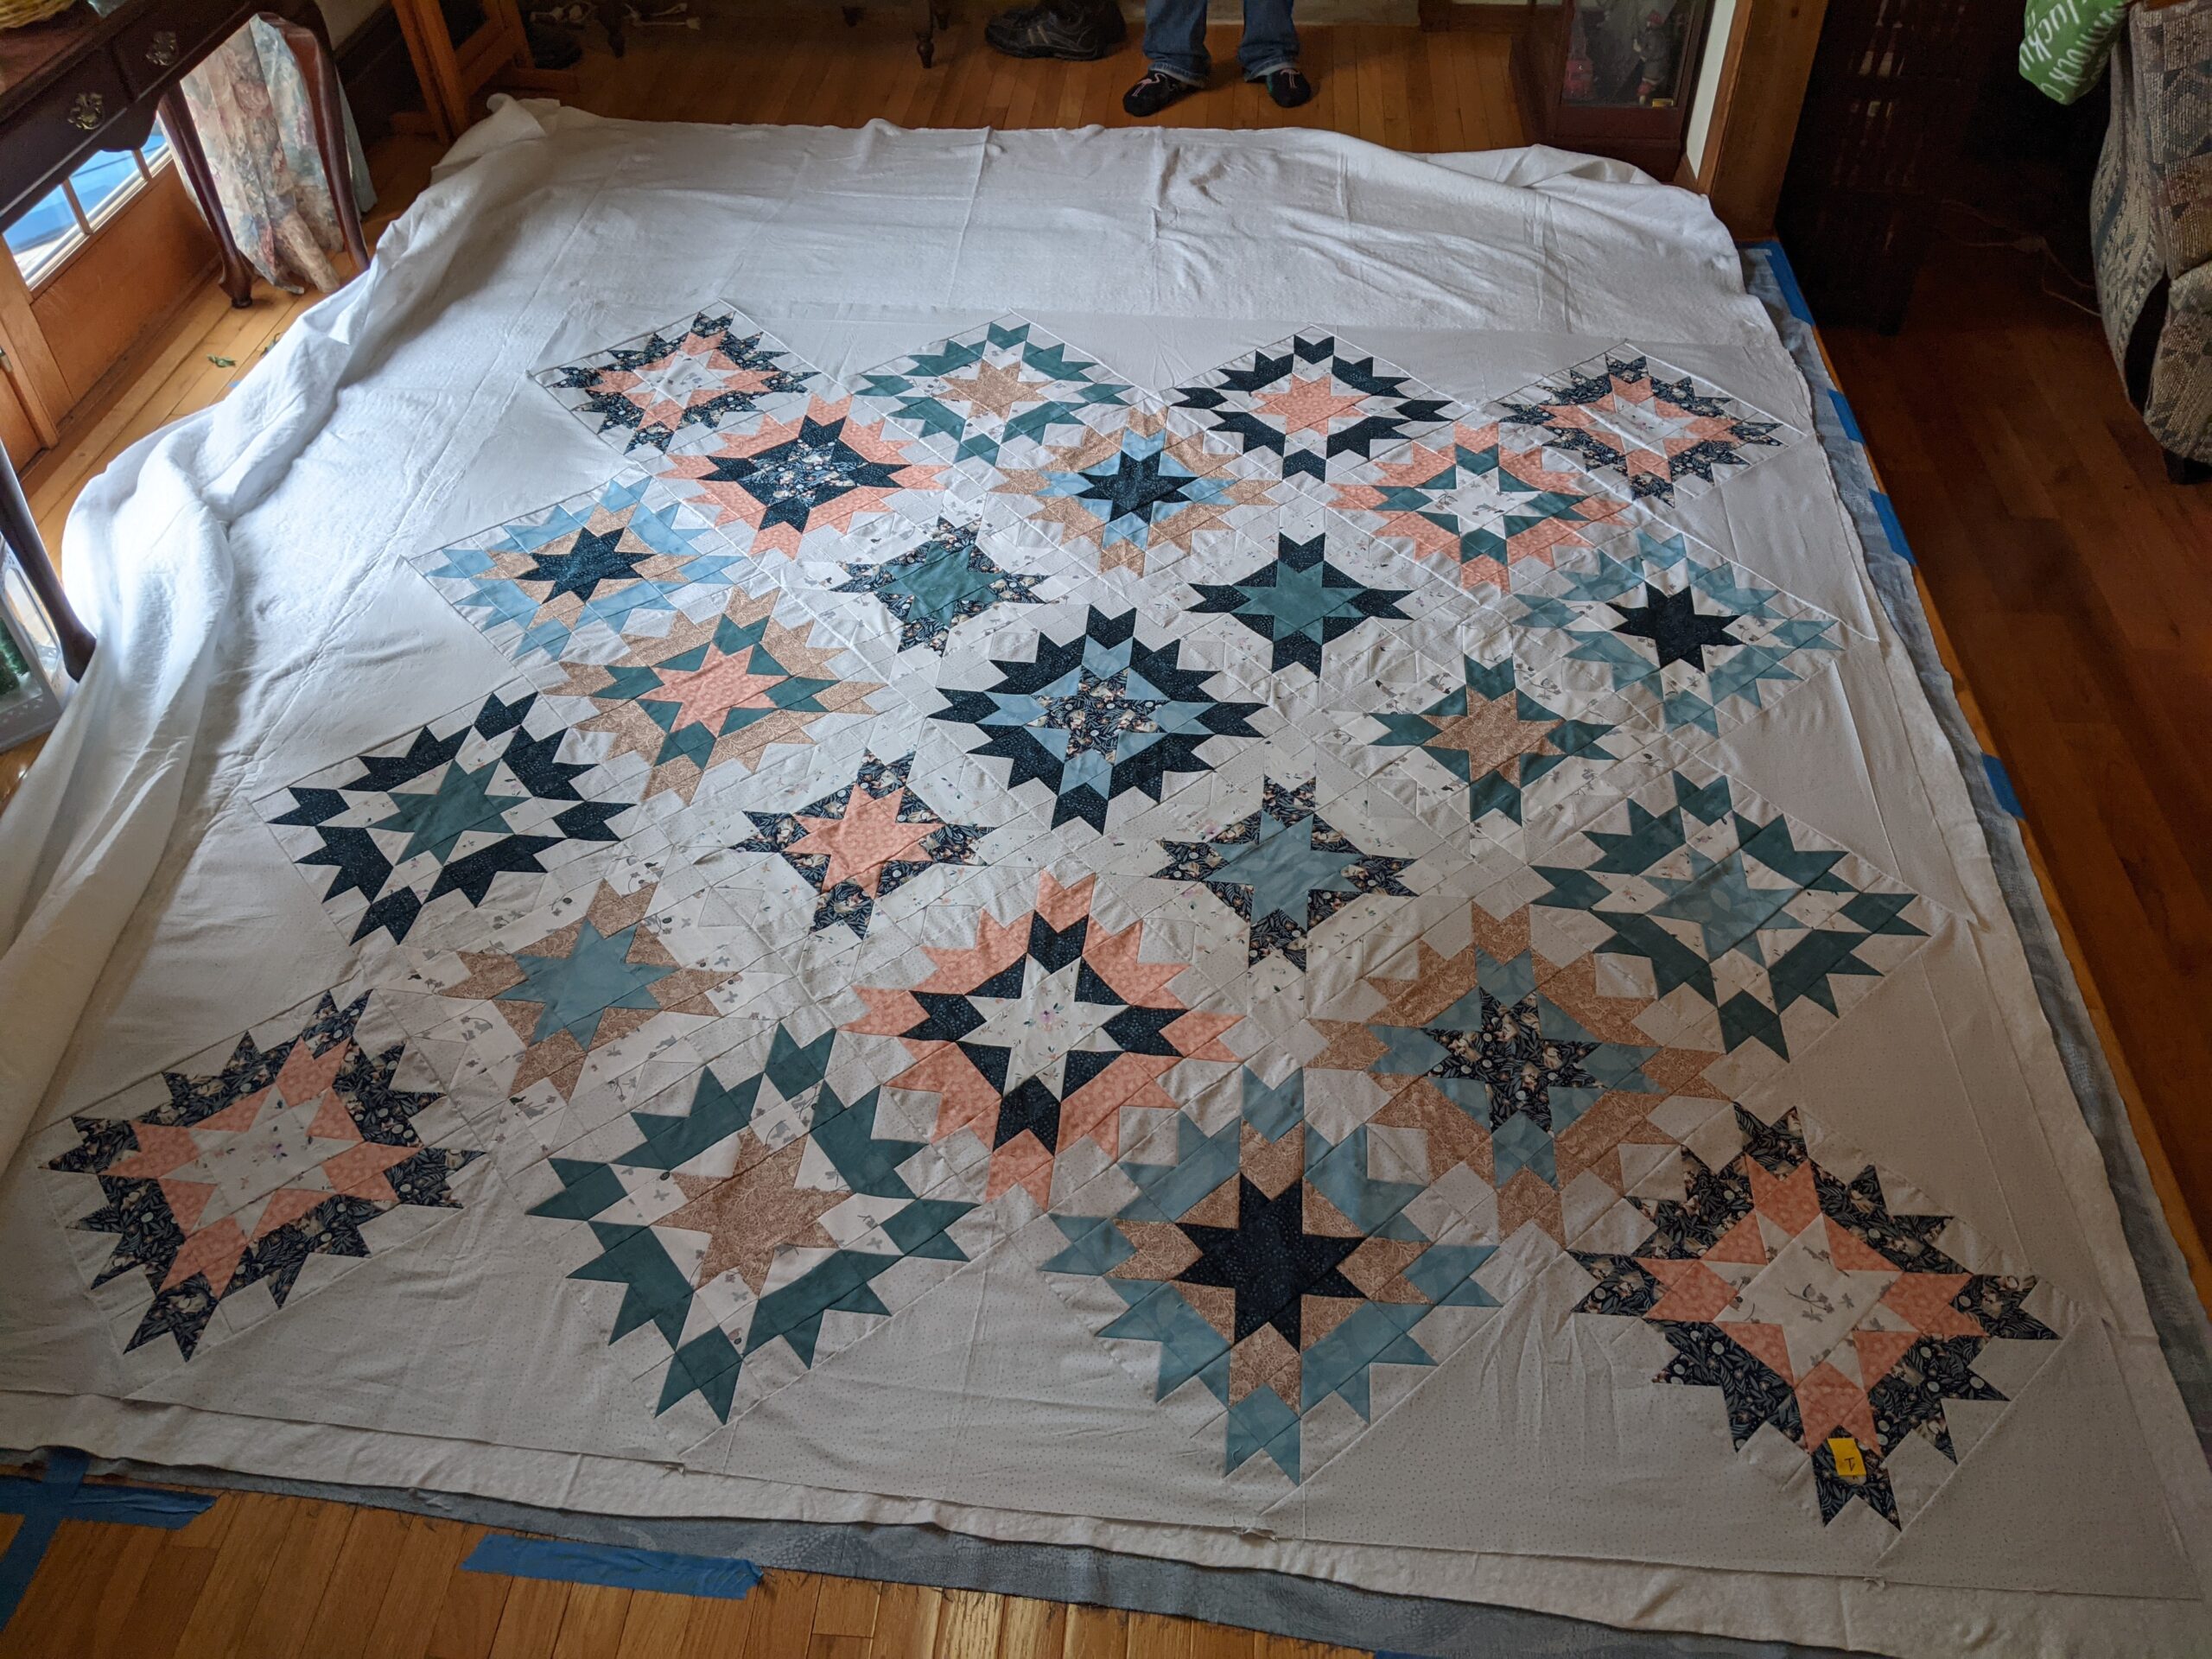
Sandwiching the Quilt
The first step to sandwiching a quilt is to find a space large enough to lay out the entire thing. As you can see in the photo above, this was the floor of my mother-in-law’s “nothing” room….it’s sort of a parlor pass through between her family room and dining room. Strategically, it has a step down into the family room, which made for a back-saving spot to pin-baste. Once you find a spot, you want to lay out your backing with wrong side up. I then use blue painter’s tape to tape down the backing. Be VERY careful to not actually stretch/distort the backing fabric. You want to ensure there are no creases or folds in it, but you don’t want to stretch it at all. Smooth, not Stretched!! (Helpful Hint: Press your backing fabric or if it’s a single piece of backing, throw it into the dryer with a wet towel for a few minutes to release all wrinkles.)
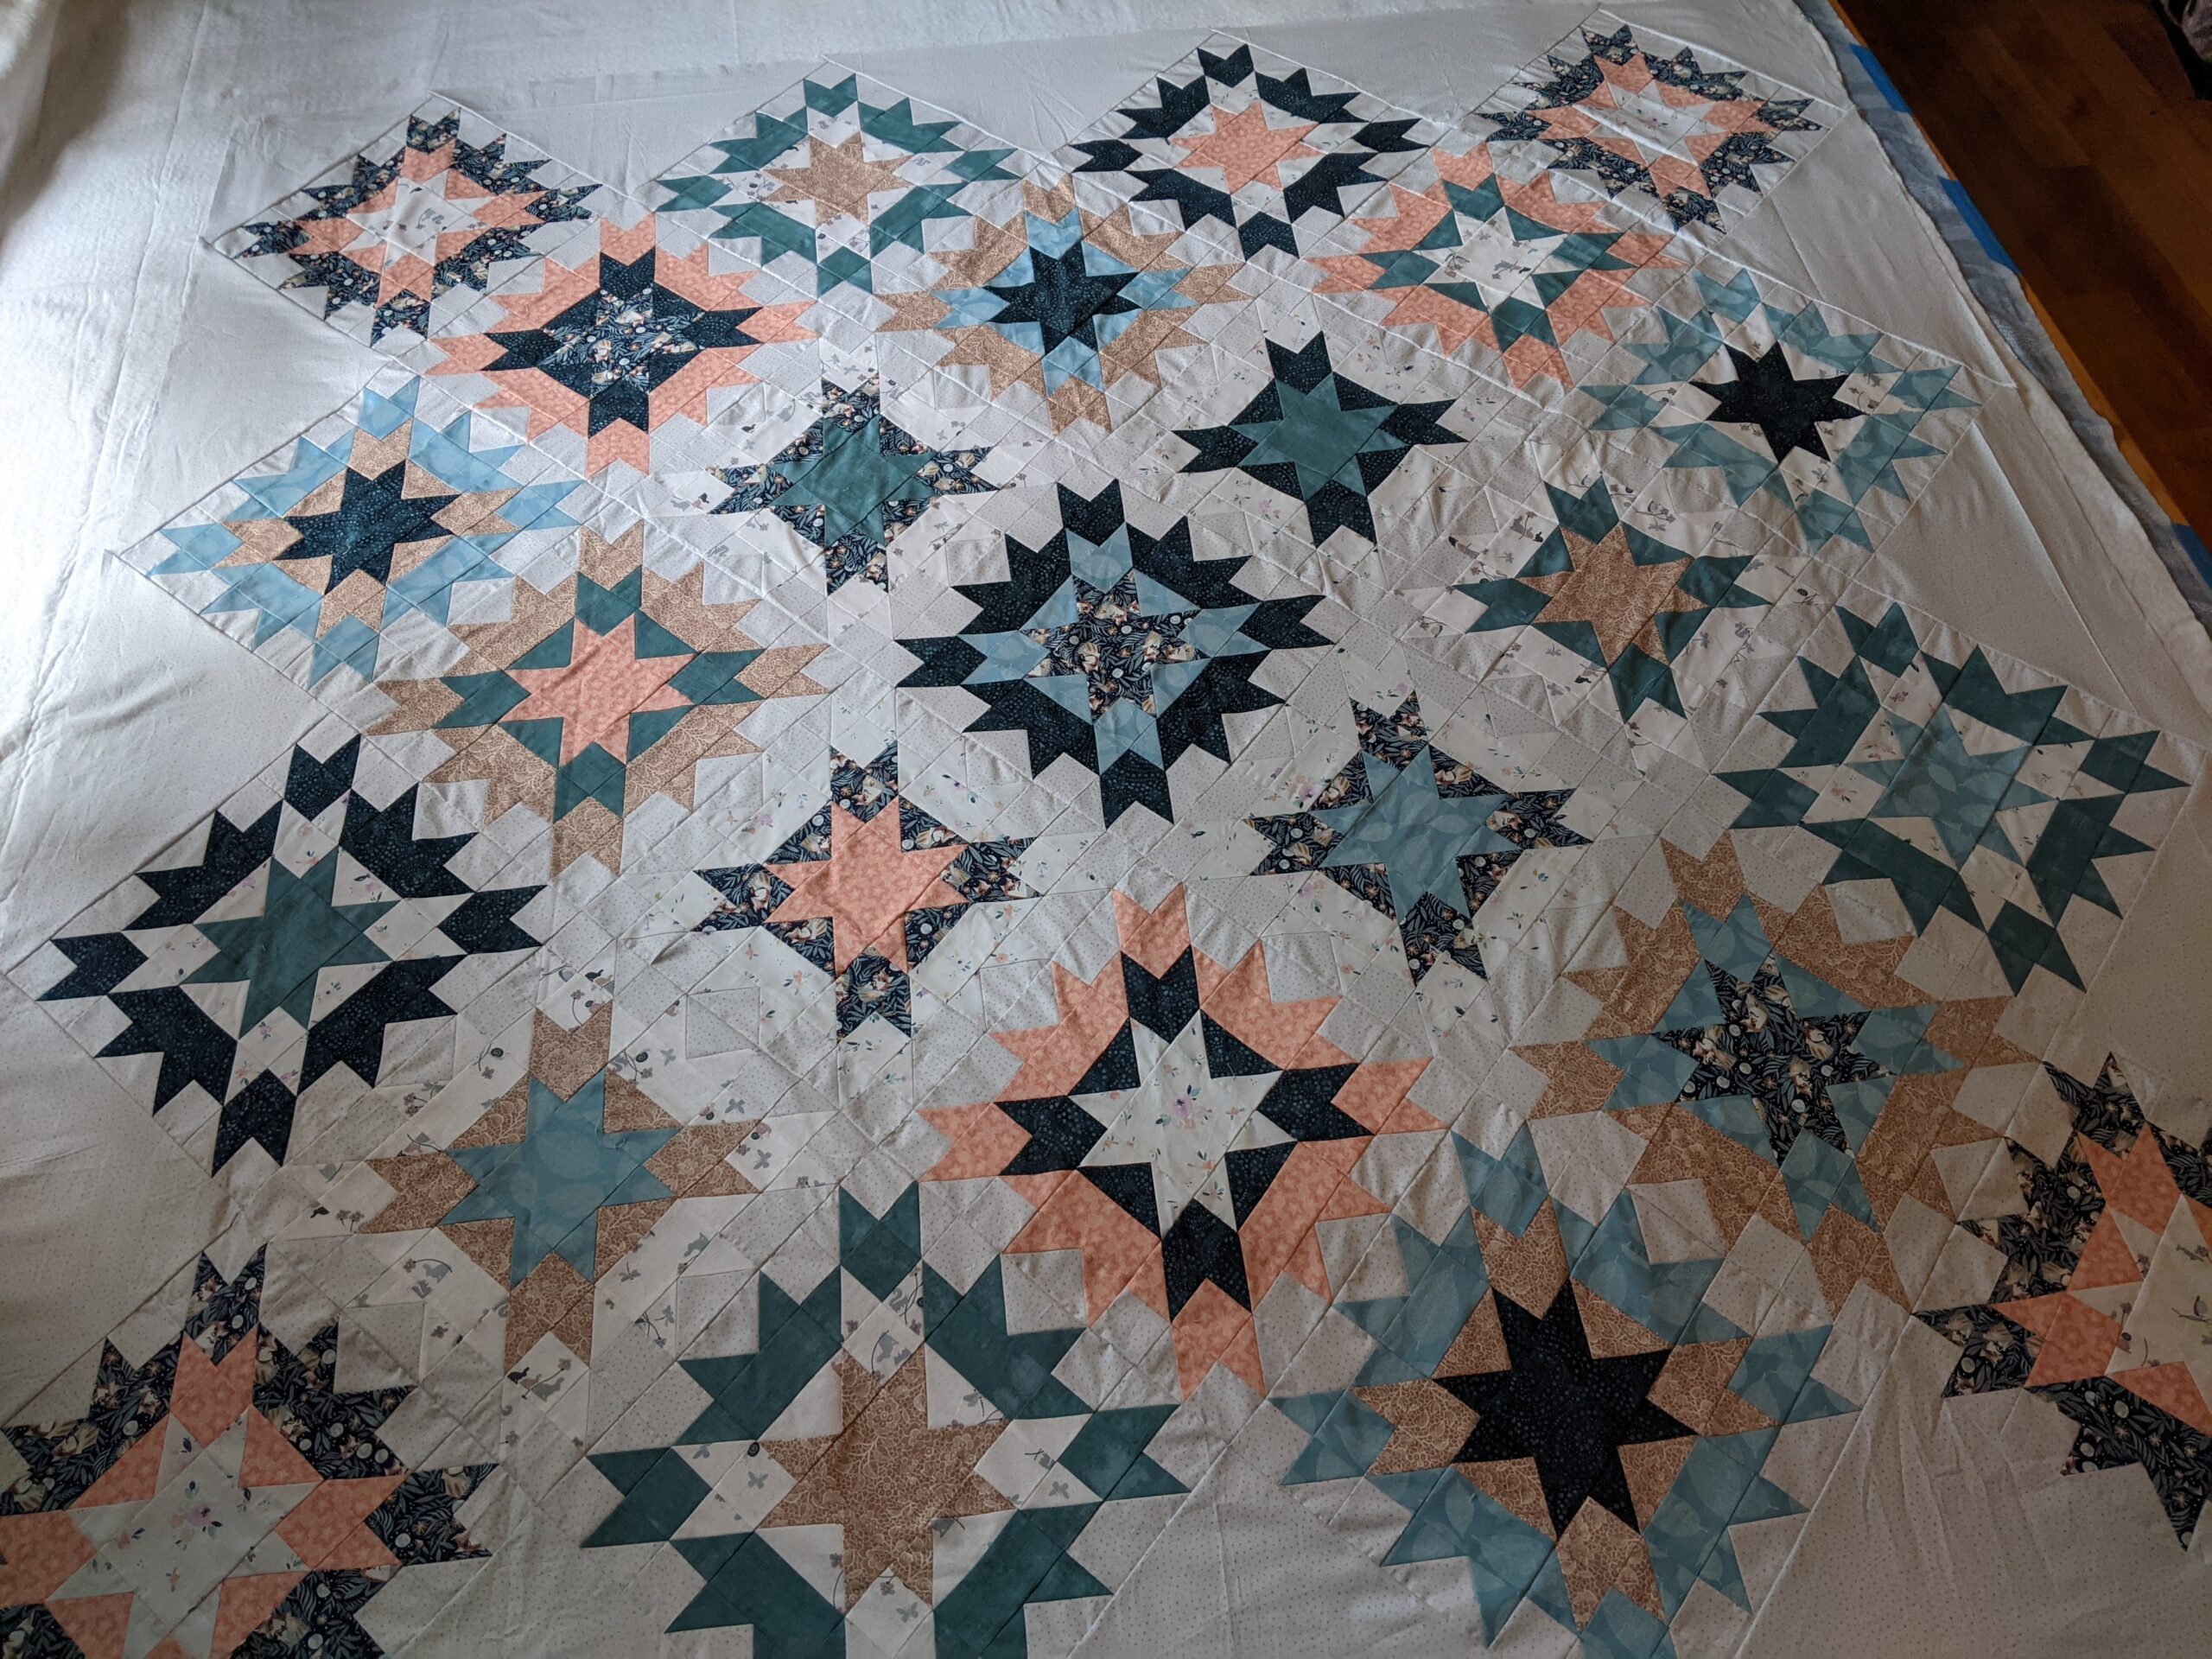
Sandwiching the Quilt Top
Next, you will want to lay out your batting. Please follow the manufacturer’s instructions for this. Some battings need to be pre-washed, others will have a front and back, some need to be pressed or put in the dryer to get the wrinkles out. You also must note something exceptionally important on the manufacturer’s instructions: How far apart your quilting or tying needs to be. This is so important, because if your batting says every 8 inches and you secure it every 10, you risk getting sagging and bunching down the line.
Once you get the batting onto the backing, I use a smoothing method that involves starting from the center and working my way out to the edges. I carefully smooth the batting with my hands and let static help me stick the layers together. I don’t like to use spray baste (because I really dislike the use of the chemicals and have so far never needed it) but if that’s your preference, no worries….just don’t ask me how to use it because I have no idea. I try to put all my extra fabric and batting towards the same edges so that I can waste the least amount of it and get the biggest pieces of left-overs. When deciding on placement, you must consider how you are finishing and binding. If you are quilting the quilt, they tend to stretch a bit, and you will need extra backing and batting on the edges (about three inches). If you are rolling the back to the front as your binding, you will also need extra backing on the edges. More about this when I discuss trimming the sandwich.
After the backing and batting are smooth and wrinkle free, place the Quilt top right side up. Smooth it in the same way you smoothed the batting. Pin baste. I use curved safety pins that are rust resistant. (Hint: I store them open in a jar so that they are ready to go when I need them….okay, okay, it’s actually a Talenti ice cream container….it’s a hard job emptying those, but you know, it’s a sacrifice for the art and all.) I pin baste every 6 to 10 inches depending on the materials I’m using and how fast I’m finishing it. If I’m basting and tying right there at the same time, I’m going to use less pins than if I’m moving the quilt after basting. Be sure to pin baste from the center out and use ample pins around the edges and corners to ensure no shifting.
At this point, it’s time to quilt or tie. As I mentioned earlier, I tied this quilt. I always use high quality cotton yarn to tie my quilts. I buy them from my local Yarn Shop, The Cornwall Yarn Shop. Gail, the owner, is always very accommodating and lets me color match until the cows come home. I prefer 100% cotton yarn because I’m using 100% cotton every thing else, so it just wears the same, especially when washed.
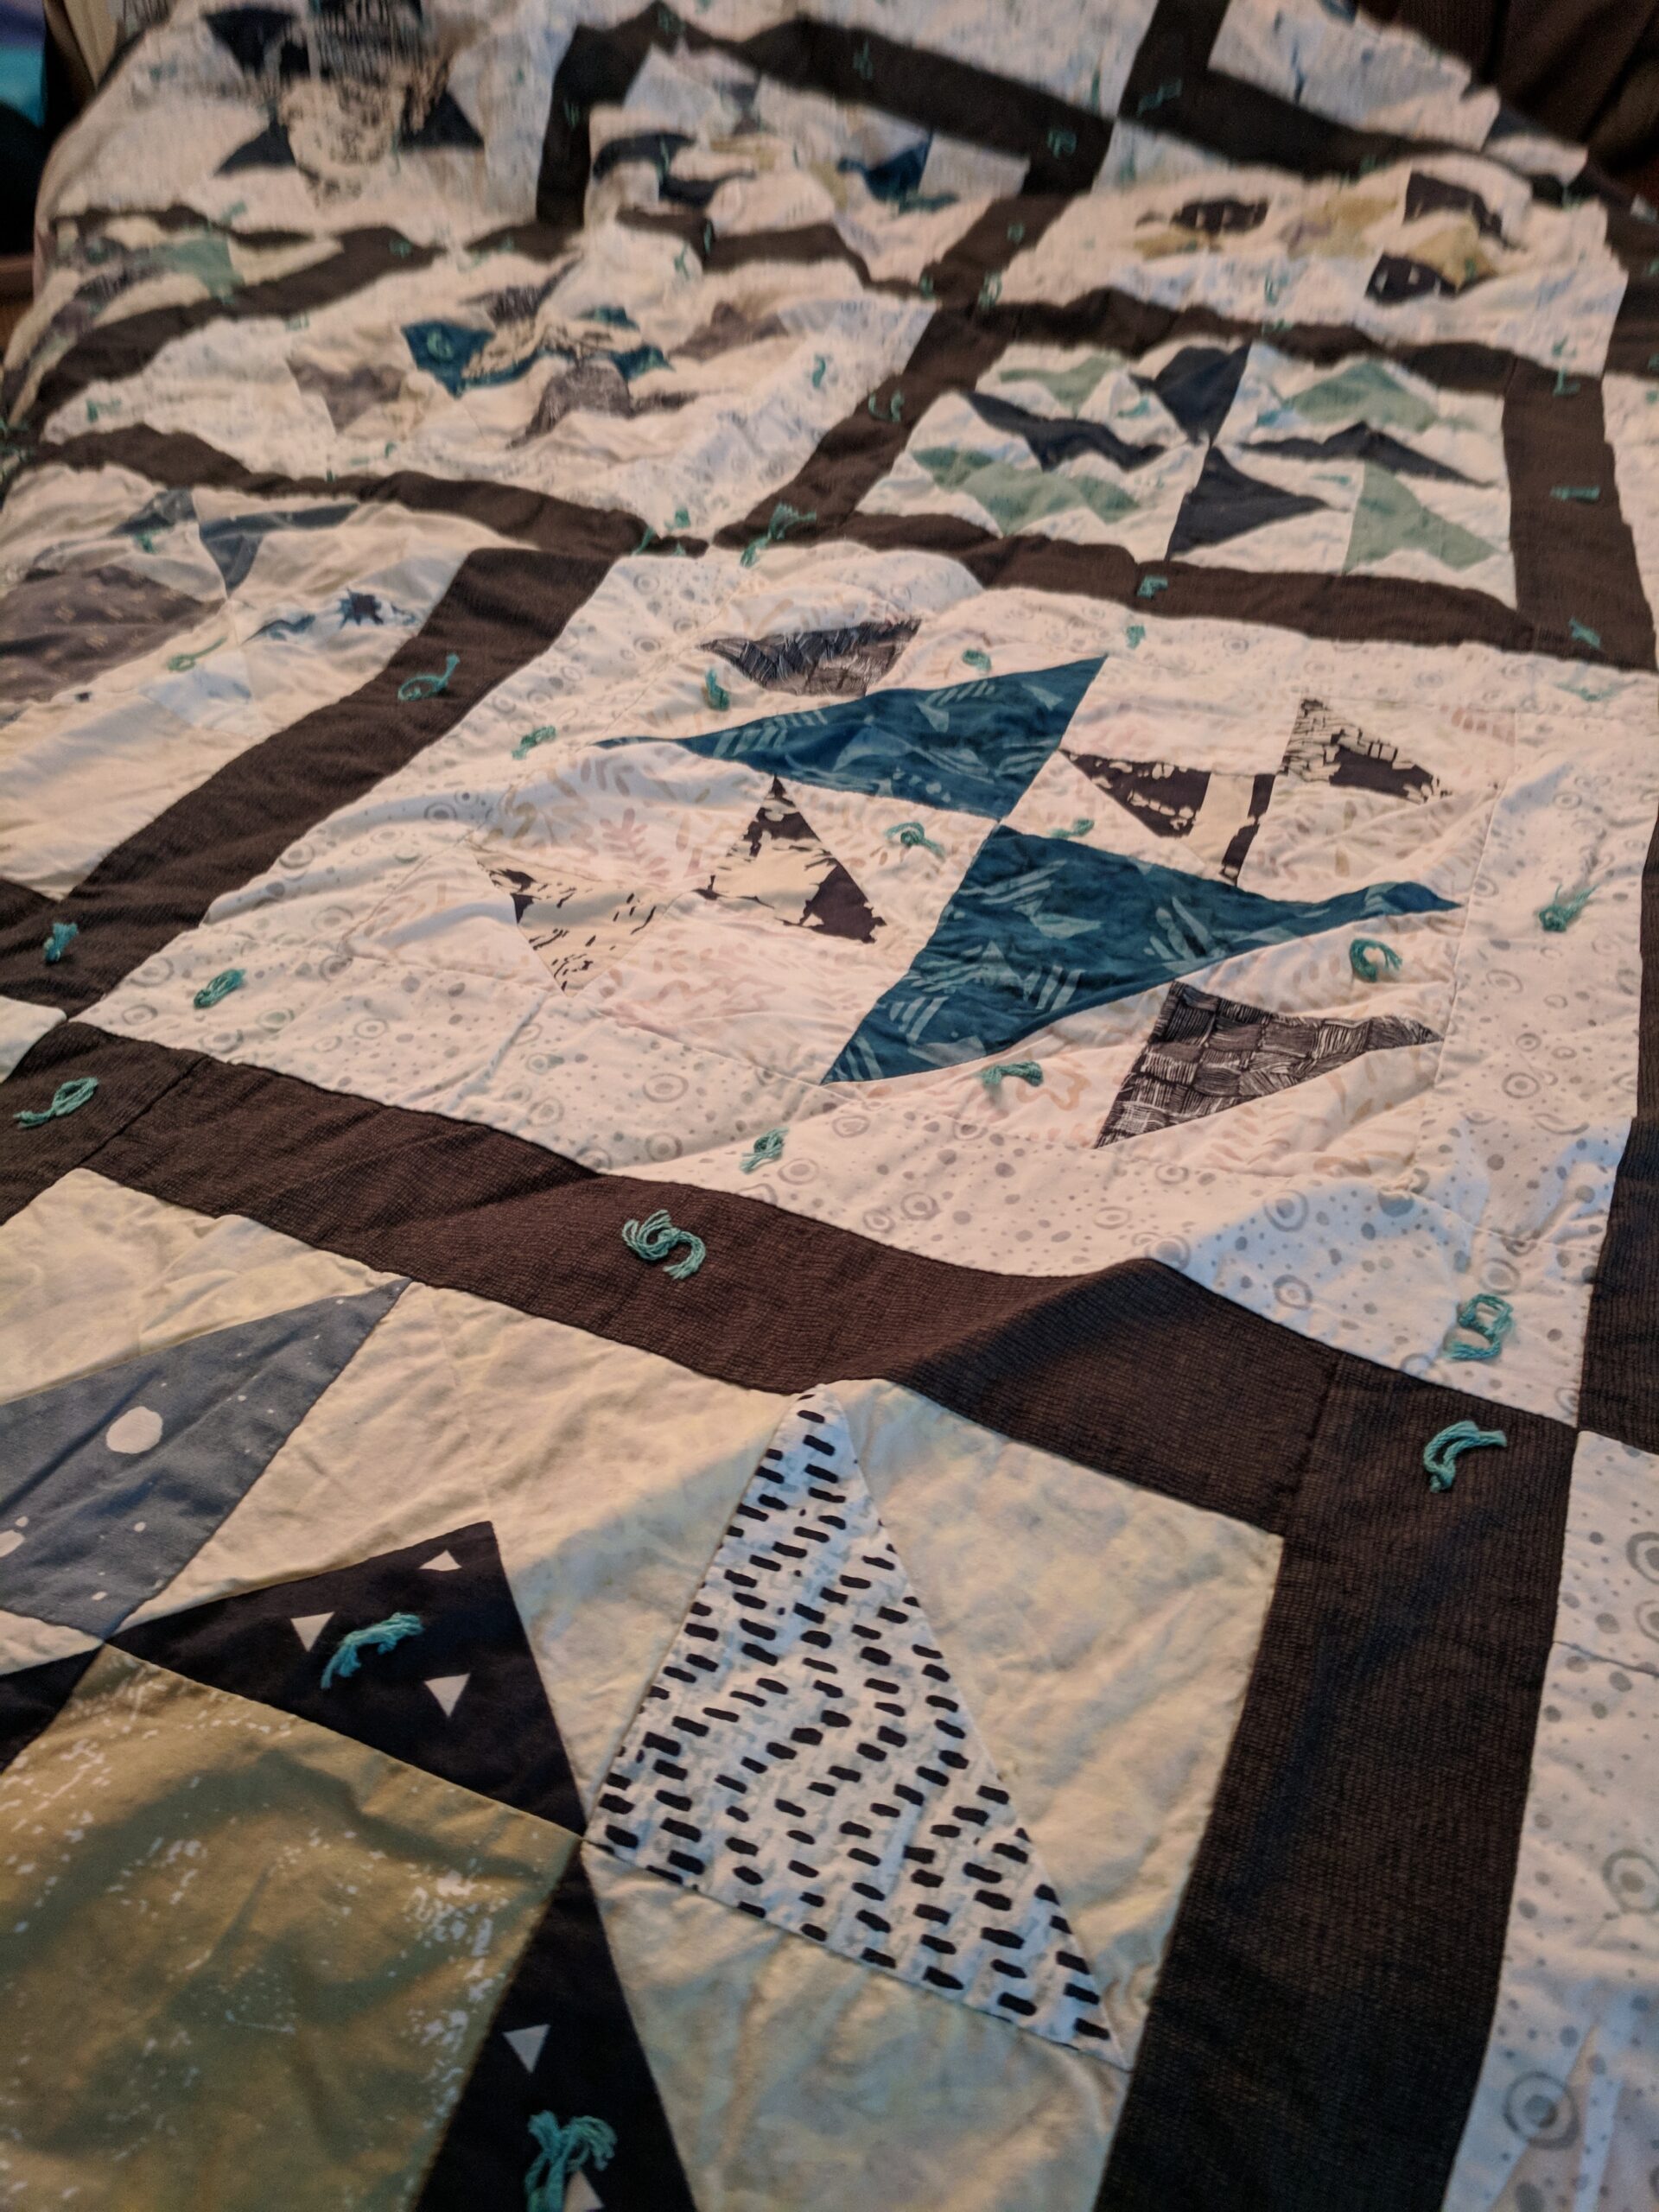
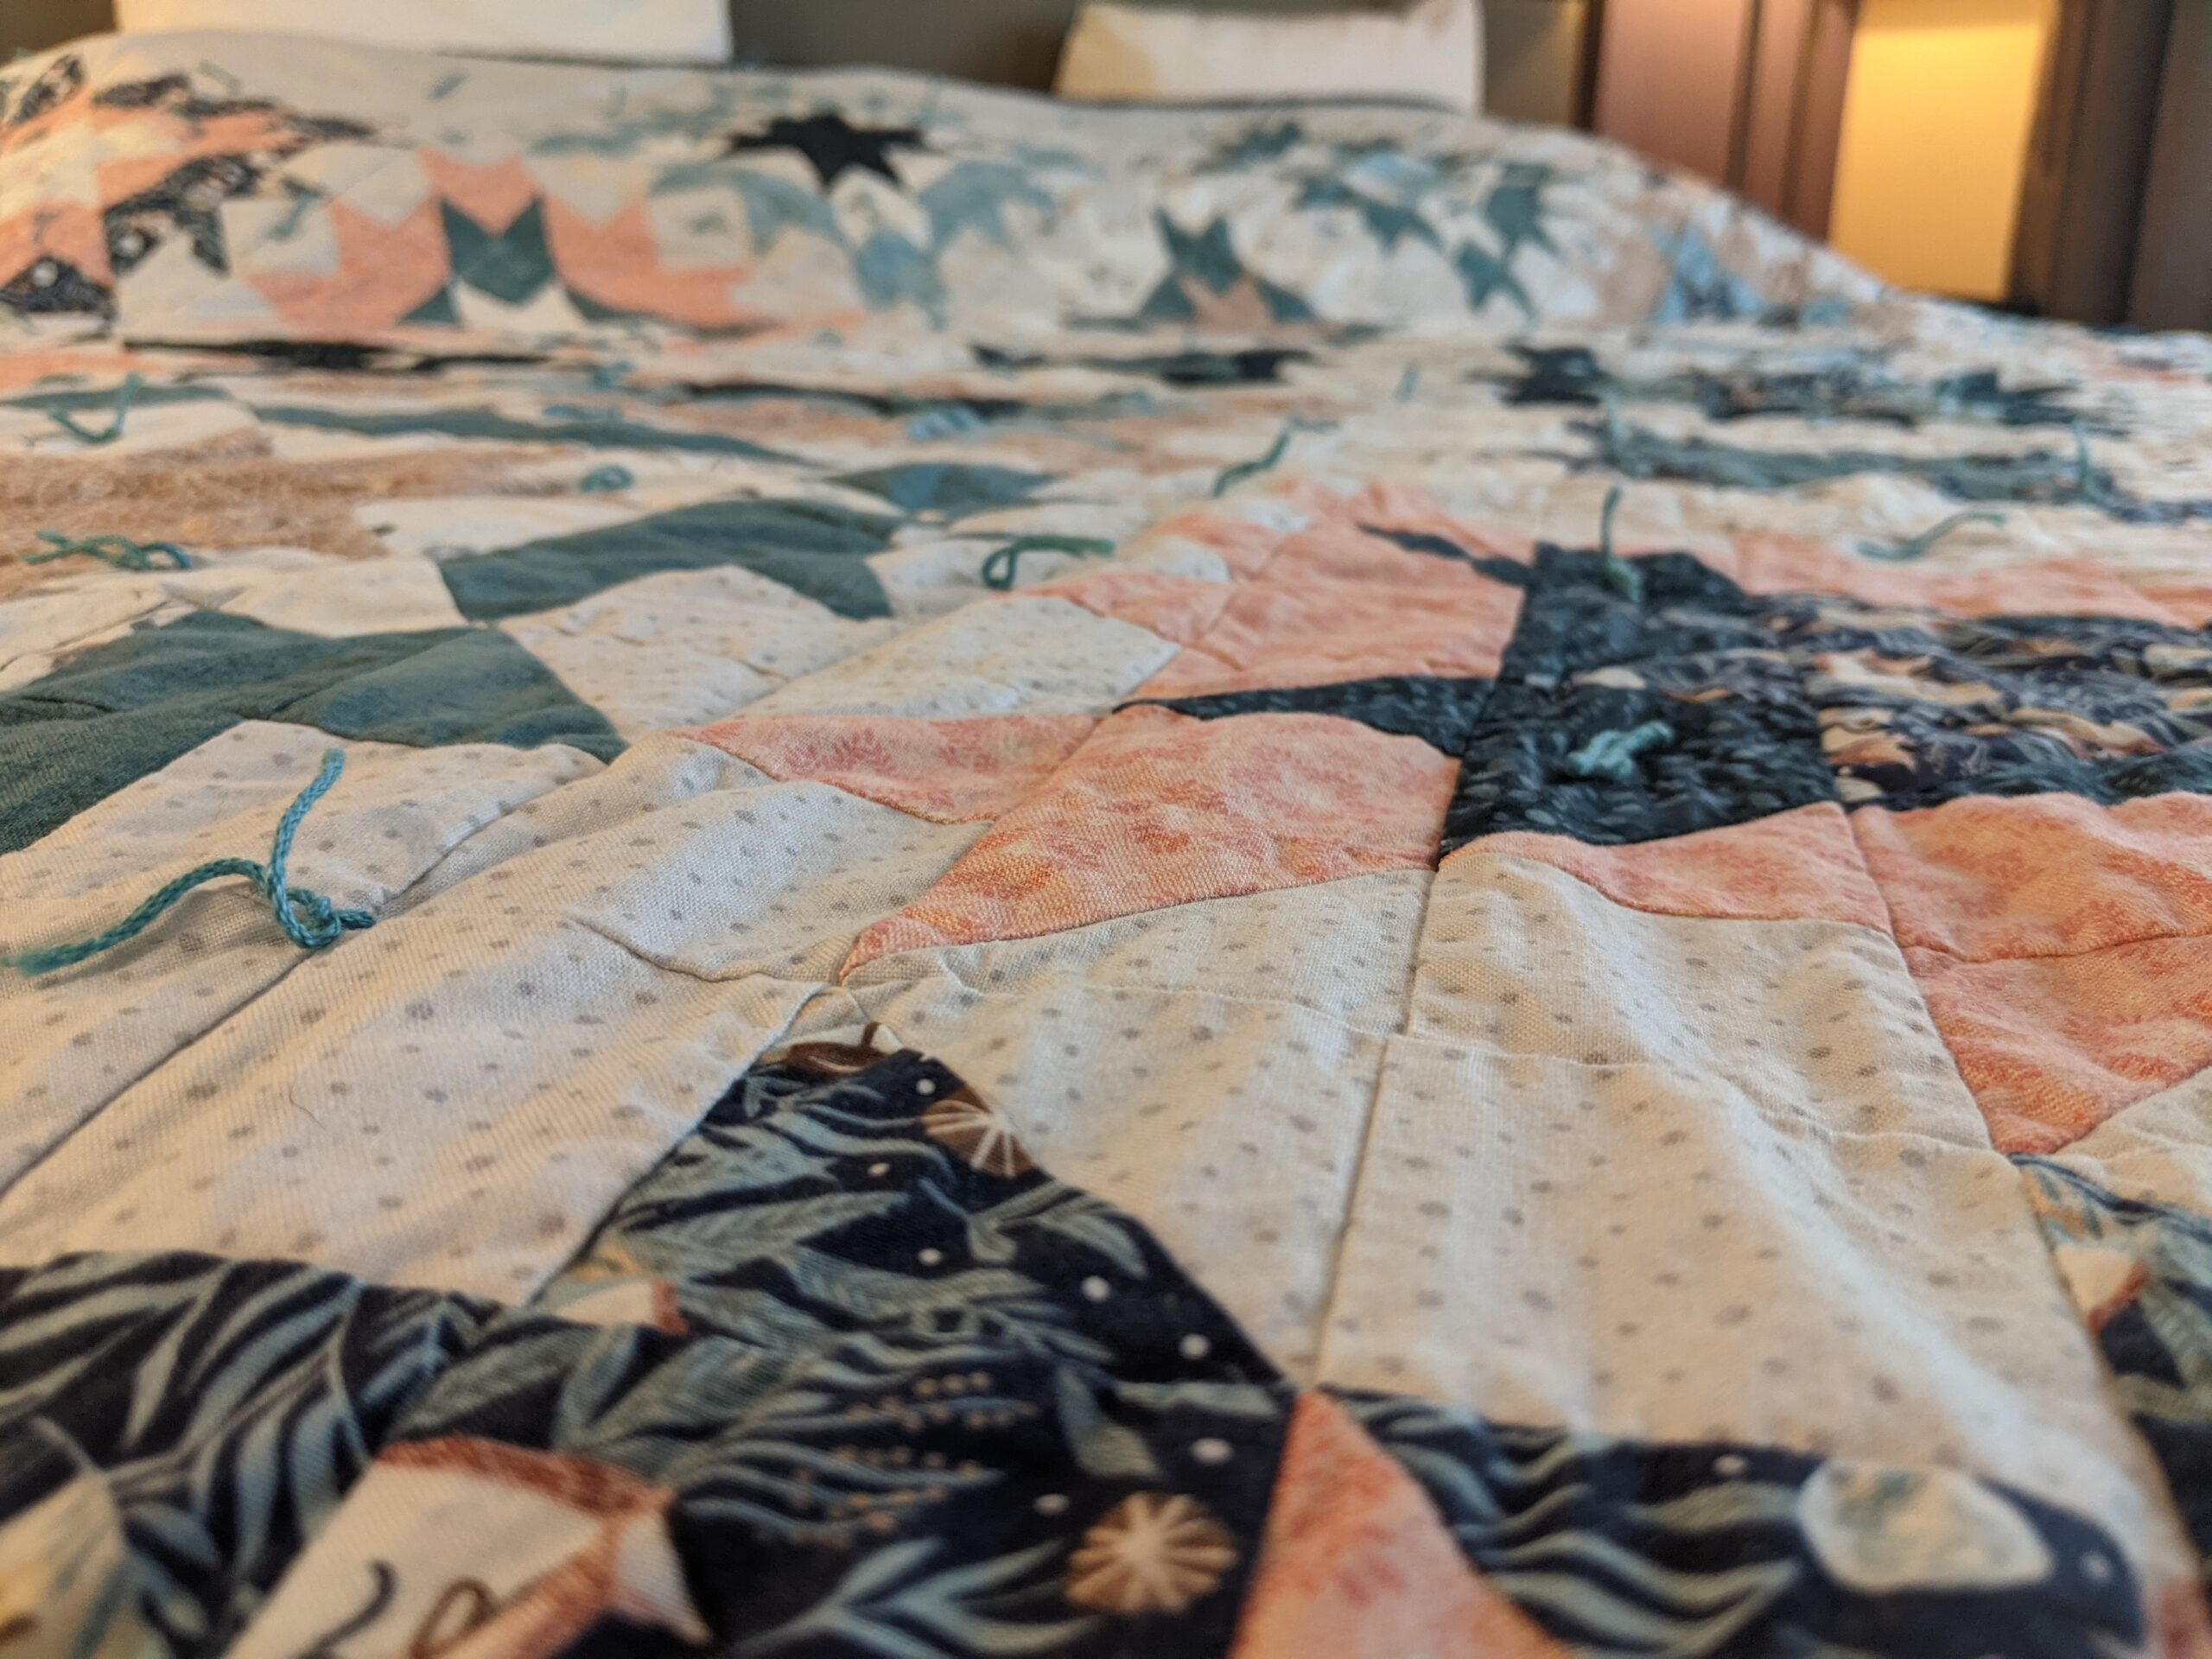
TiesTiesMore Ties
I chose to tie this quilt on the Middle Ring and the Background of each block. I wanted to leave the Center Star alone and was able to, because my batting allowed for that distance.
After I finished the tying, I trimmed my sandwich, leaving a border of about 2.5 inches of backing more than the top and batting. I planned on rolling the back to the front for my binding.
Hour Count:
Previous Hours: 84
Sandwiching and Tying the Quilt: 7 hours
Total Hours so far: 91
Next Steps: Binding, adding the label, washing and packing
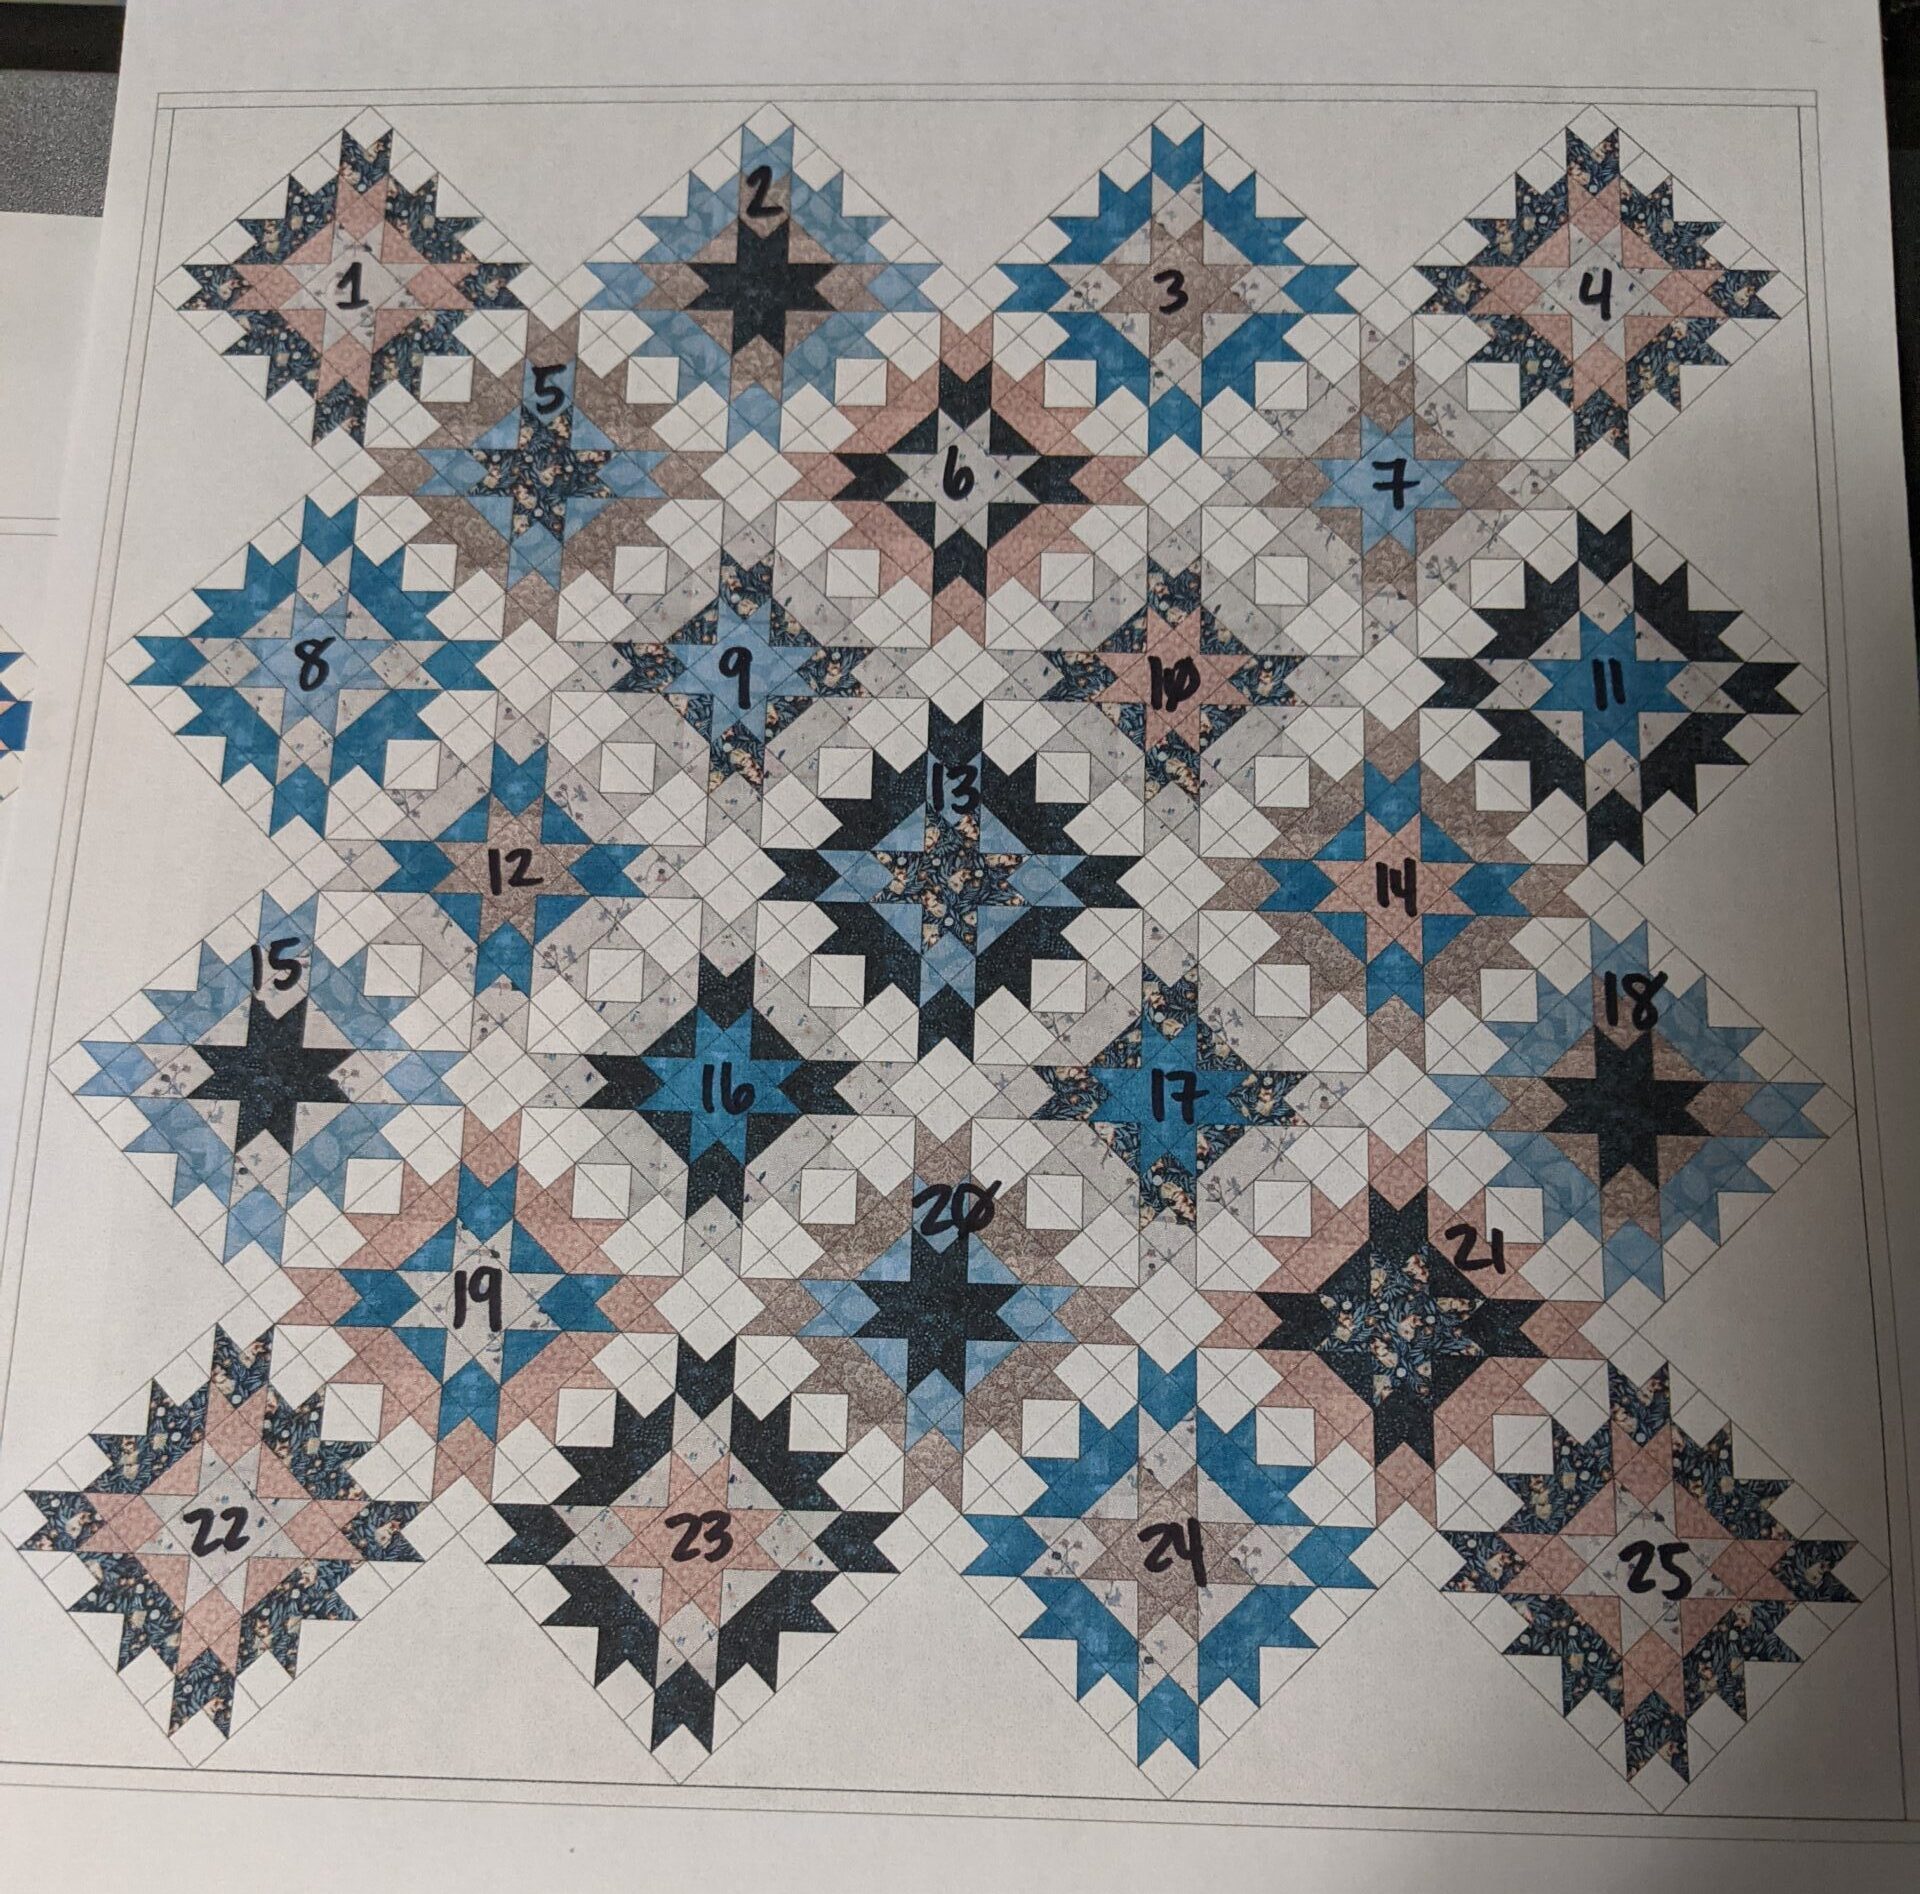
Next step after assembling all of the blocks is to assemble the actual rows that make up the Quilt Top. This was the layout (below) that I had come up with and labelled the blocks accordingly. To assemble the top, I needed to put the …
So, umm…let’s talk about this deadline. The Wedding was May 13th. The Quilt was done in time and gifted! She loved it. Having said that, I want to catch you all up on the rest of the process…..and yup, I’m totally going to make you …
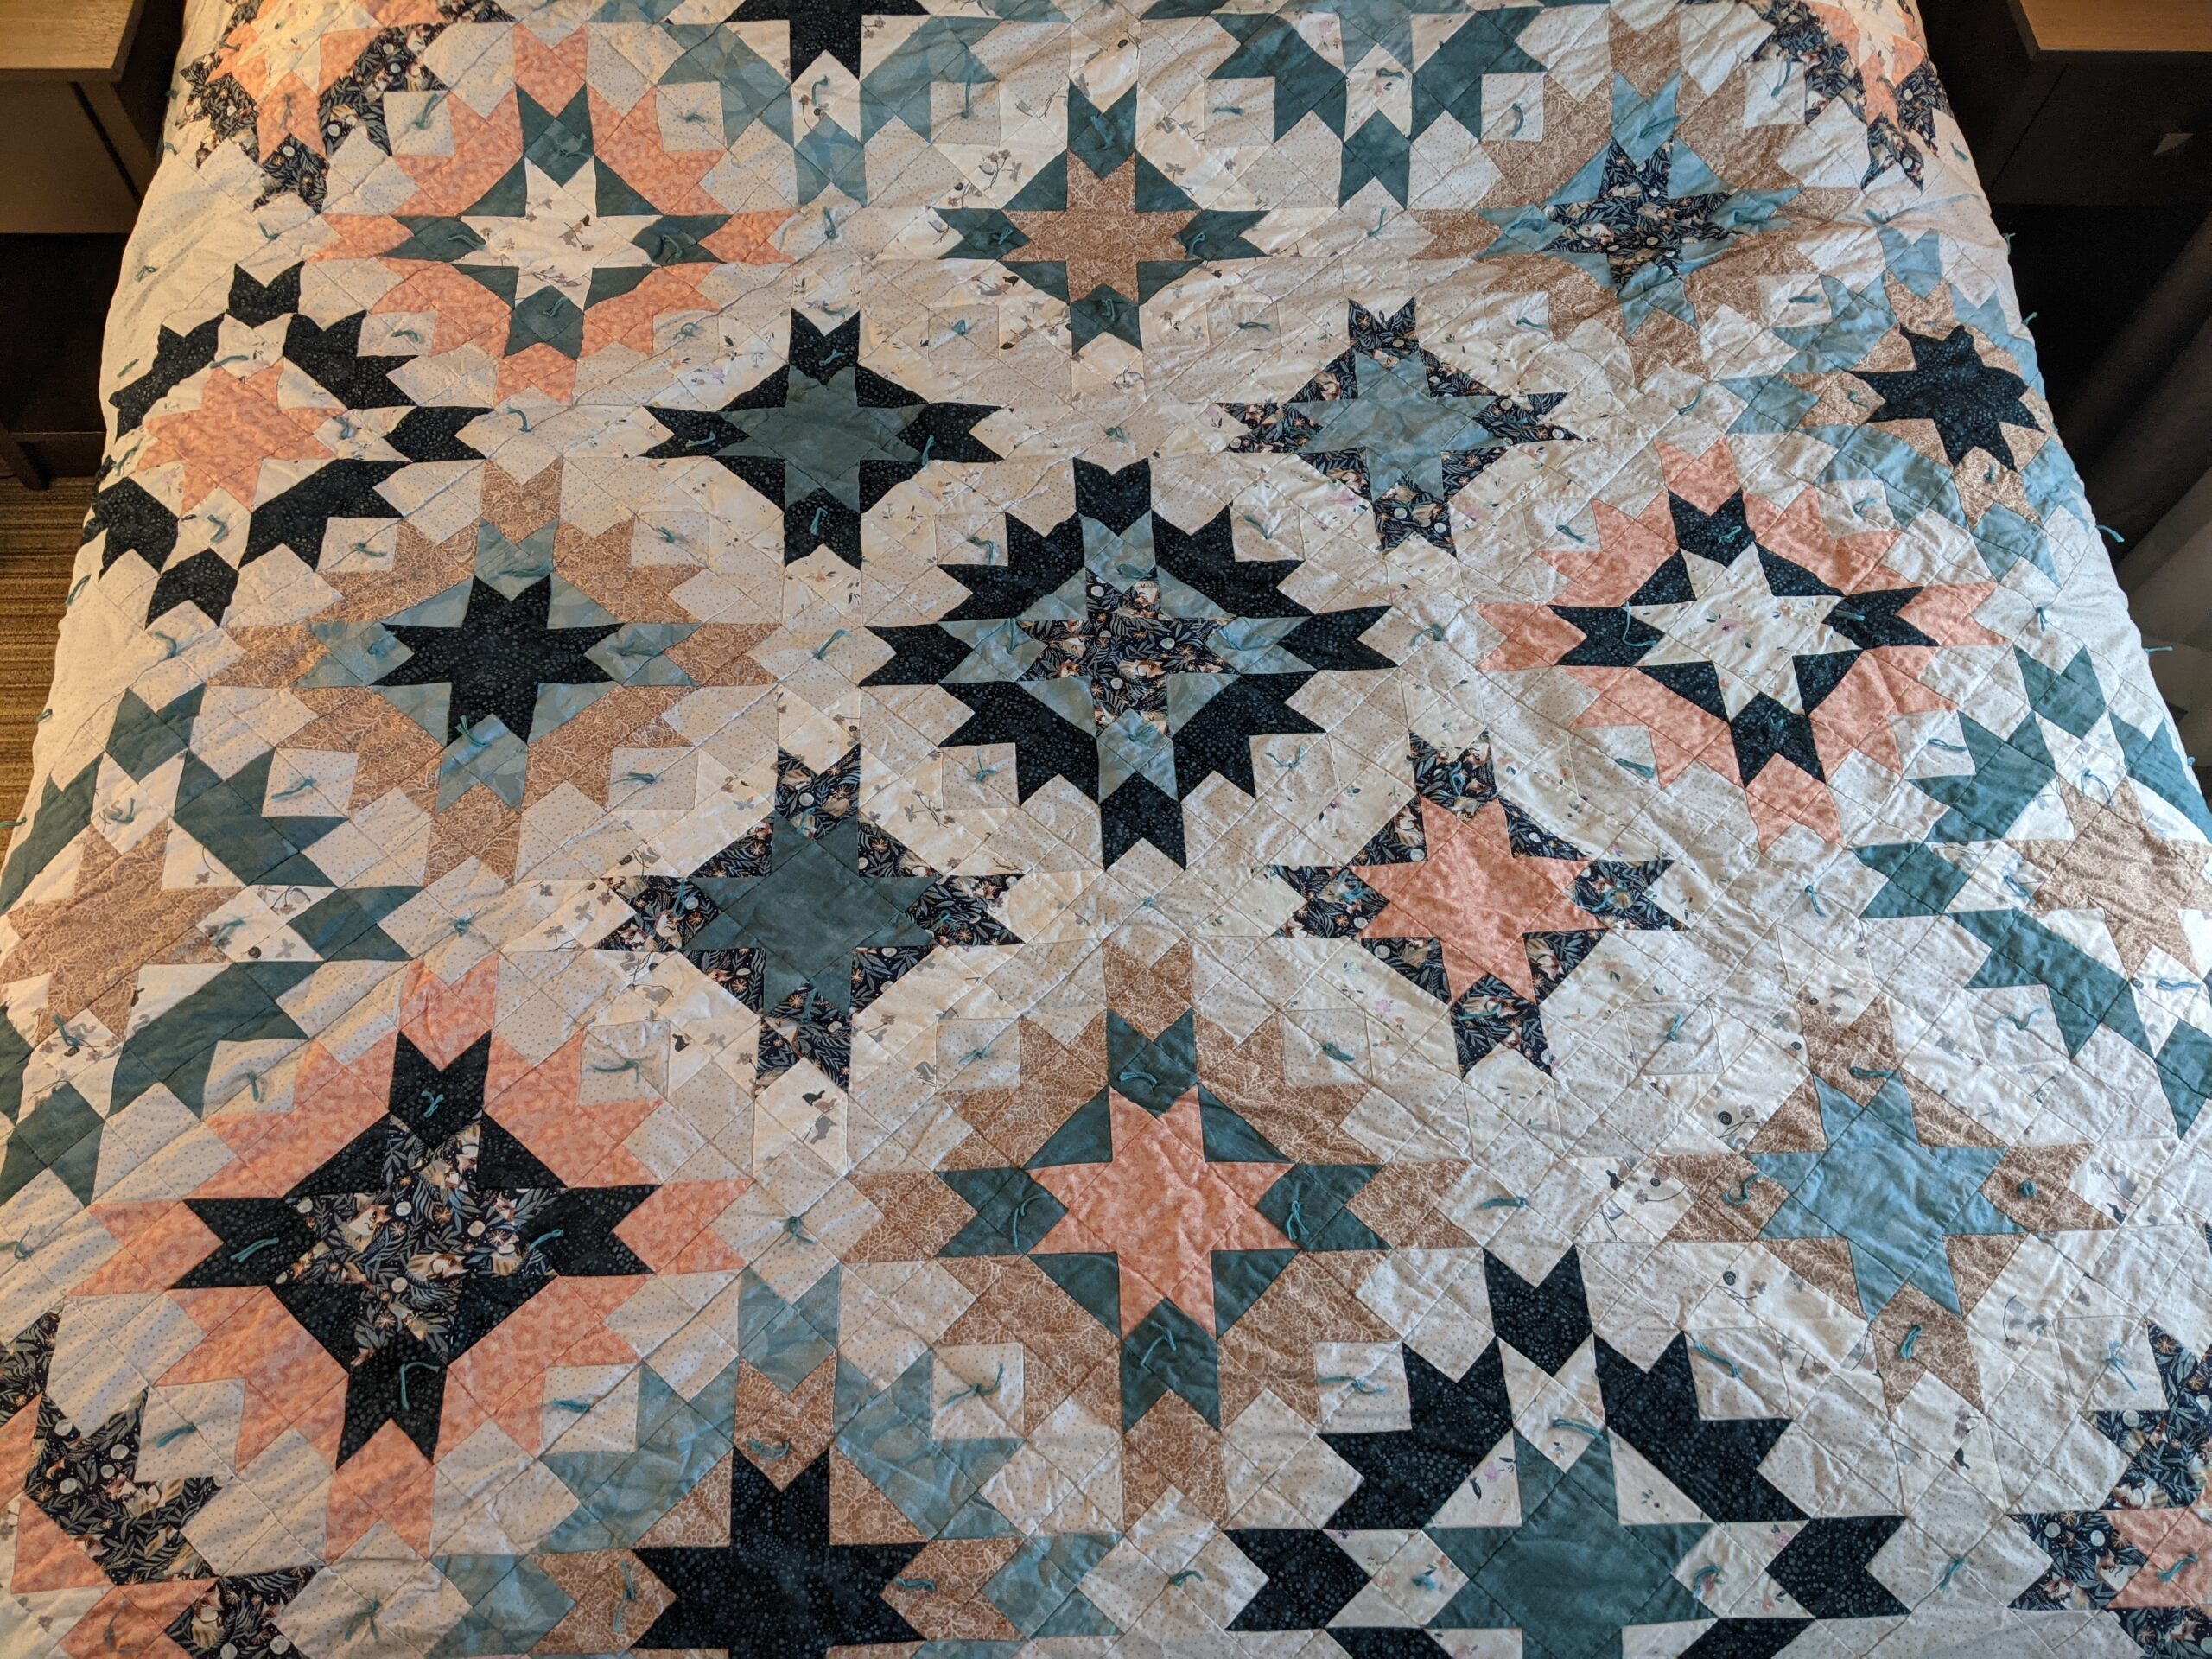
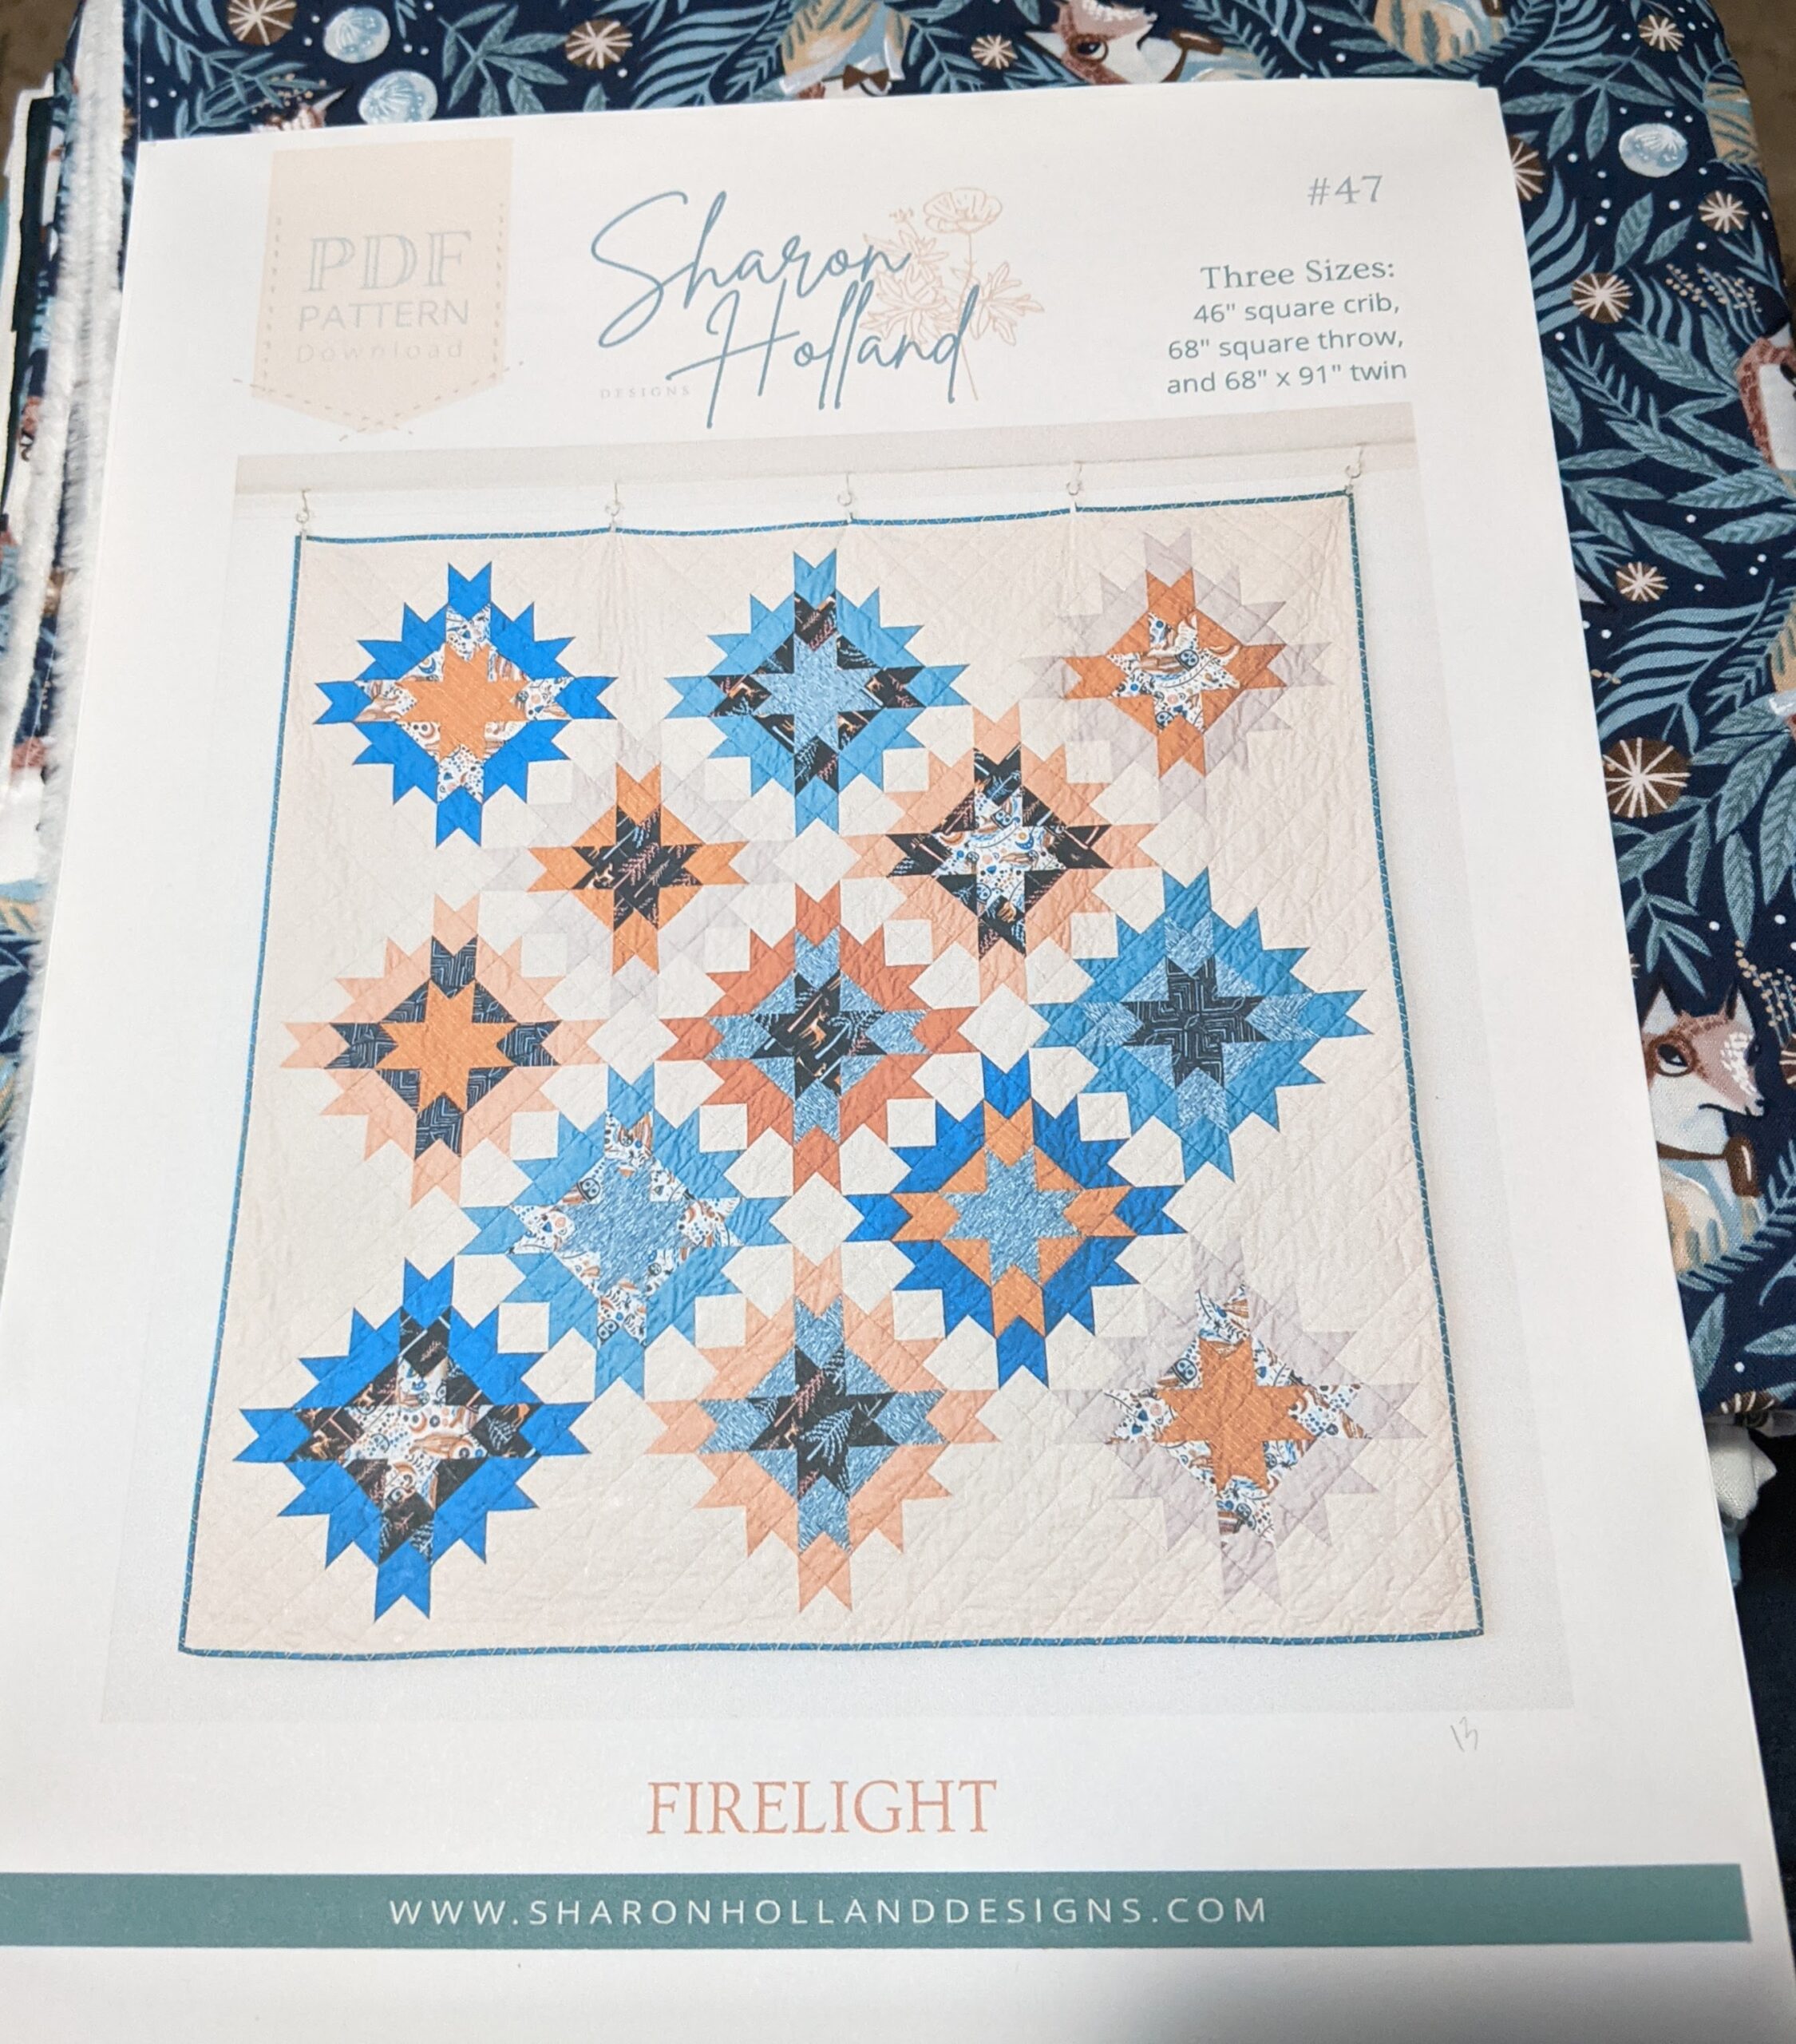
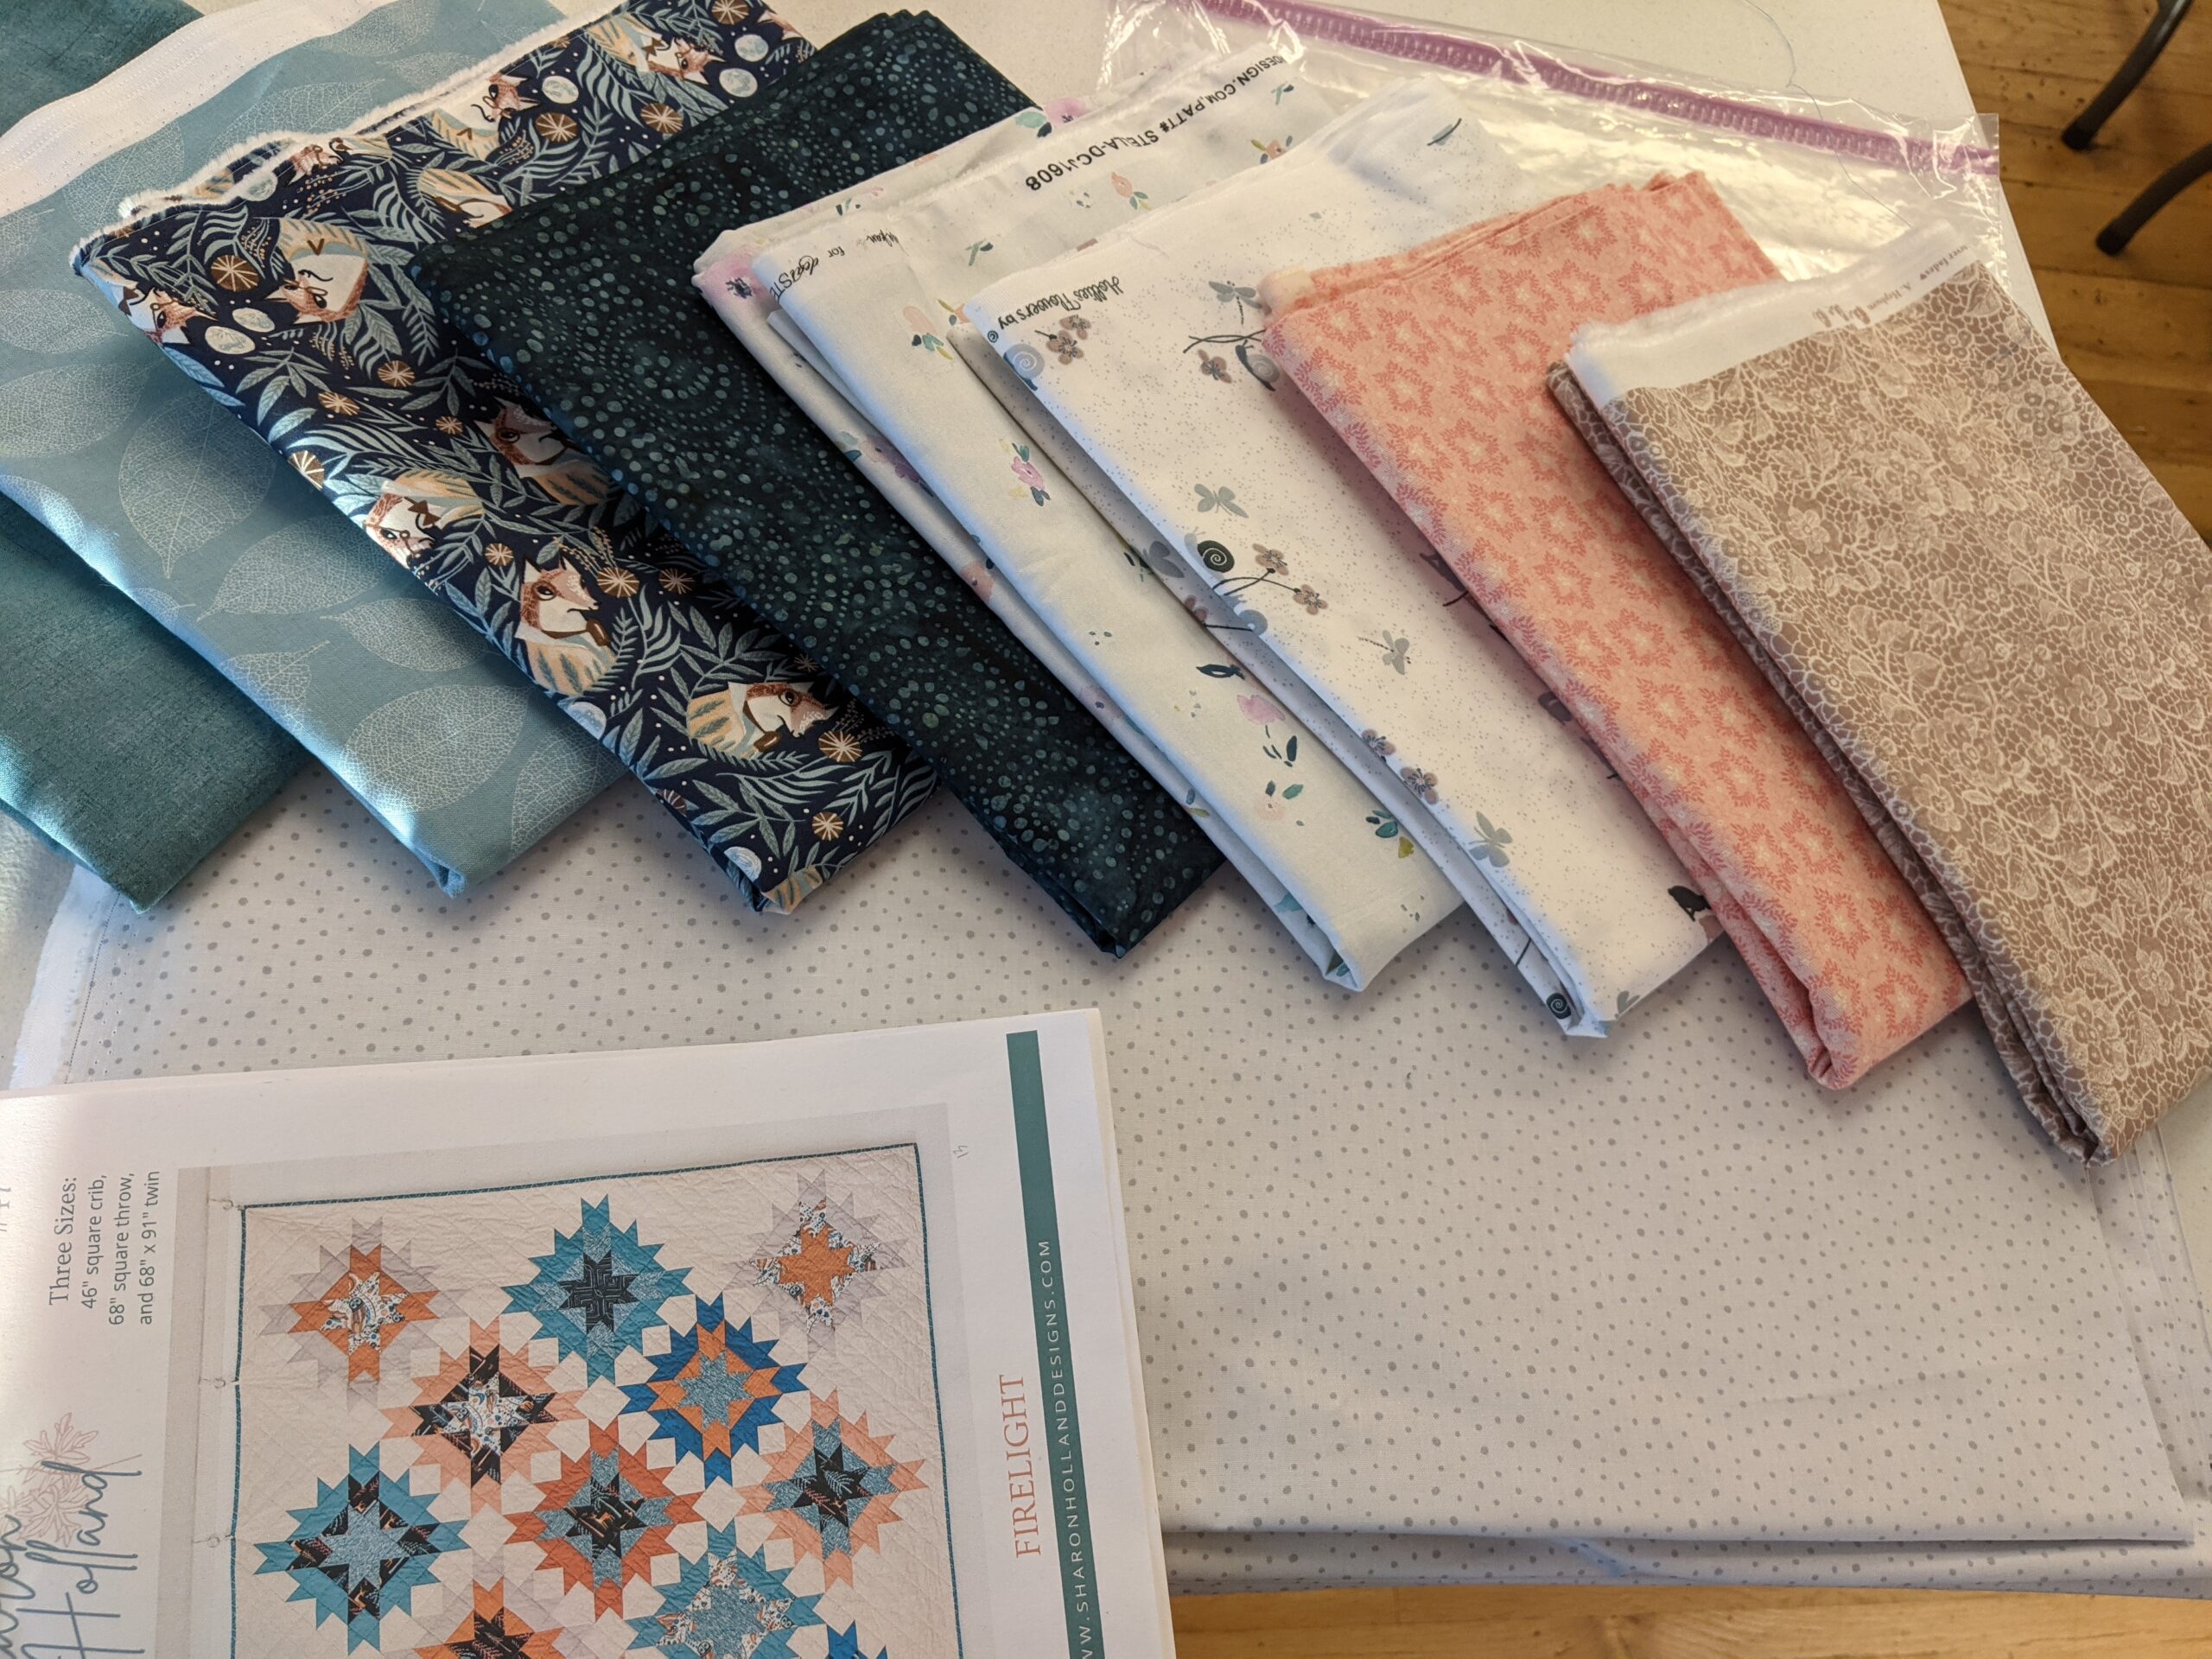
As you know, I am creating this Quilt using a beautiful pattern by Sharon Holland called Firelight. I have altered the pattern slightly, in that, I am making it larger than the pattern’s largest size….so not a real modification, but definitely some adjustments with yardage, cutting, etc.
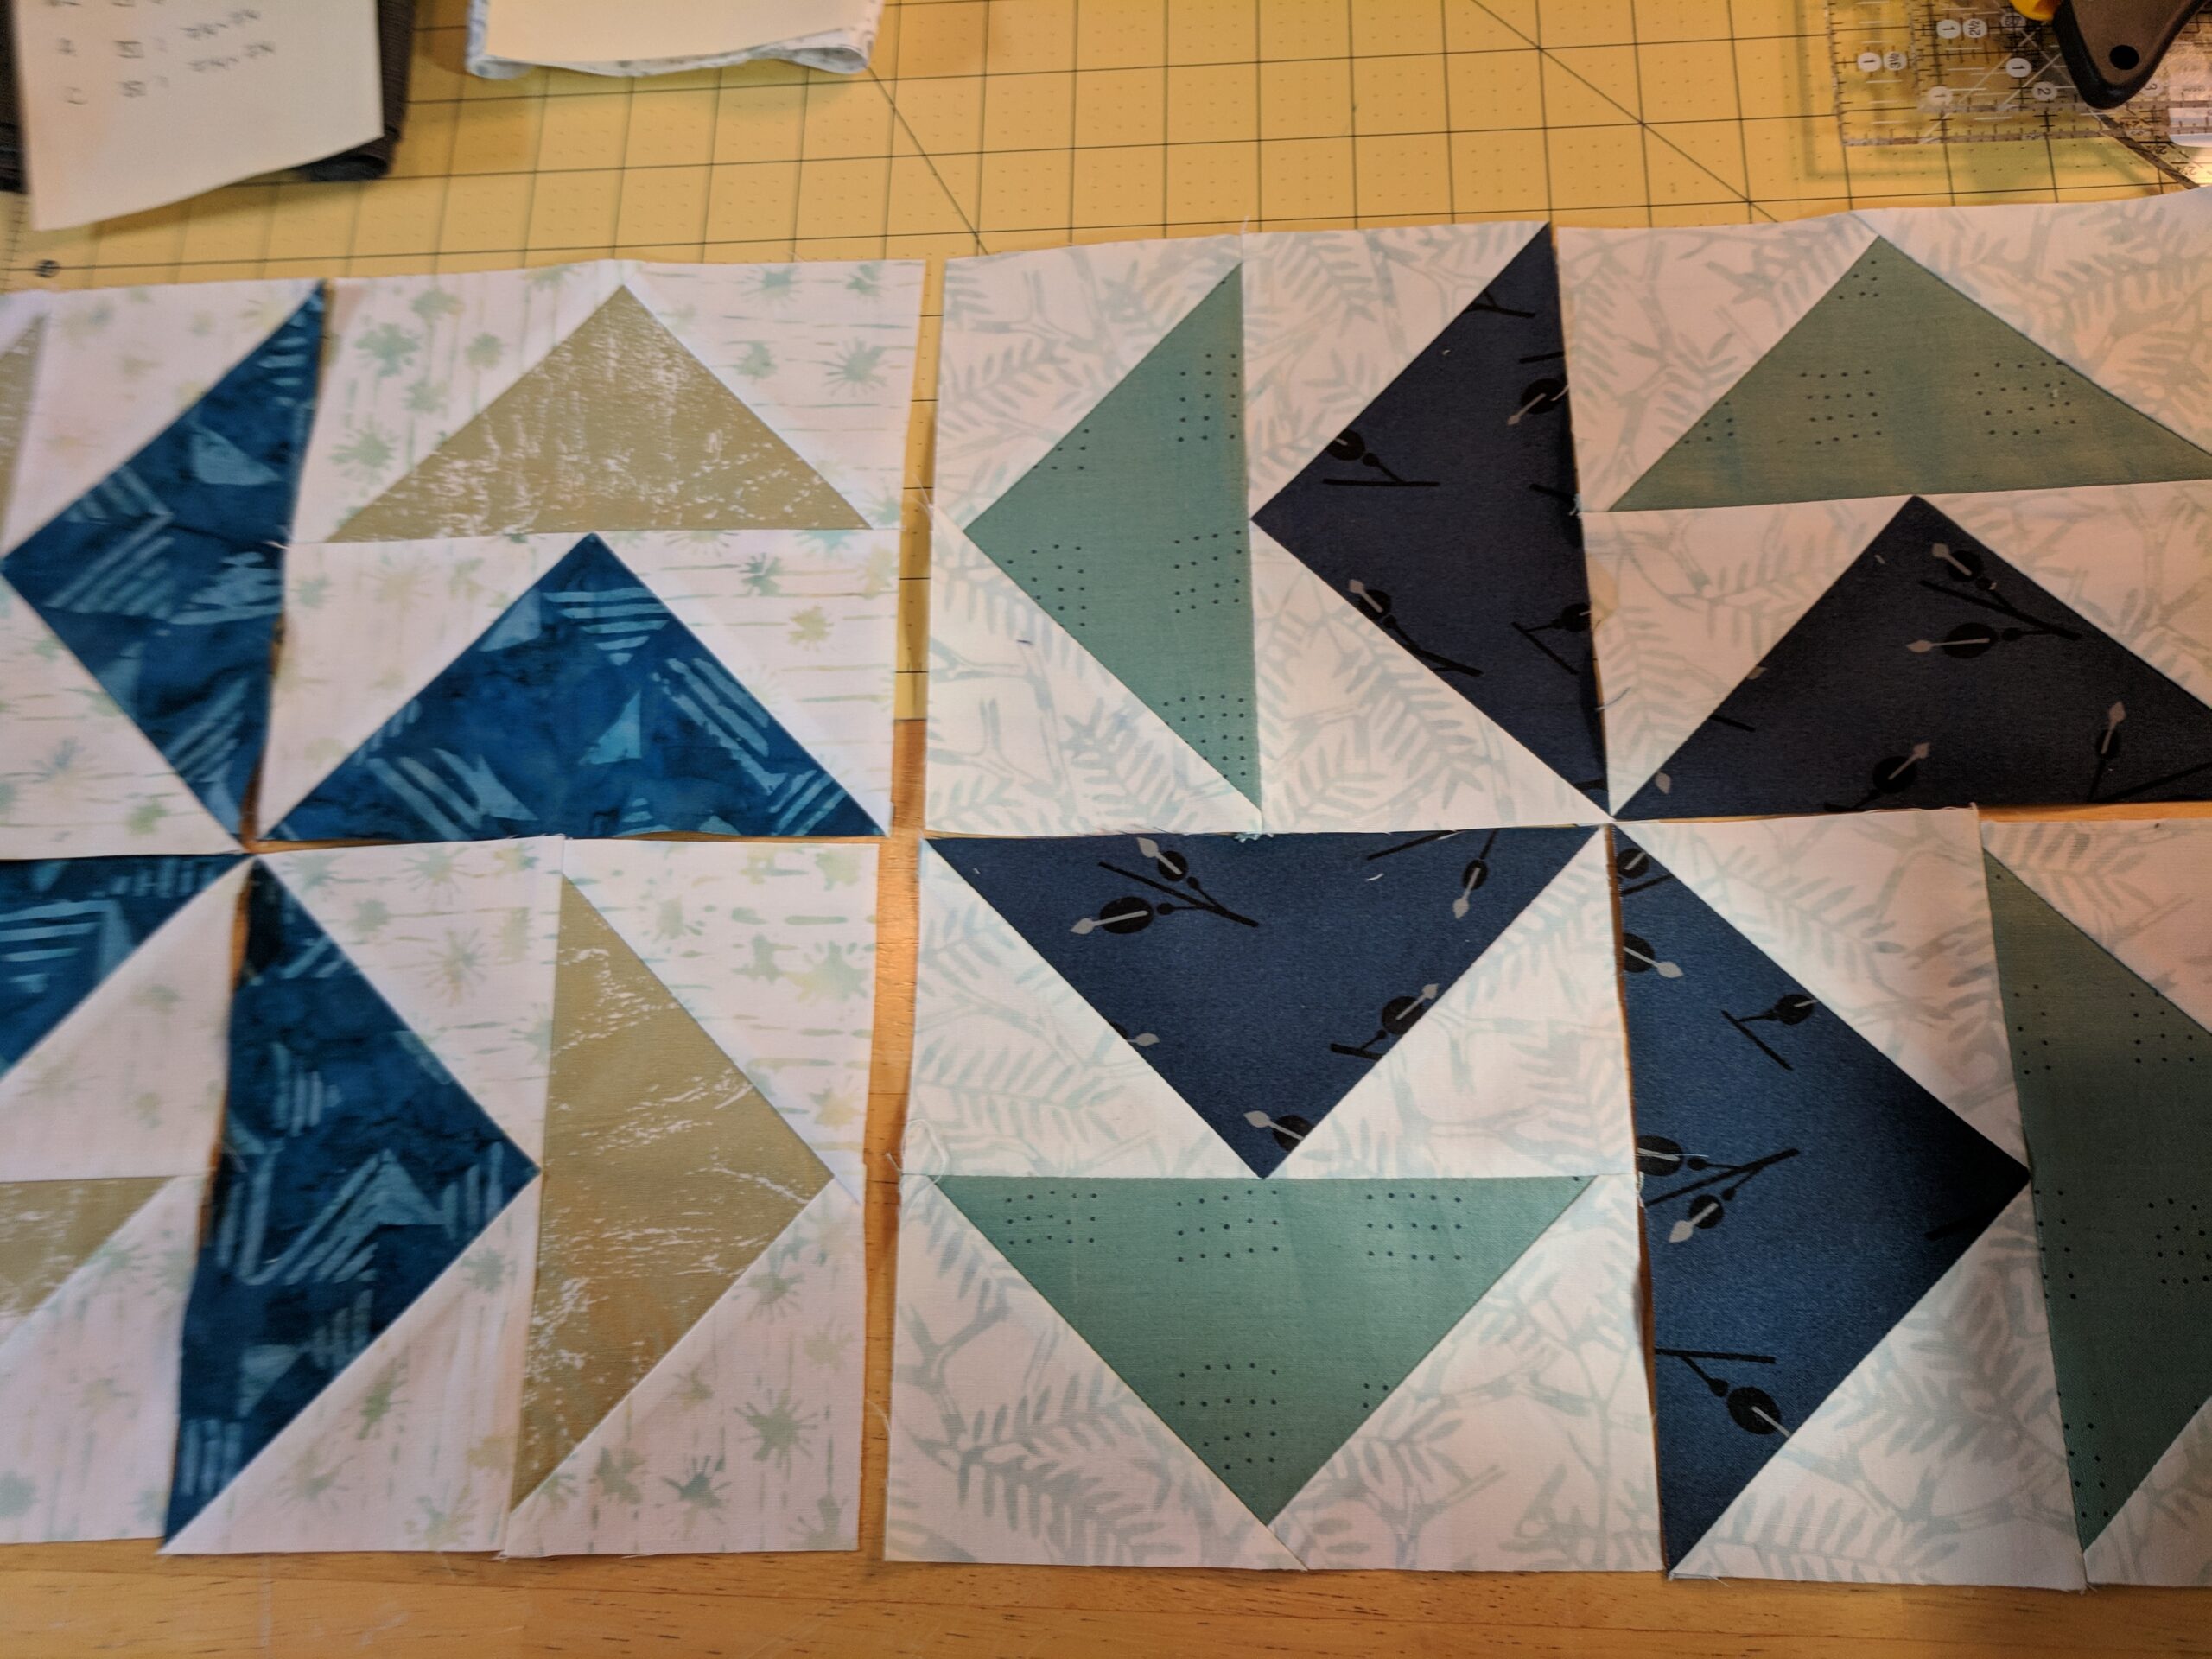
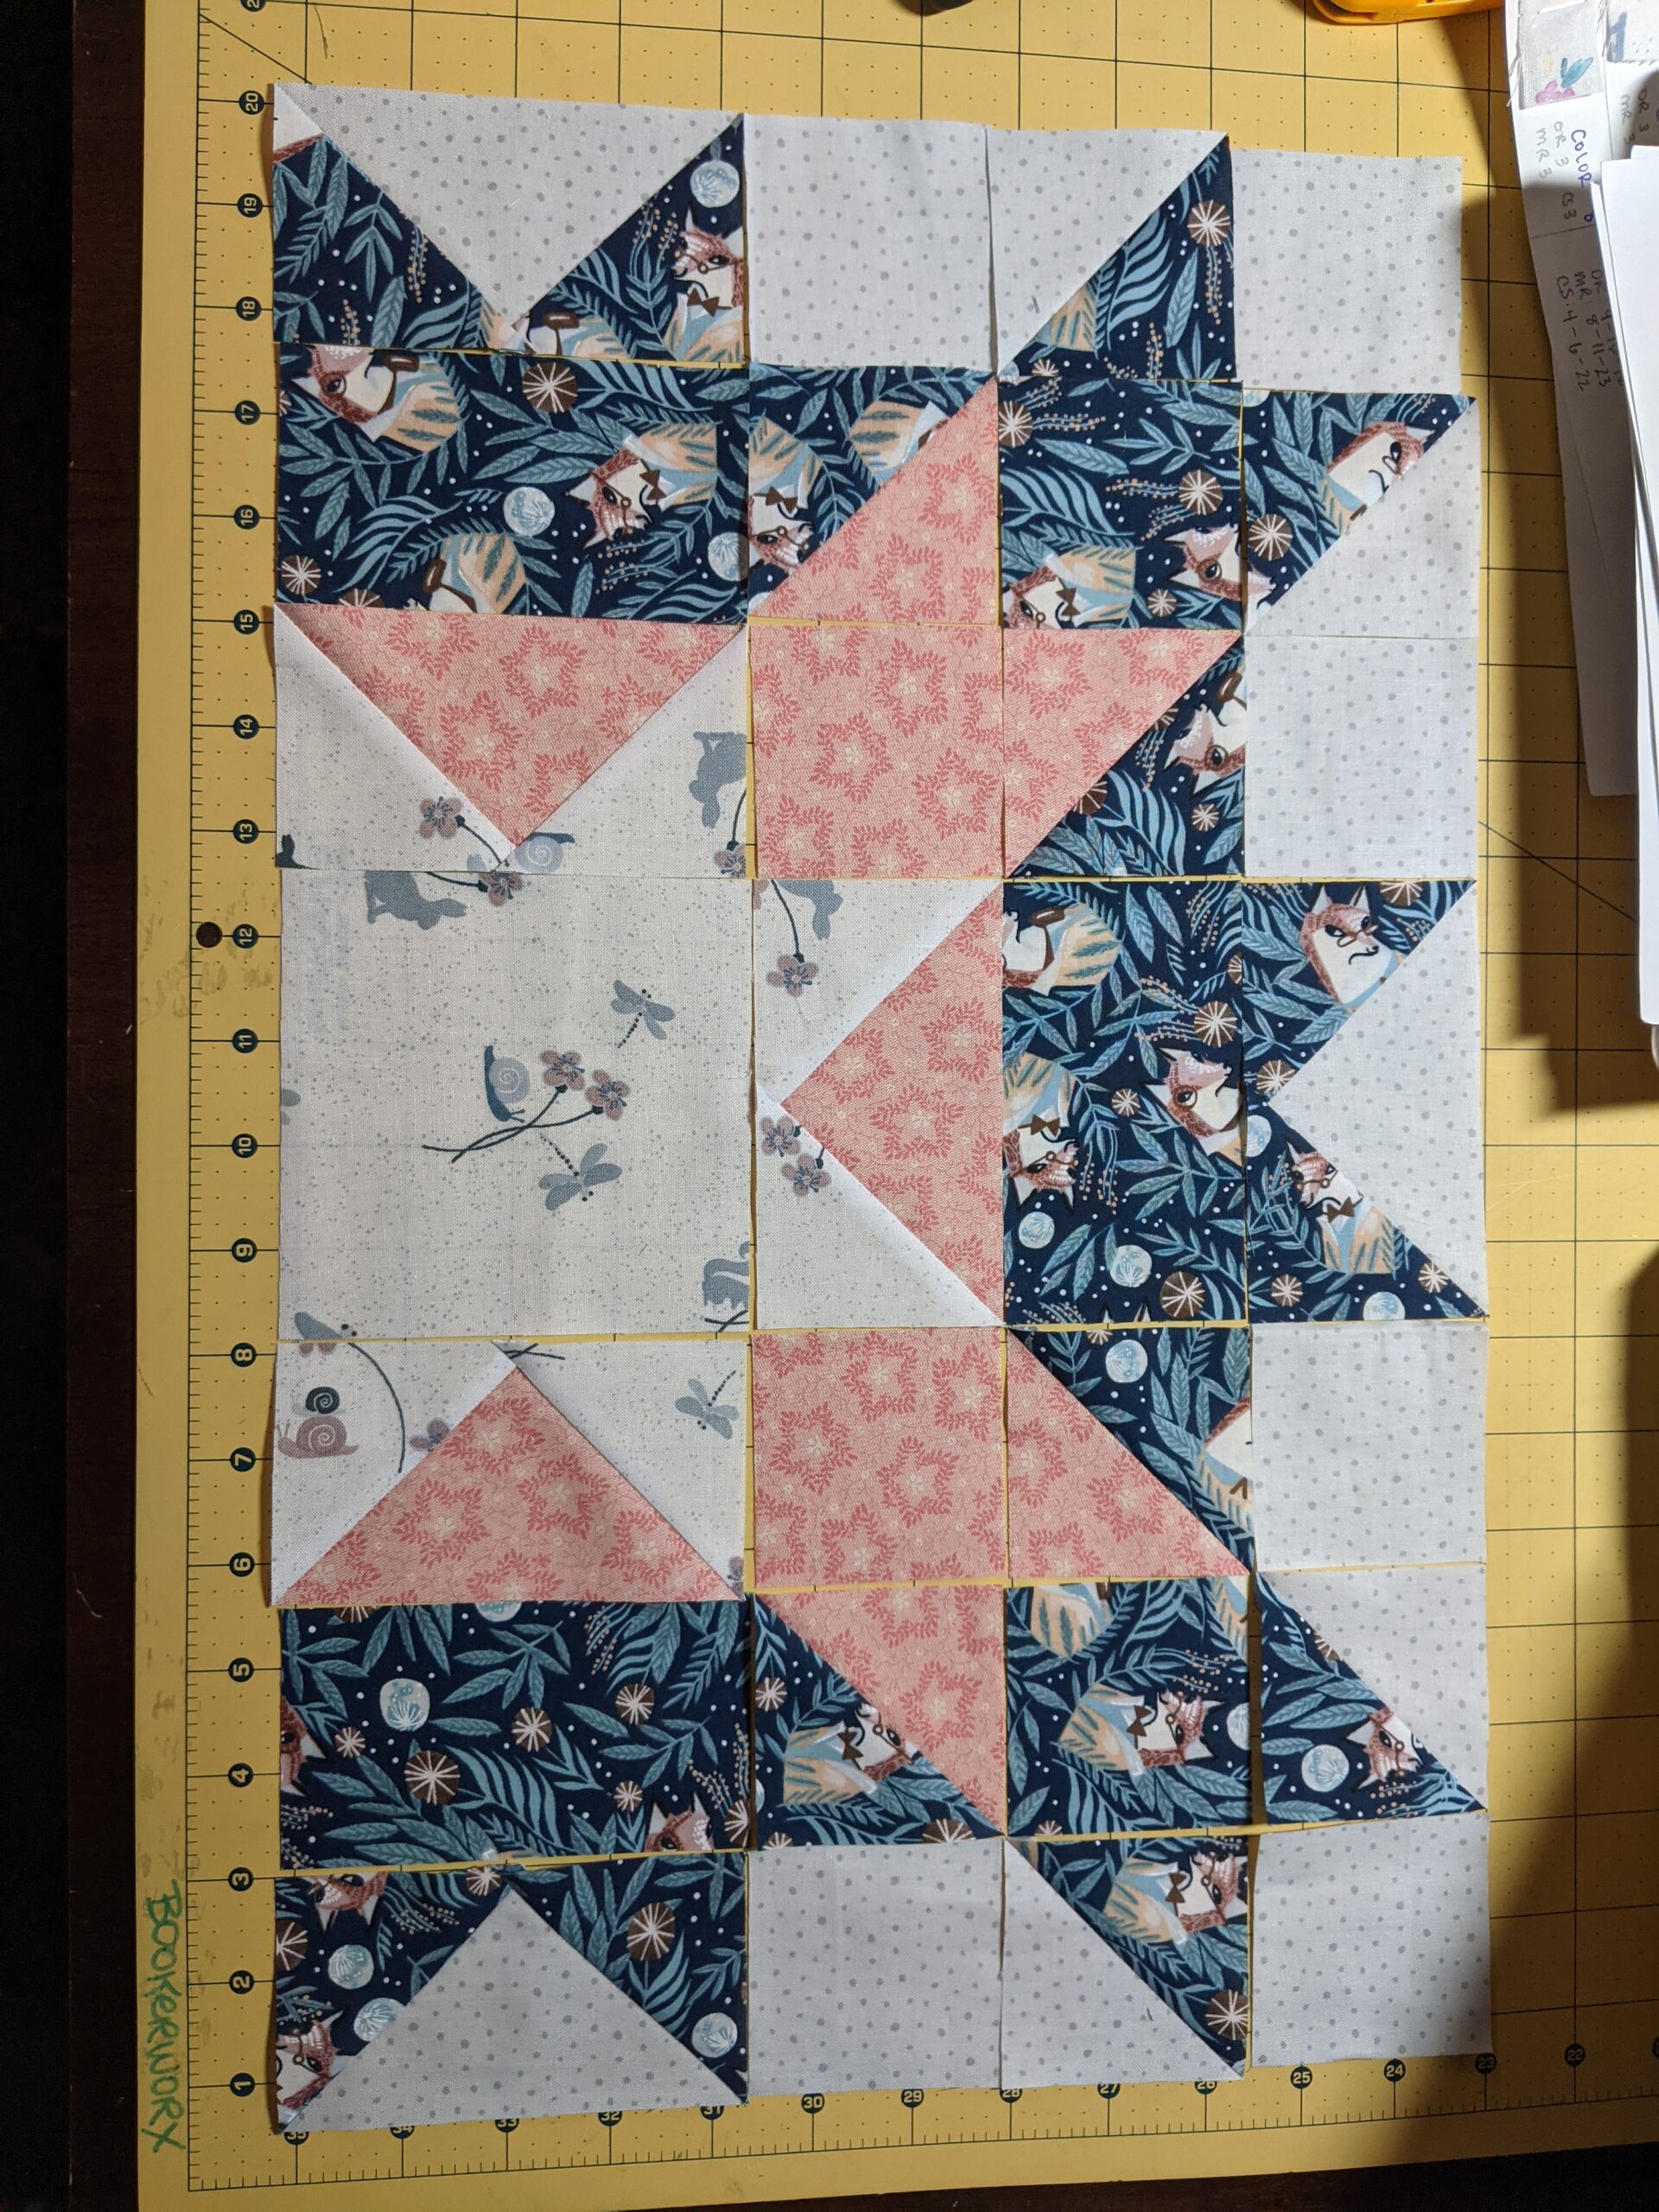
If you’ve been following along, this Quilt consists of 25 blocks, and each block has two sets of four-at-a-time Flying Geese and two sets of eight-at-a-time Half Square Triangles.
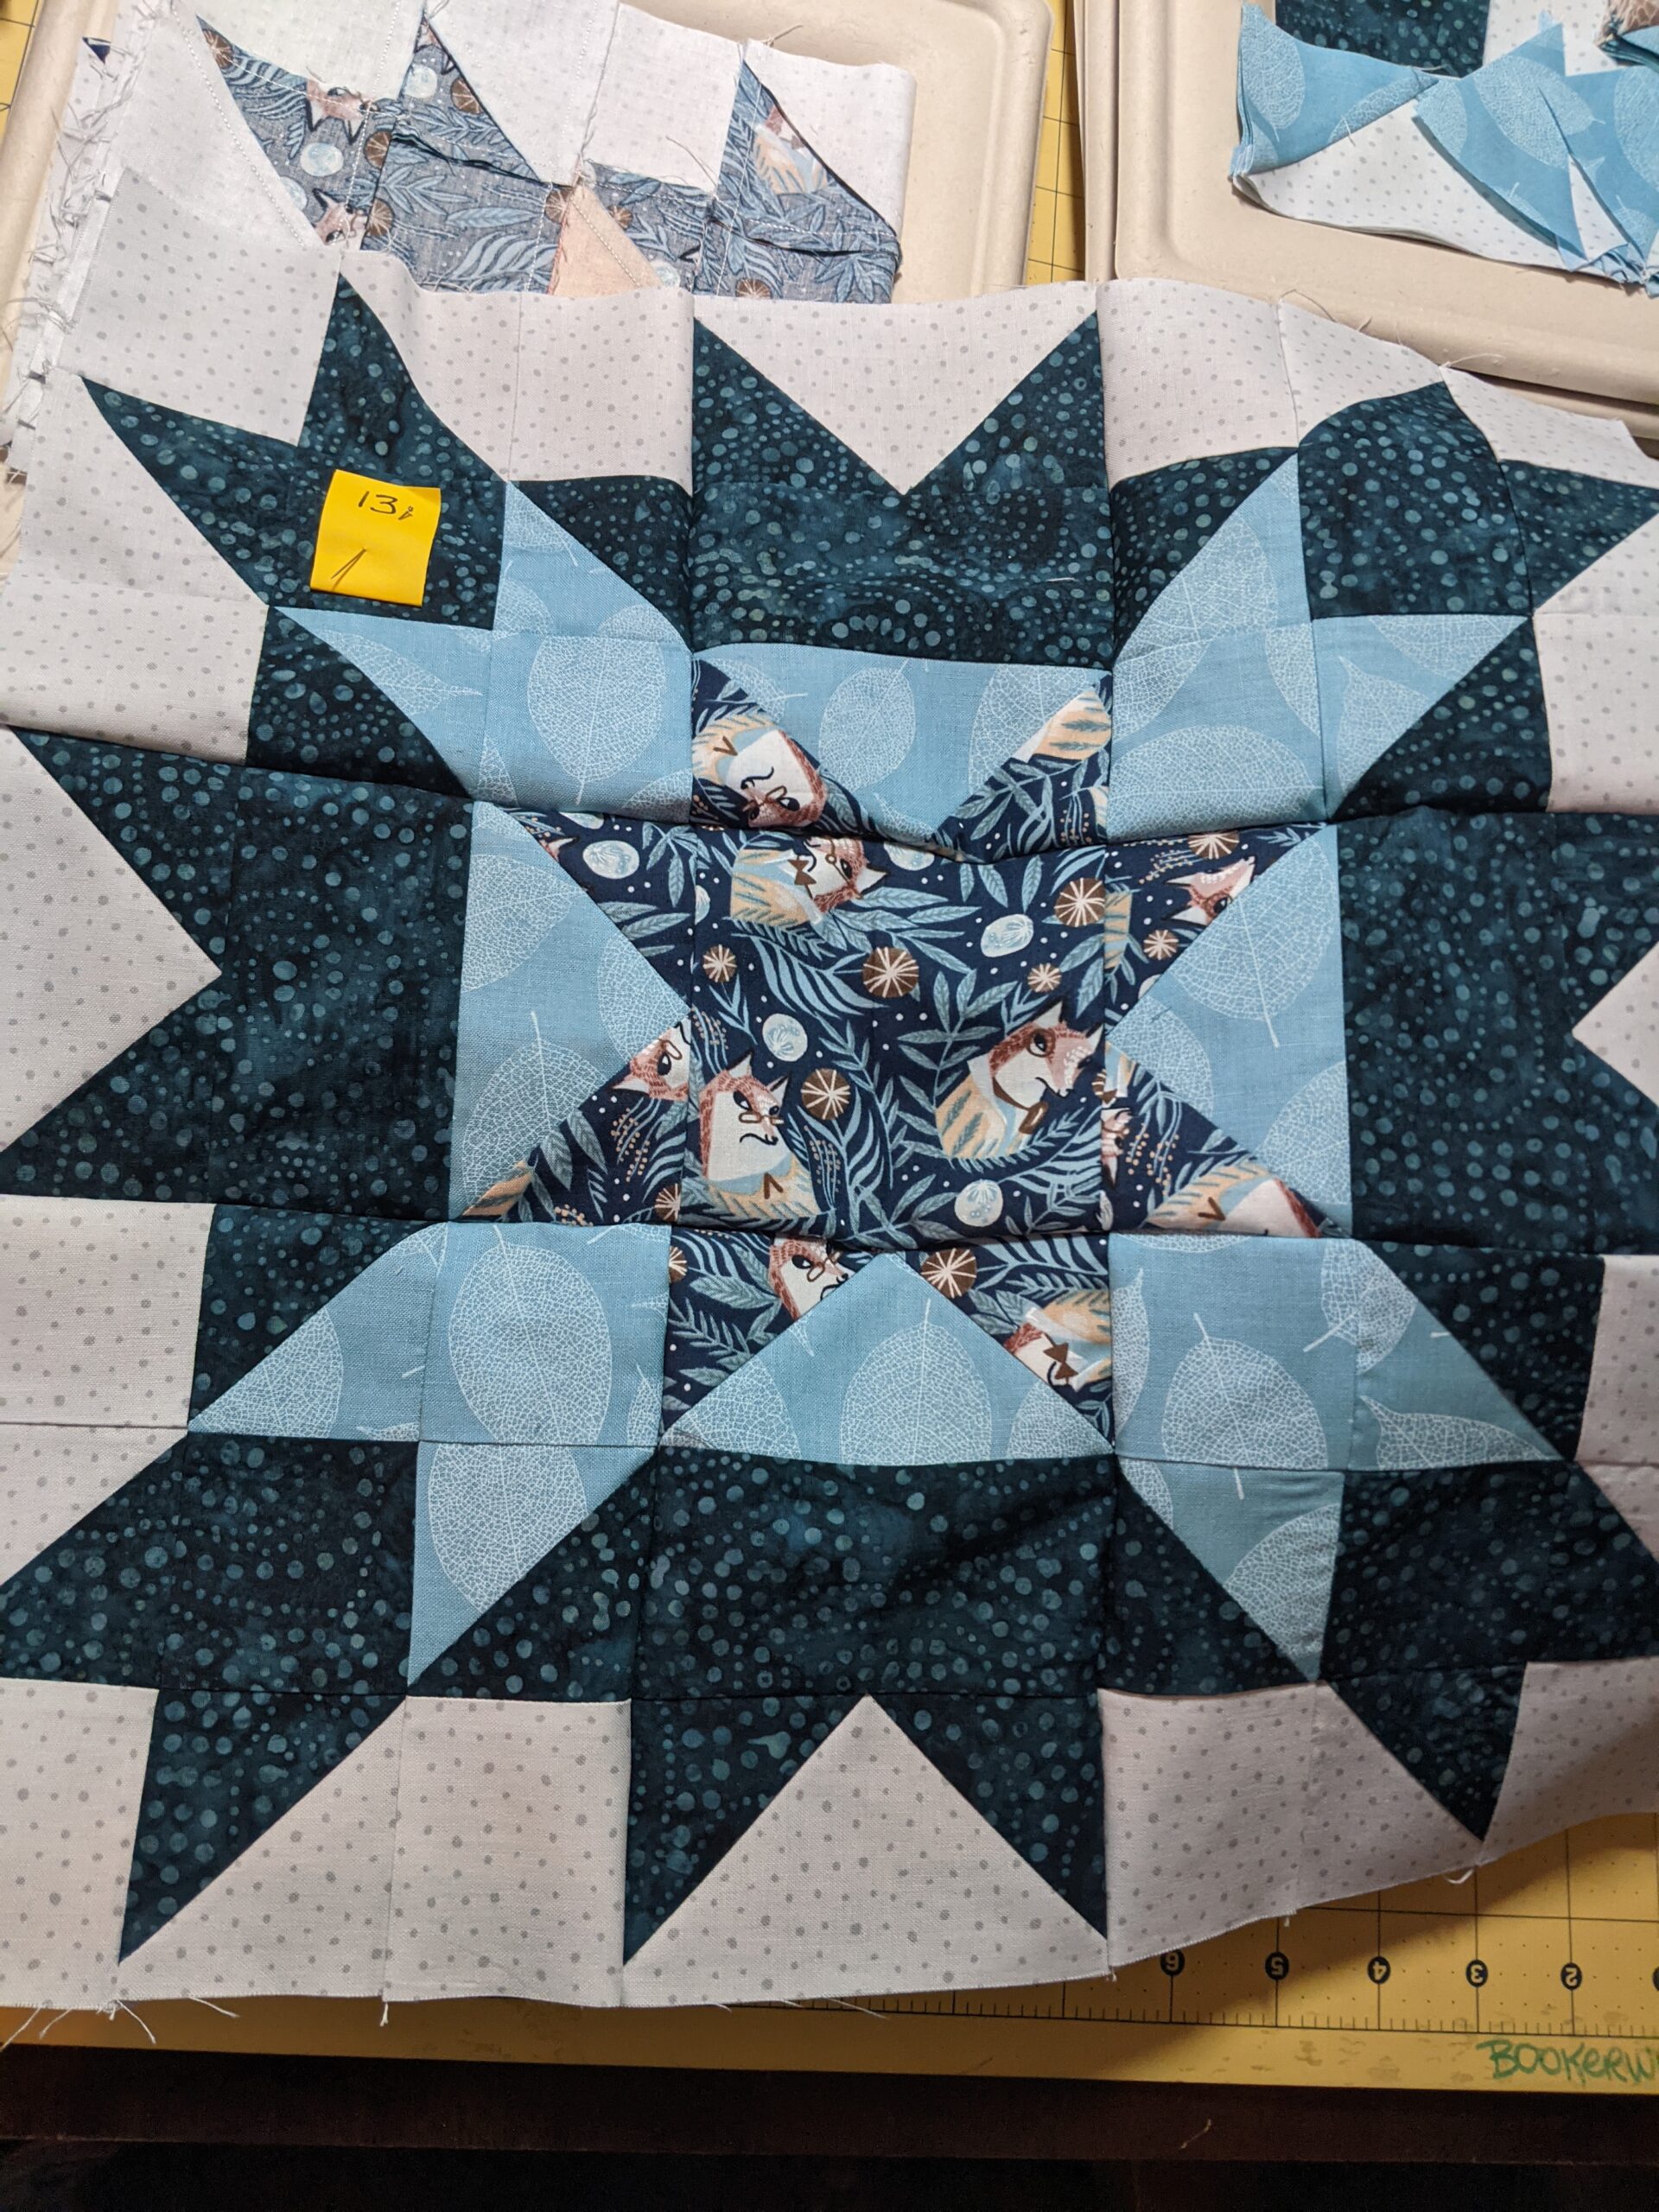
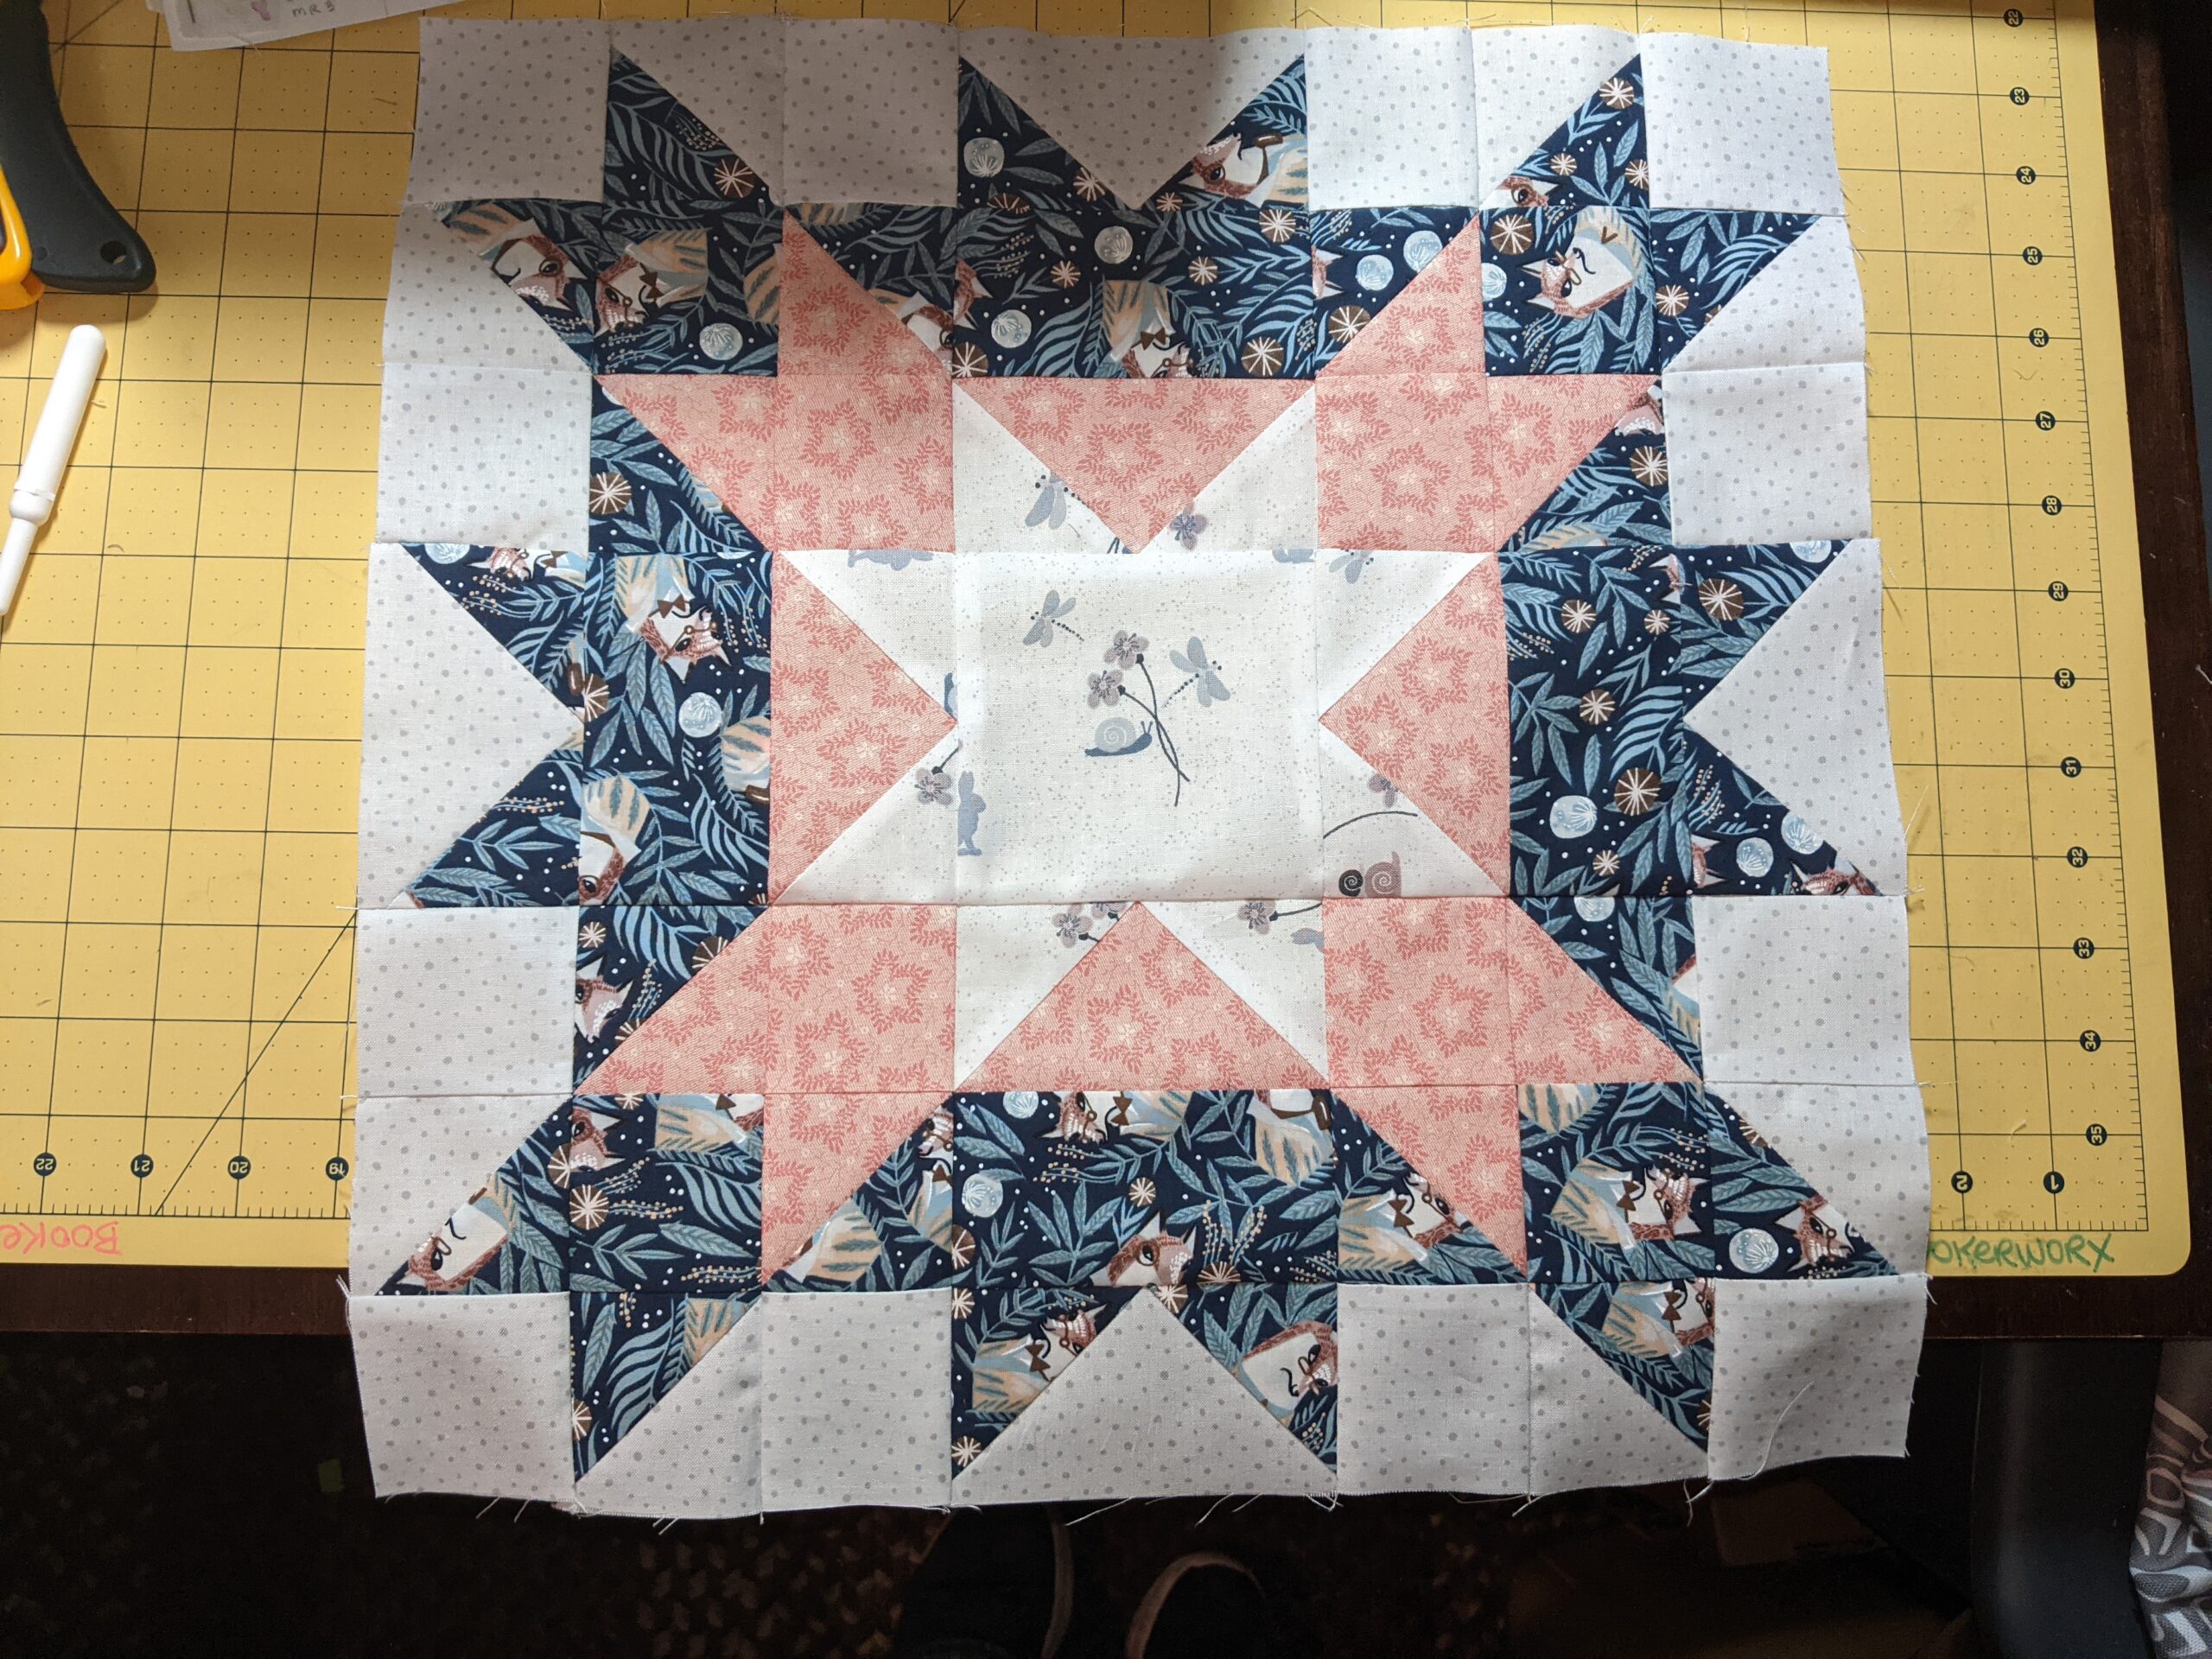
Before I jump into the insane assembly line that is now in front of me, I wanted to make one complete block to ensure I had cut everything correctly and to make sure that I understood the pattern completely. I’d rather have to re-cut fabric for one block, or rip out one whole block, then realize there’s a mistake that I just assembly-lined into the whole darn thing. To put you all out of your misery, here’s Block #1. I finished it last night.
Finished Block 1
I’m such a huge fan of this fabric. I cannot wait to see the other fabric combos in these blocks! Block 1 took a bit over three hours to finish….that includes making and trimming the geese and HSTs and assembling the entire block. It assembles fairly simply, basically a nine patch made up of nine patches. I’m hoping that once I assembly-line the rest of the geese and HSTs, the assembly will go together much faster. As I continue, I think the layout and orientation will become quicker and less fussy. I spent a ton of time triple checking that I had each piece in exactly the right spot.
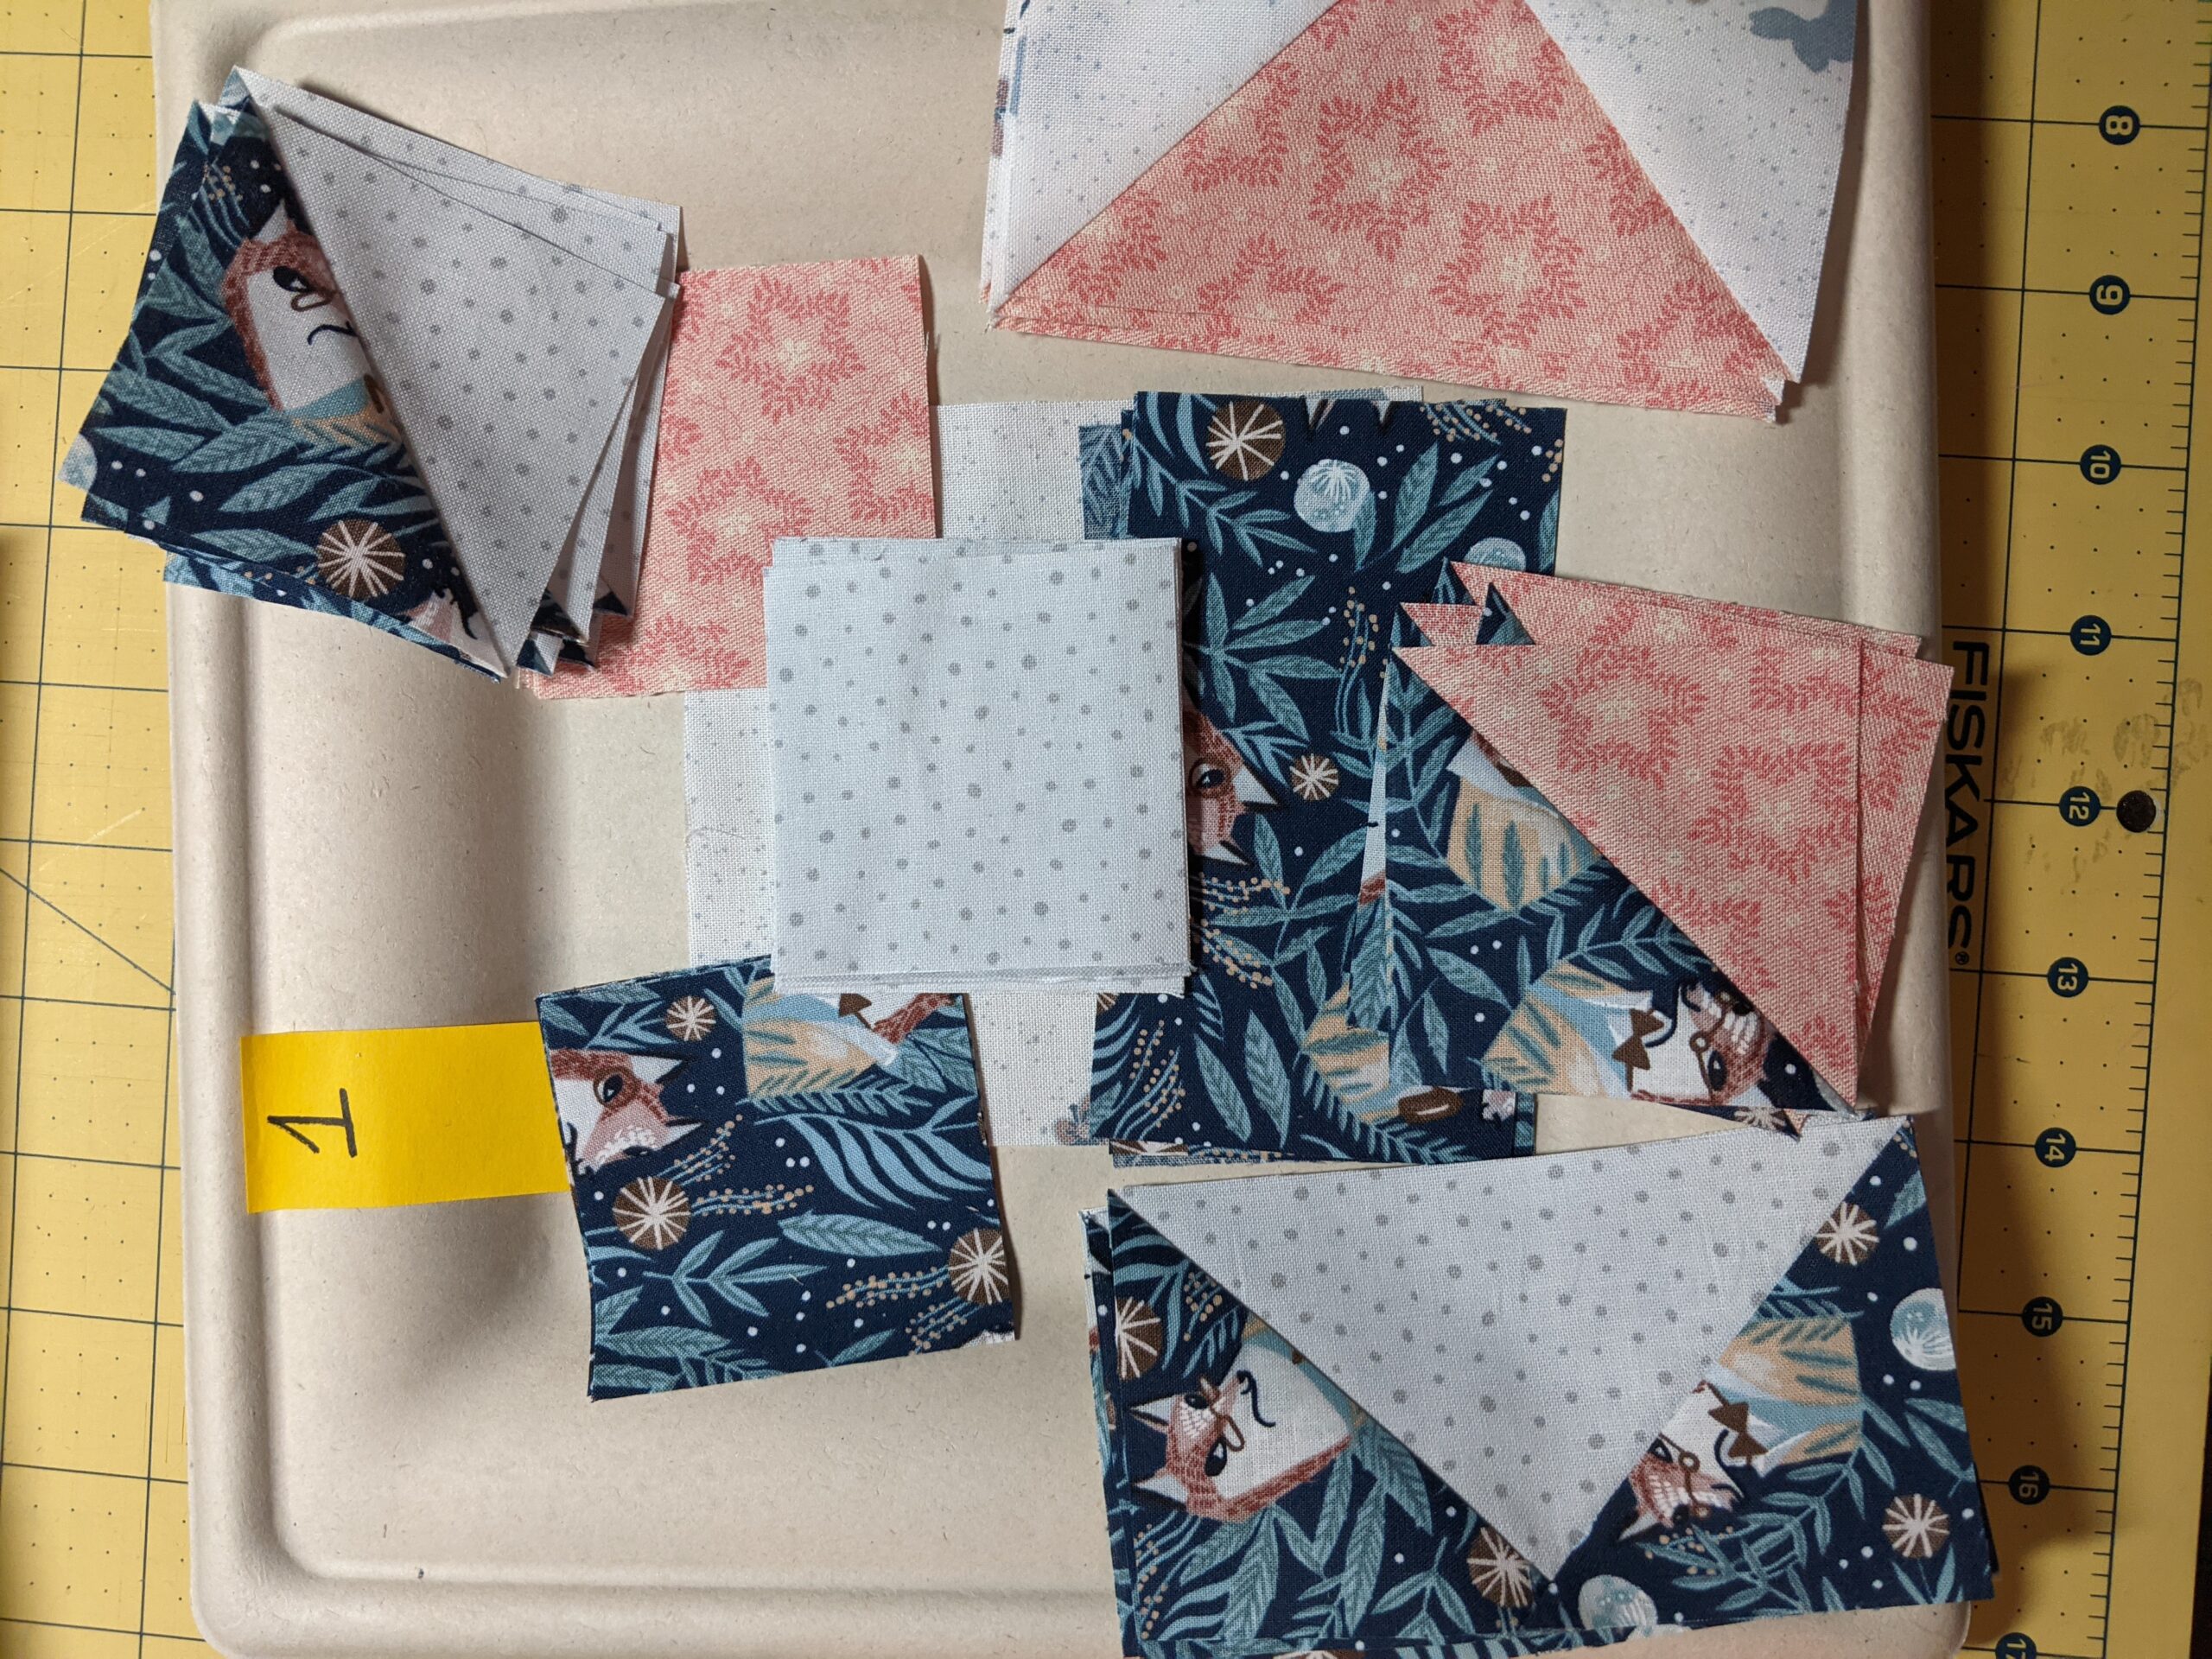
I want to give a few photos to some of my tricks on trimming geese and HSTs…so you’ll see those below.
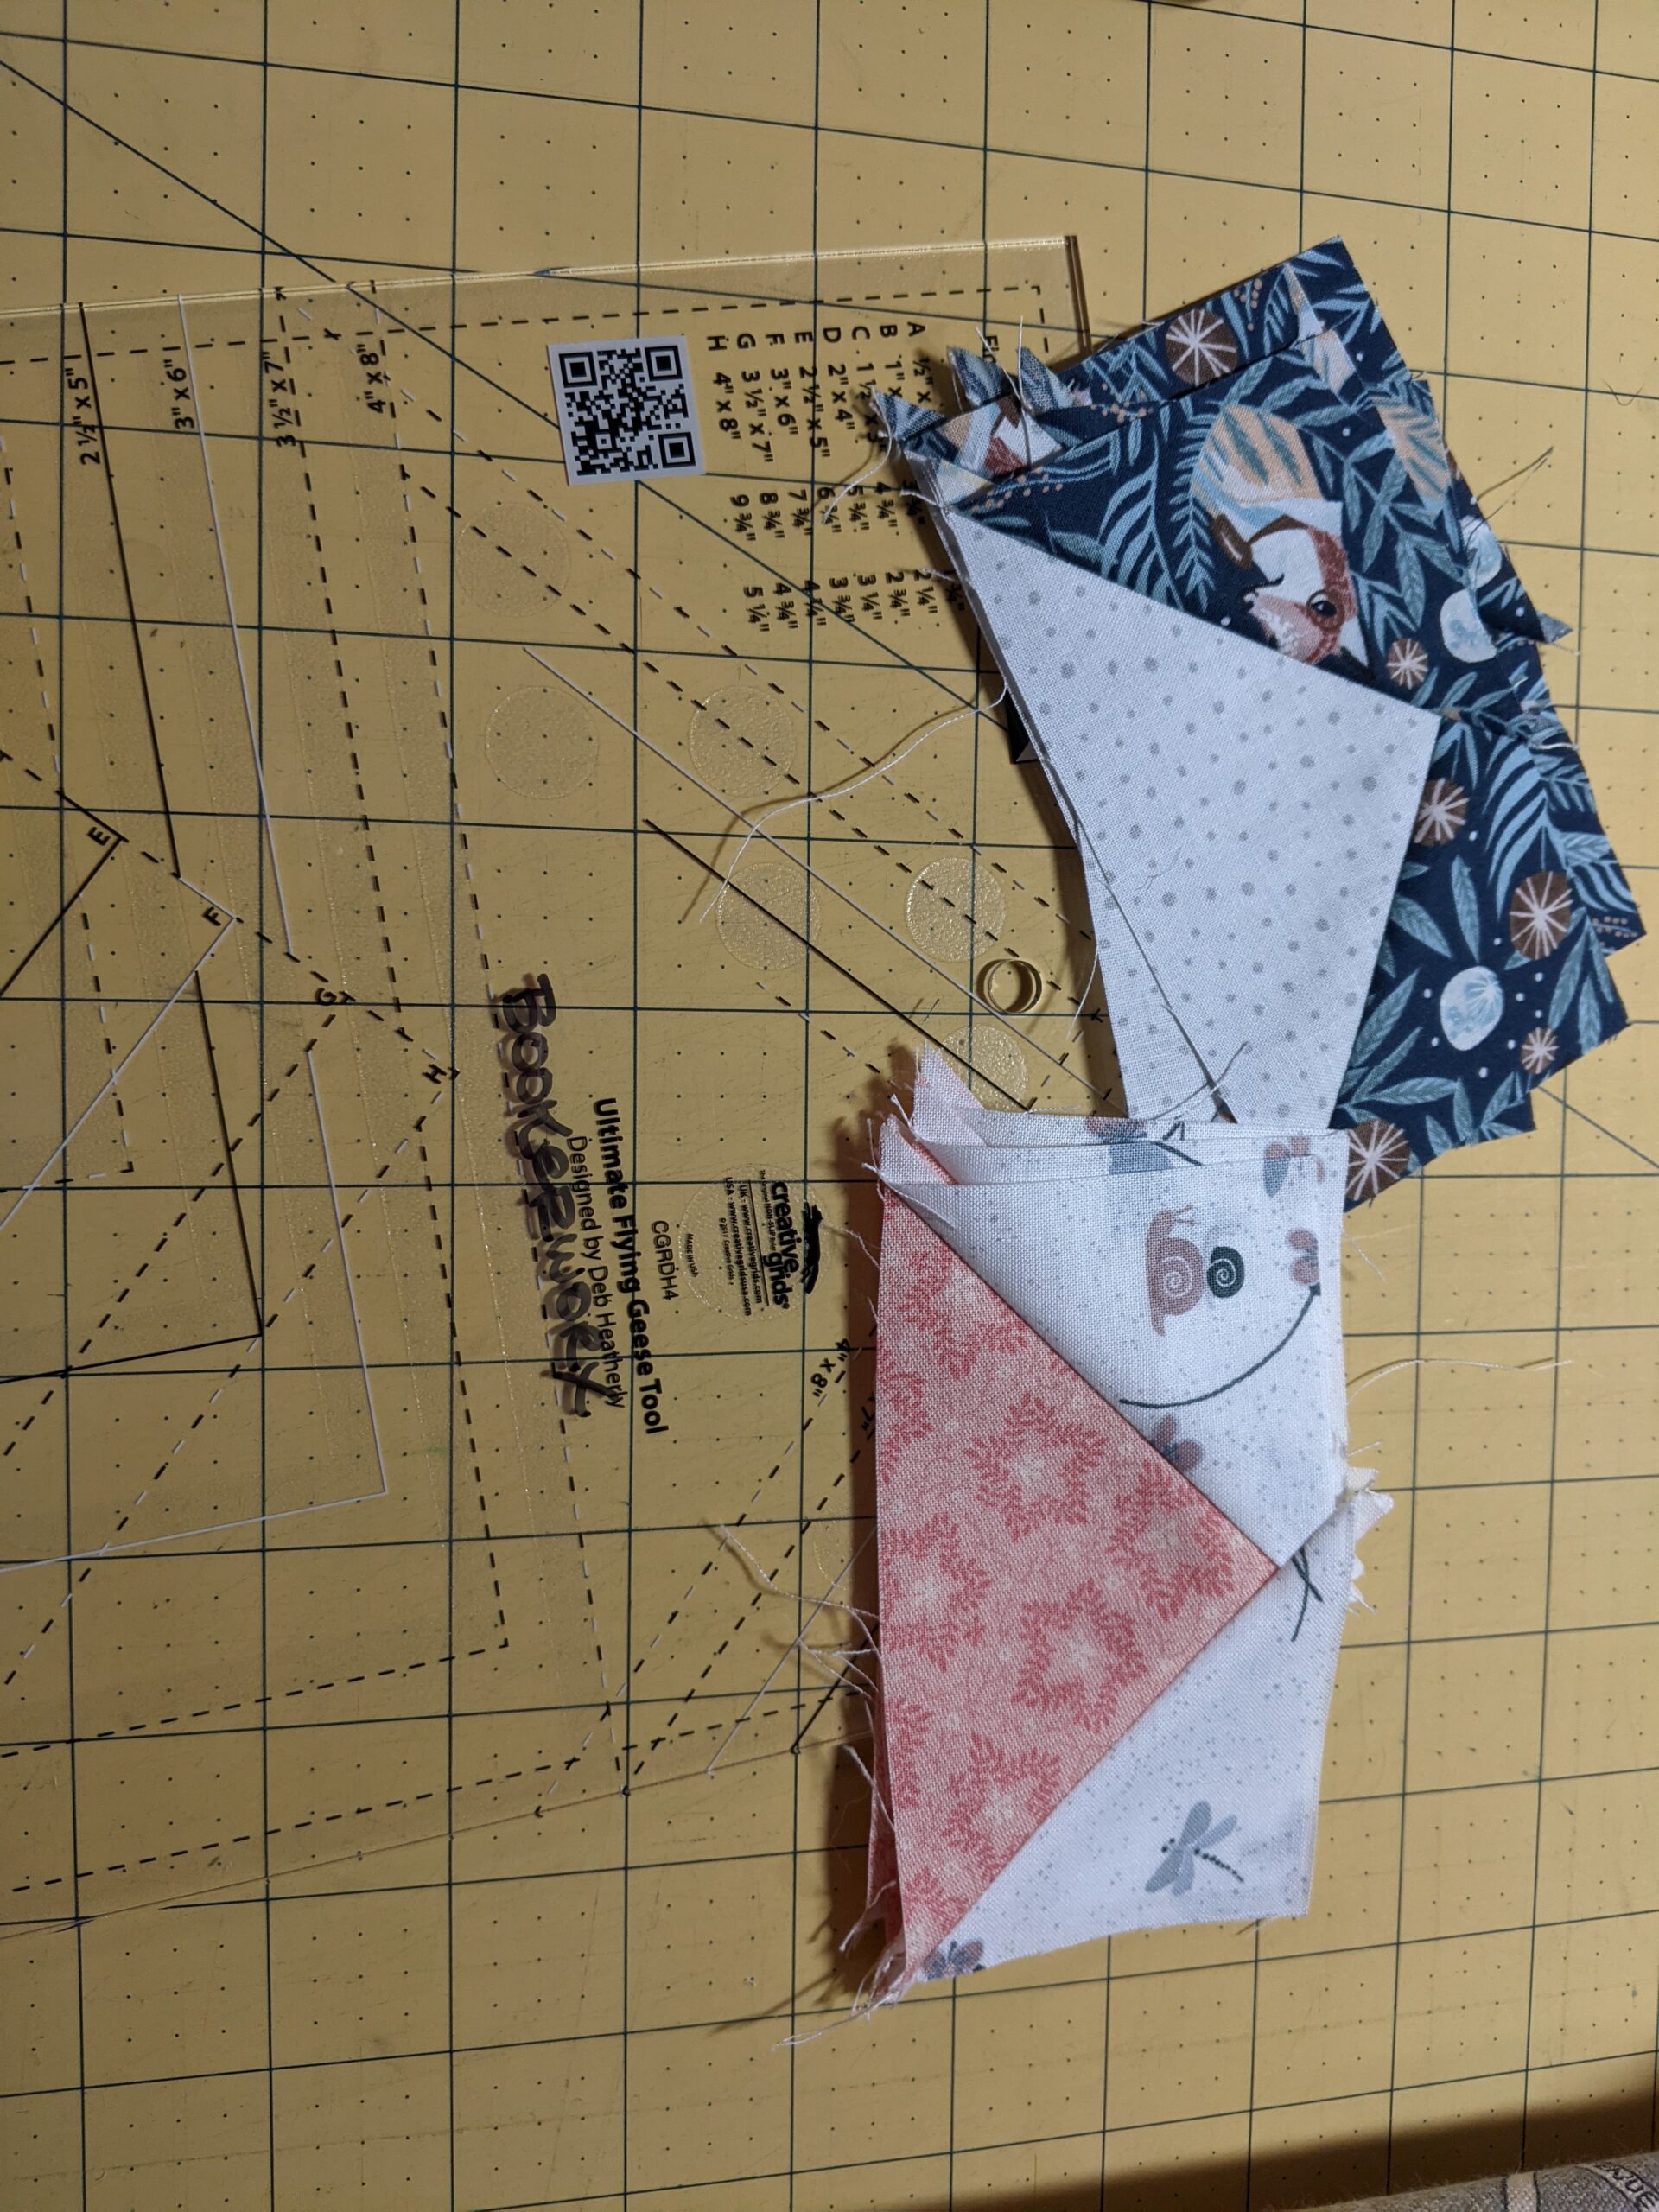
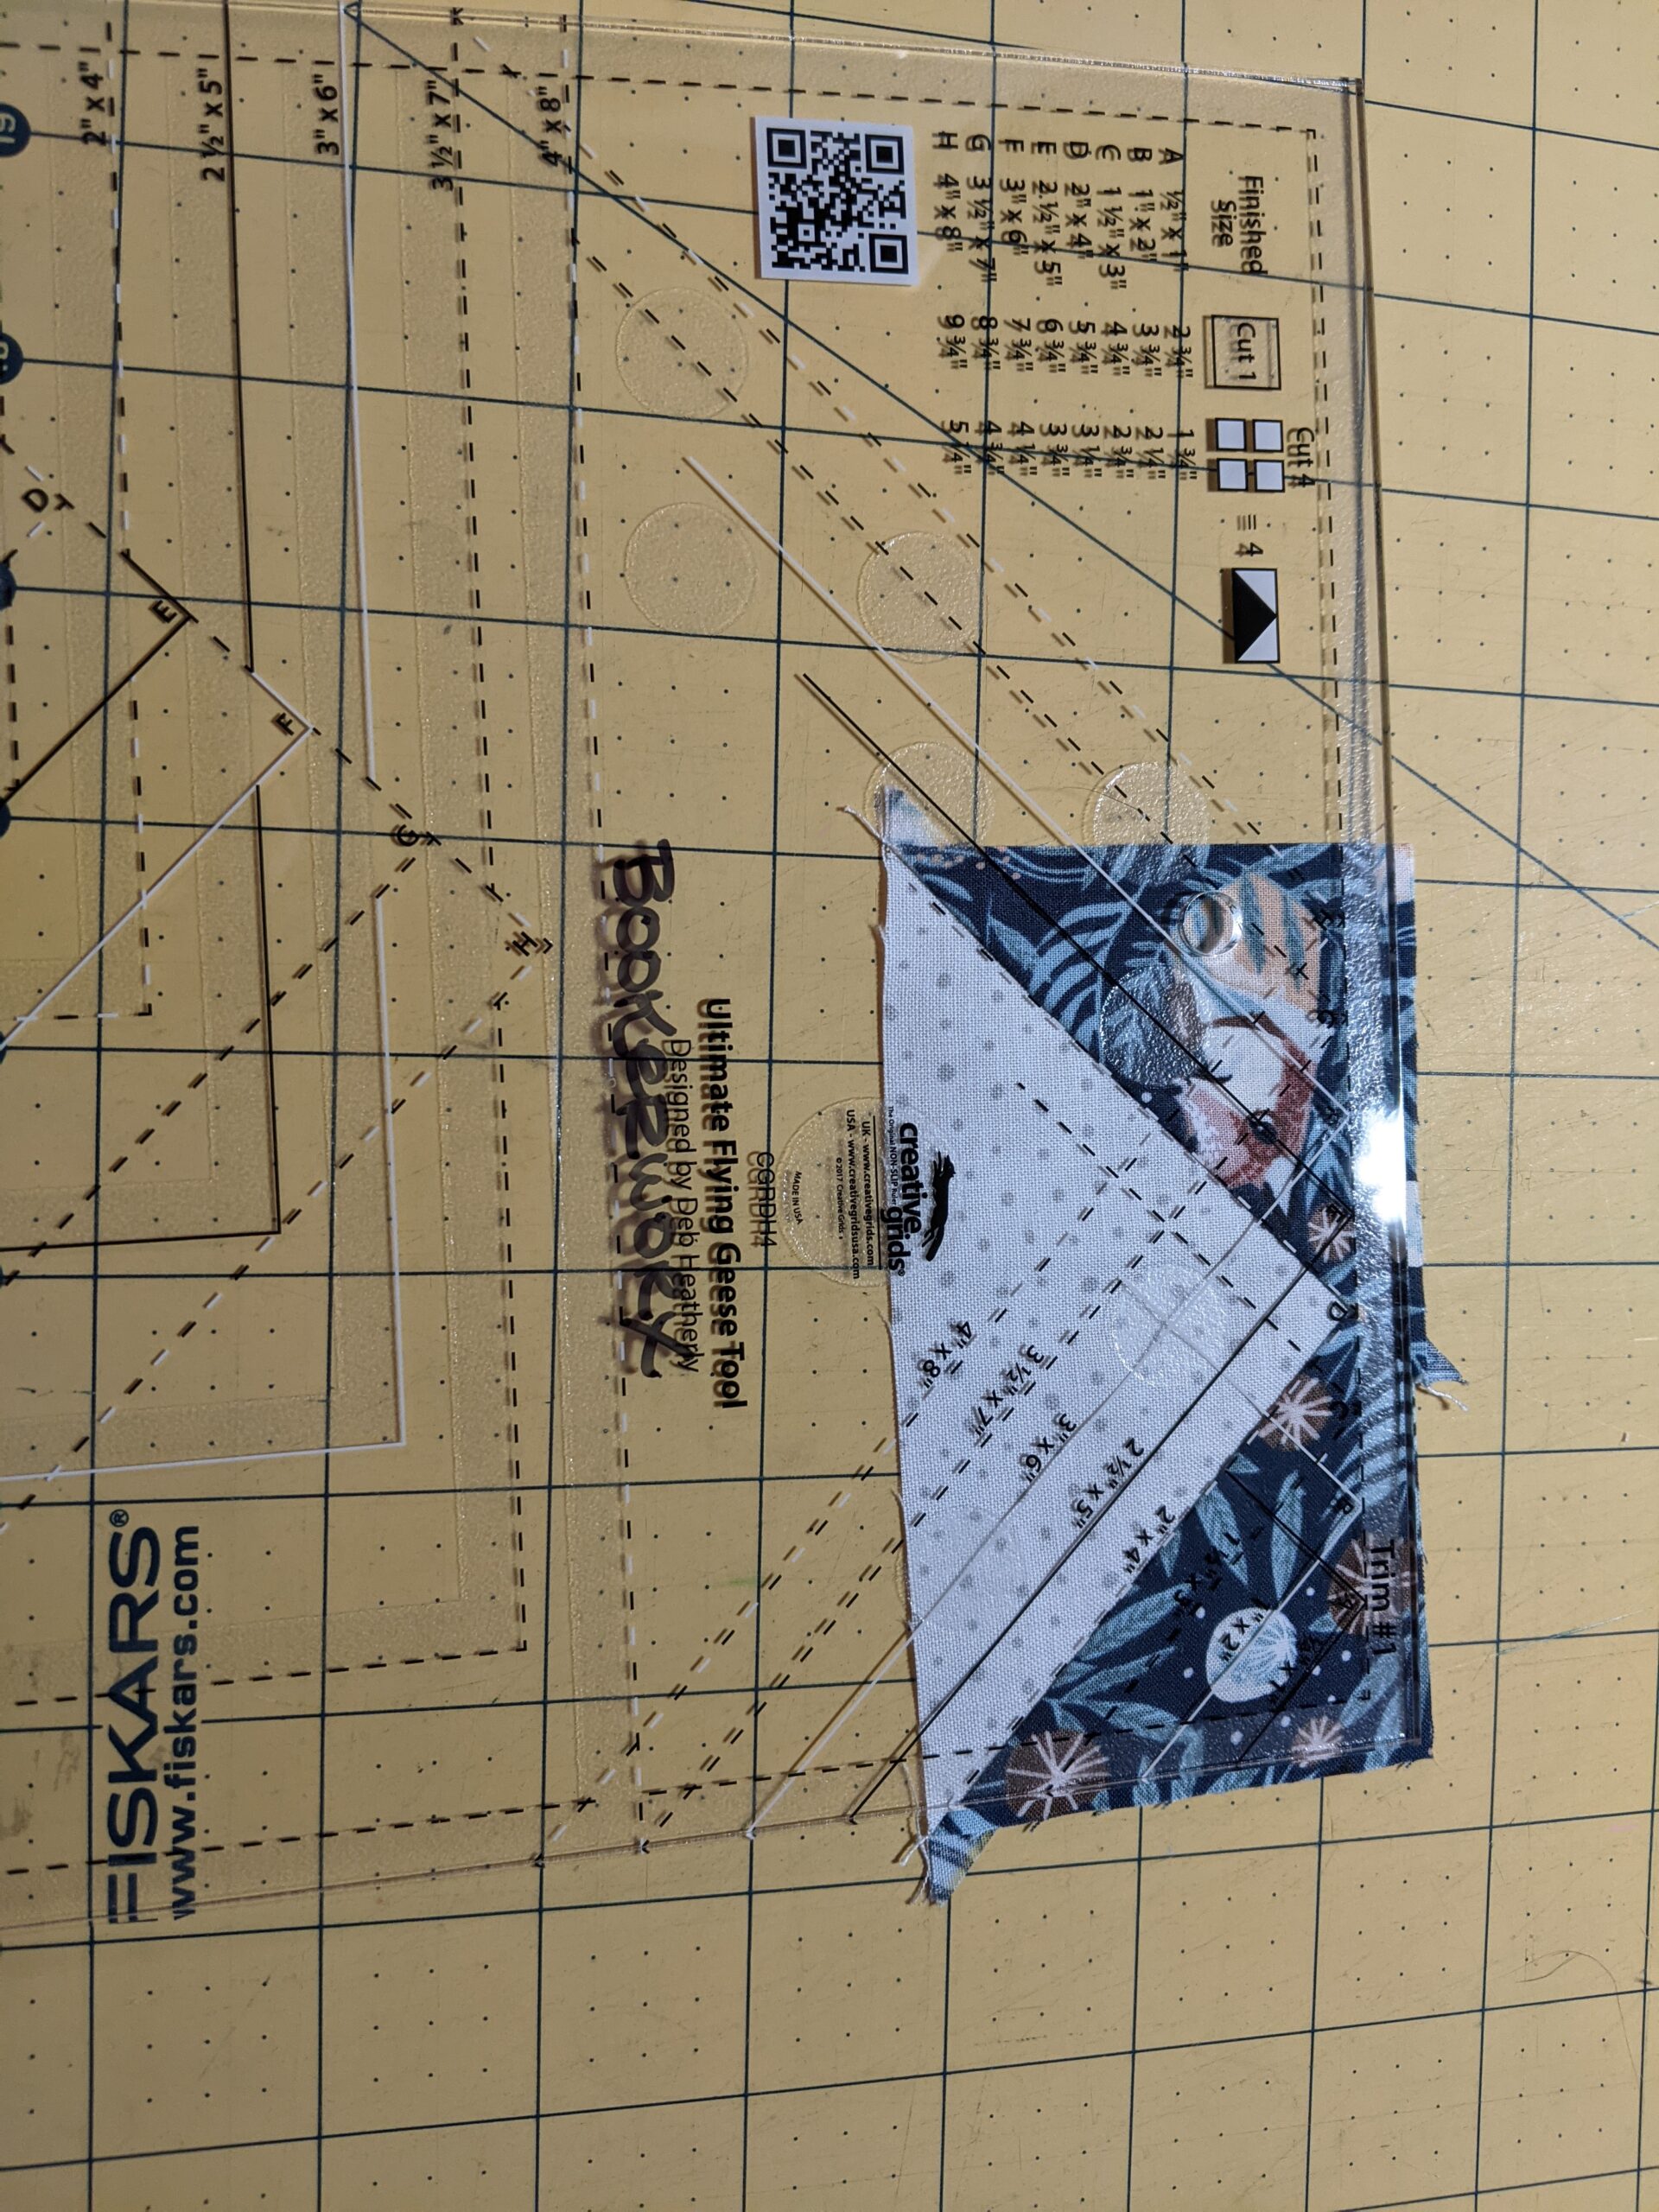
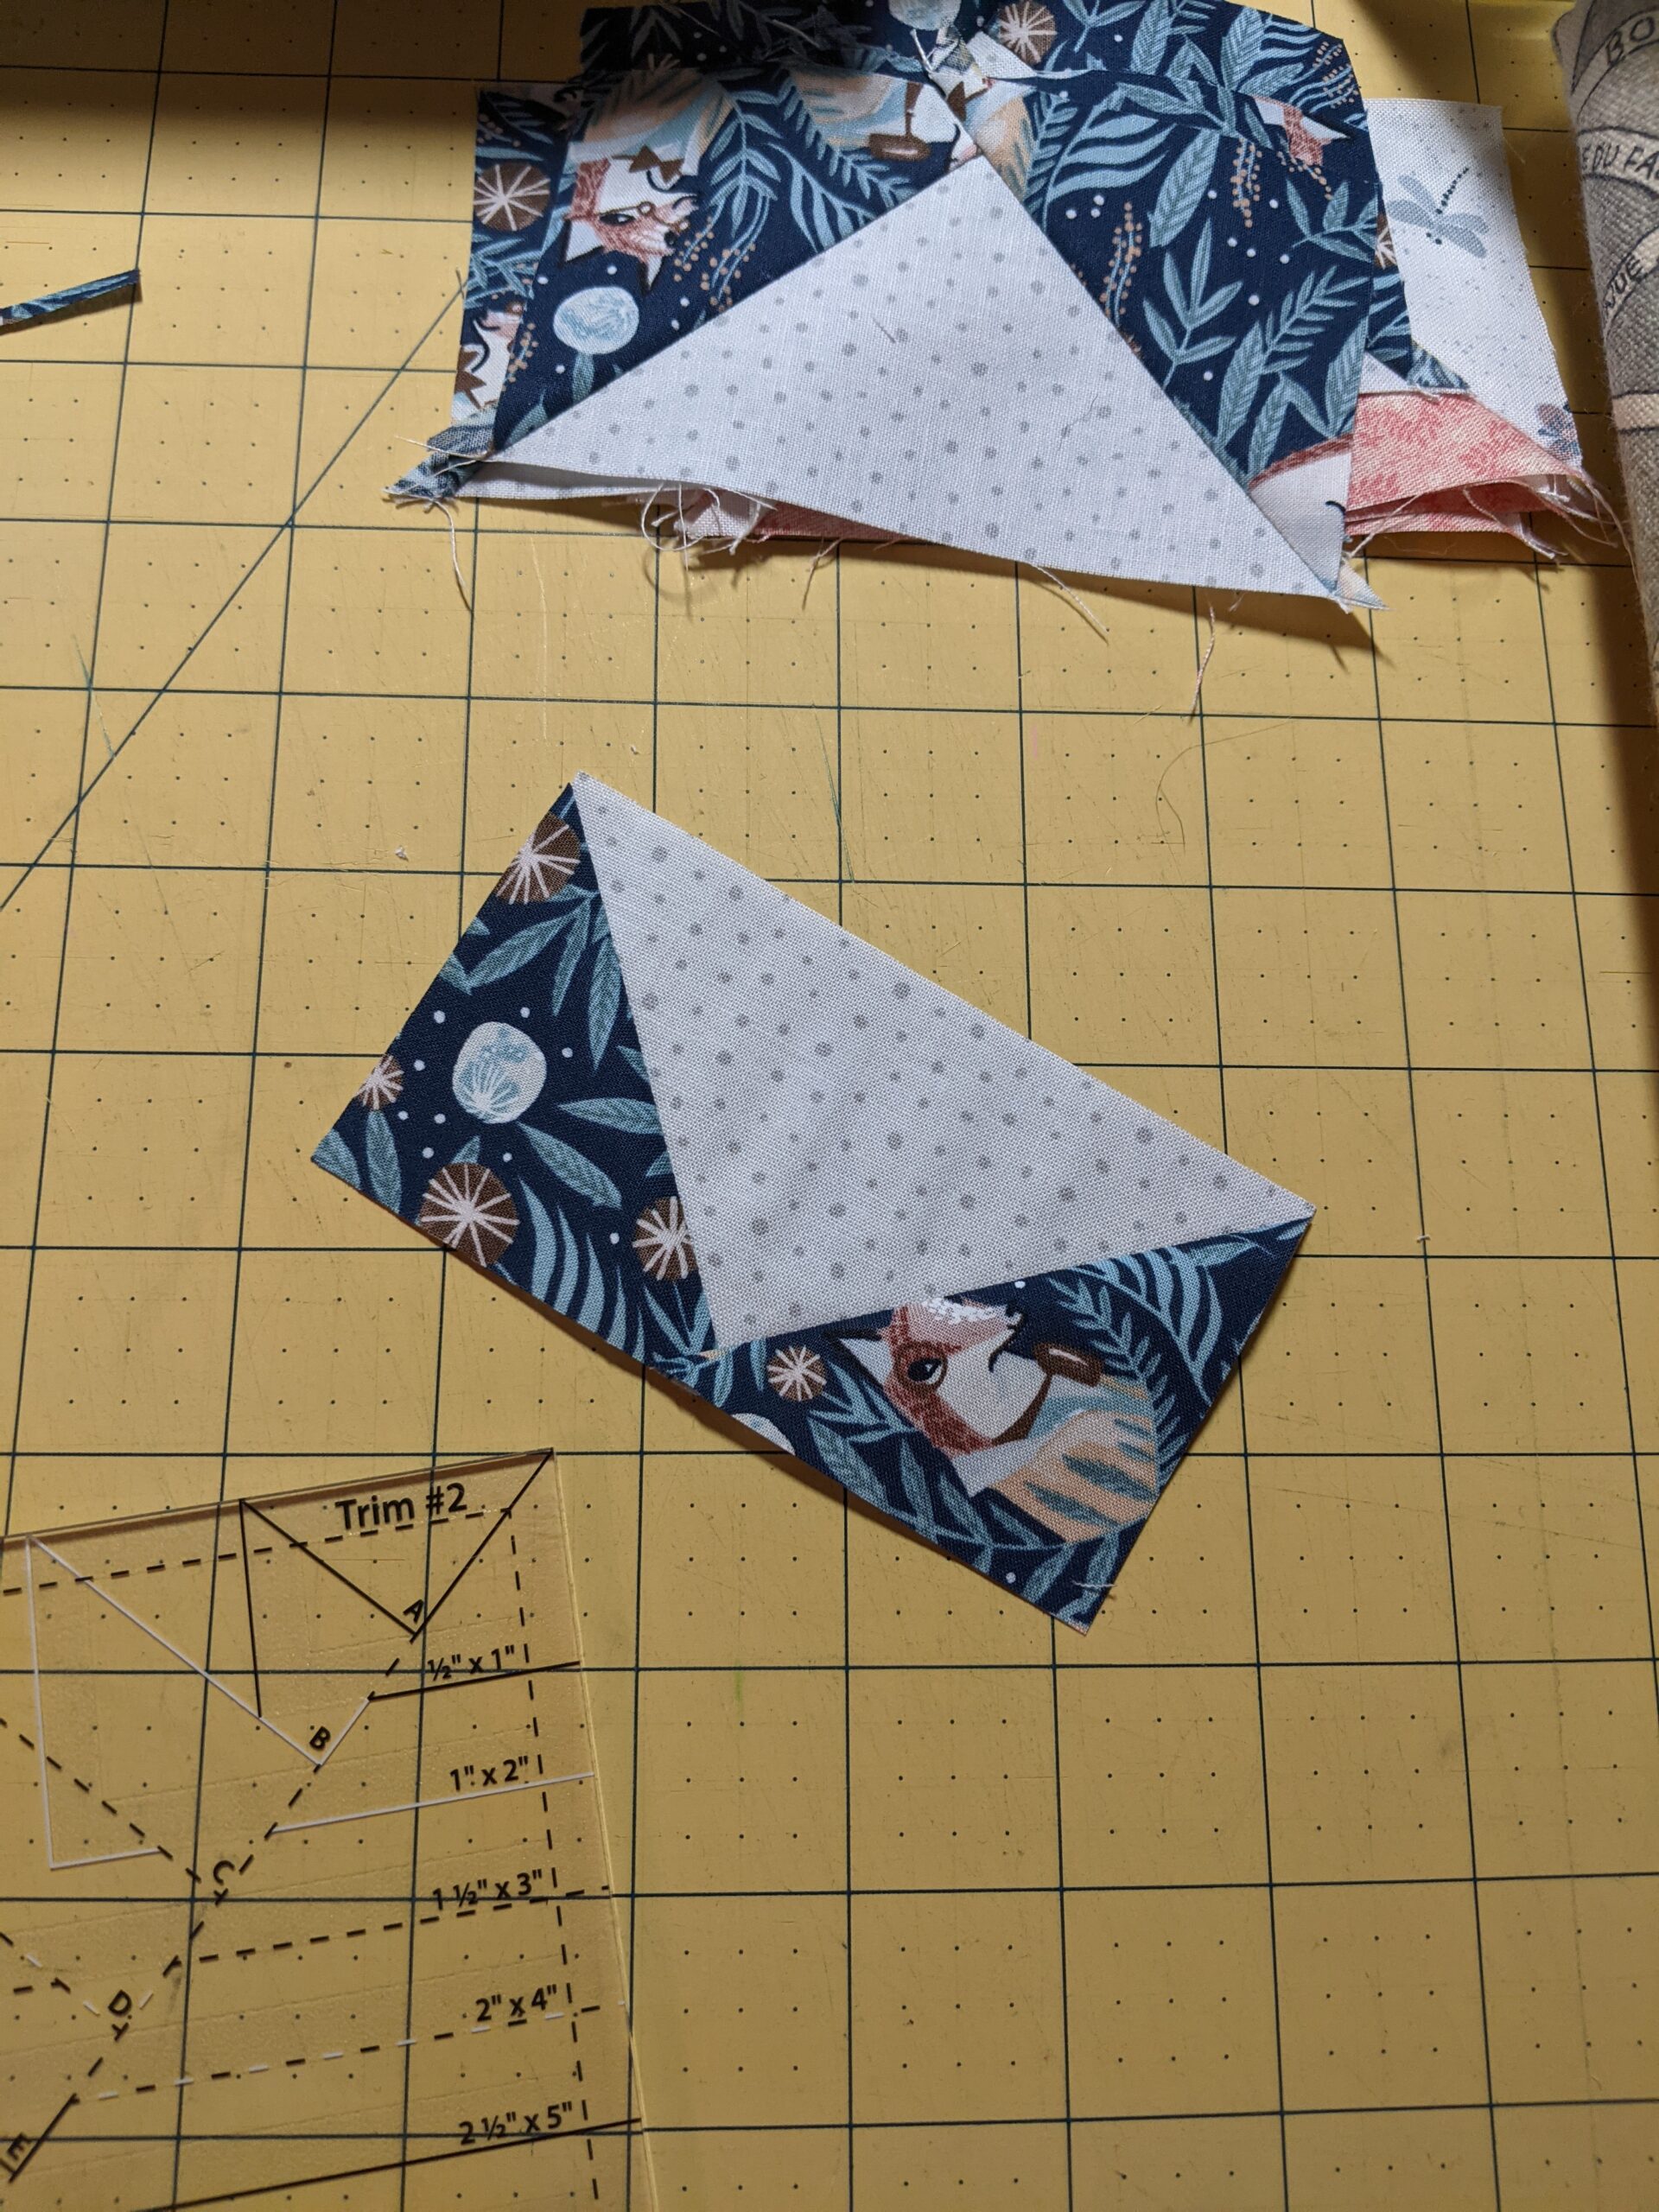
Four at a time Flying Geese, ready to trimFirst Trim, Flying GeeseFully Trimmed Flying Geese
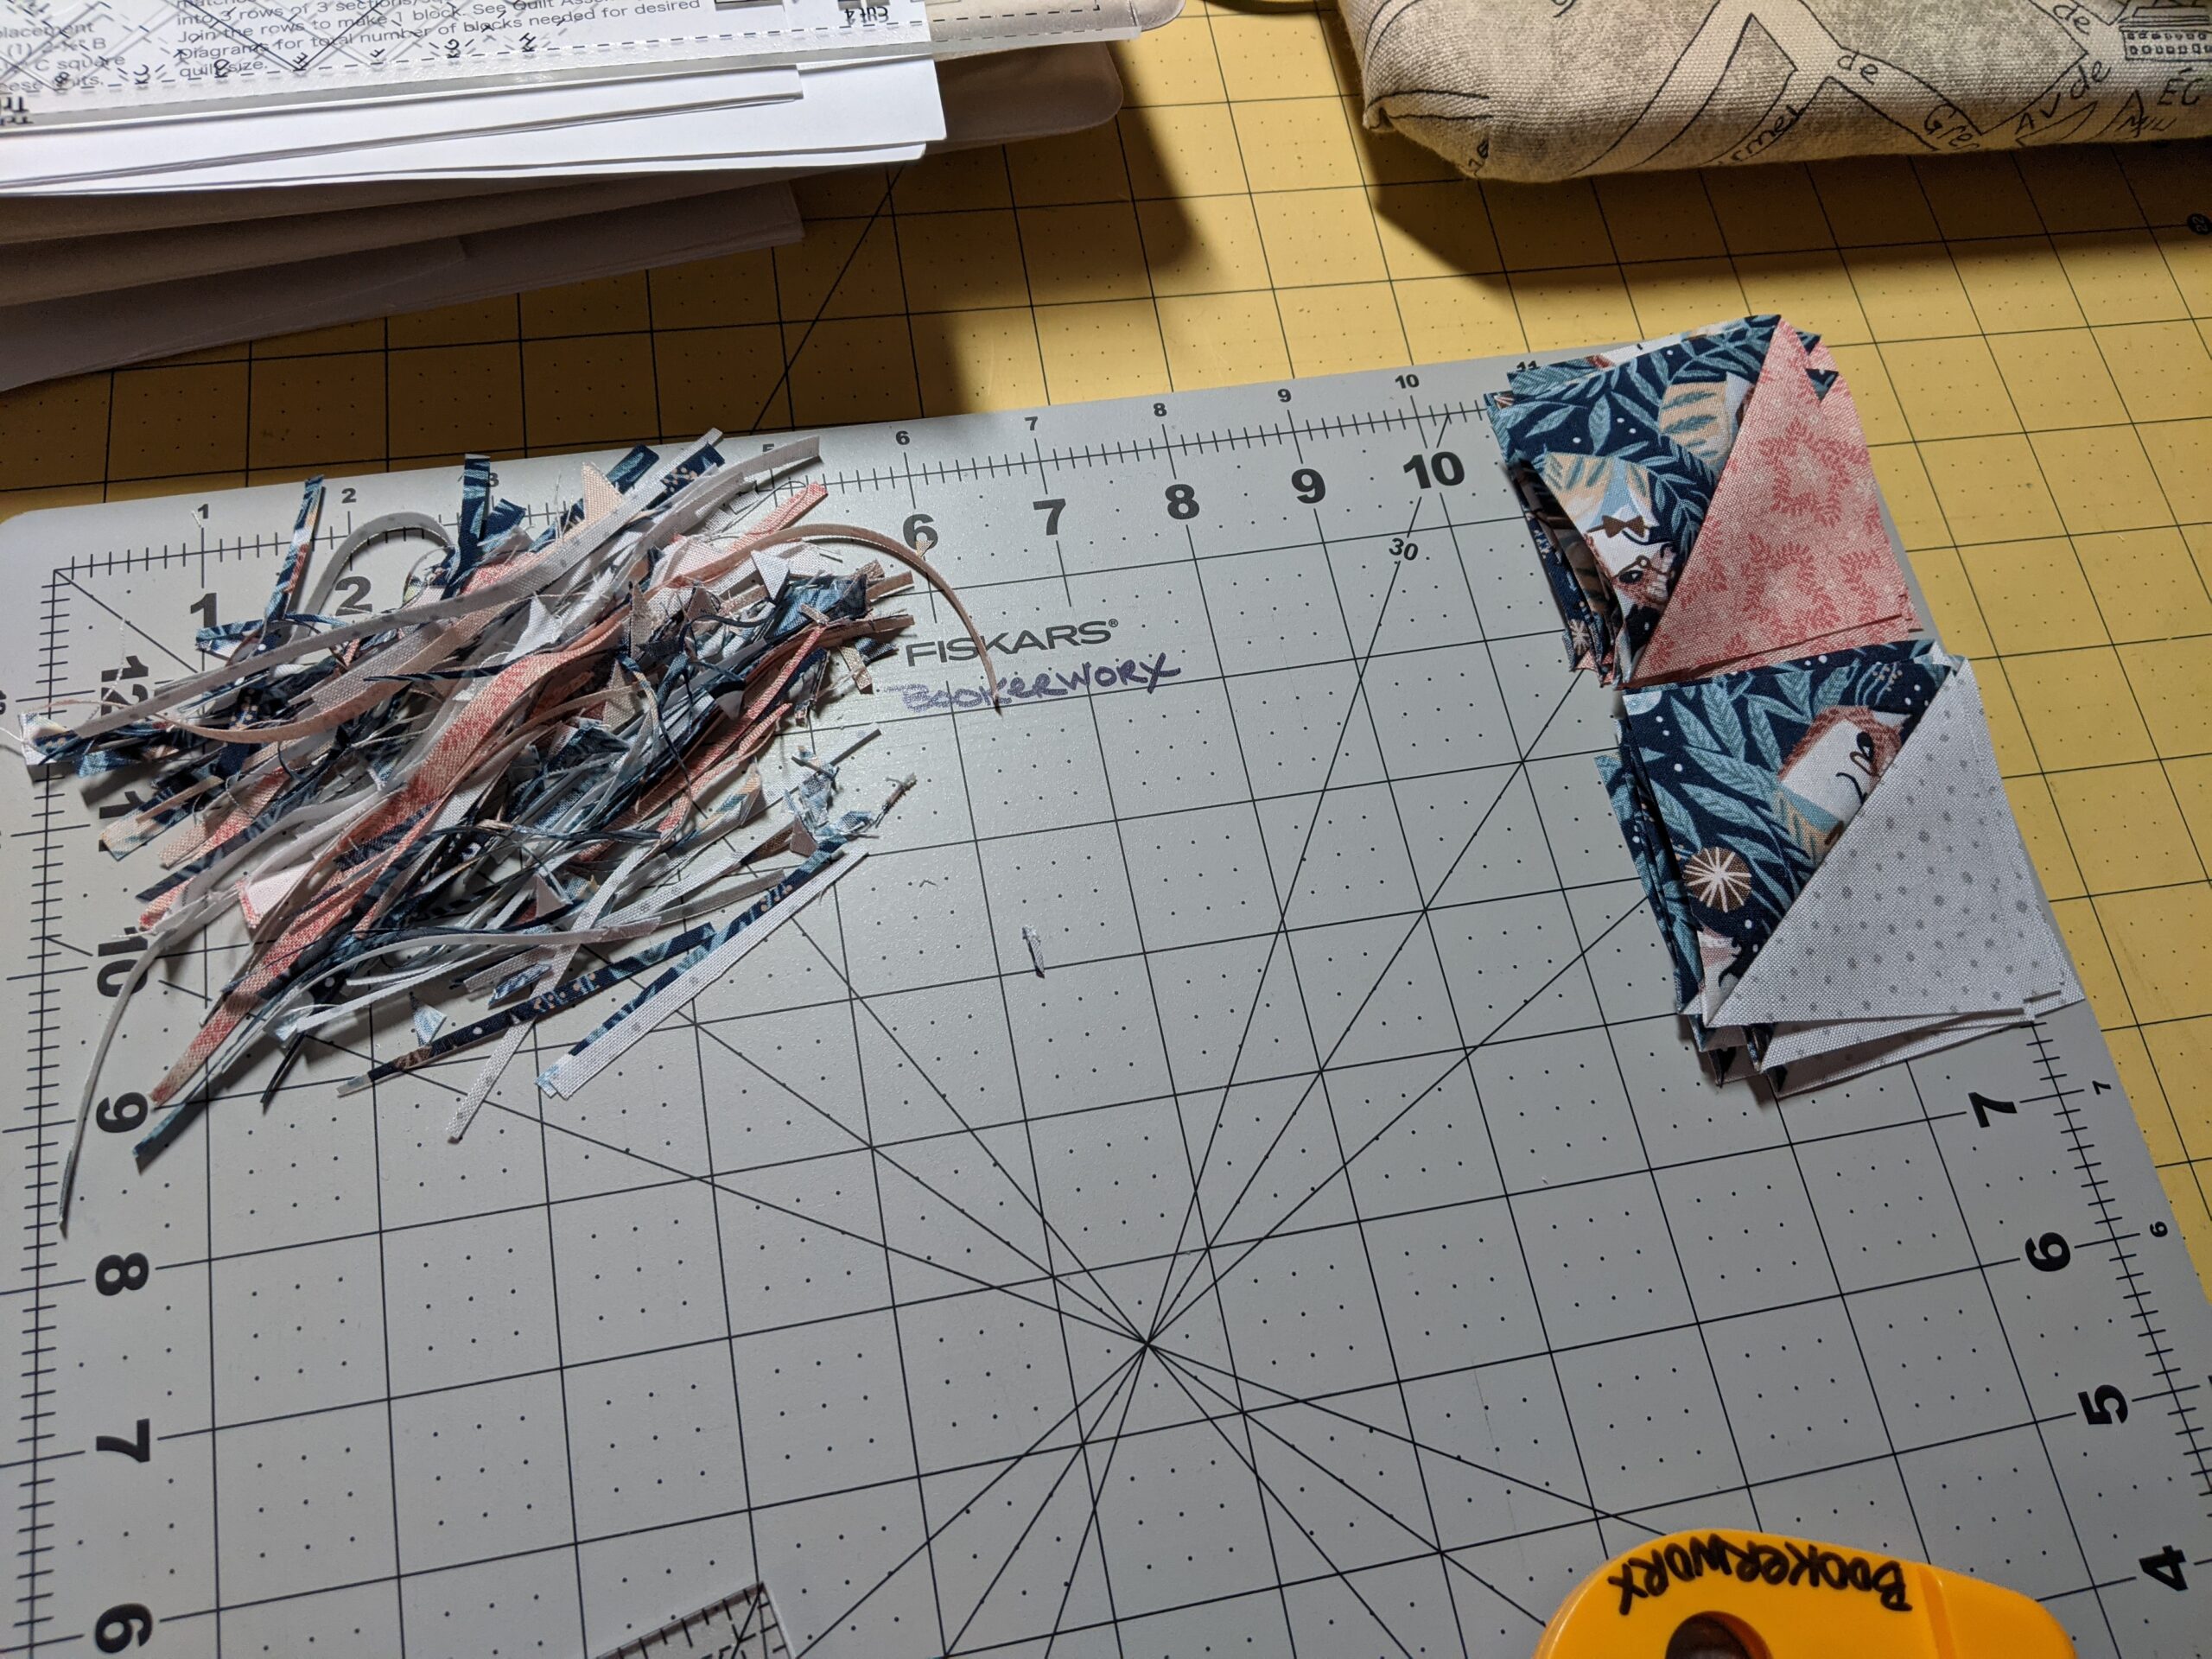
I made the Flying Geese, and used my beloved Creative Grids Ultimate Flying Geese Tool. I exclusively use Creative Grids for everything. I have not found ANY rulers that work as well or are as useful as Creative Grids. No, I am not sponsored by them or anything (although, I ‘d love to be….I Love You Creative Grids! I’d love to considered for a Sponsorship! lol) these are my unsolicited reviews. Anywho, this tool is wonderful because it has little geese in multiple sizes printed right on it….so I can just lay the ruler on the goose, line it up, trim and then move on to the next. I trim all of them on one side (well, technically I trim two sides here) and pile them and then flip them and the ruler and trim for the second time (sides three and four). Fast, efficient, easy. Love it. It trims them beautifully and also removes the dog ears. Remember: Accurate pressing and trimming is the ONLY way to get accurate piecing. You can not have one without the other two.
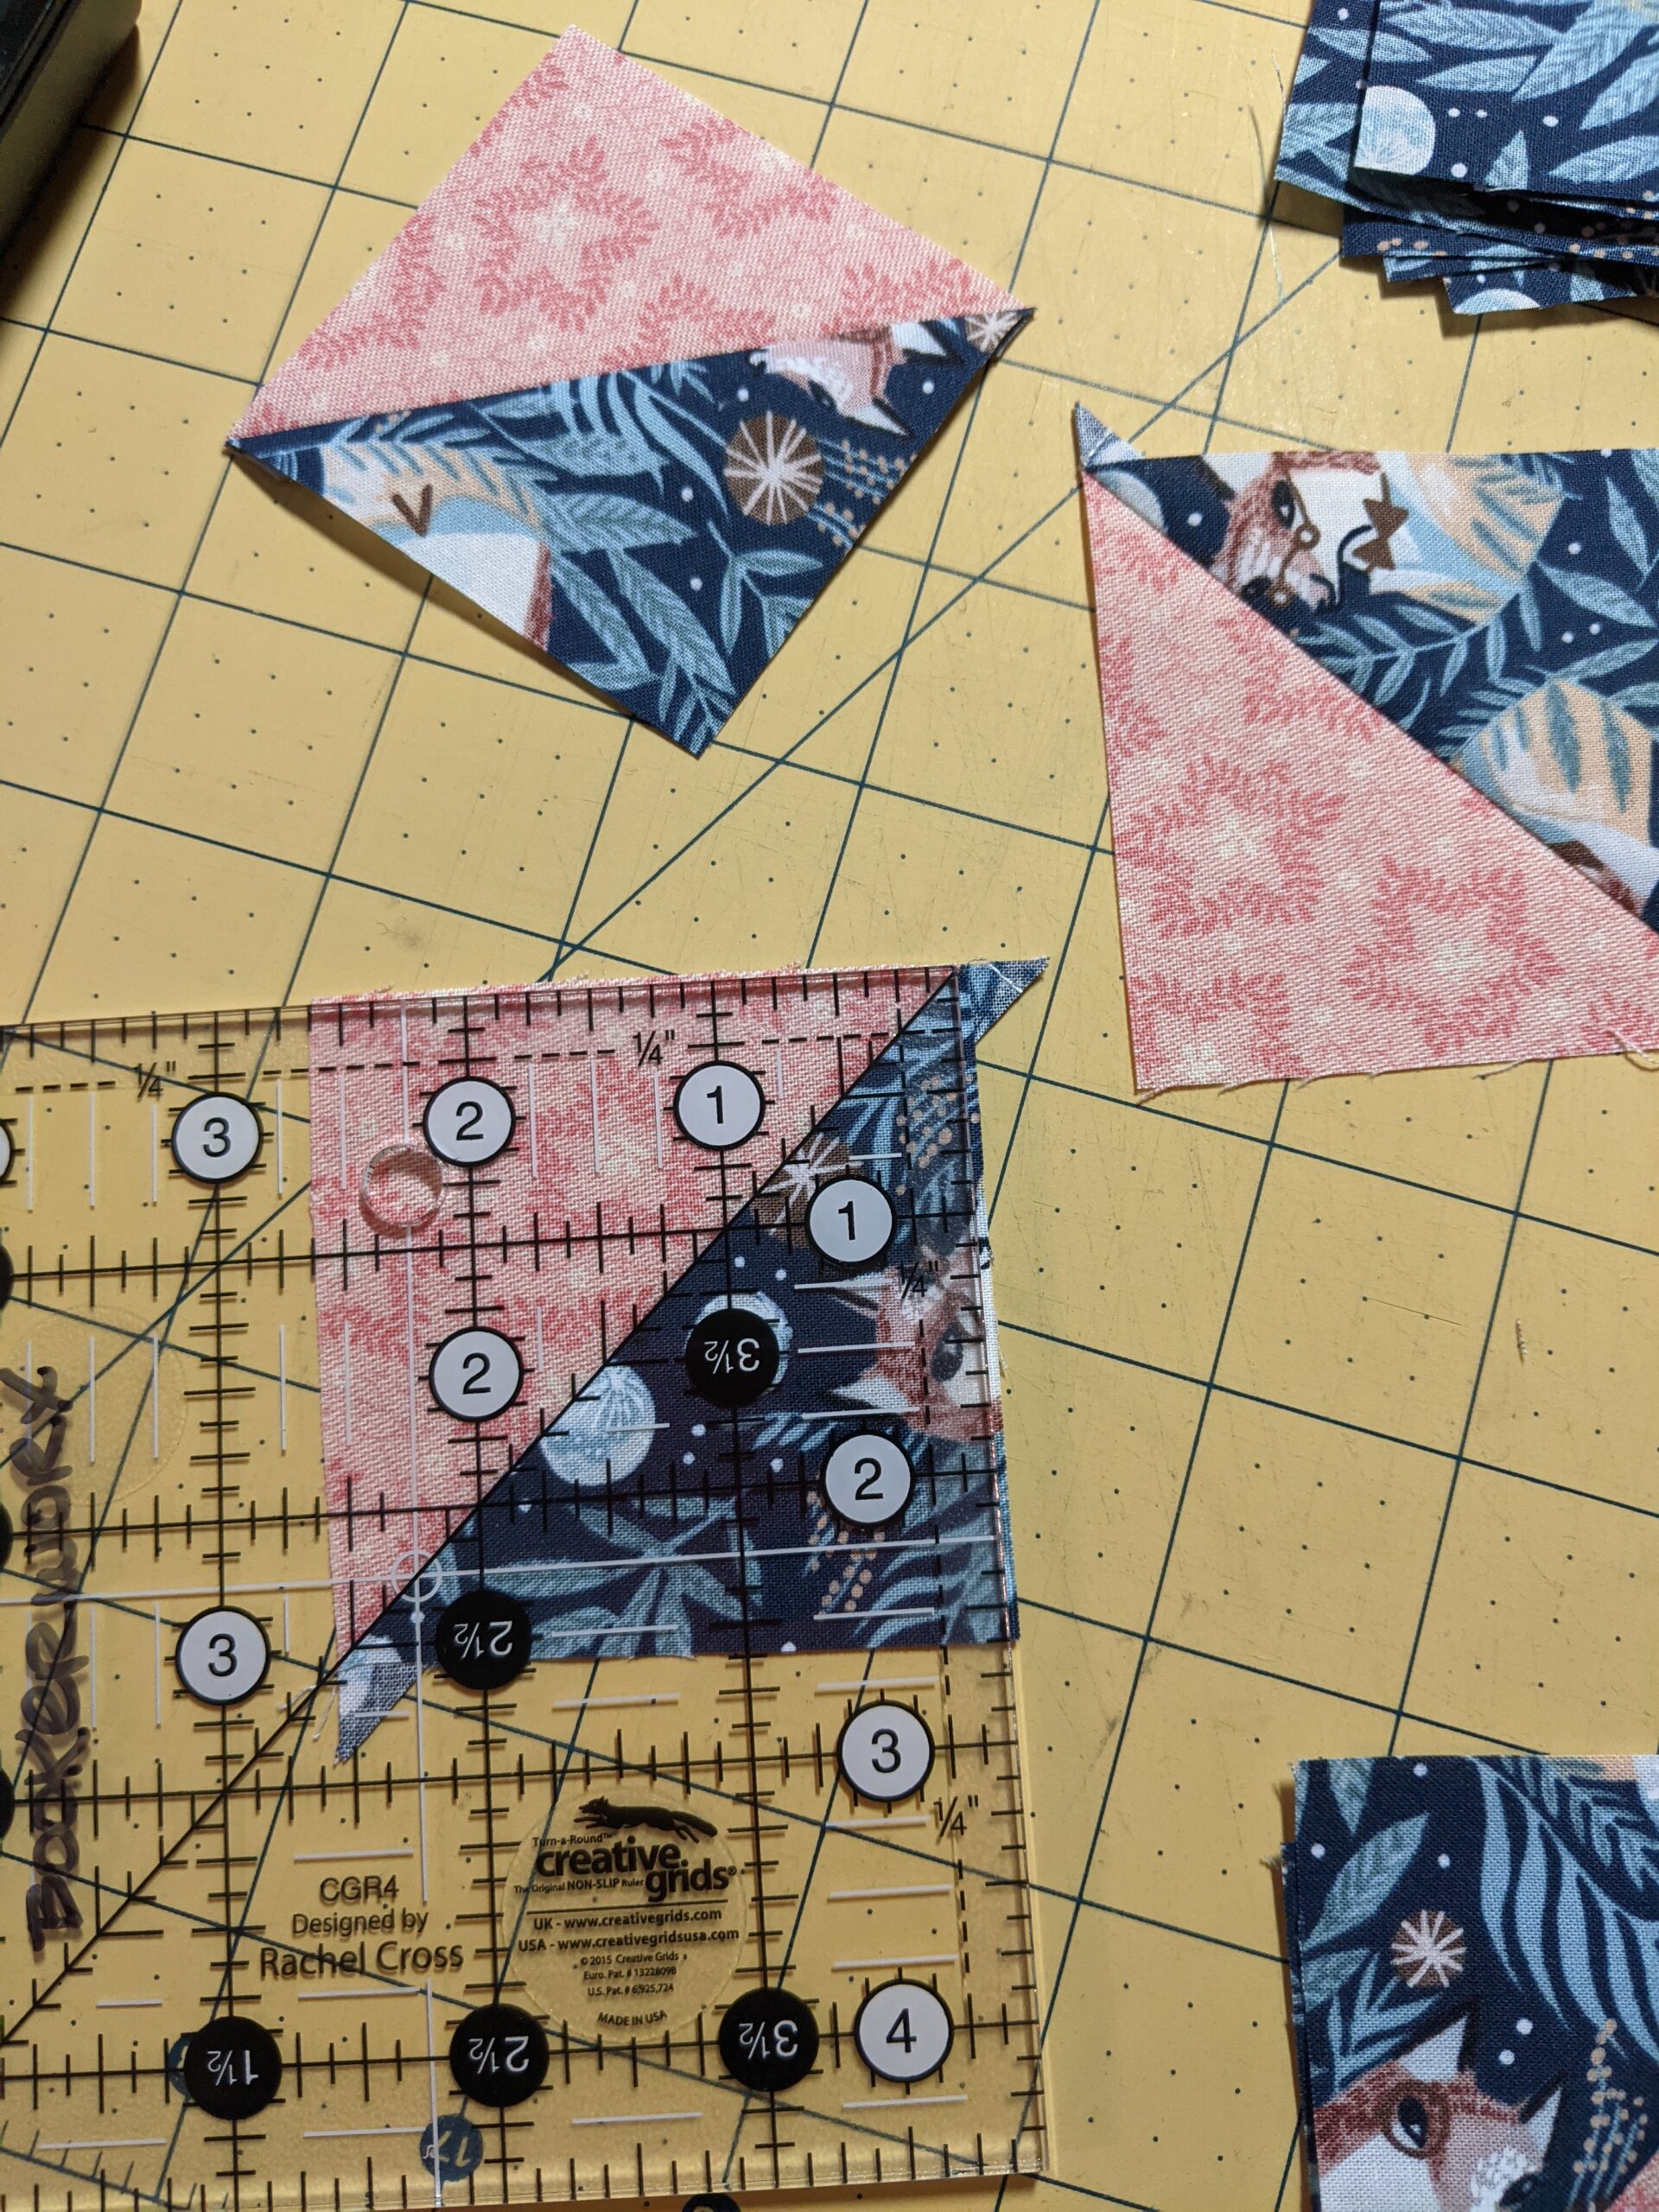
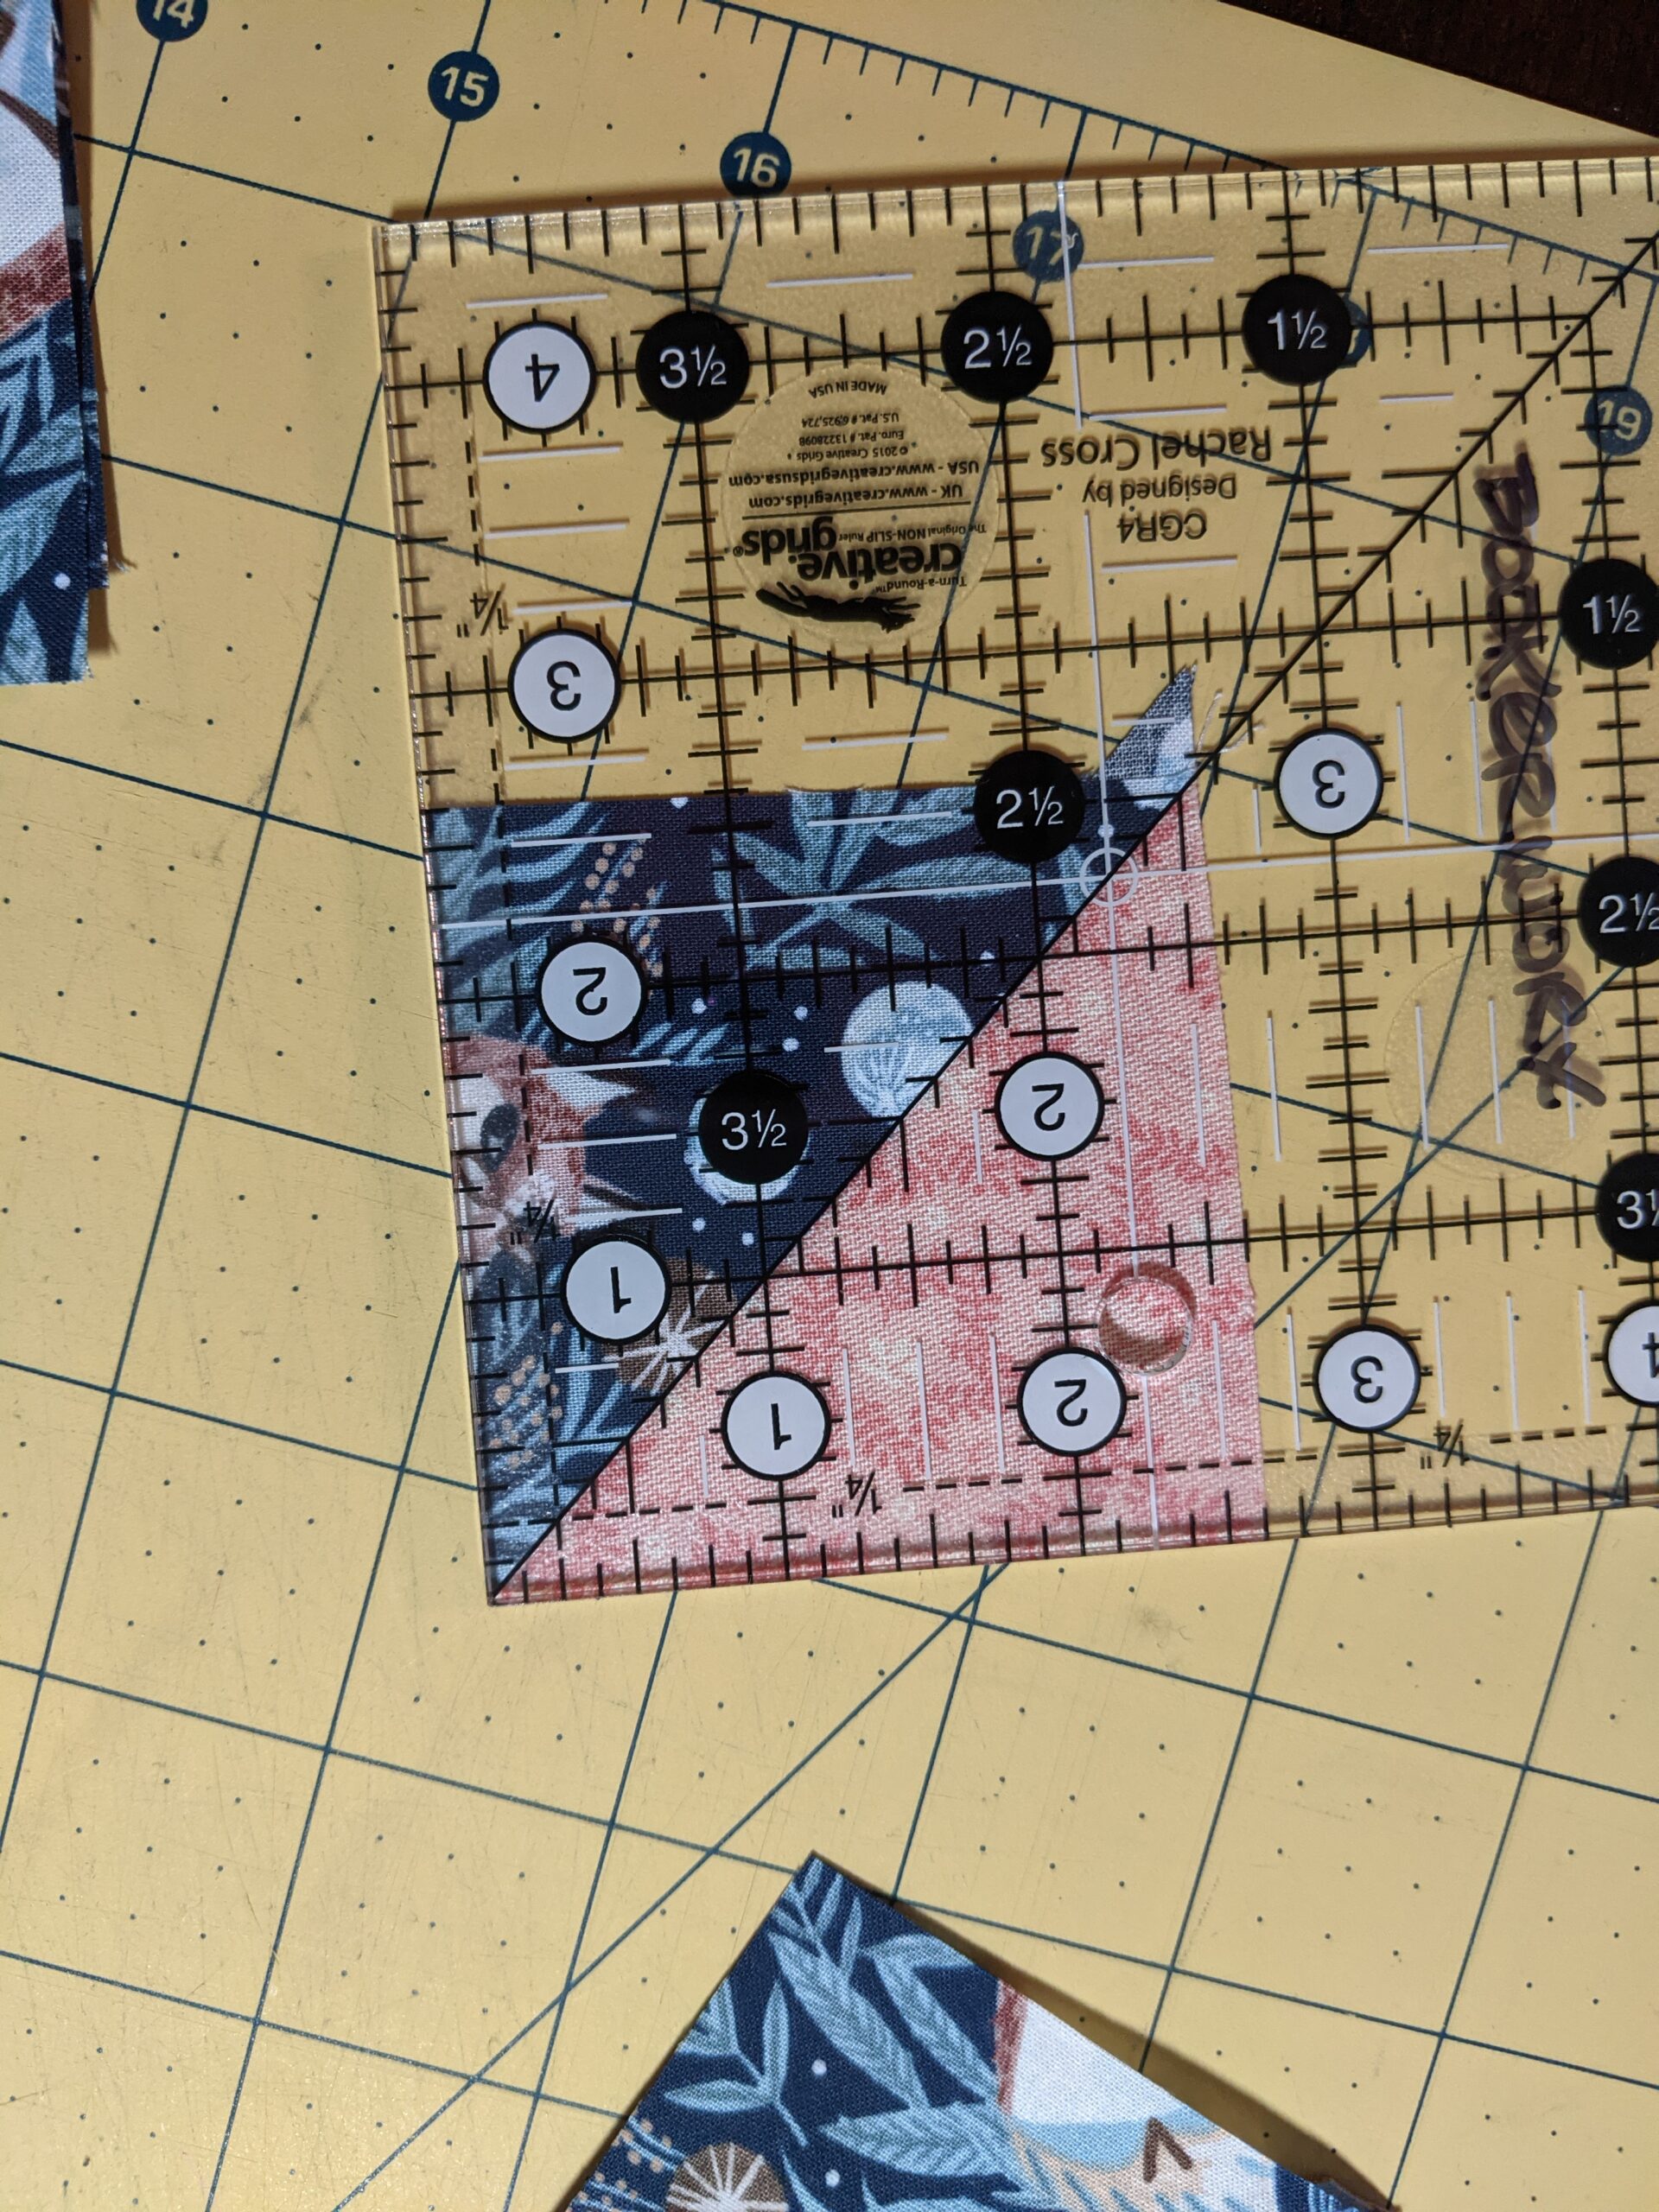
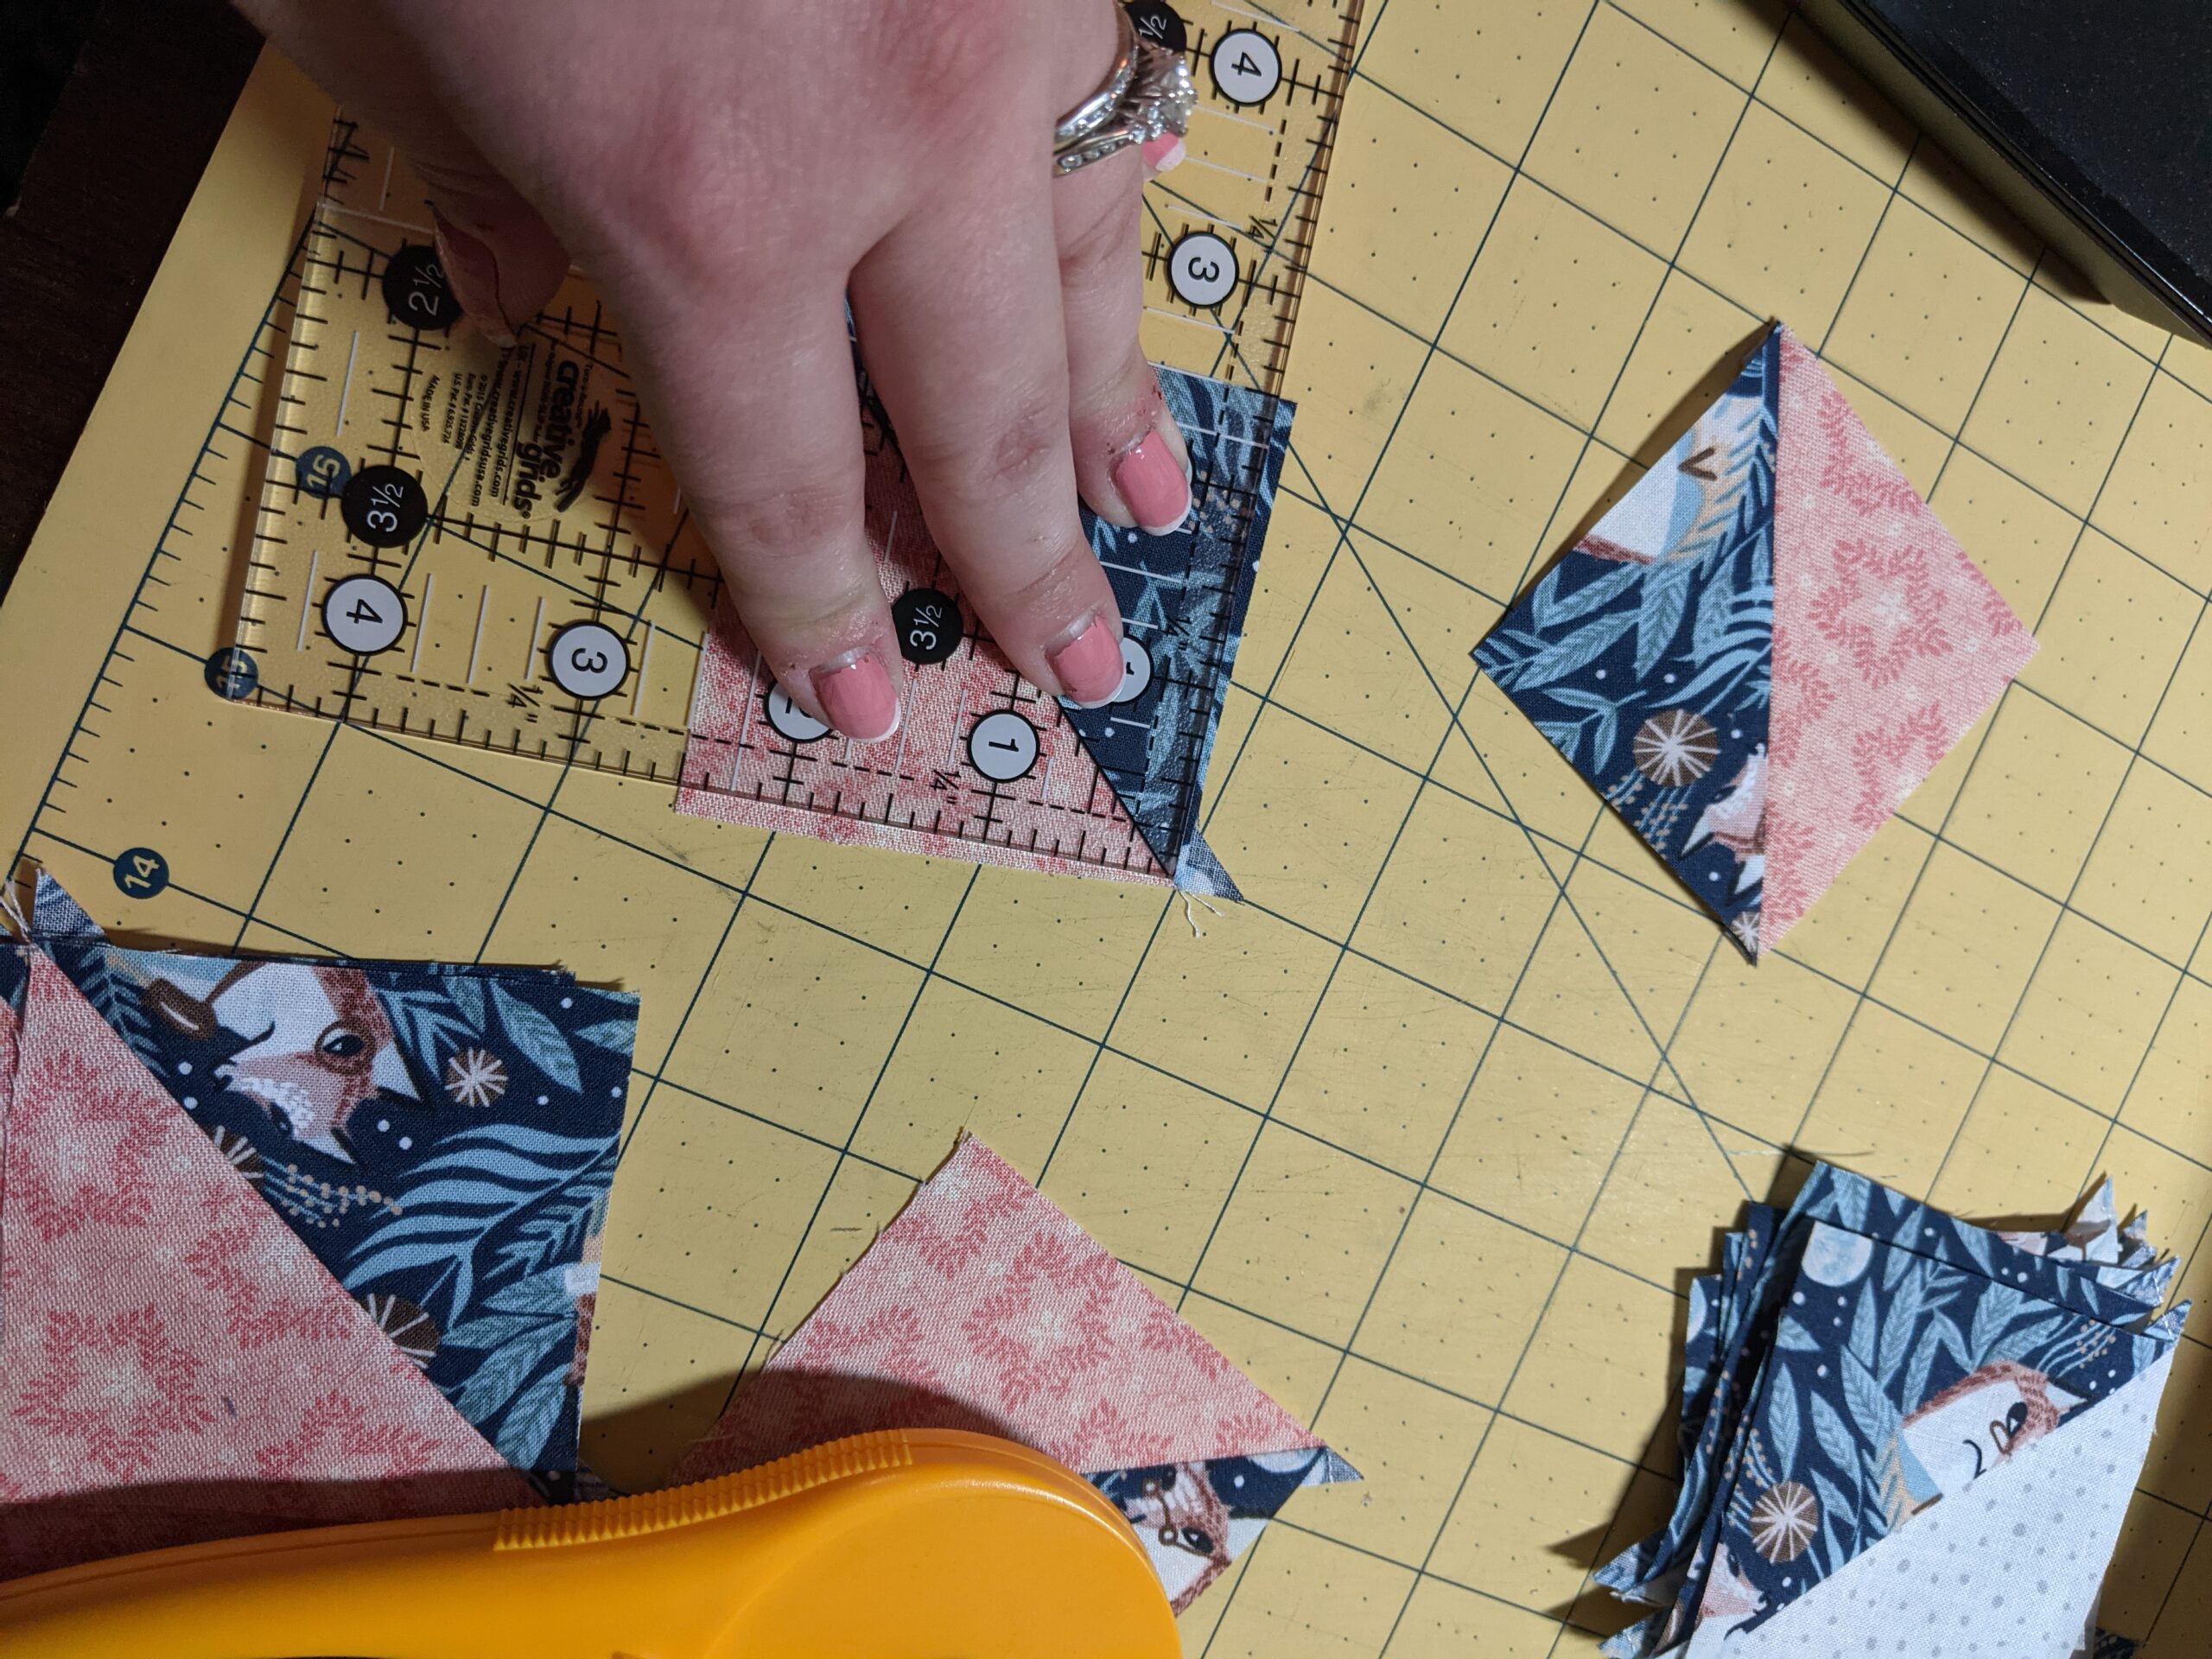
Trimming the HSTs, first trimTrimming HSTs, after the first trimTrimming the HSTs, second trim
Continuing my love for Creative Grids, I used the Creative Grids Quilt Ruler 4.5″ Square to trim my Half Square Triangles. I could have also used my regular 4.5″ x 12.5″ Creative Grids ruler, but my space is very limited right now, so being able to flip the small square one around is awesome. I think the number one reason I love these rules is the grippy texture on the back, but a very close second is the legibility. I can very clearly read my measurements on any color fabric, and they are so good to highlight common measurements….in this case, the 2.5″ square. This particular ruler has a very clear 45degree line and a very clear set of notches at 2.5″. To trim a HST, I place the 45degree line on the diagonal formed by the two fabrics and then find the 2.5″ notch. I ensure that I center the untrimmed block so that it goes beyond the 2.5″ notch and trim the top two sides. I put it in a pile and trimmed the rest, then flipped the pile, and this time line up the diagonal and the 2.5″ notch on the freshly cut edge….line it up, trim and then done.
Trimmed HSTs and all the trim scrapsTrimmed Geese and HSTs, scrapsBlock 1, all pieces ready to lay out
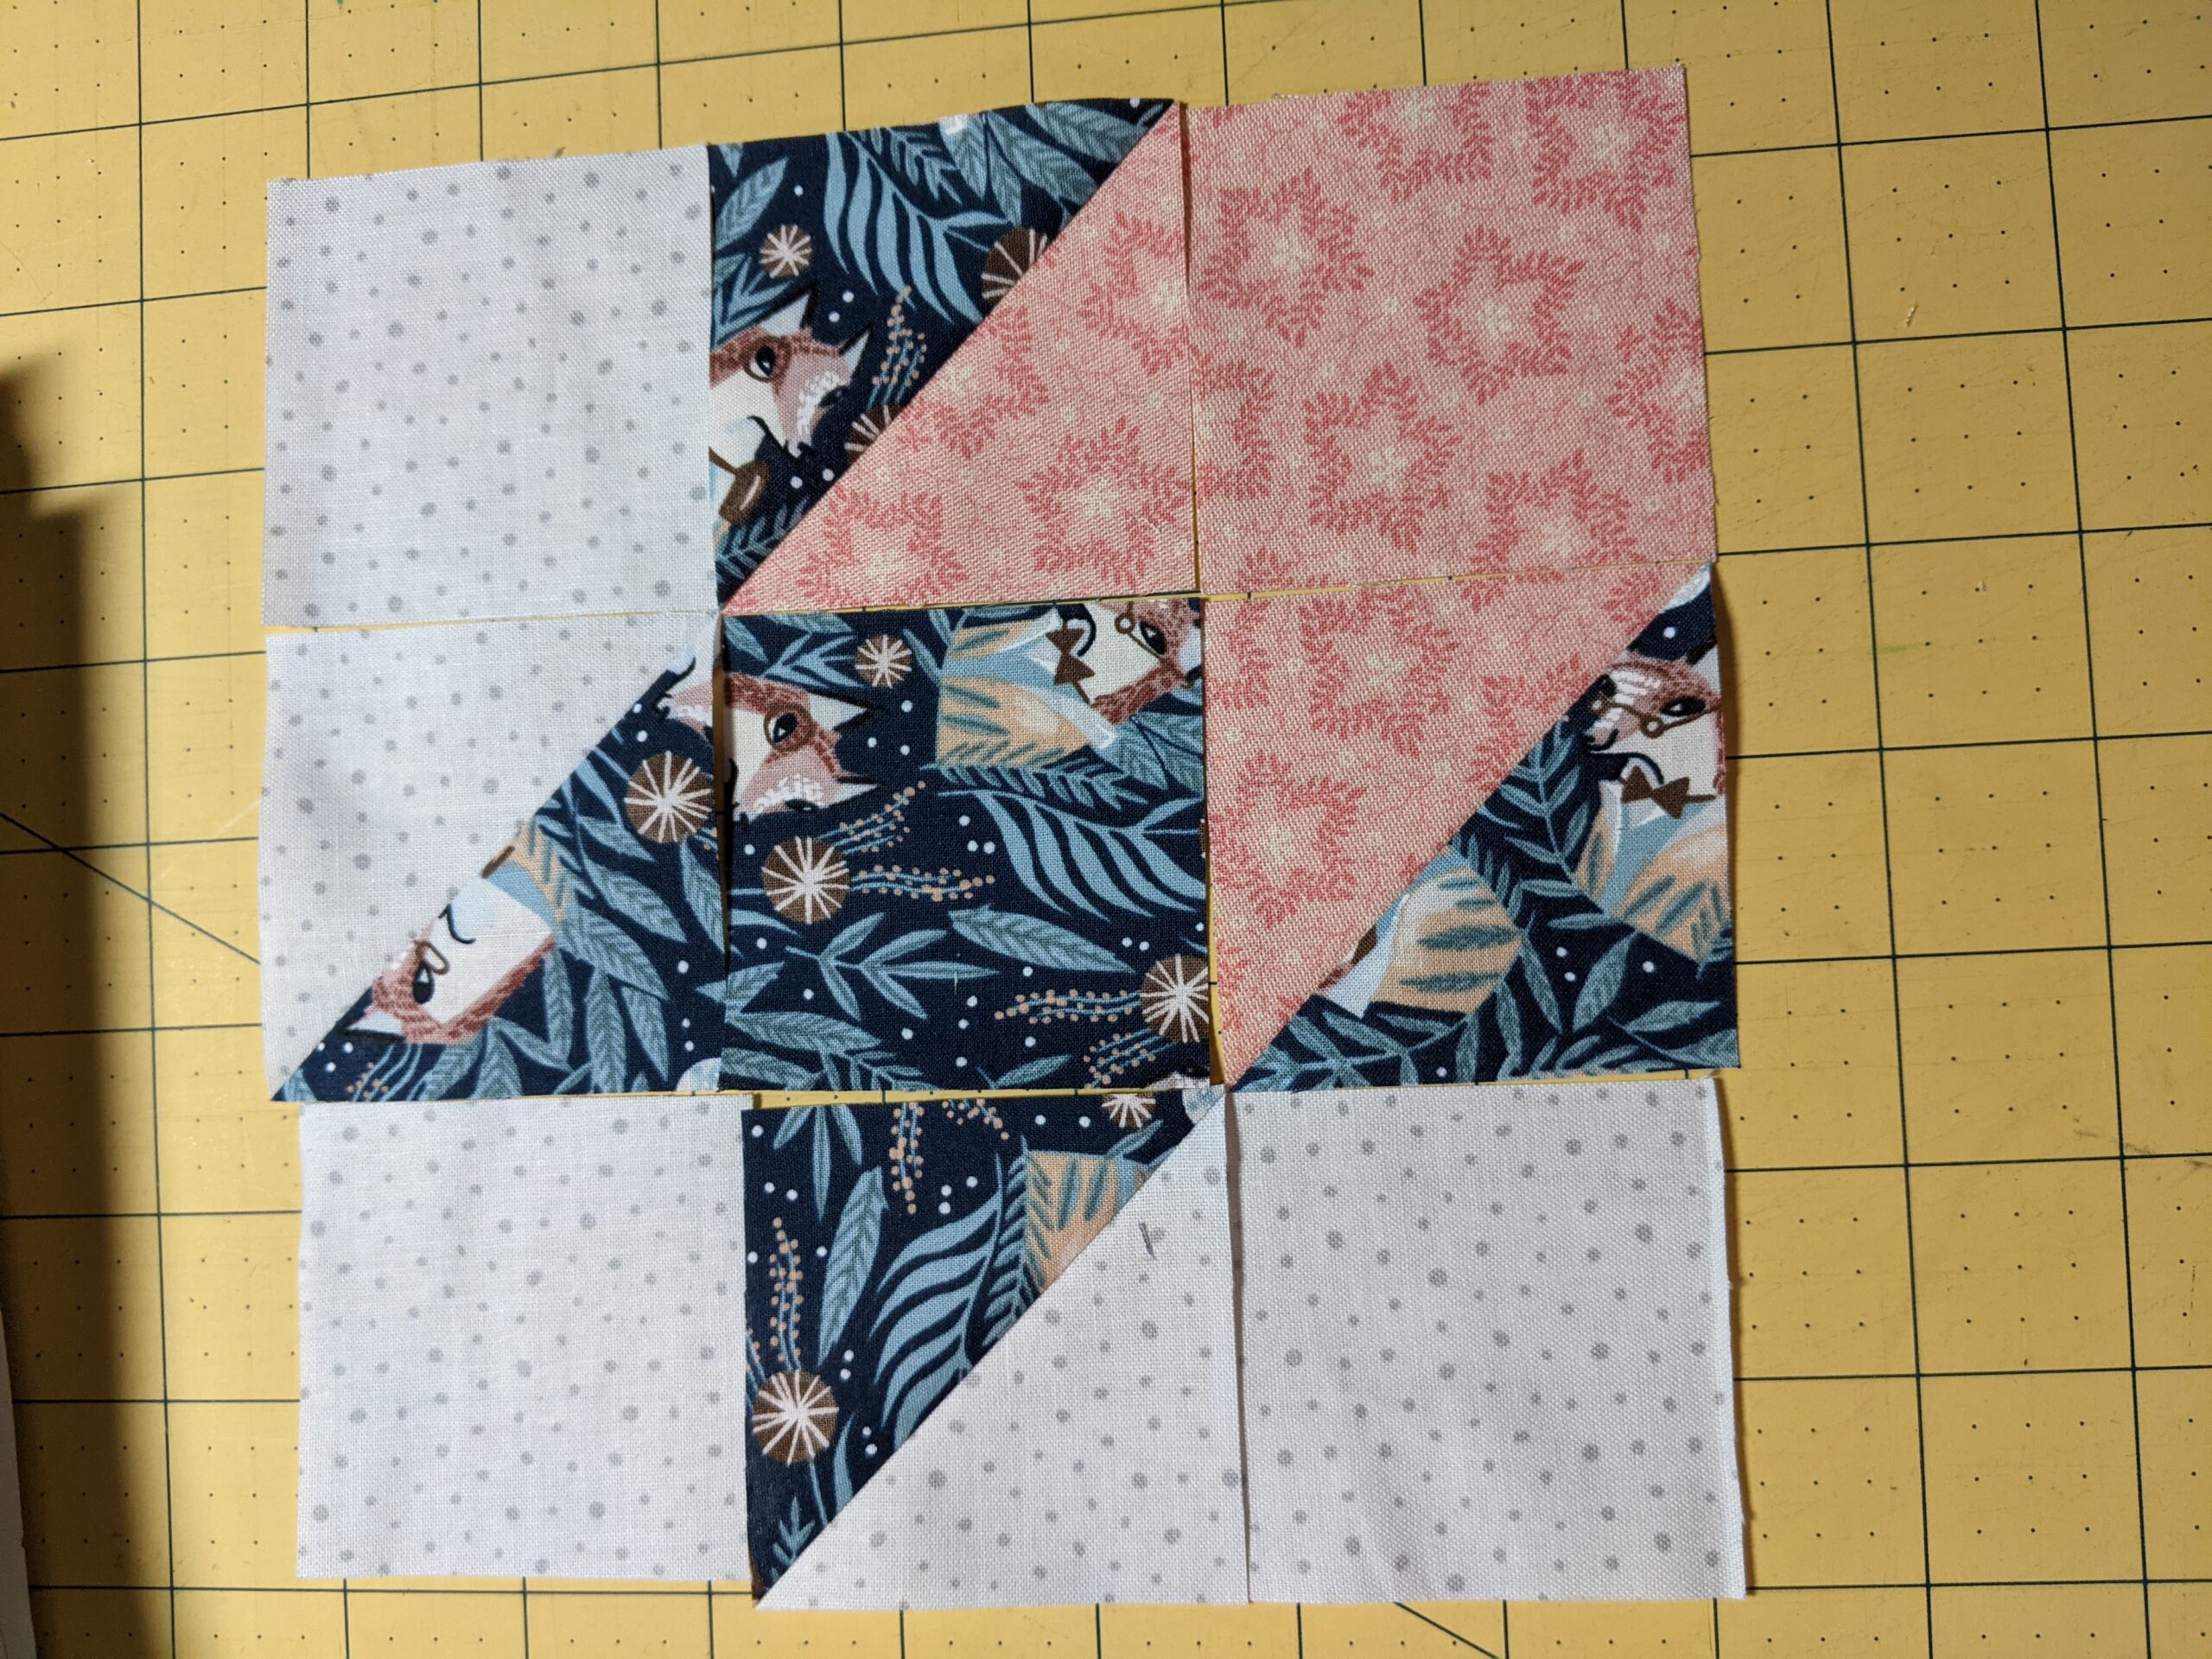
Okay, now we’ve trimmed everything, let’s lay it out and assemble the block. As you can see below, orientation is very important. I assembled this block after laying the entire block out. Moving forward, I’ll just assemble four “corner units” and four “geese units” and then assemble the block. That will mean a lot less worry about messing up the orientations. This was done with chain piecing. I will go into detail about that and how to pin properly to not lose points another day. Please zoom in on the assembled block. There are no missing points. I’m not trying to toot my own horn, but a simple pinning technique is the way to master this. I promise, I’ll let you know how to do it!
Corner UnitSix of nine unitsAssembled Block 1
For those following along with the Quilt Math…
Flying Geese: There are 8 flying geese in each block (two different color sets of four) times 25 blocks for a total of 200 geese. (I have completed 8 out of 200)
Half Square Triangles: There are 16 total HSTs in each block (two different color sets of eight) times 25 blocks for a total of 400 HSTs. (I have completed 16 out of 400)
Hopefully, those numbers will adjust a bunch by the end of the day…Stay Tuned!
Hour Count:
Previous Hours: 20
Assembly of Test Block 1: 3 hours
Total Hours so far: 23
Next Step: Assembly Line until the cows come home…err…until the geese come home.
I’m adding a new Count Down up here. lol Quilt Countdown: 29 Days I want to take a moment and just say, that if you are starting out, please don’t get overwhelmed. I’m showing the whole process with this particular Quilt as its typical of …
I realize as I type this, that Part 1 of this Instruction was started in November (ooooh boy) and this Quilt’s deadline is May 13th. I’d love to say that I’m just behind on the blogging part, but no….this quilt hasn’t been worked on since …
I am often asked about the whole entire process of making a quilt. In times B.C. (Before COVID), in my Sampler class, I taught the entire process and we even finished one whole quilt, but not every one has the time to commit to such a long class, and until this virus is more under control, I won’t be teaching that class any time in the next few months.
I thought maybe I will document the Quilt I am just starting work on. This particular Quilt is being made for a dear family friend of mine who is going to be married in May of 2022. As of right now, that’s my deadline, but I fear there will be a shower, so the deadline will be moved up. So, I’m going to set out with the hopes of finishing this quilt by February/March. (sure….okay…..) She is unaware of this gift, so I won’t be mentioning names, and I don’t think she follows me (hopefully, she doesn’t start! But I think she’d appreciate her Quilt being used in the name of Science, so to speak….so here goes.)
Generally, when setting out to make a quilt you need a jumping off point. This varies from quilt to quilt, project to project and person to person. This is not a hard and fast Step 1. (Hence, why I didn’t name this blog Chapter 1.) In this particular case, I started with a theme and went from there. The recipient of this Quilt loves animals. She has lots of pets, but is a true lover and spokeswoman for domestic rats. She’s rescued more than I can count. So, obviously, I thought I’d start with some kind of classy, rat fabric and go from there. Sounds easy, right? I also had started researching some patterns and was looking for inspiration on that front. I often design my own patterns and wasn’t against that idea, but a pattern literally jumped off of a page of a quilting magazine and I just knew it was the right one for this quilt. It was even in the magazine as a pattern….it was just an advertisement. I tracked it down and purchased the pattern that night. This Quilt was going to be Firelight by Sharon Holland.
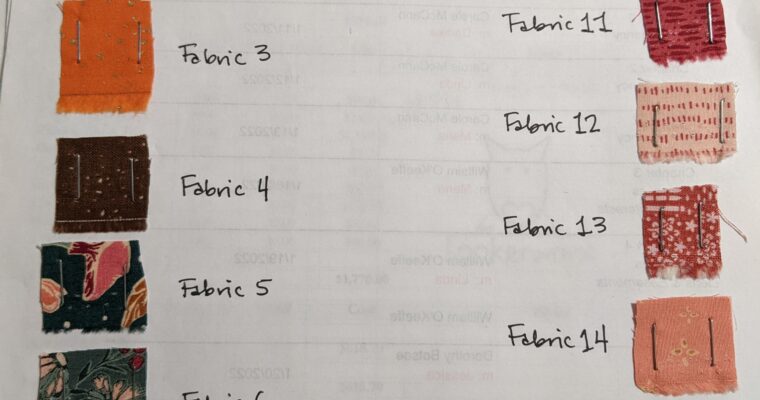
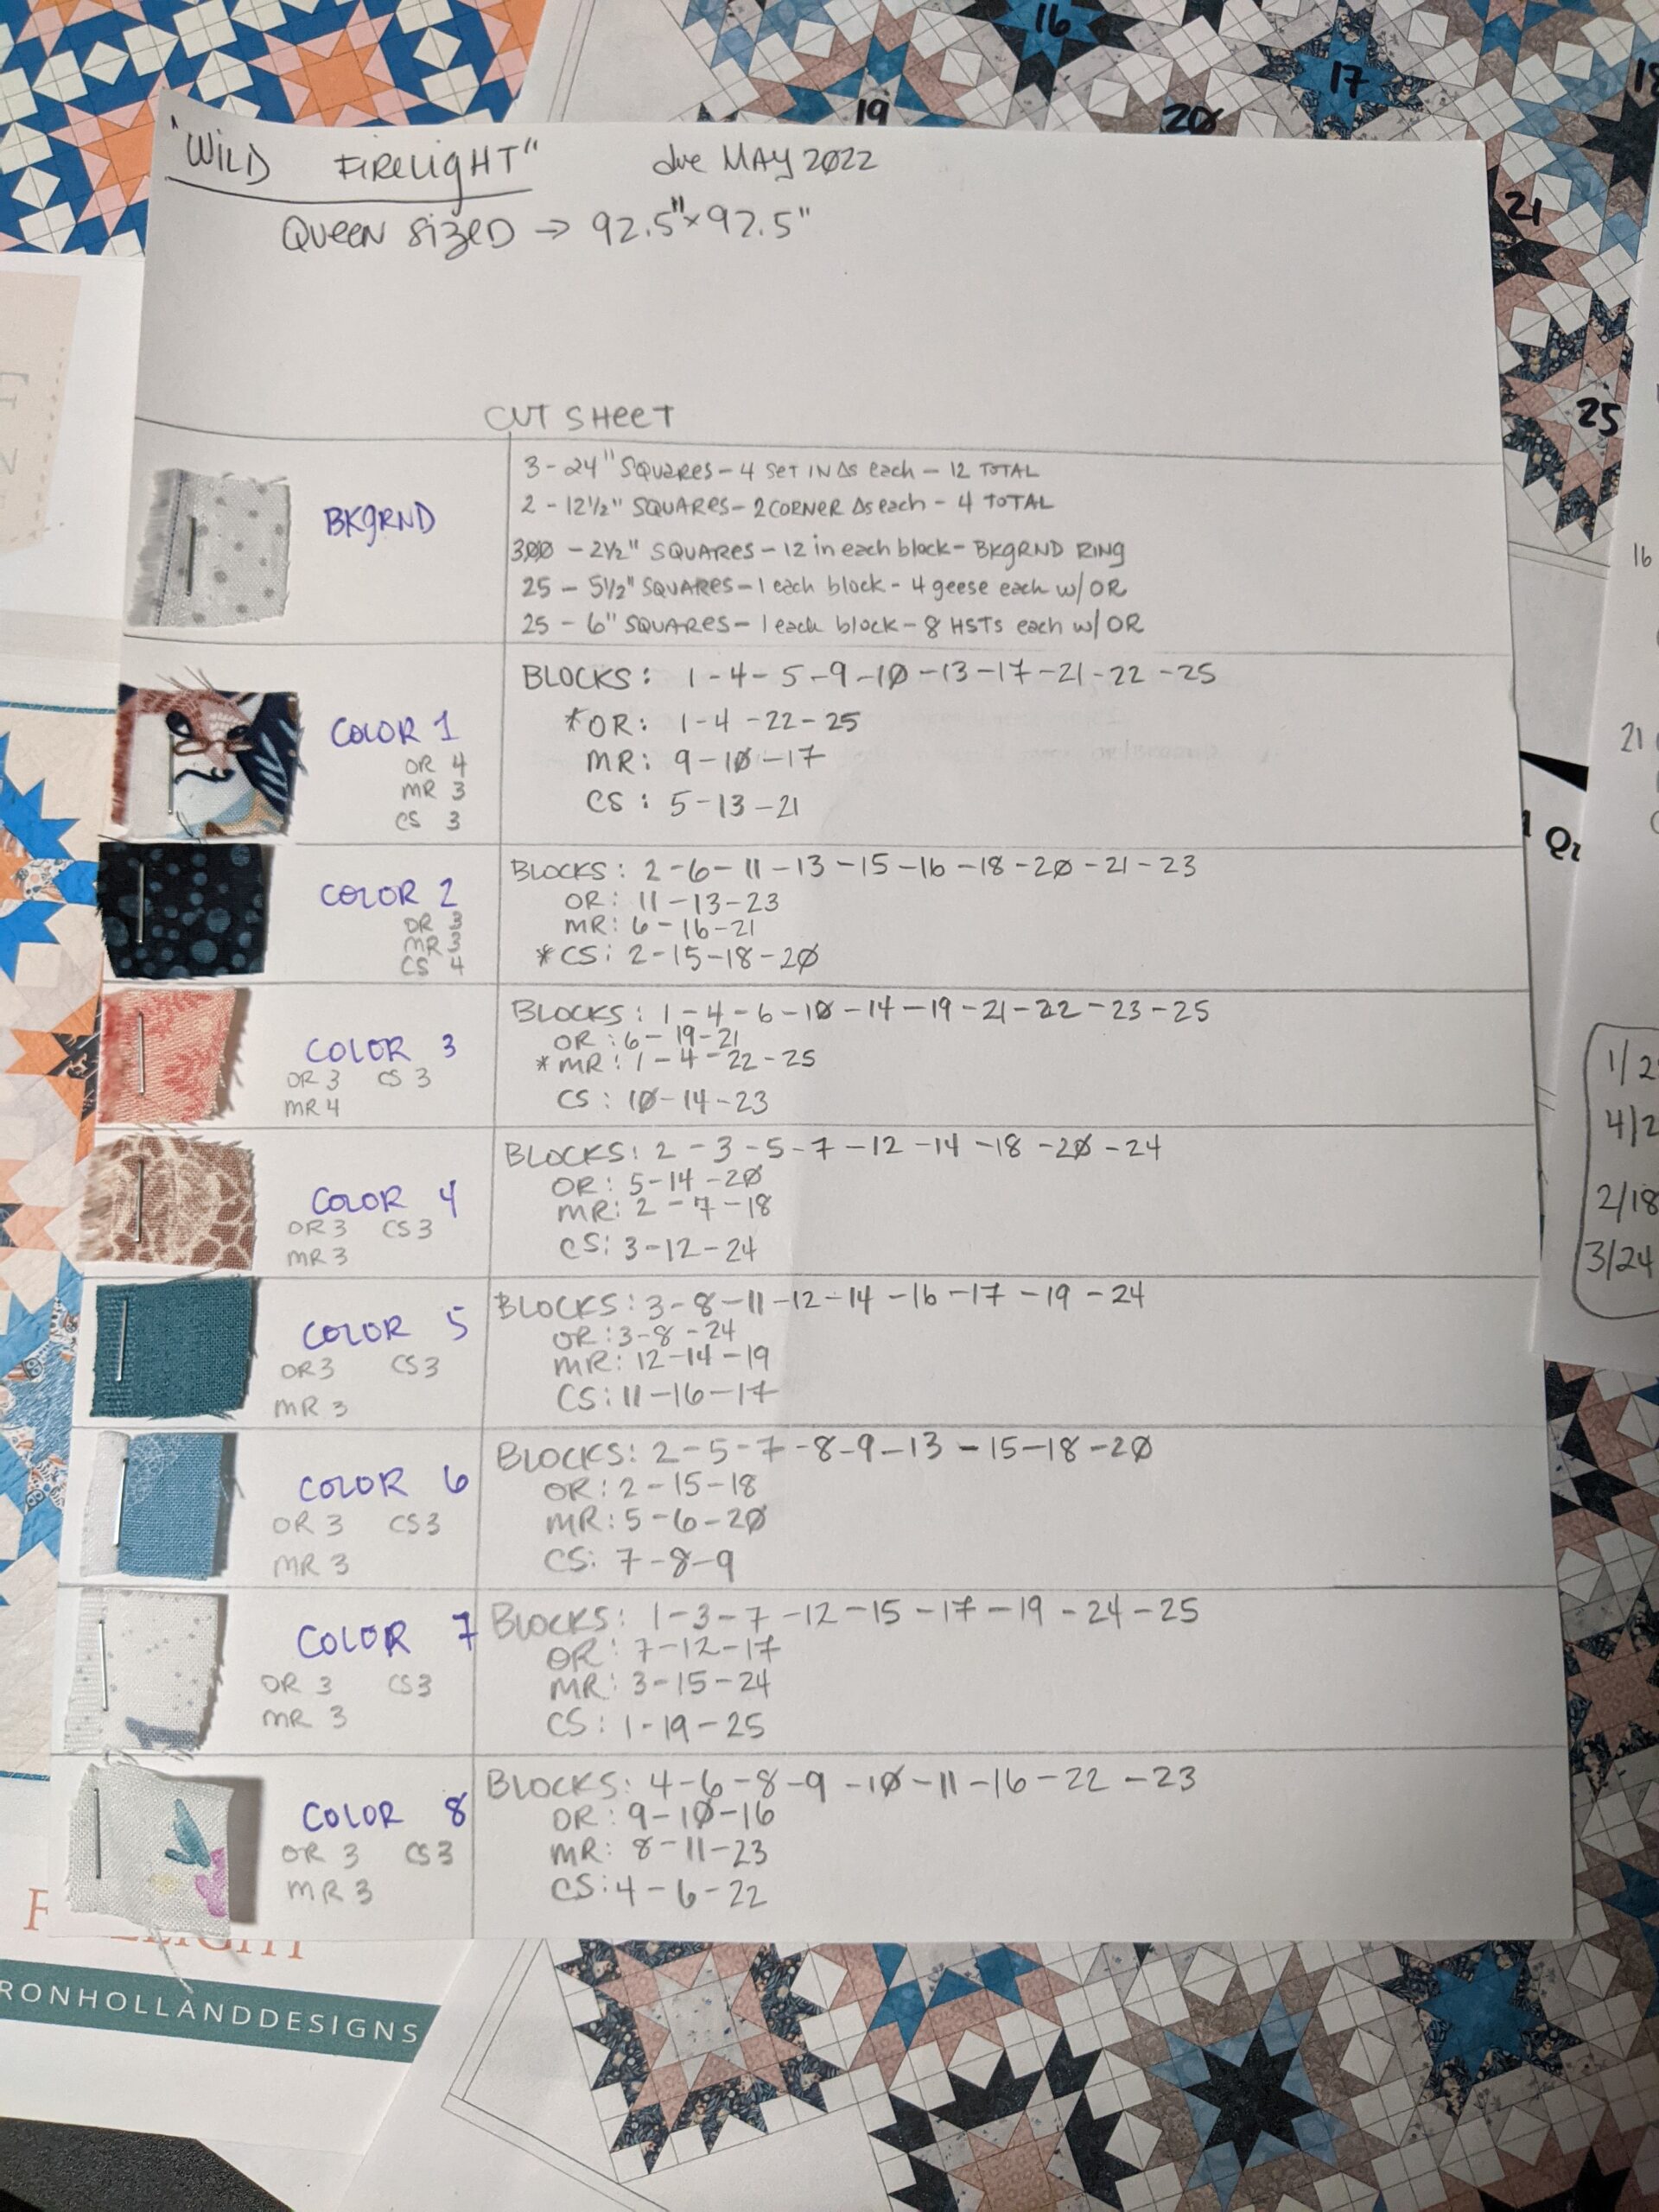
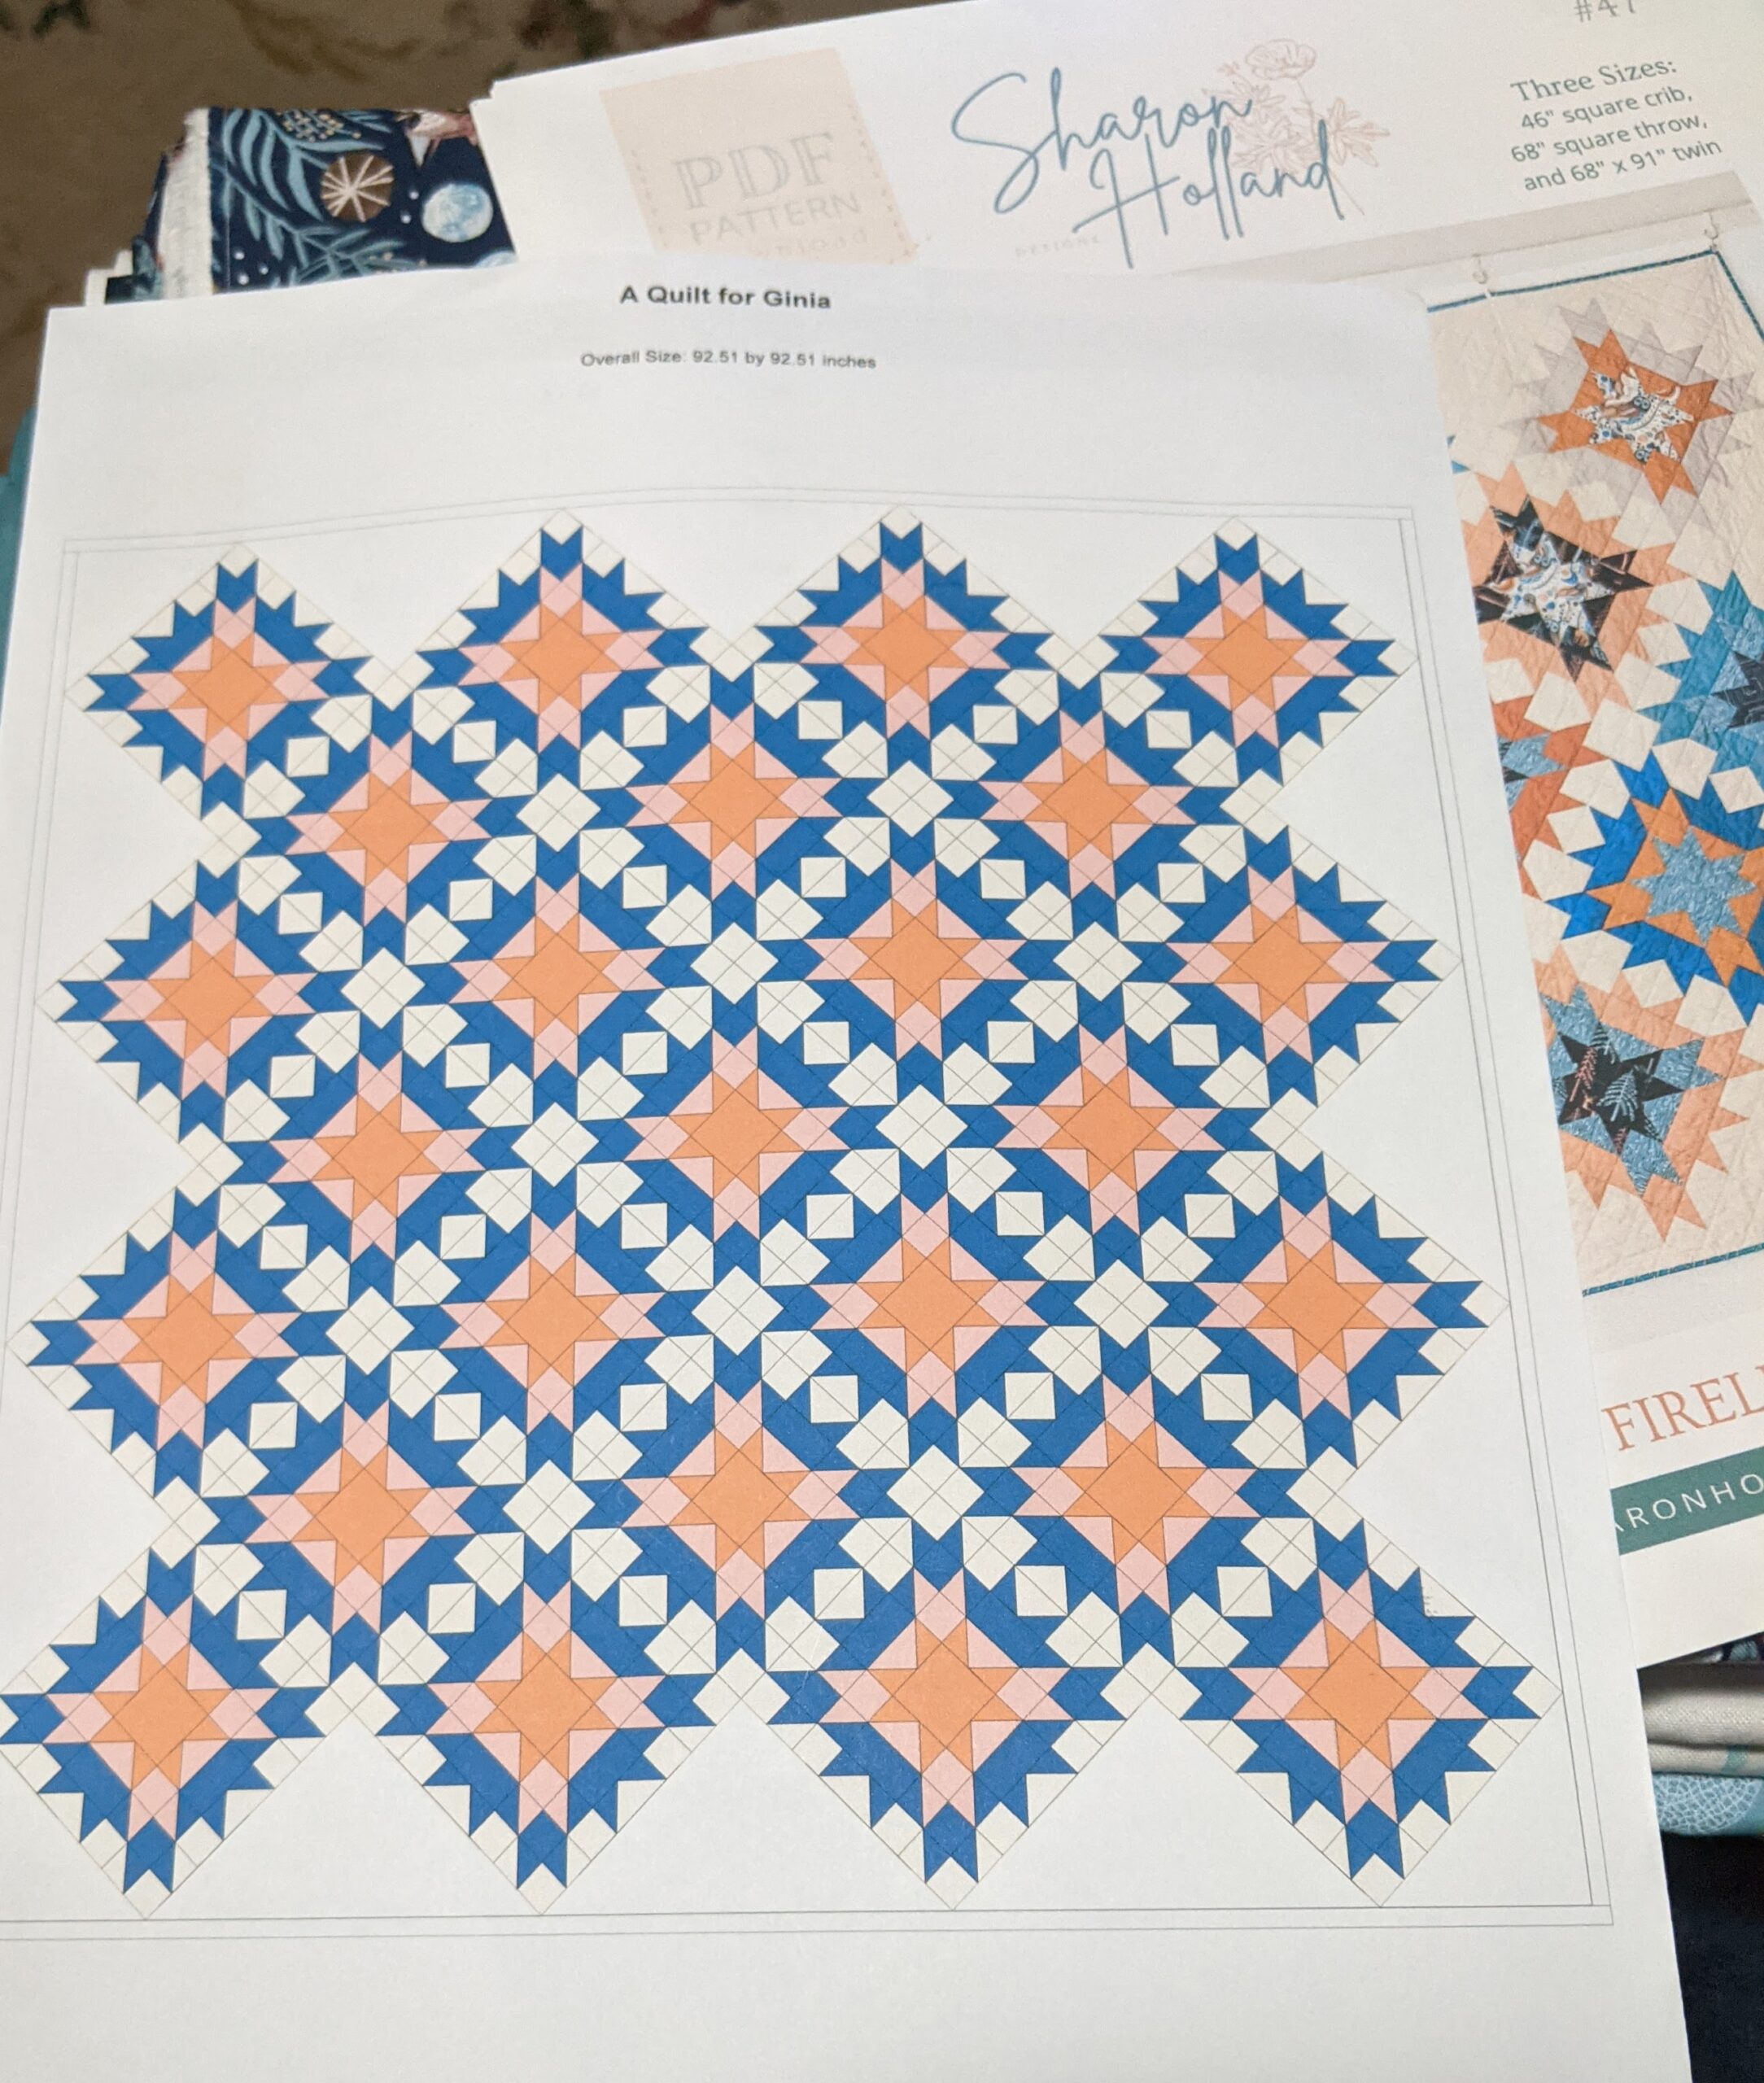
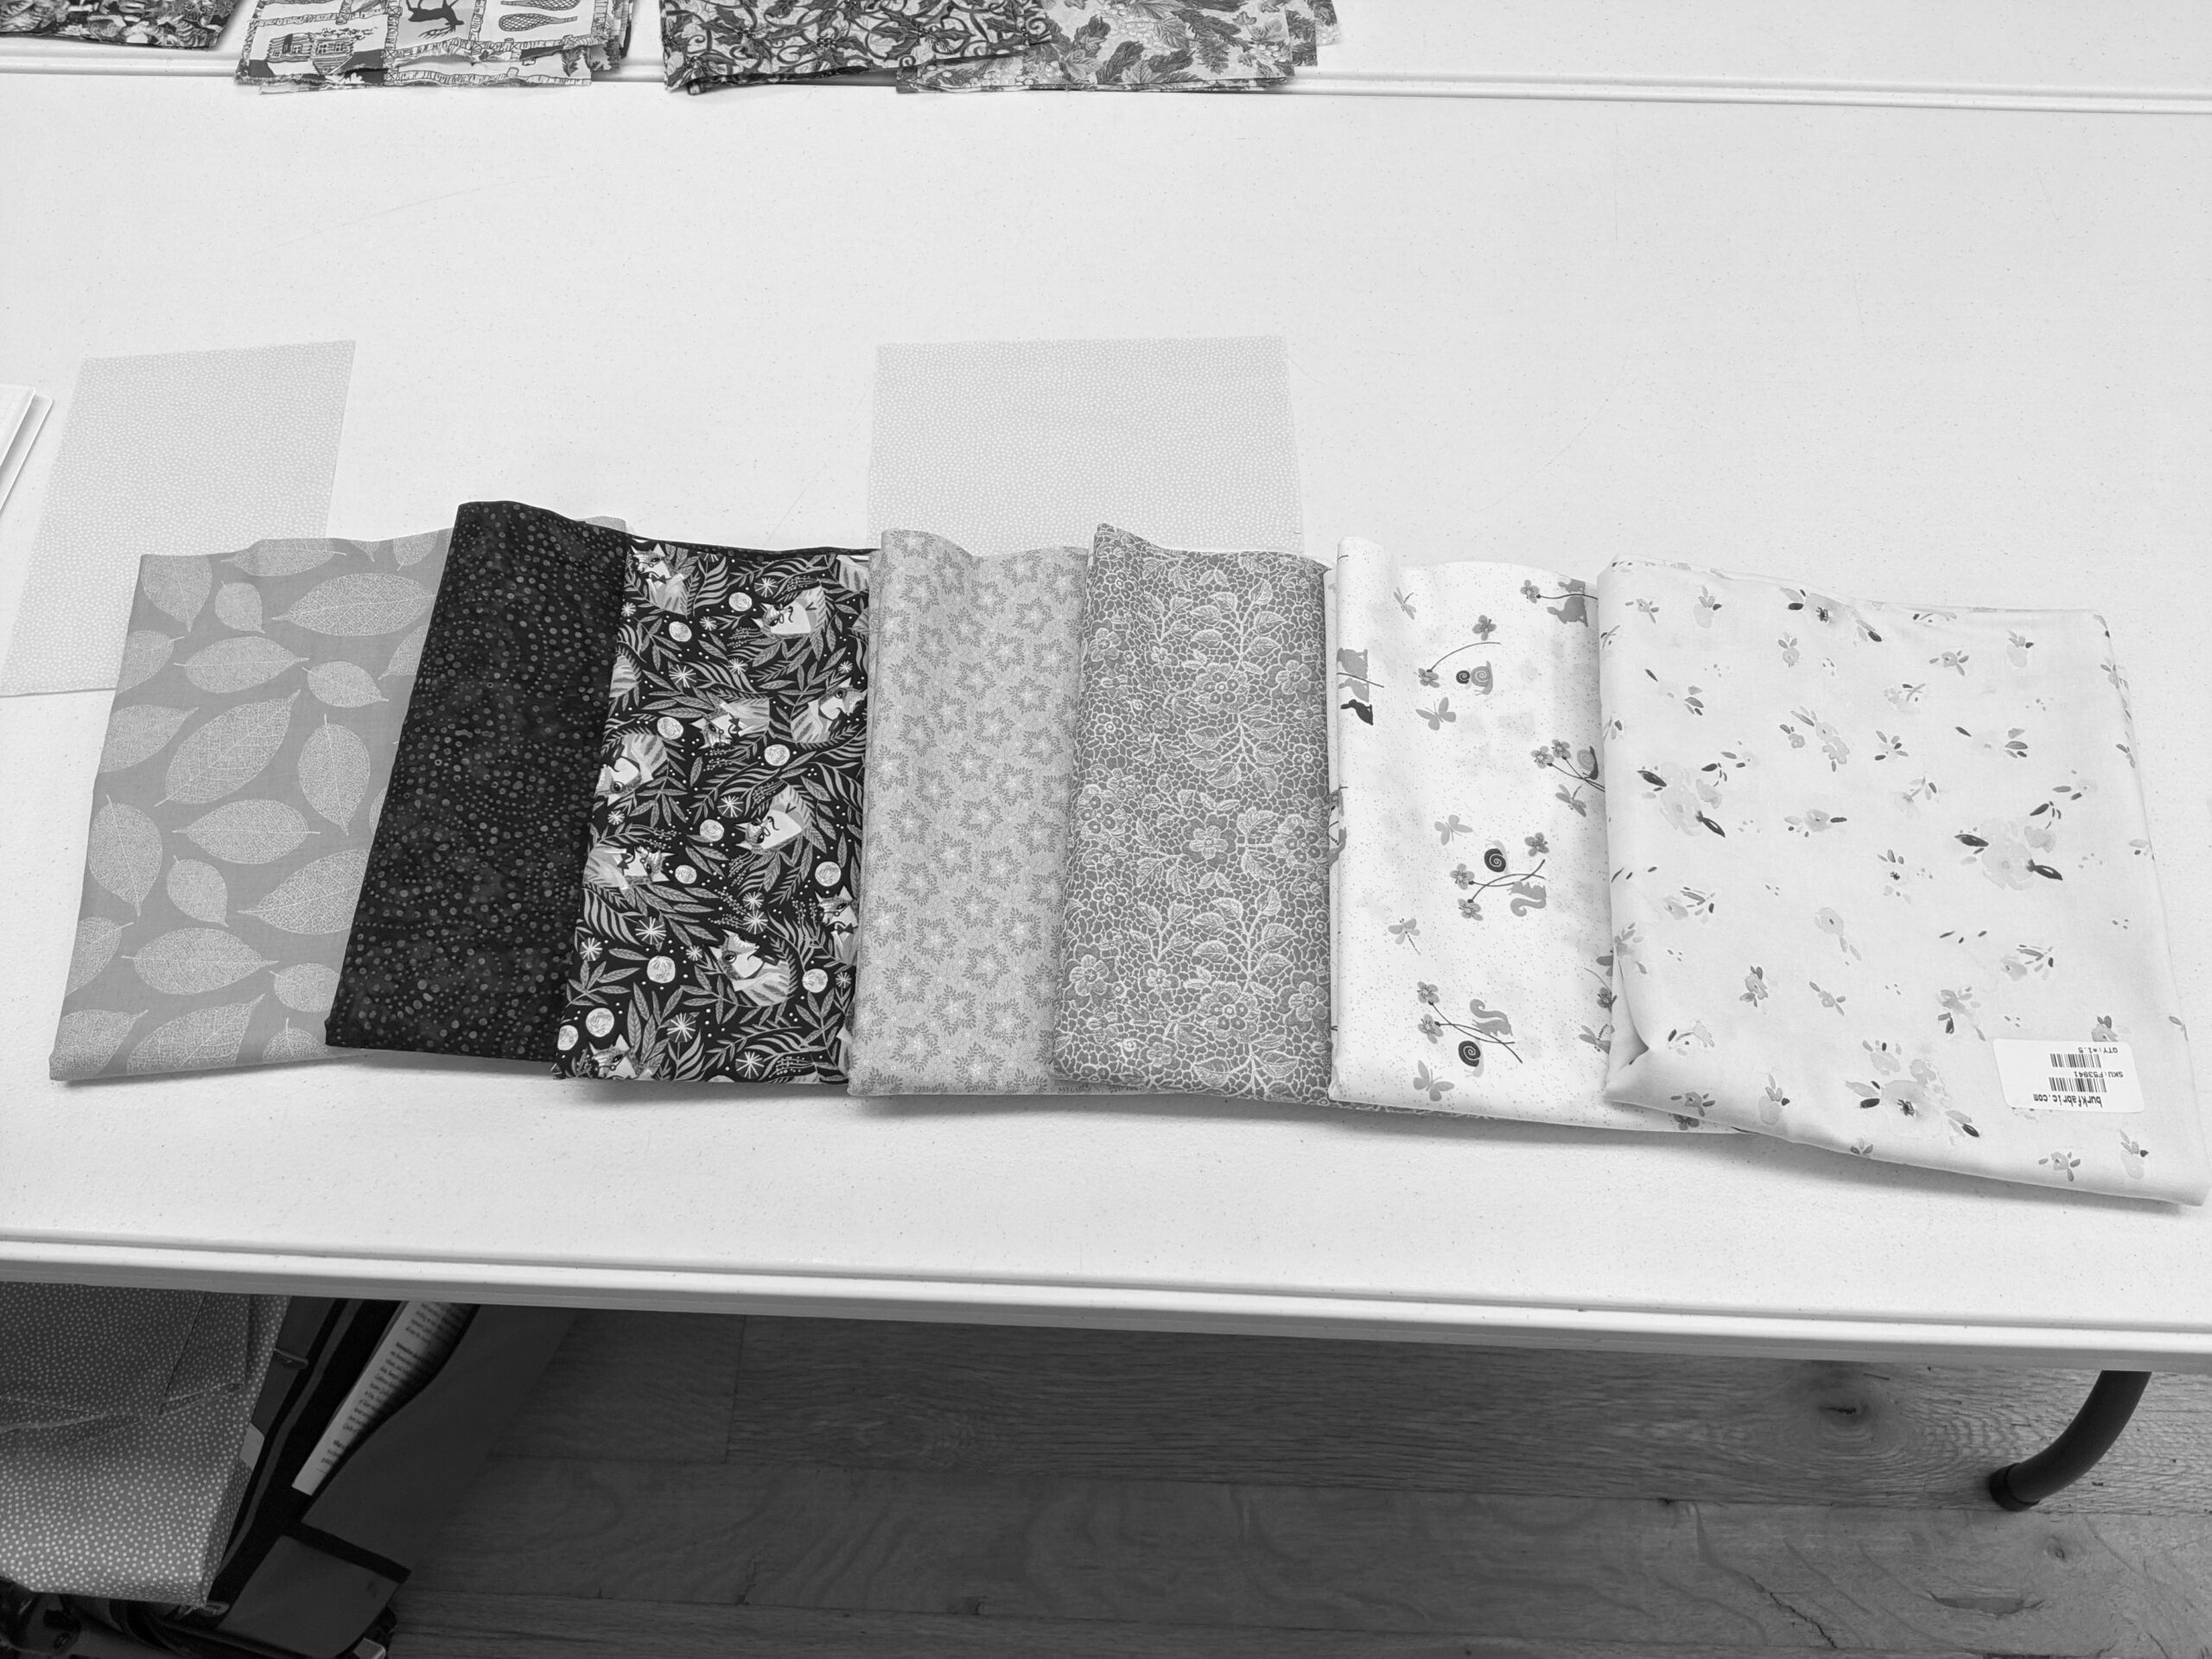
This pattern is beautiful, and boasts several different volumes of color. It has a very white as the background, and varying fabrics in four volumes throughout: light whites, medium oranges, medium blues, and dark blues. The pattern comes in several sizes (crib, throw and twin) but none of those are good for a Wedding Quilt. As a rule, I make Queen sized quilts for Weddings. I find that it fits most people’s beds and even if they have a King sized bed, a queen sized quilt works as a bedspread….I have had no complaints yet. I quickly threw the pattern into my editing software just to grab some new yardage measurements. I also counted the amount of final blocks in the Queen sized pattern I modified (25 blocks total) and realized that the throw size quilt has 13 blocks. Perfect!! I doubled the yardage for that size and rounded up. You can see my quick software modification above. I’m also going to show you the color volumes I ended up with….this is a GREAT trick. Take a photo of your fabric collection and remove all of the saturation. This is very easy to do on your phone. This will give you a very easy way to see your volume selections.
No Color Saturation to show Volume
Back to the rat fabric: I spent hours and hours searching at my go-to fabric stores online and could find nothing that was right. I was at a Quilt Retreat last month and had the opportunity to go into a rather large fabric store in hopes of finding what I was looking for….still no rat fabrics. I was hoping for something sort of classic looking that had rats hidden in it…..but I couldn’t even find mice! Okay…..dead end. What on earth do we do?
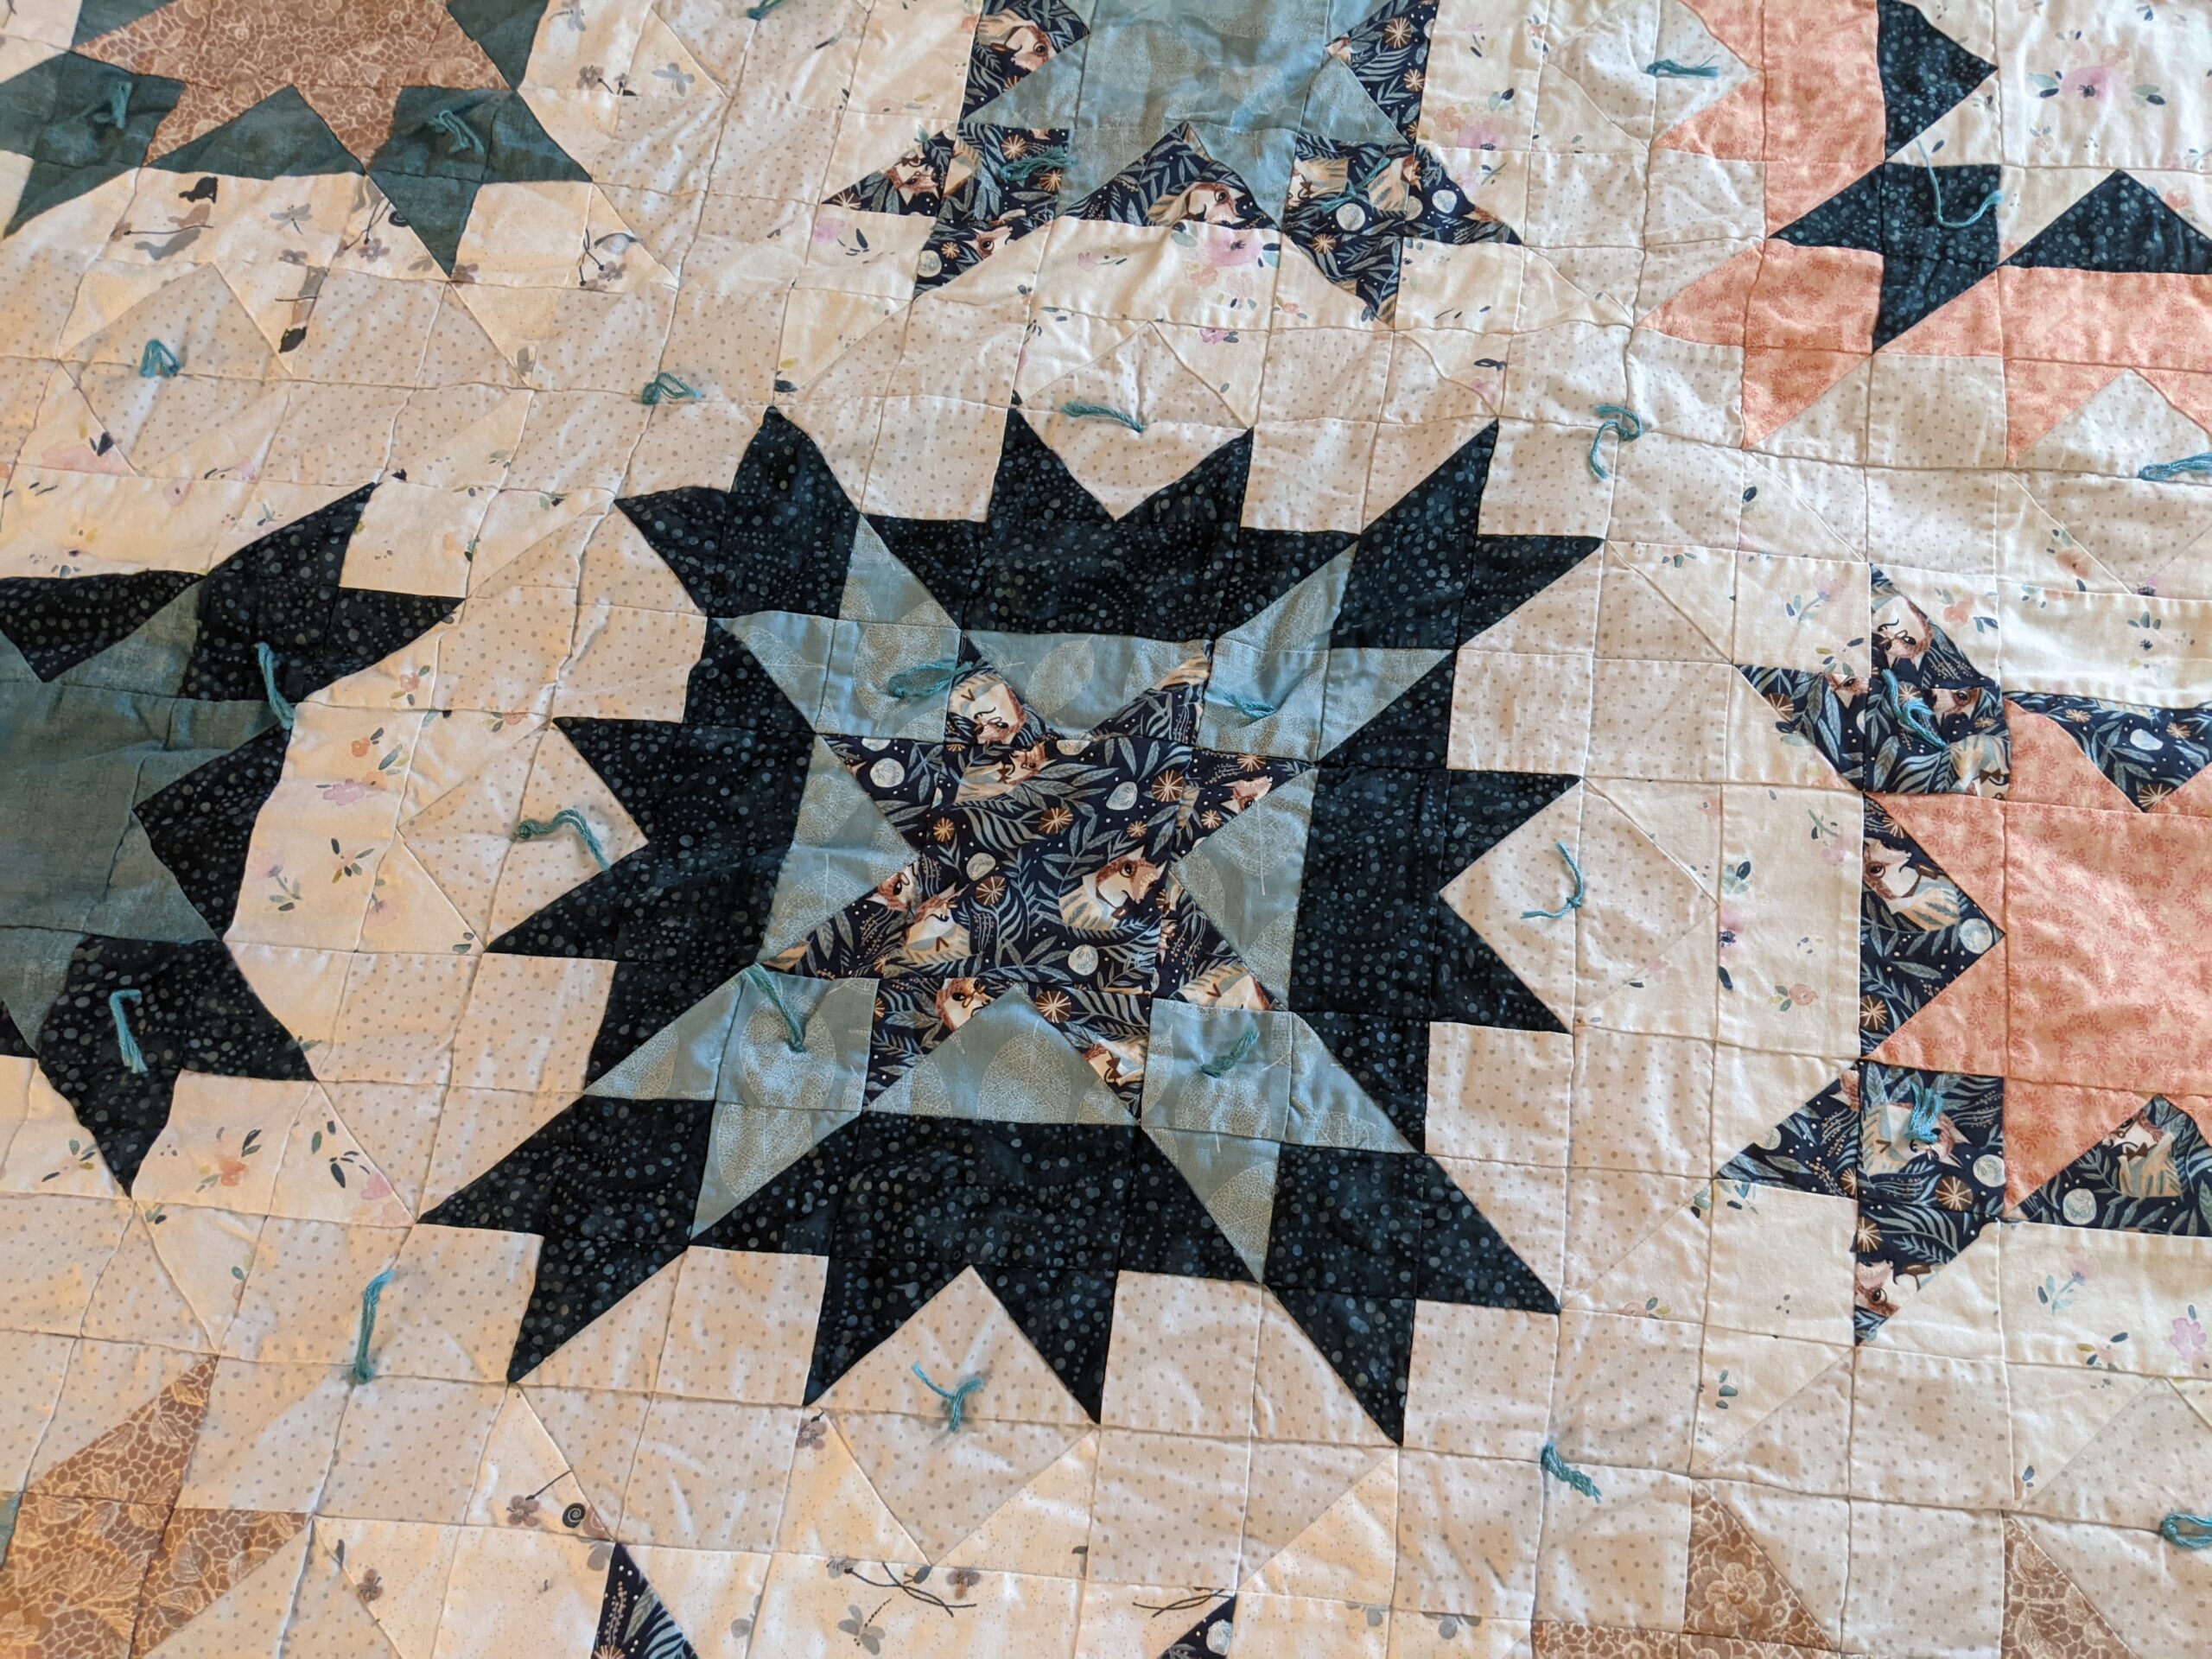
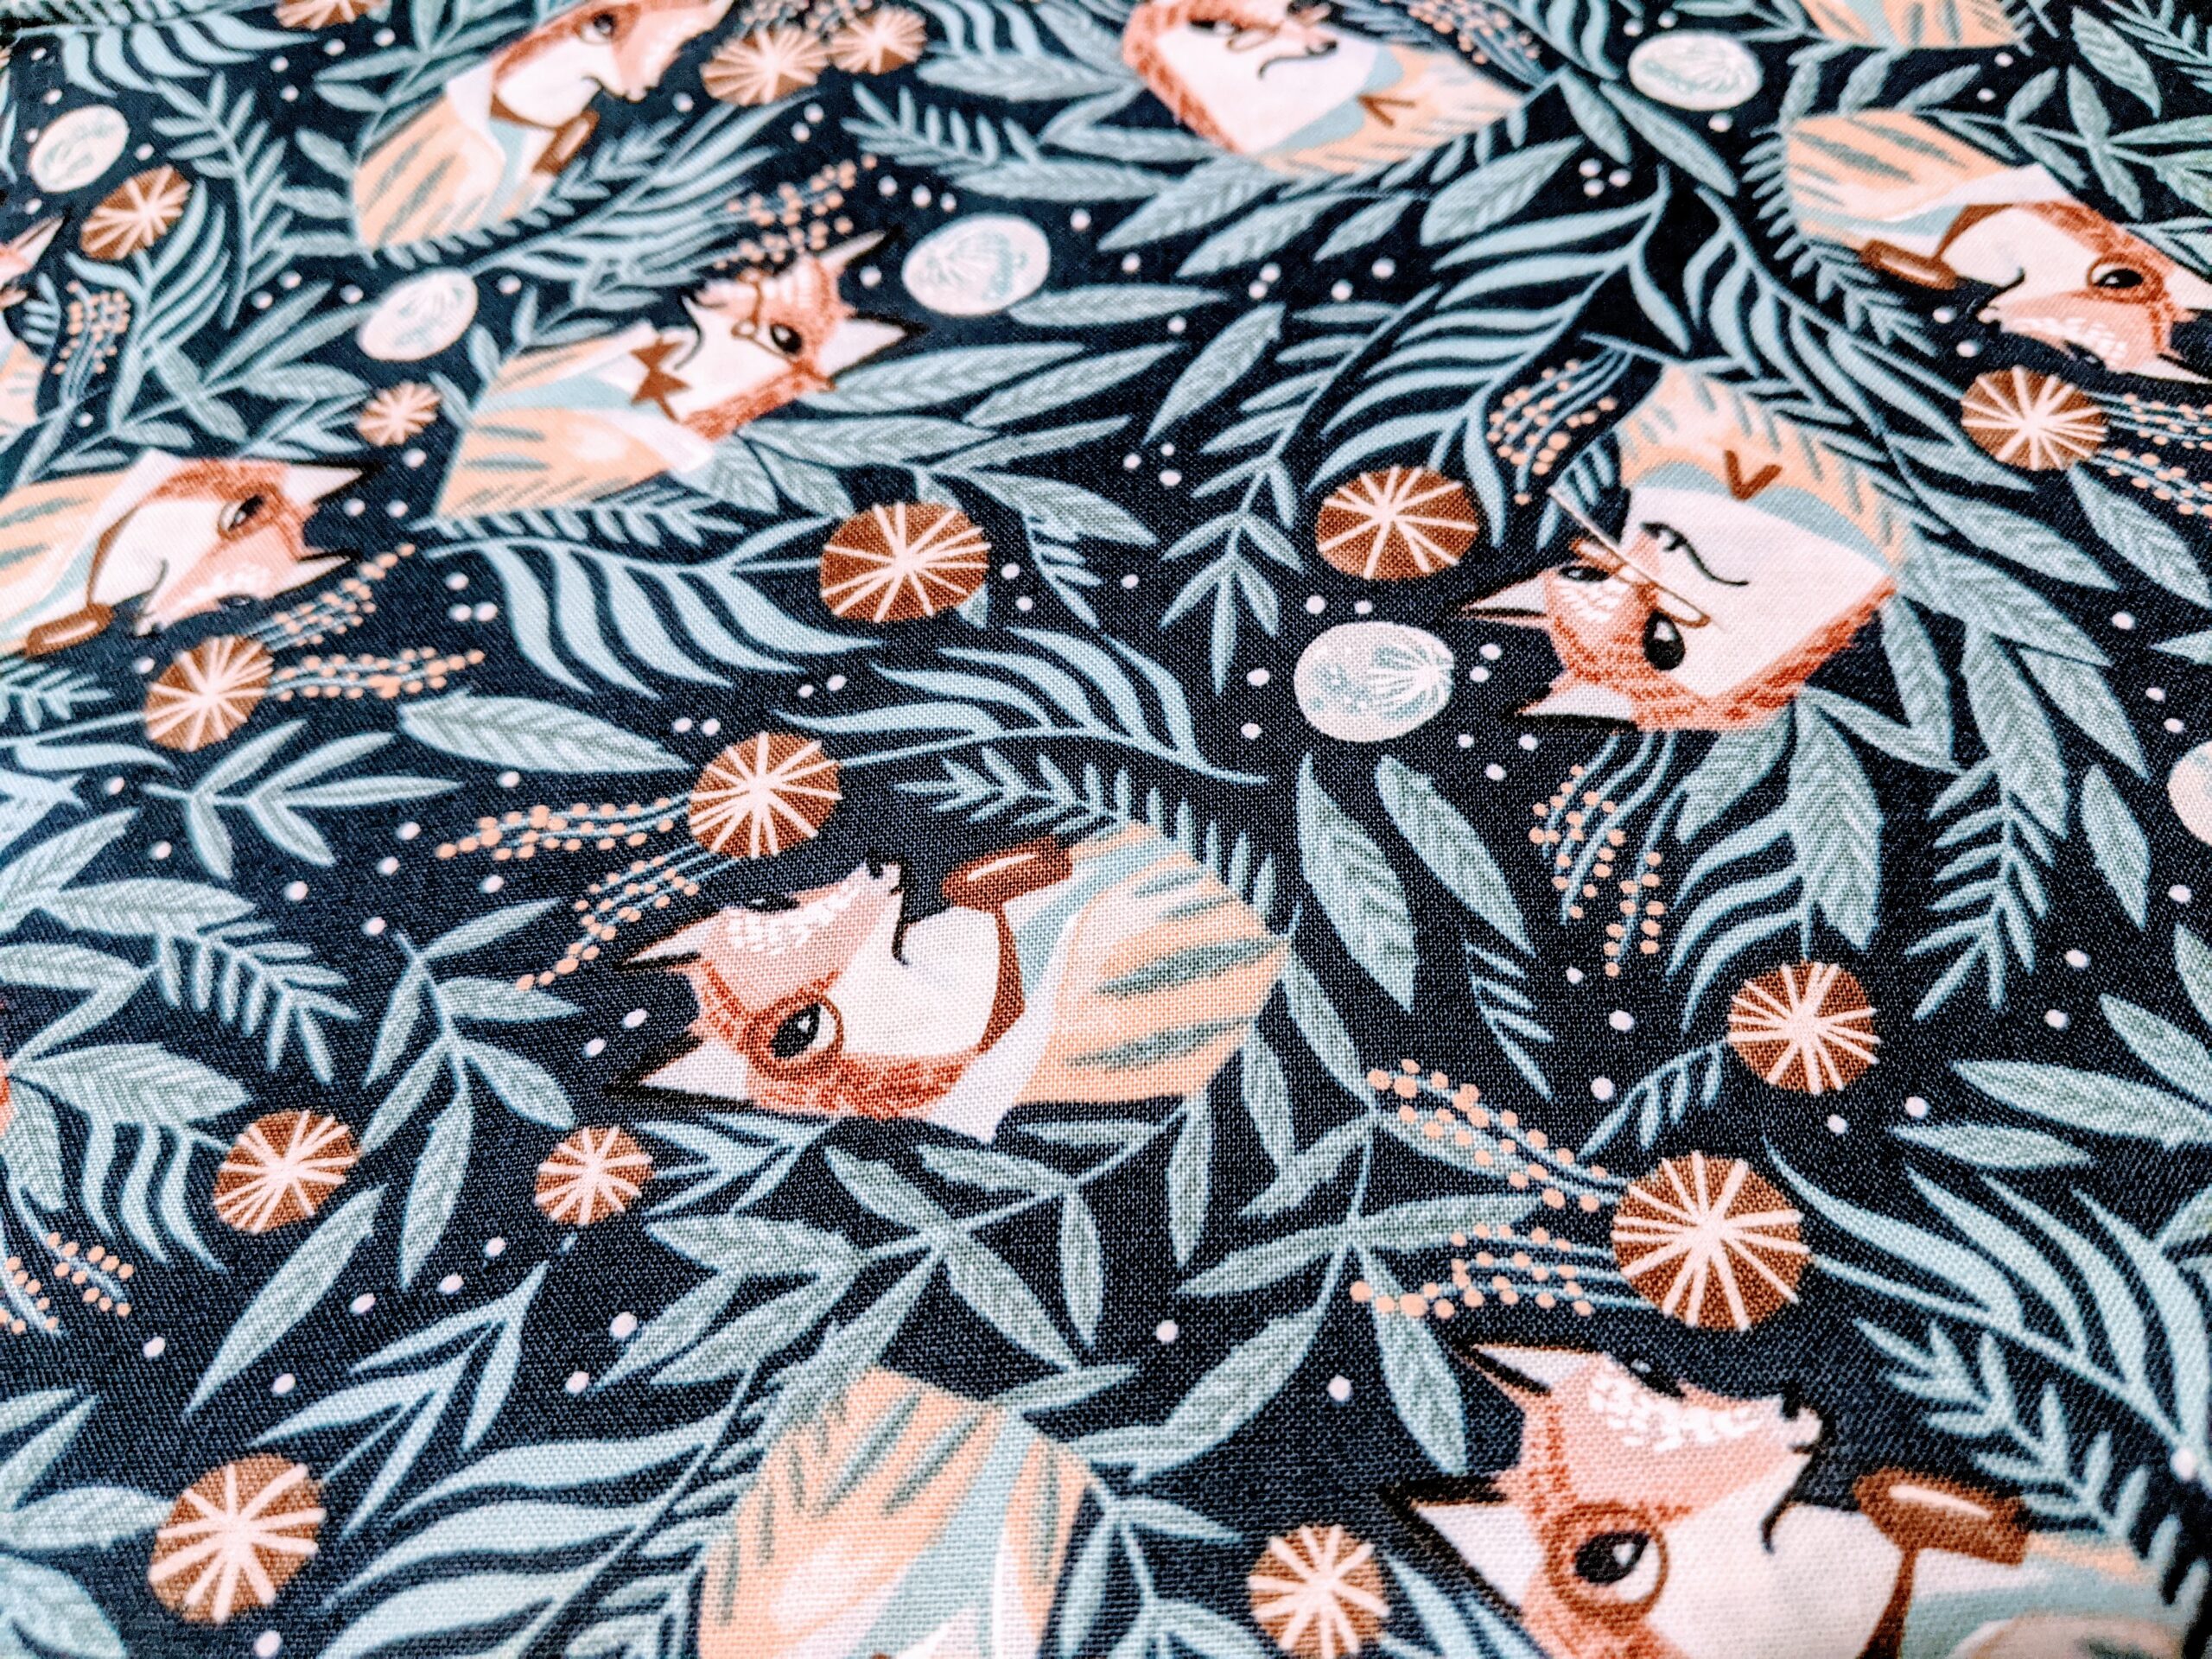
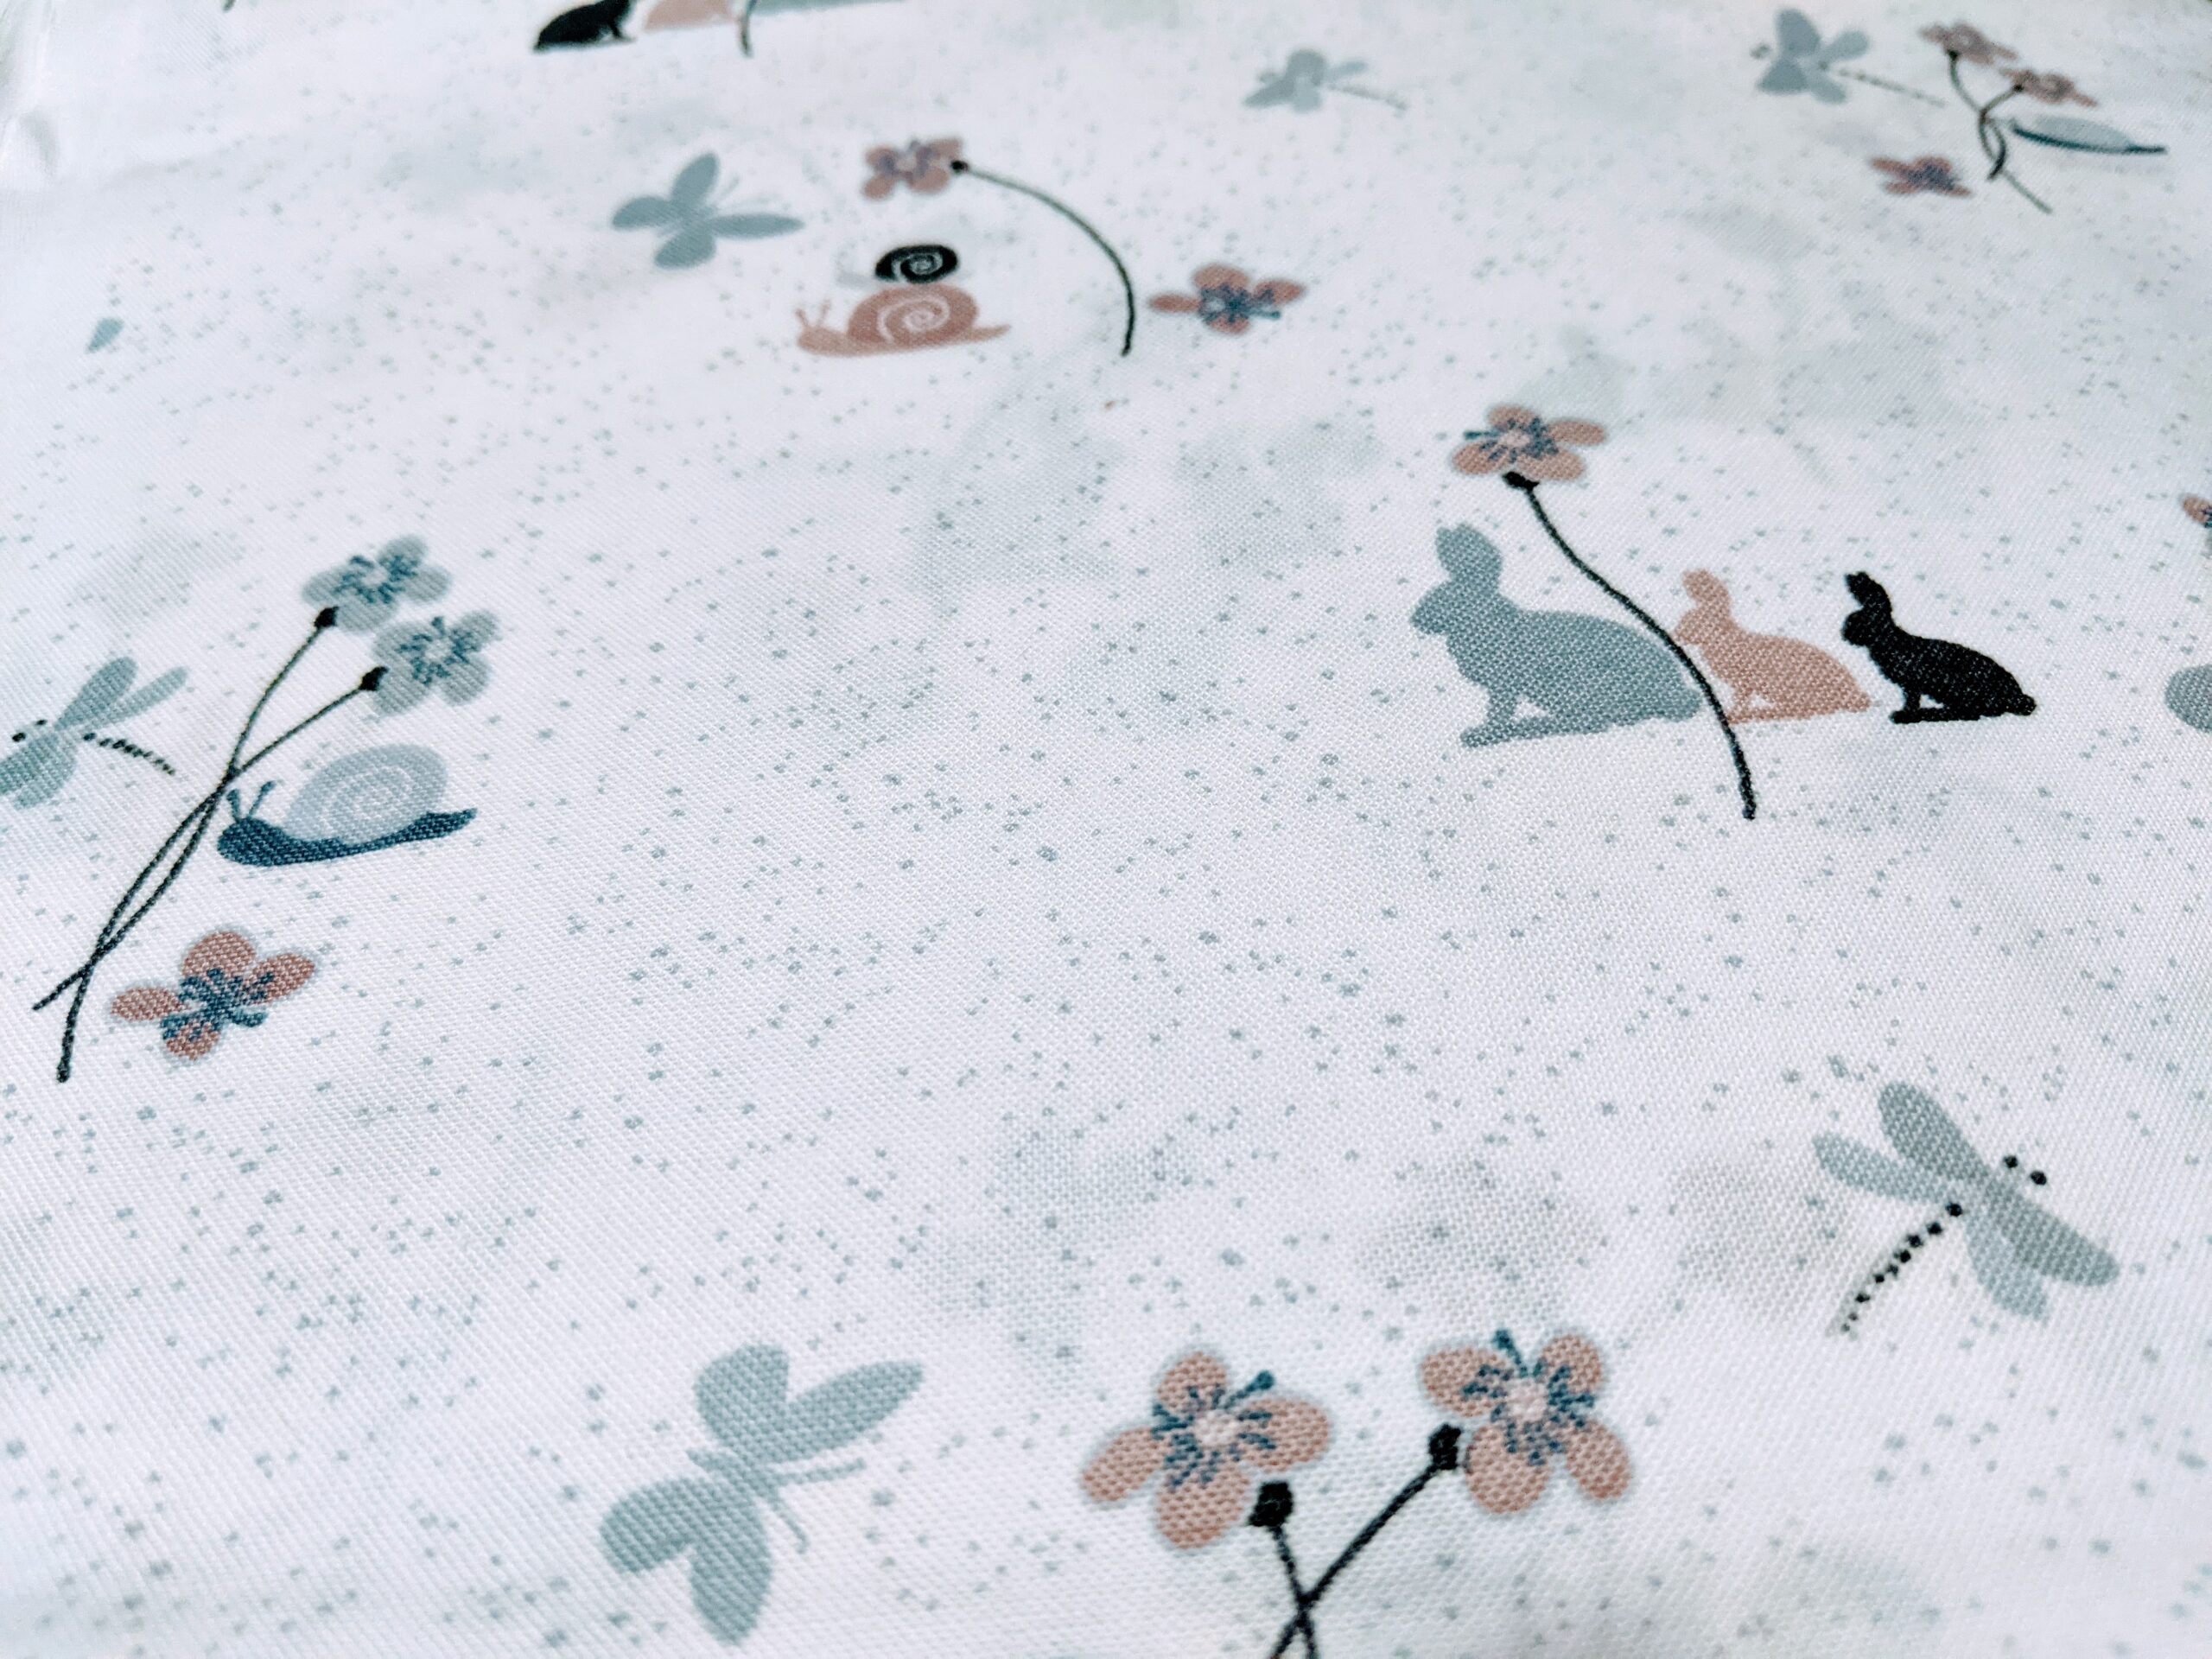
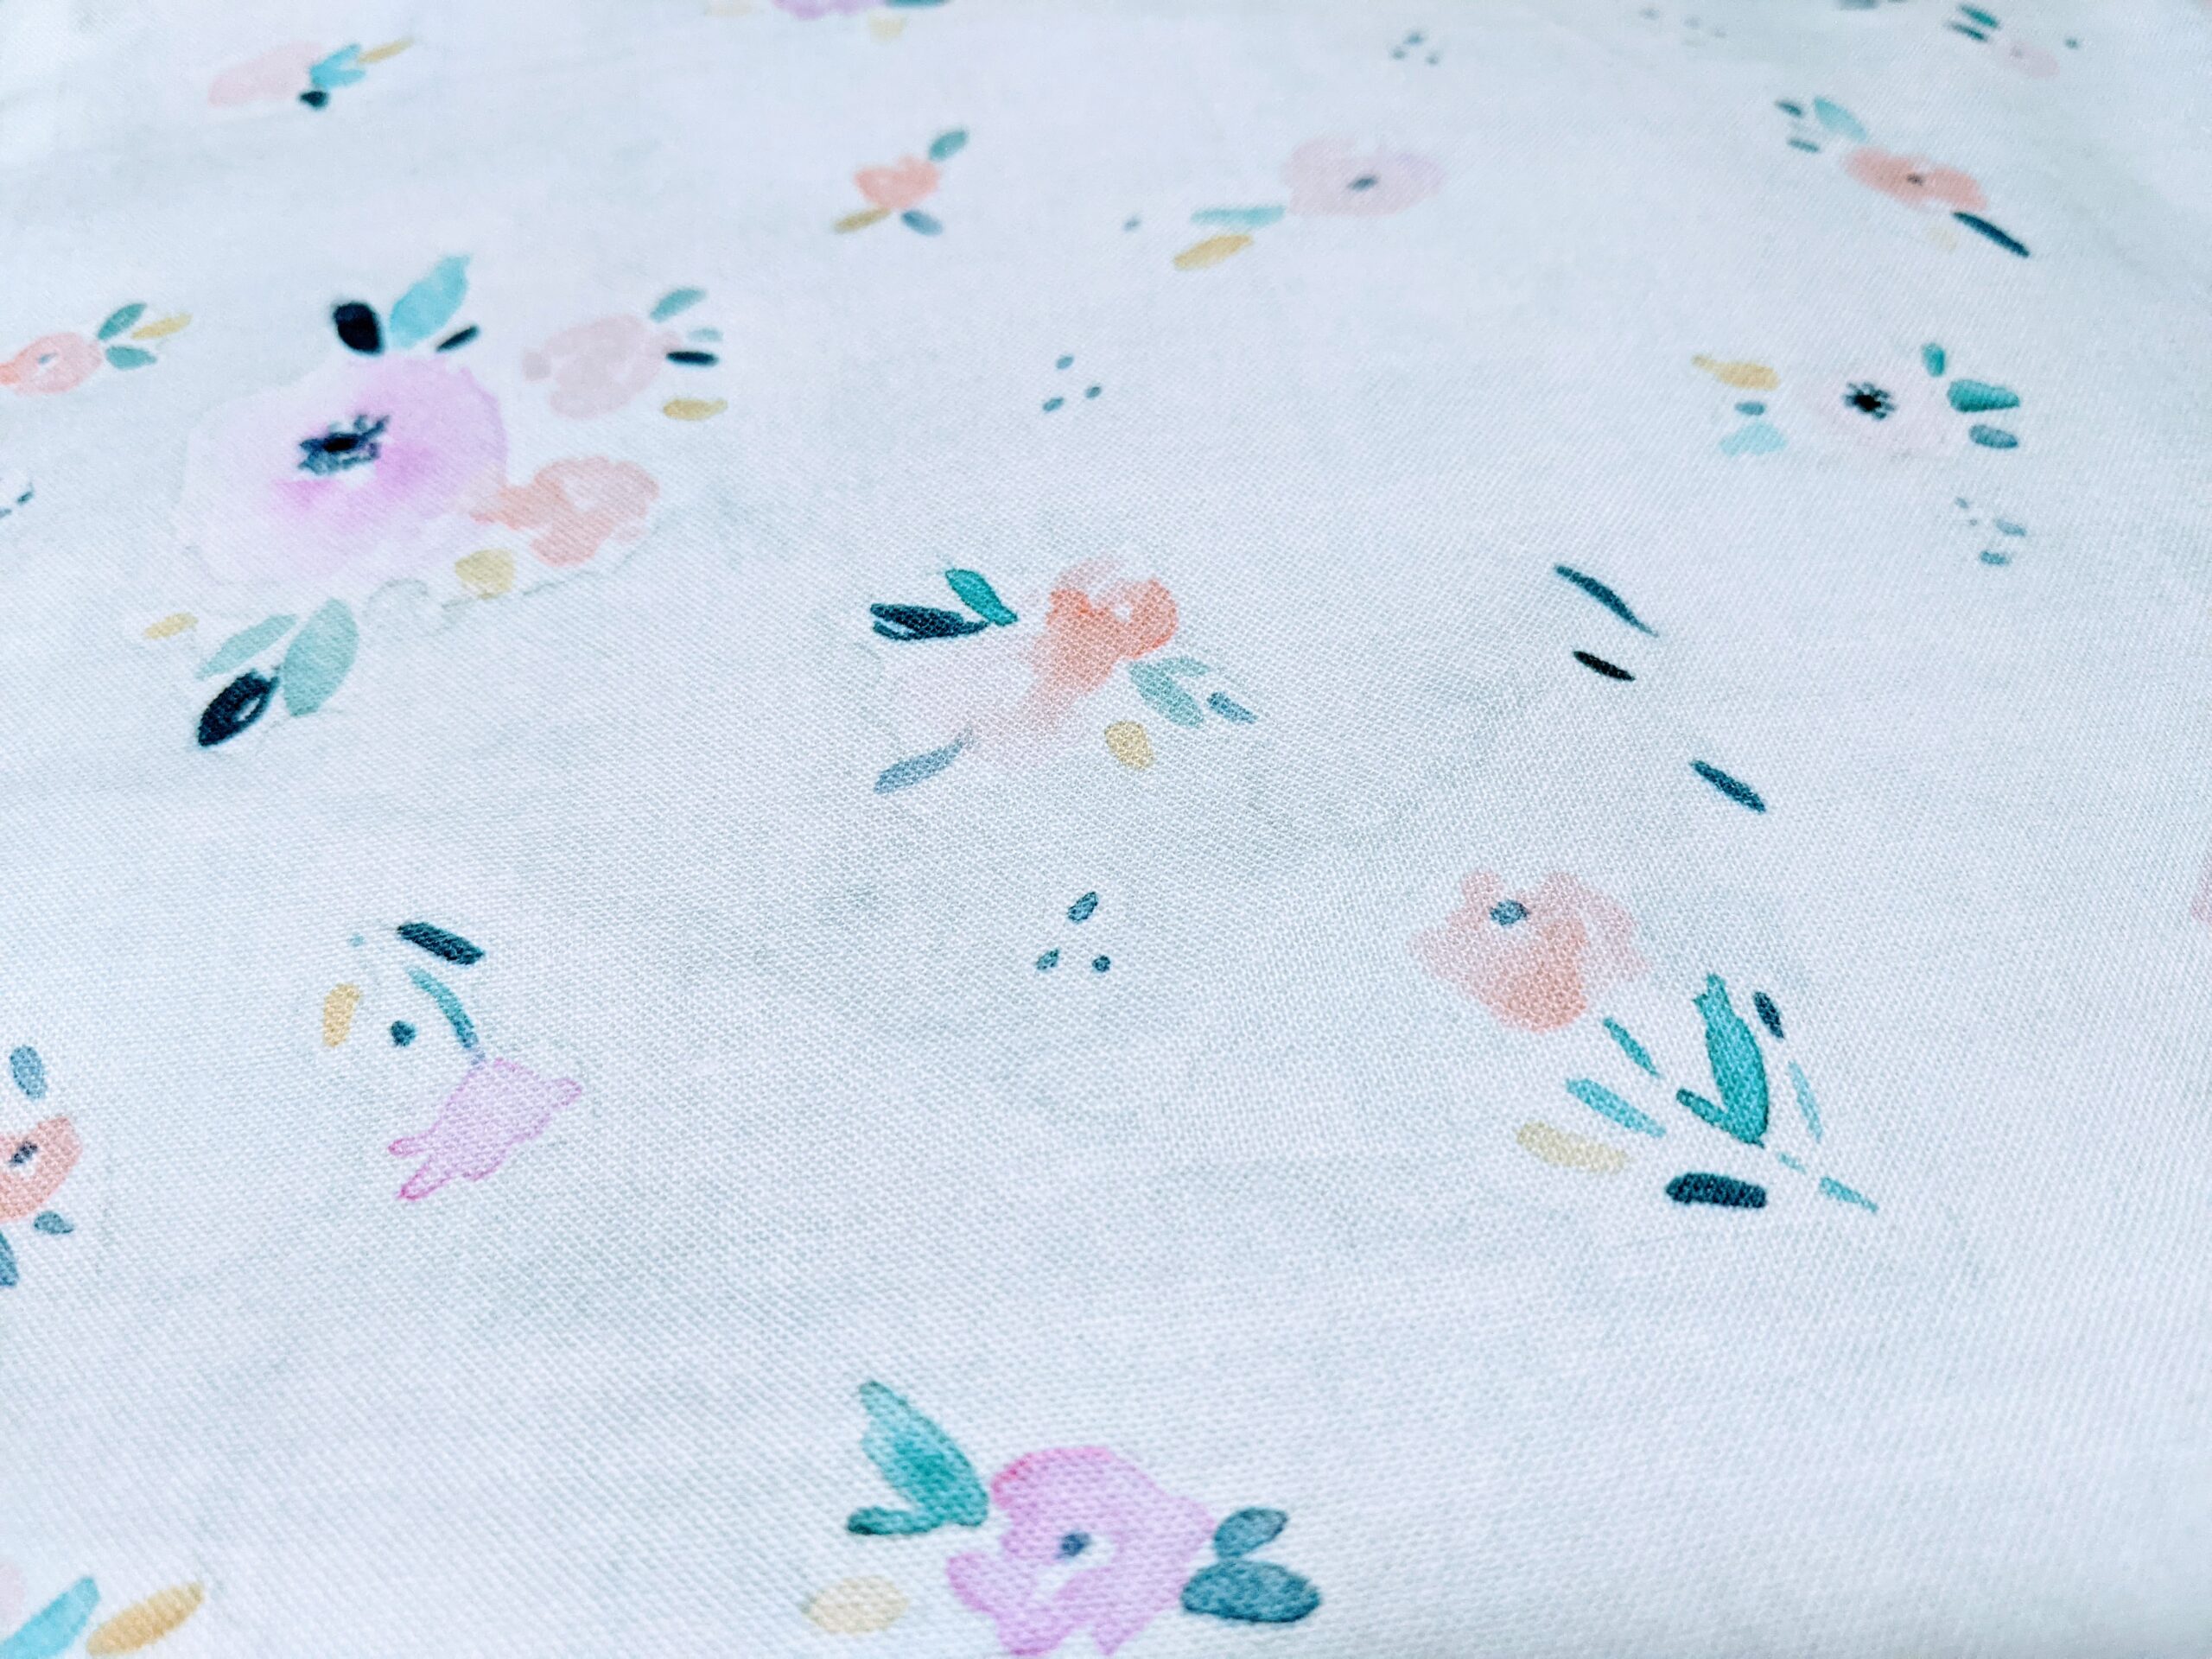
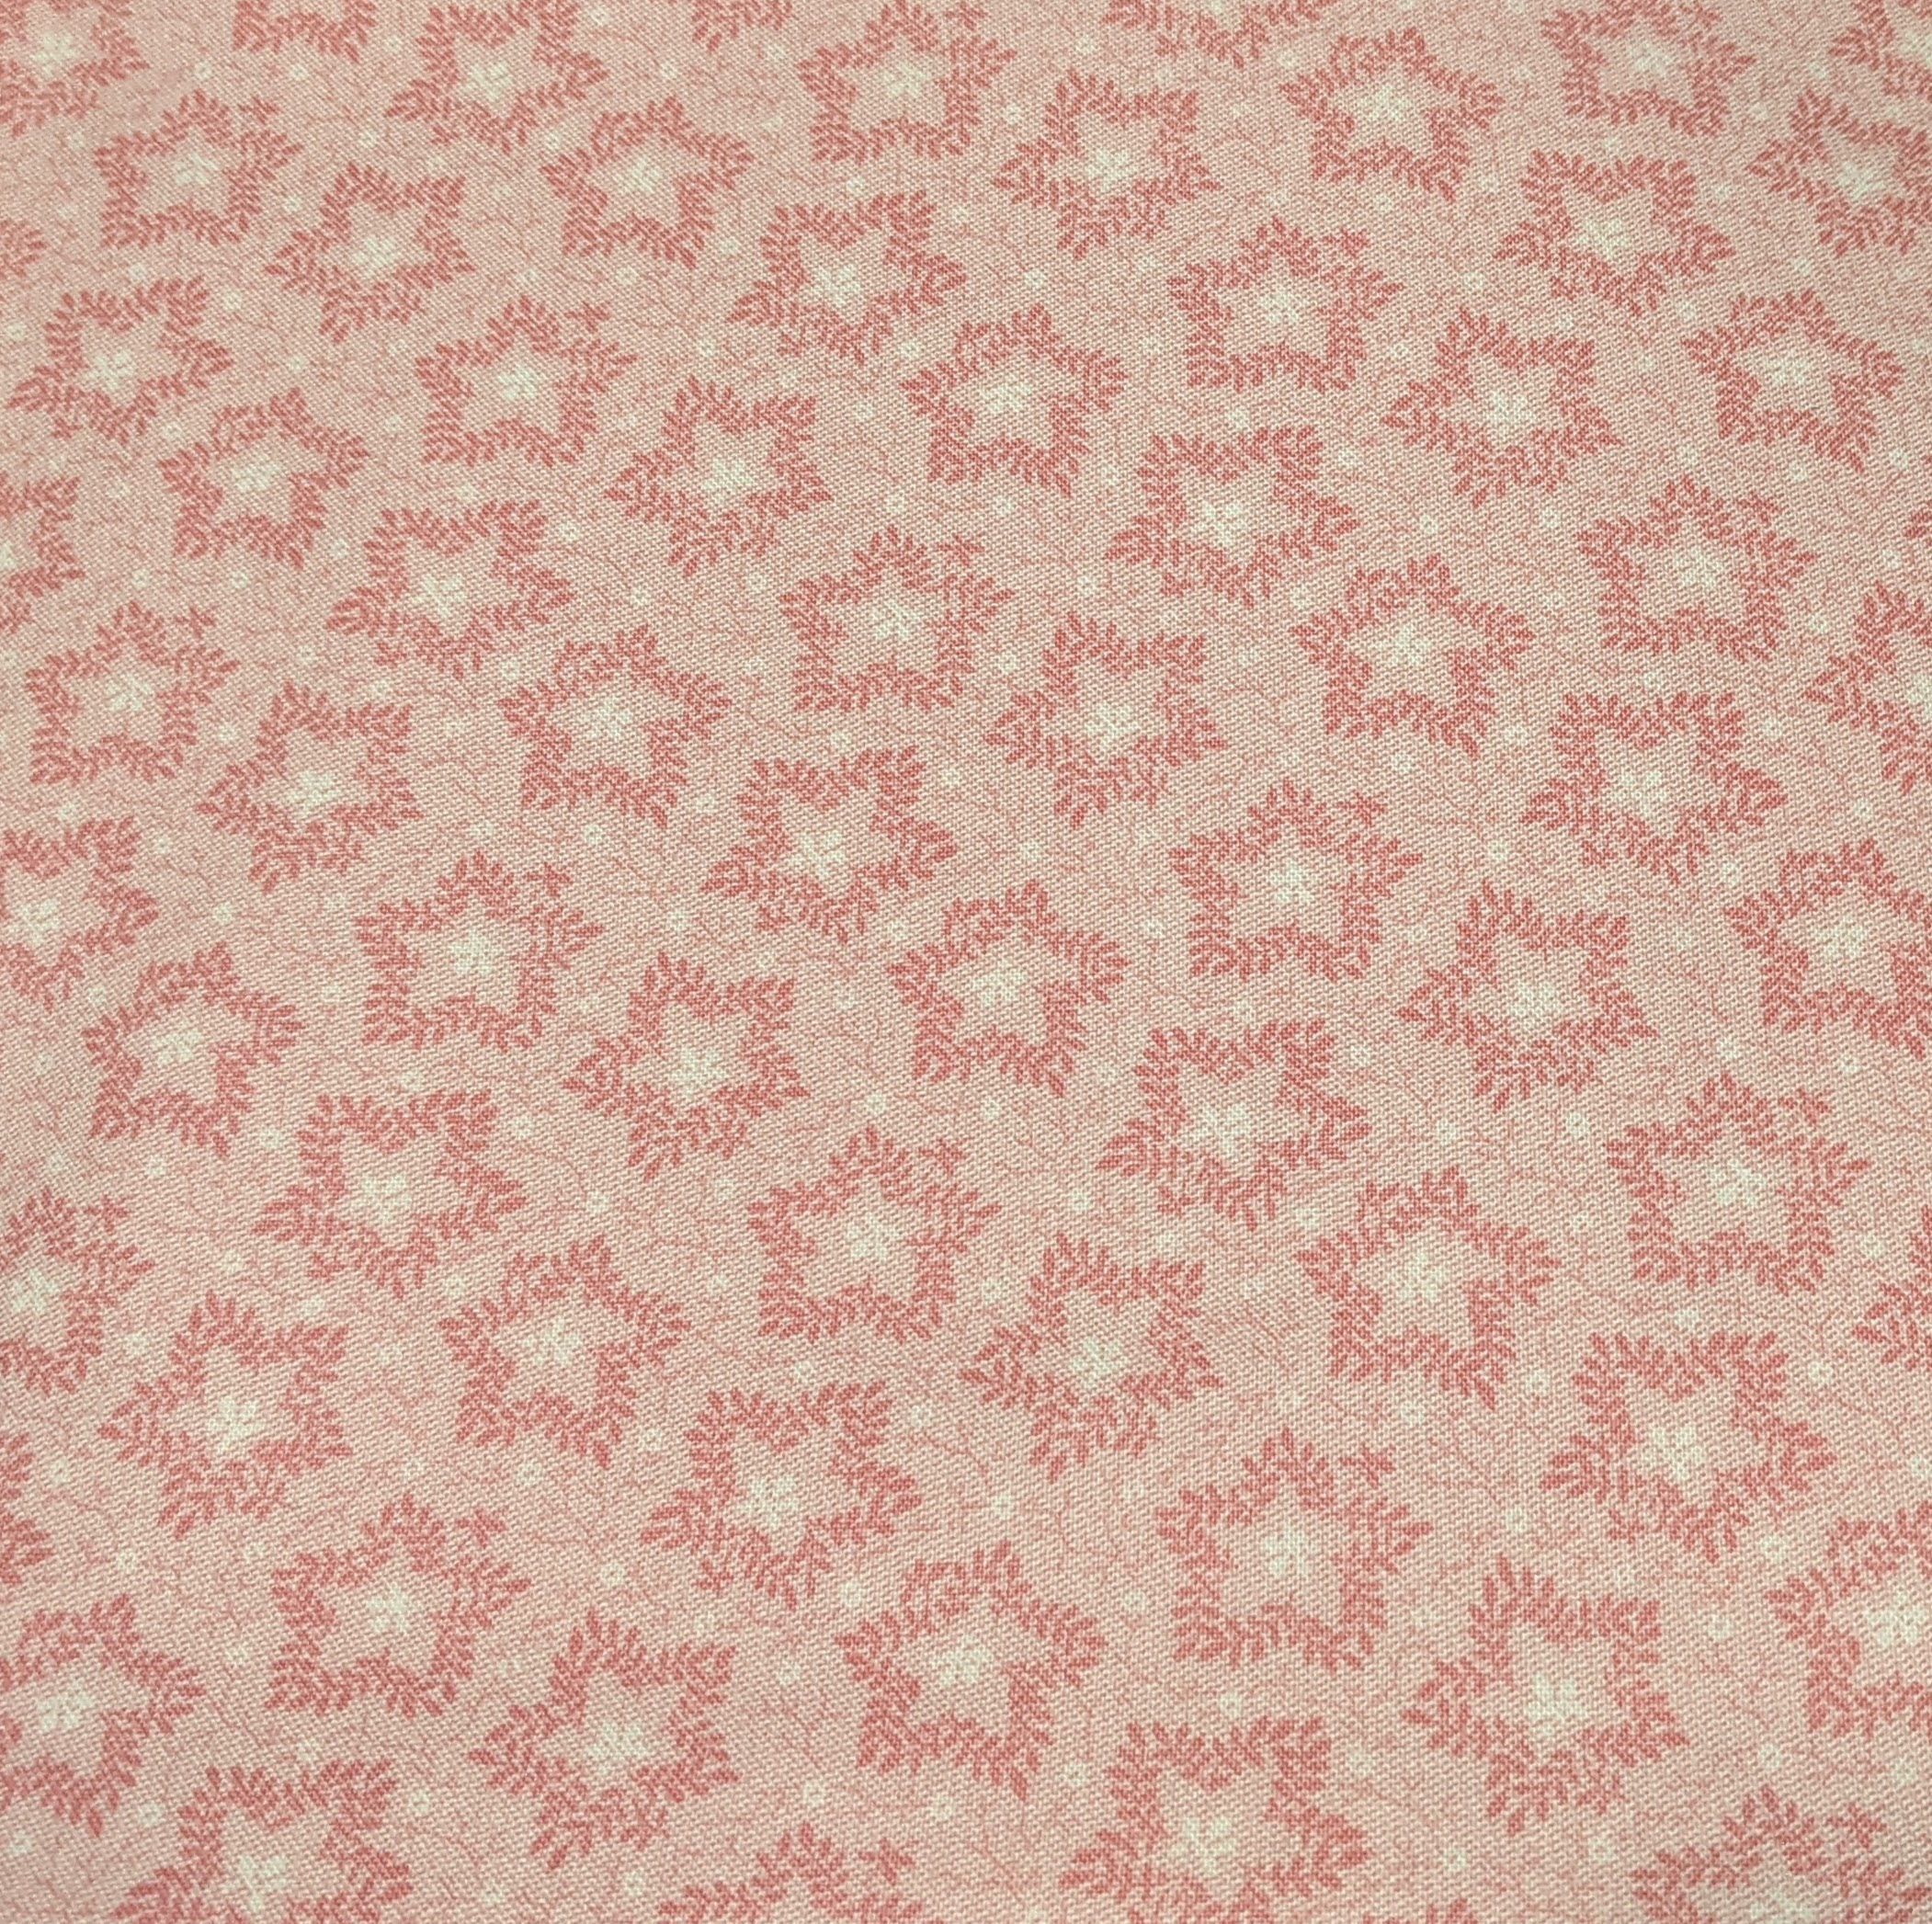
So, no rats. My friend also has bunnies….maybe that will be easier fabric to find. And I figured I should start thinking of color combinations that are classic and beautiful and not too feminine. This is for my friend, but it is for her and her soon-to-be-husband, so I do try to make Wedding Quilts for all parties involved….not just my friend or family member. I always loved the navy/rose gold/grey combination and thought I’d find some inspiration there…..so on to the clearance rack I went…might as well start with the stuff on sale, right? I came across a gorgeous fabric on the clearance rack (SCORE!!) that featured these great foxes and foliage. It was more teal than navy, so I adjusted. Then another fabric practically jumped off the rack with bunnies on it!! (and really cute snails just for good measure.)
Foxes!
Bunnies and snails!
I spent another hour or two in the shop right then (along with a good friend–thank you Diana!!) trying to pull fabrics that would match. Since this would be such a color-centric quilt, I knew I had to color match these fabrics in person. I find that if you need something very specific color-wise, it’s really best to do that in person than online. If you are a bit more loose with your needs, online is always great. And if you’re concerned (or not confident in your color-choosing) try starting with a collection of fabric….the designers go through so much trouble to curate beautiful color collections for our use.
After another trip to the same store, fabrics in hand to be able to color match, I am confident and pleased with what I ended up with. We went from Rats and Navy/Rose Gold/Grey to foxes and bunnies in Teal/Aqua/Peach. If there’s one thing I’ve learned over the years its to be flexible and let the inspiration come from wherever it may.
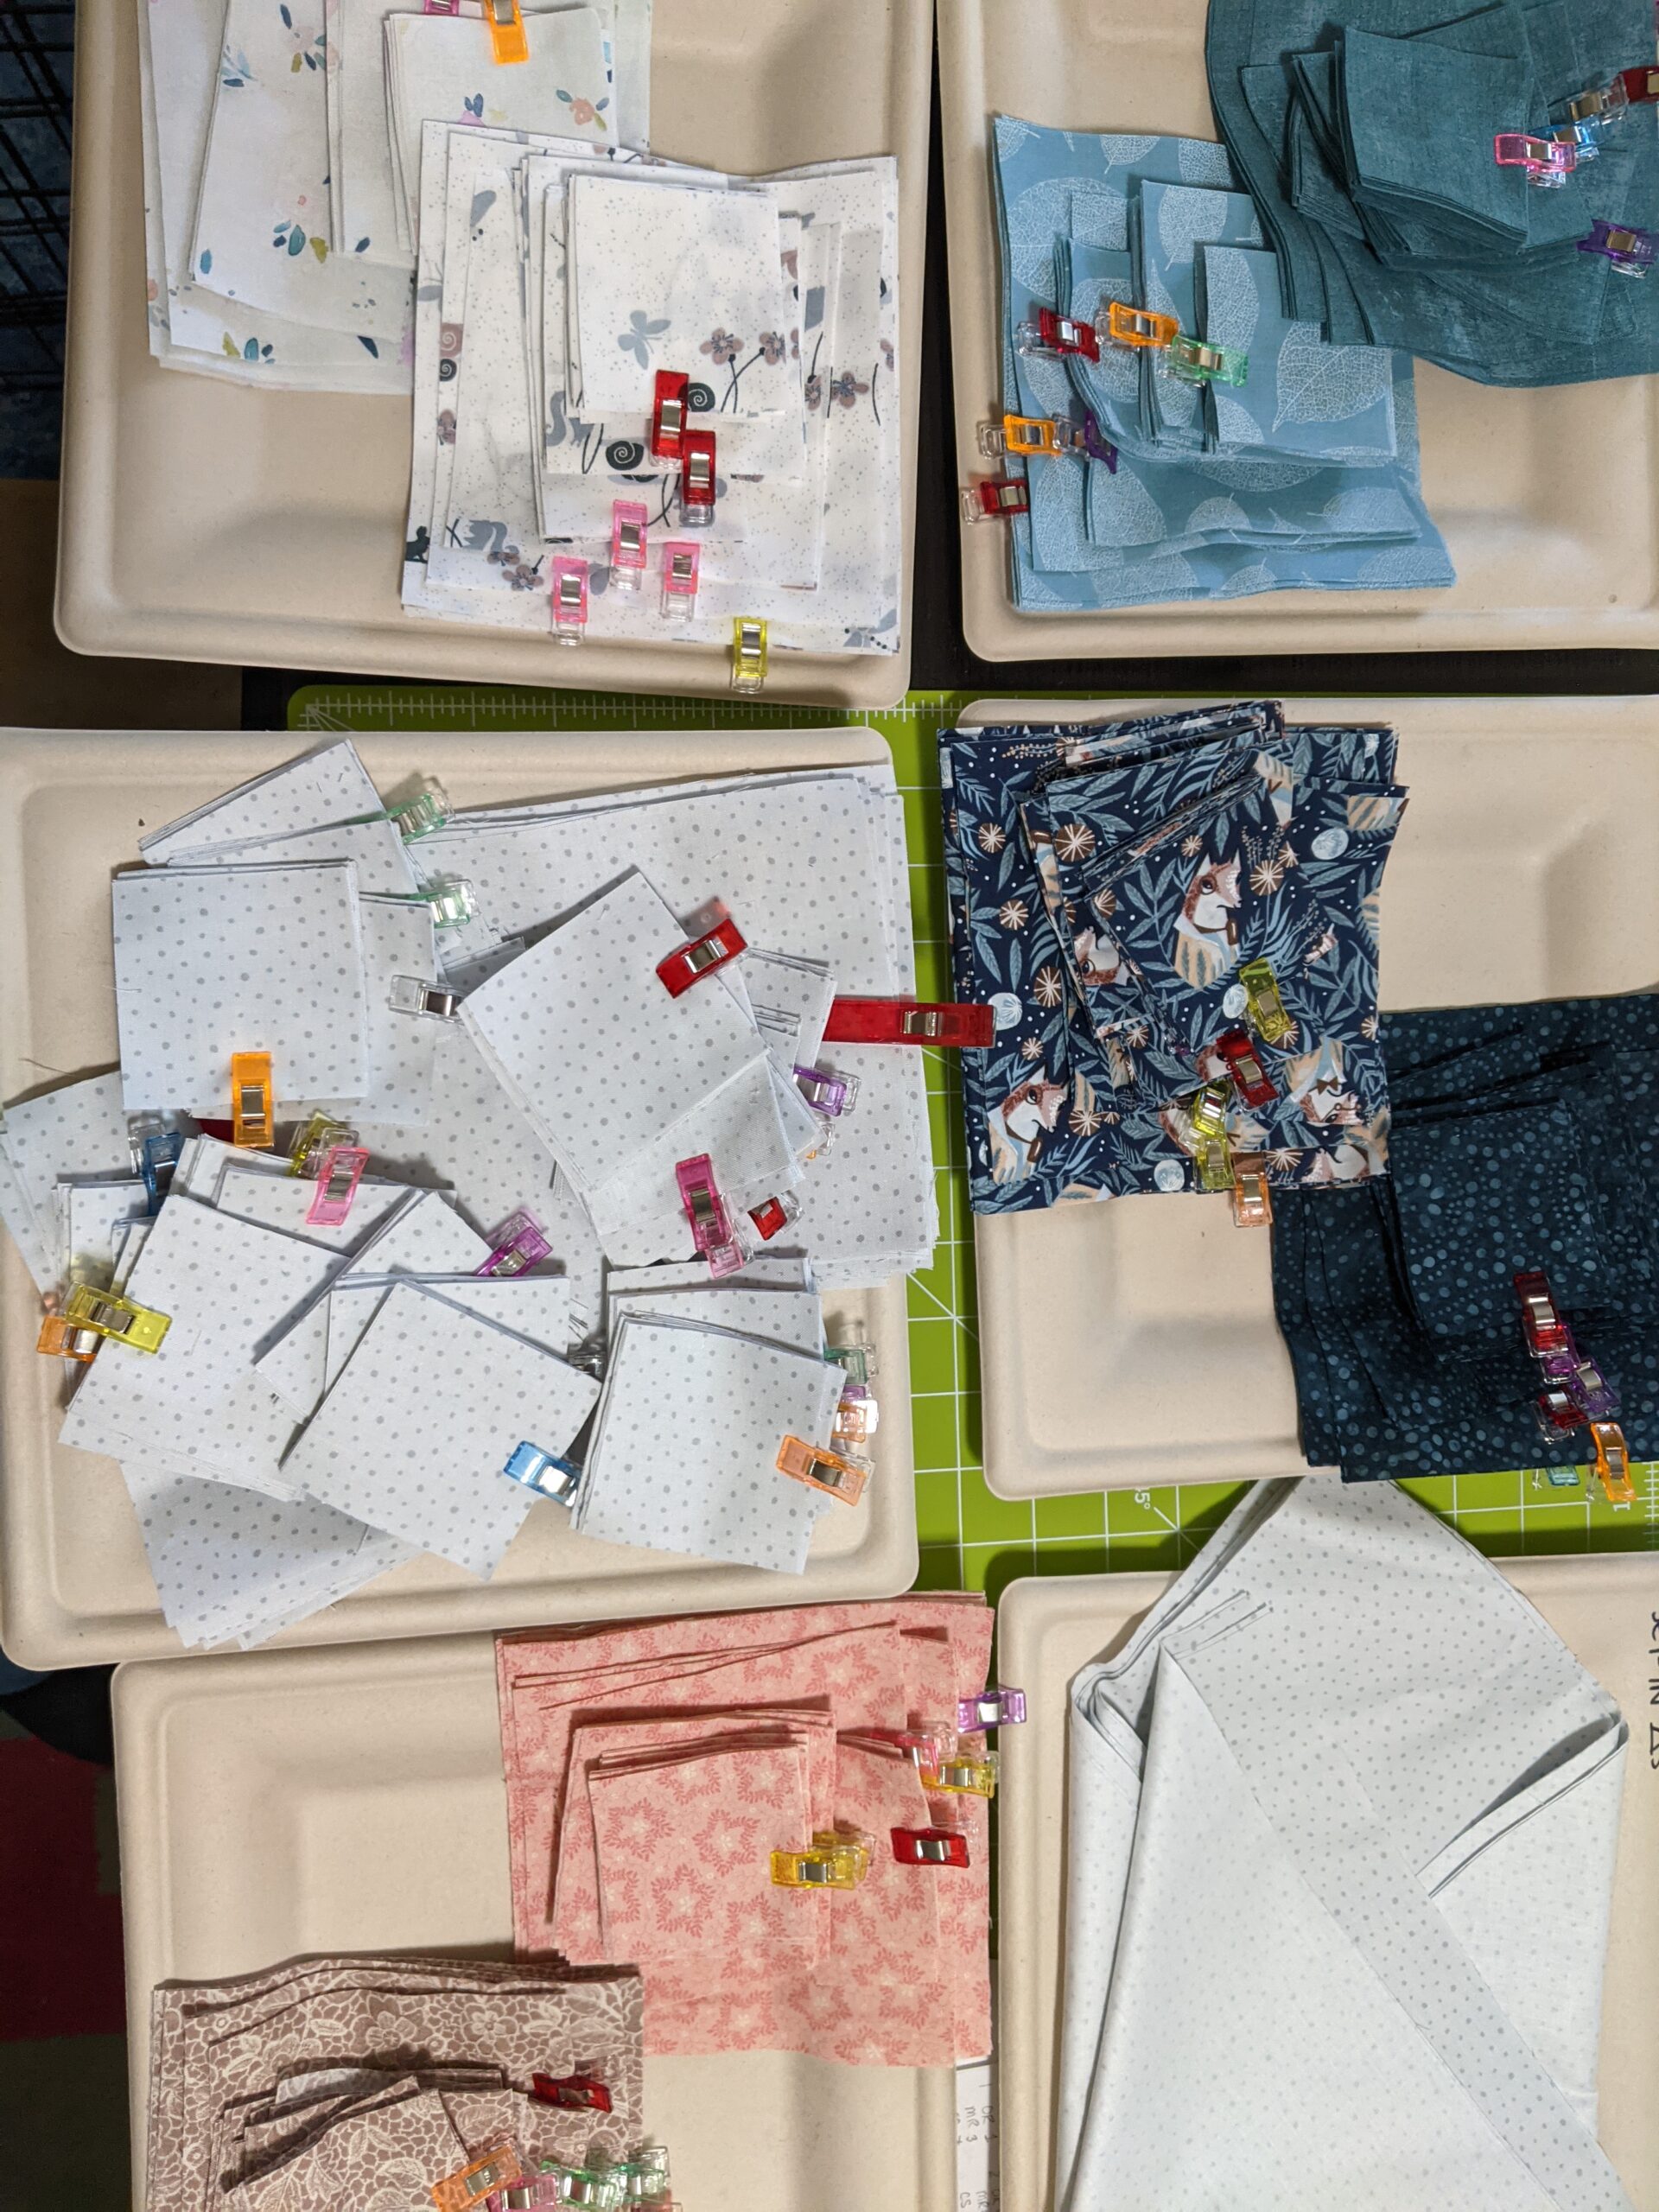
Fabric spread
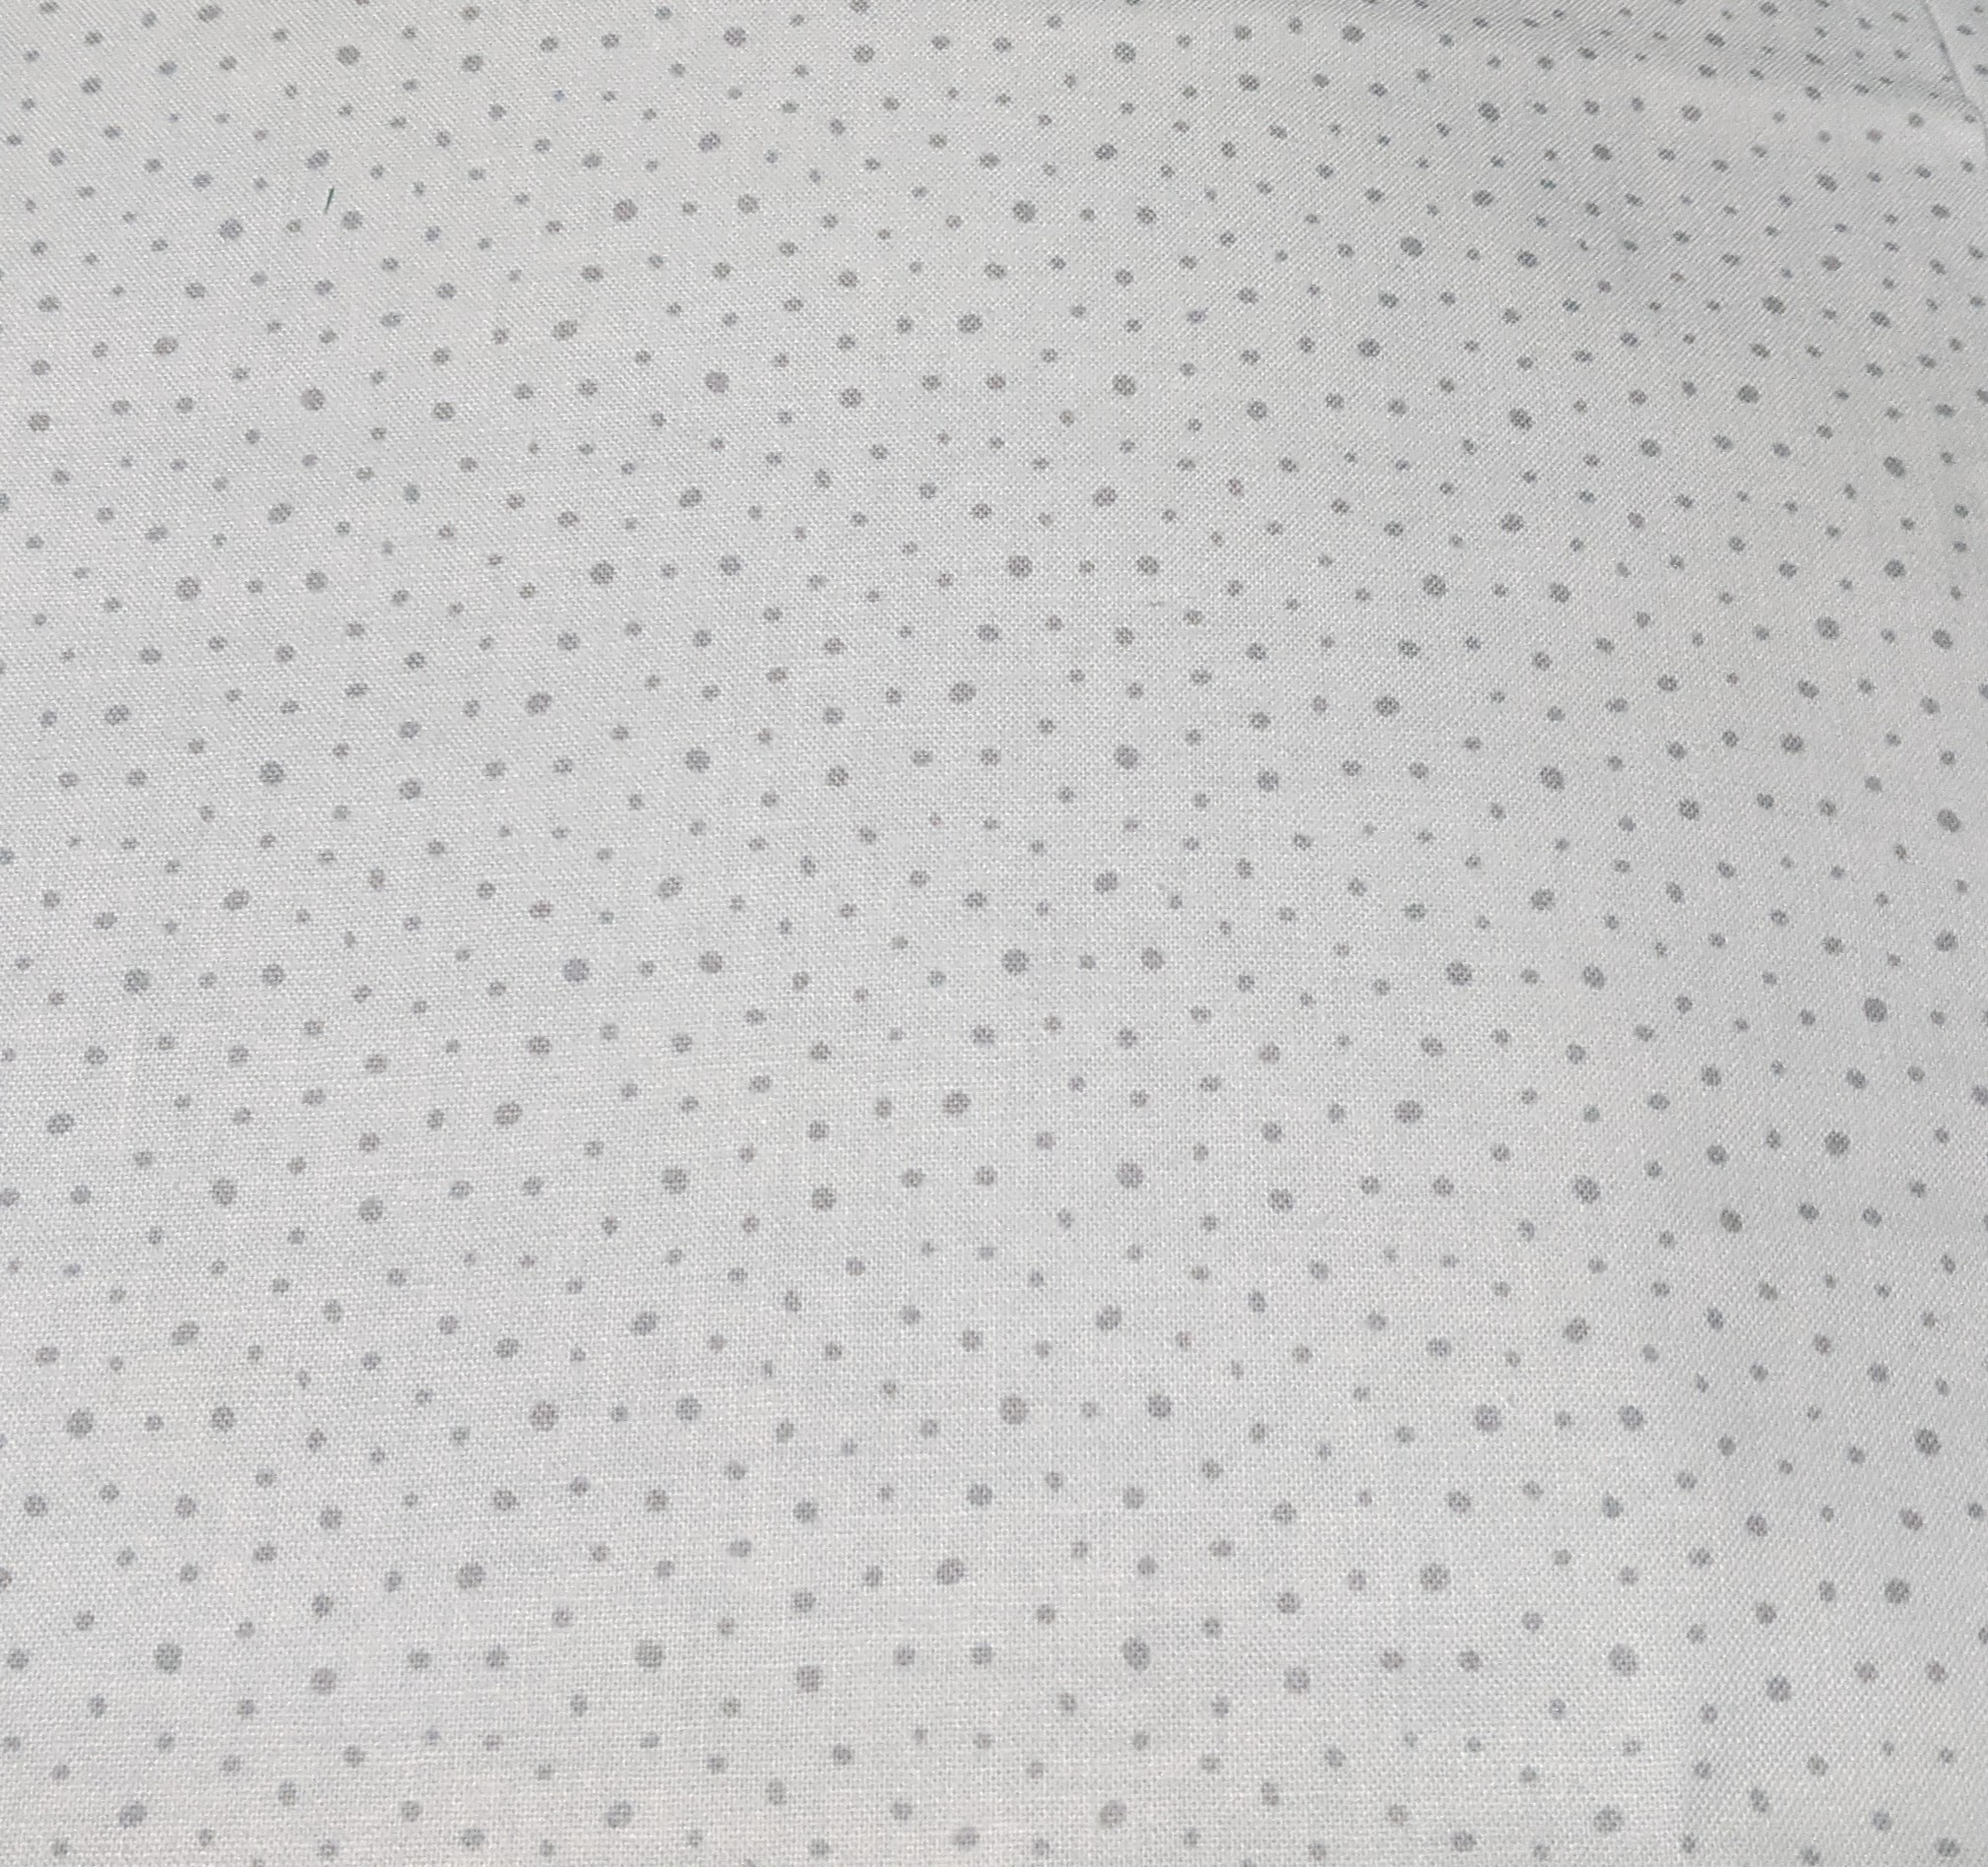
Background fabric
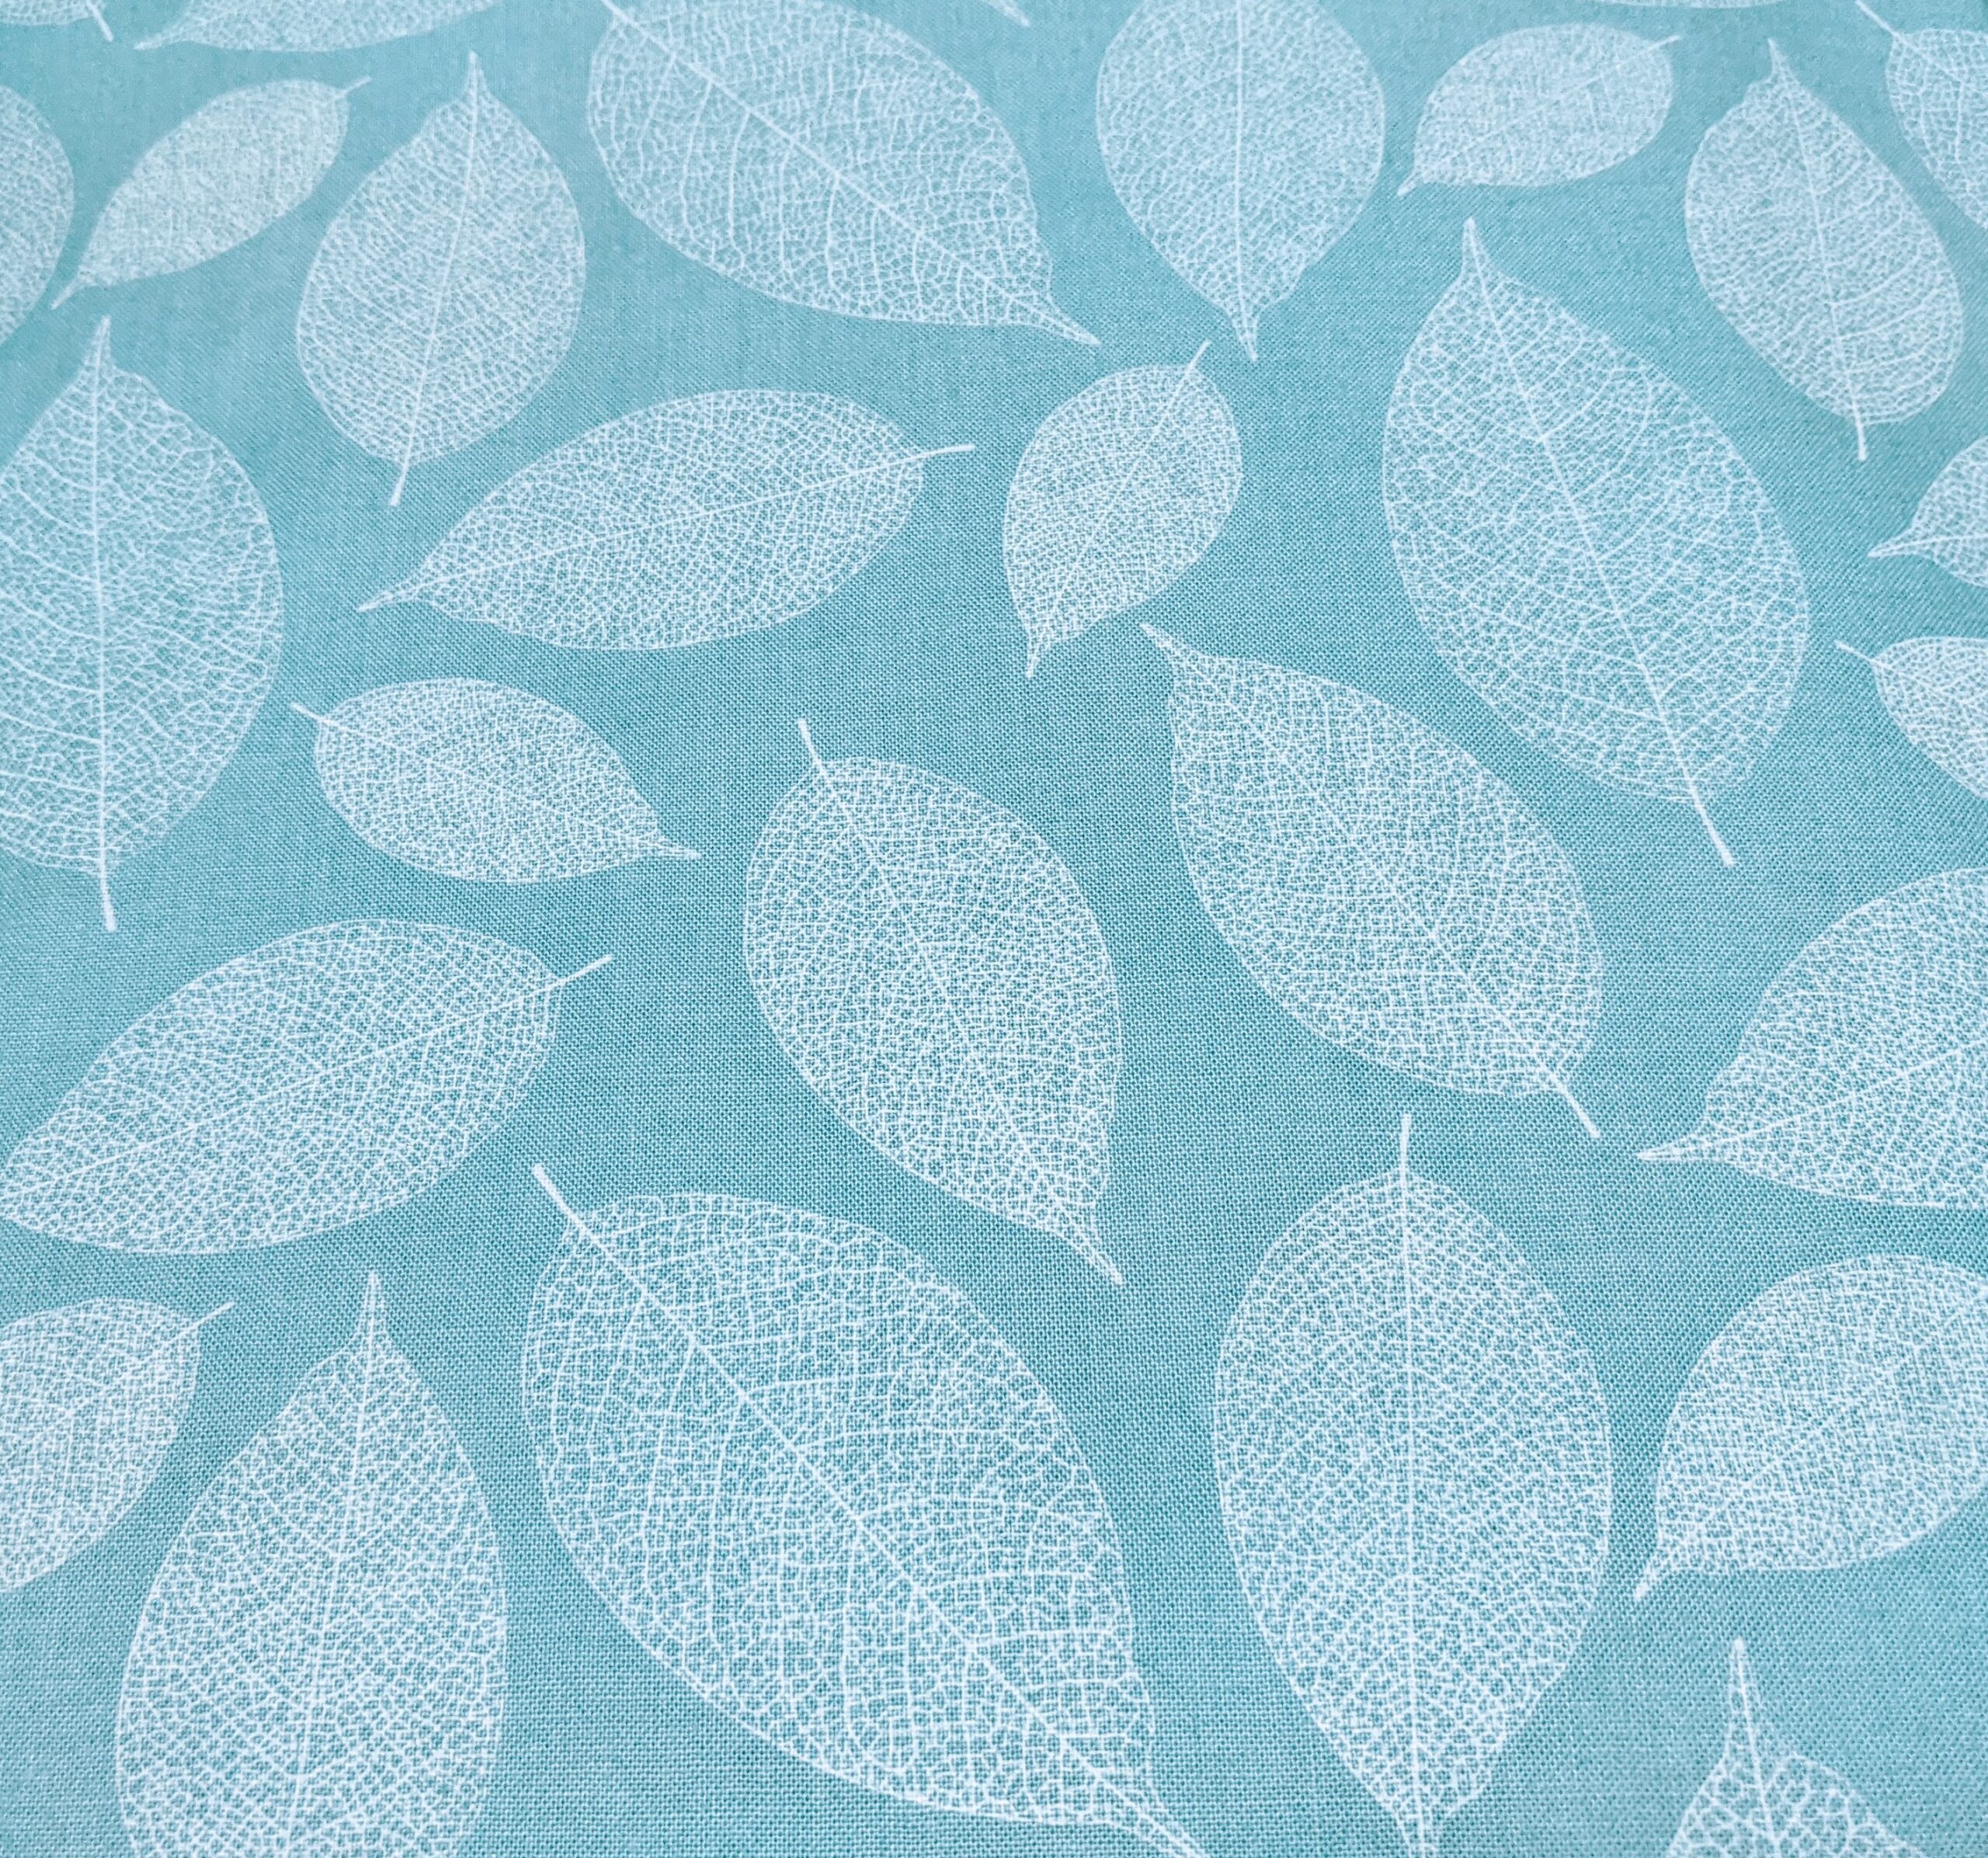
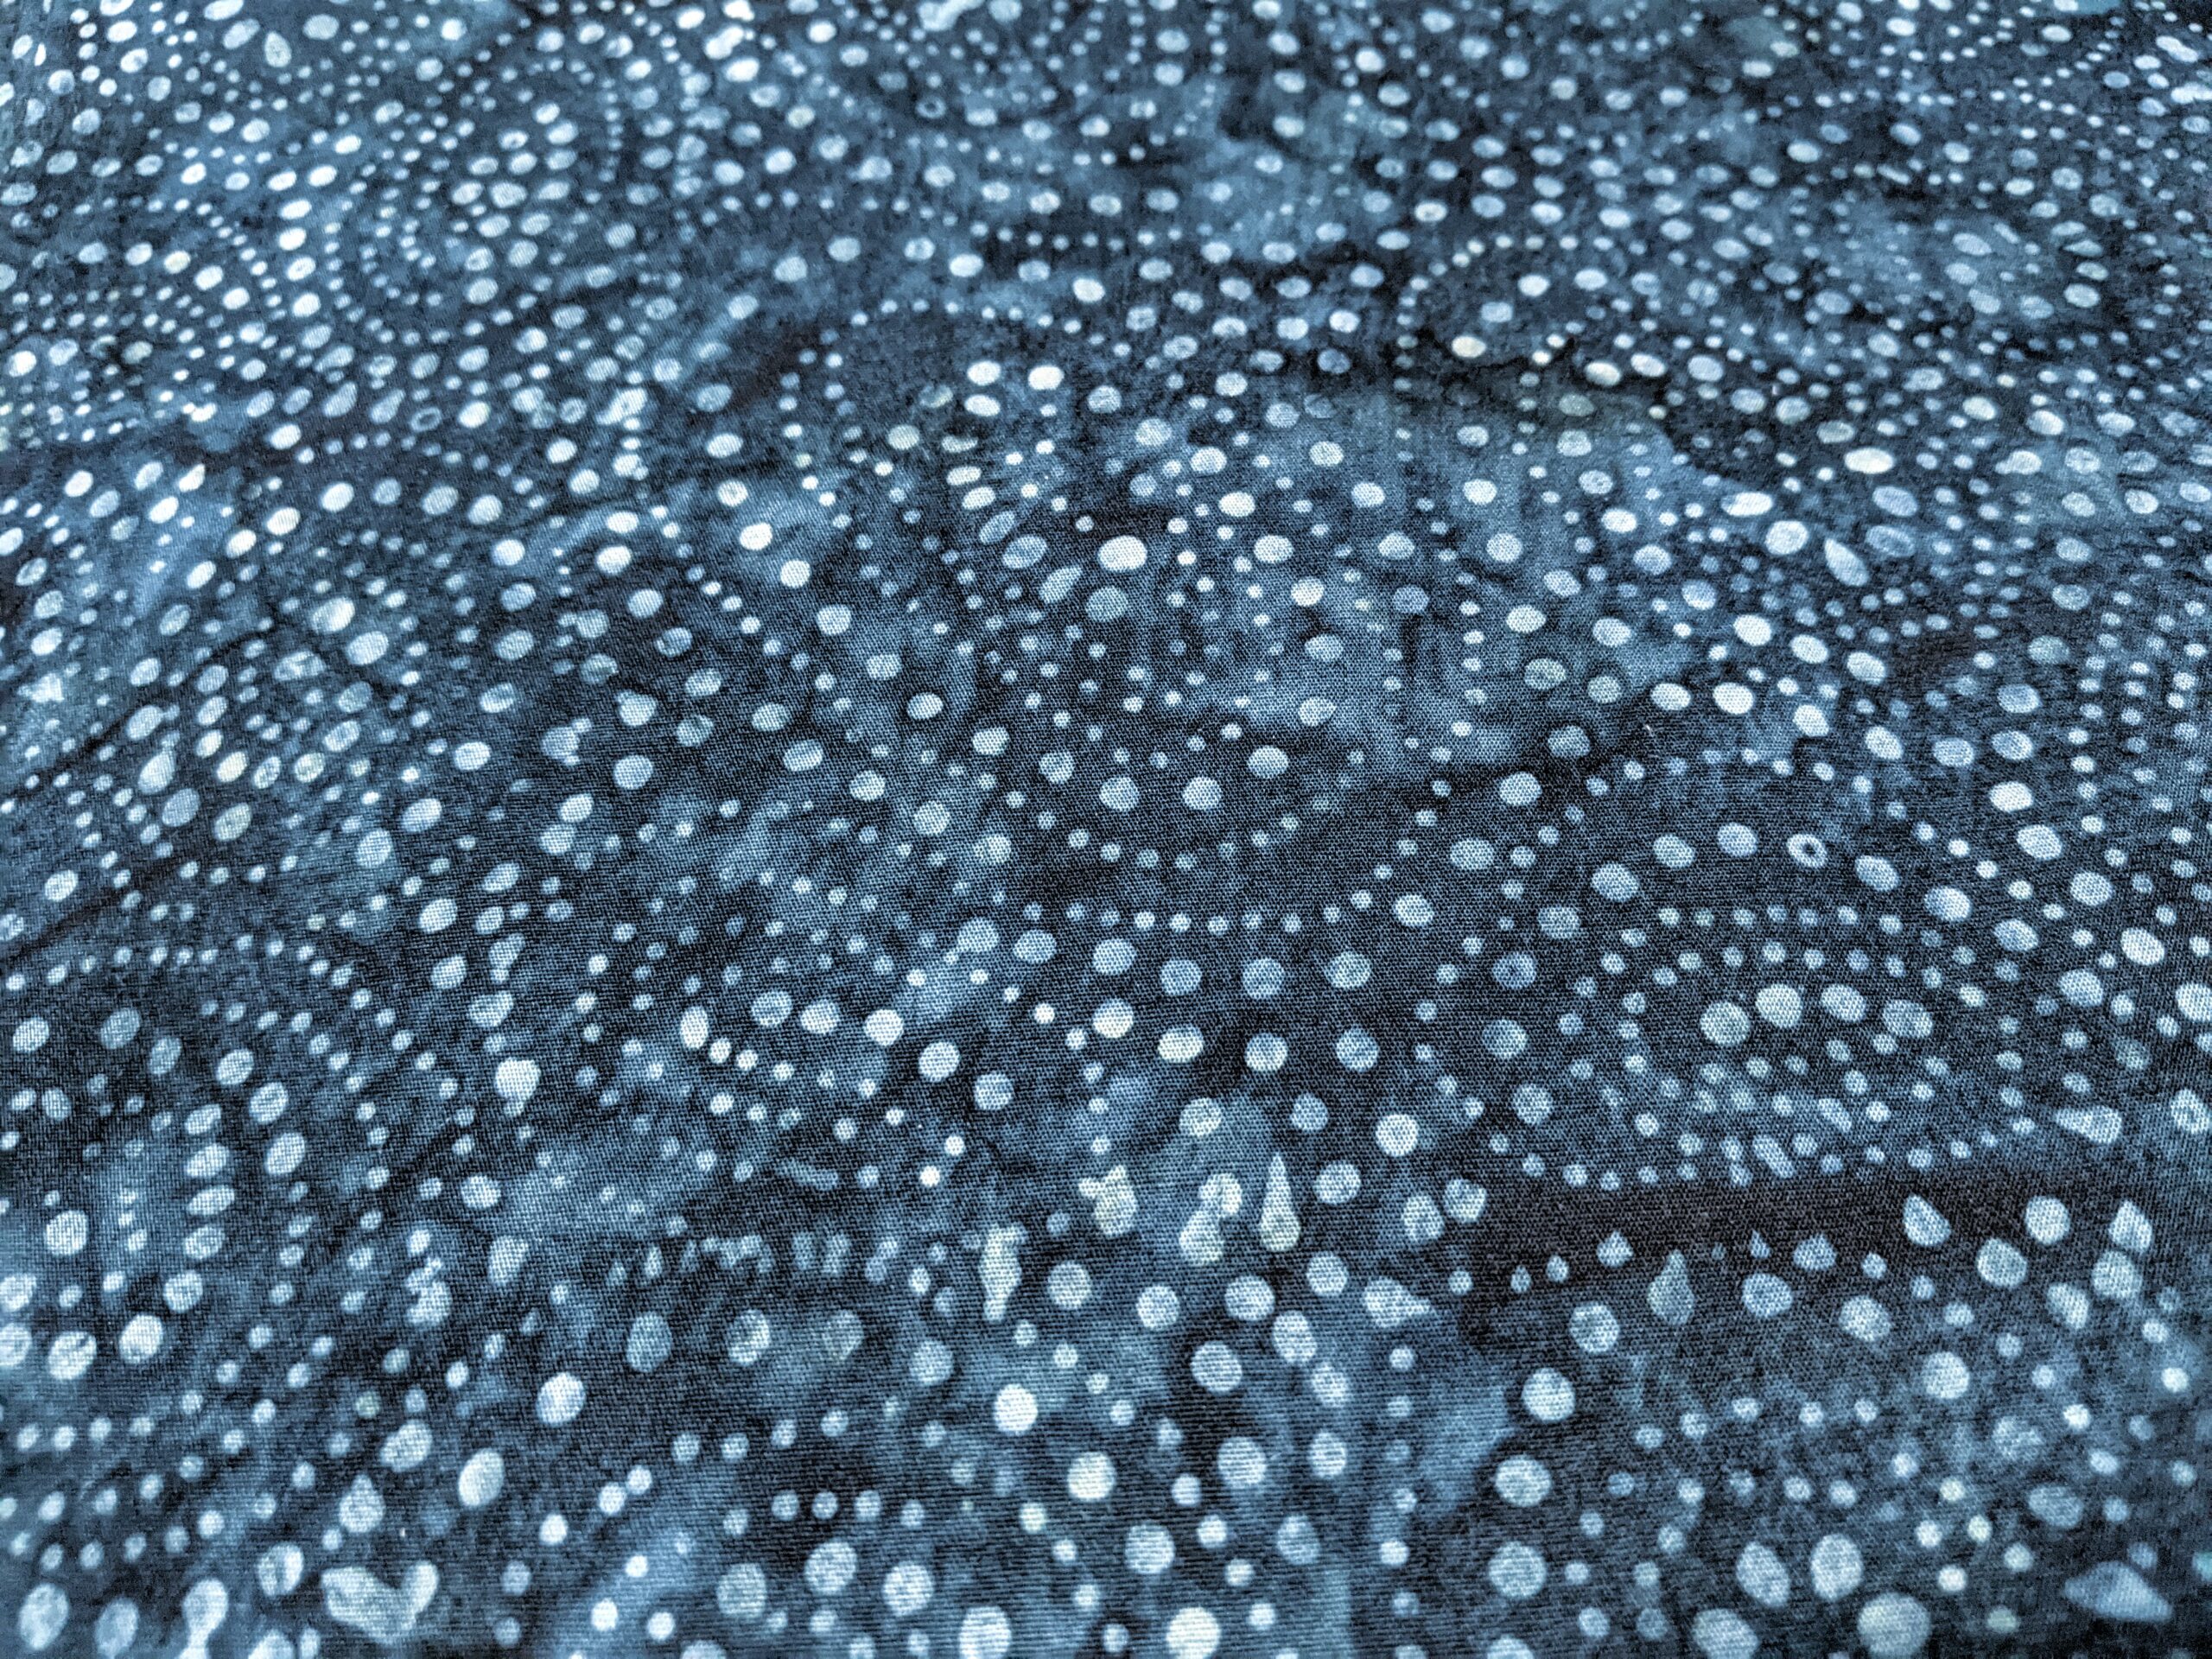
Back to the original pattern, I made some color modifications: the very white background is now a light grey polka dot, and varying fabrics in four volumes throughout: light whites, medium oranges (now medium peach/beige), medium blues (aquas), and dark blues (teals).
light white 1
light white 2
medium peach
medium beige
medium aqua 1
medium aqua 2
dark teal 1
dark teal 2
As an added bonus, I’m going to keep track of the hours spent on this quilt. All of them….not just the ones sewing, because let’s be honest, there’s a lot more to making a quilt than just the sewing. I’ve spent the last few years being very accurate with my time charts. I even have a spreadsheet that I use to track them all. I find that even I don’t realize how much time goes into things sometimes.
Hour Count:
Researching a pattern and calculating yardage: 3 hours
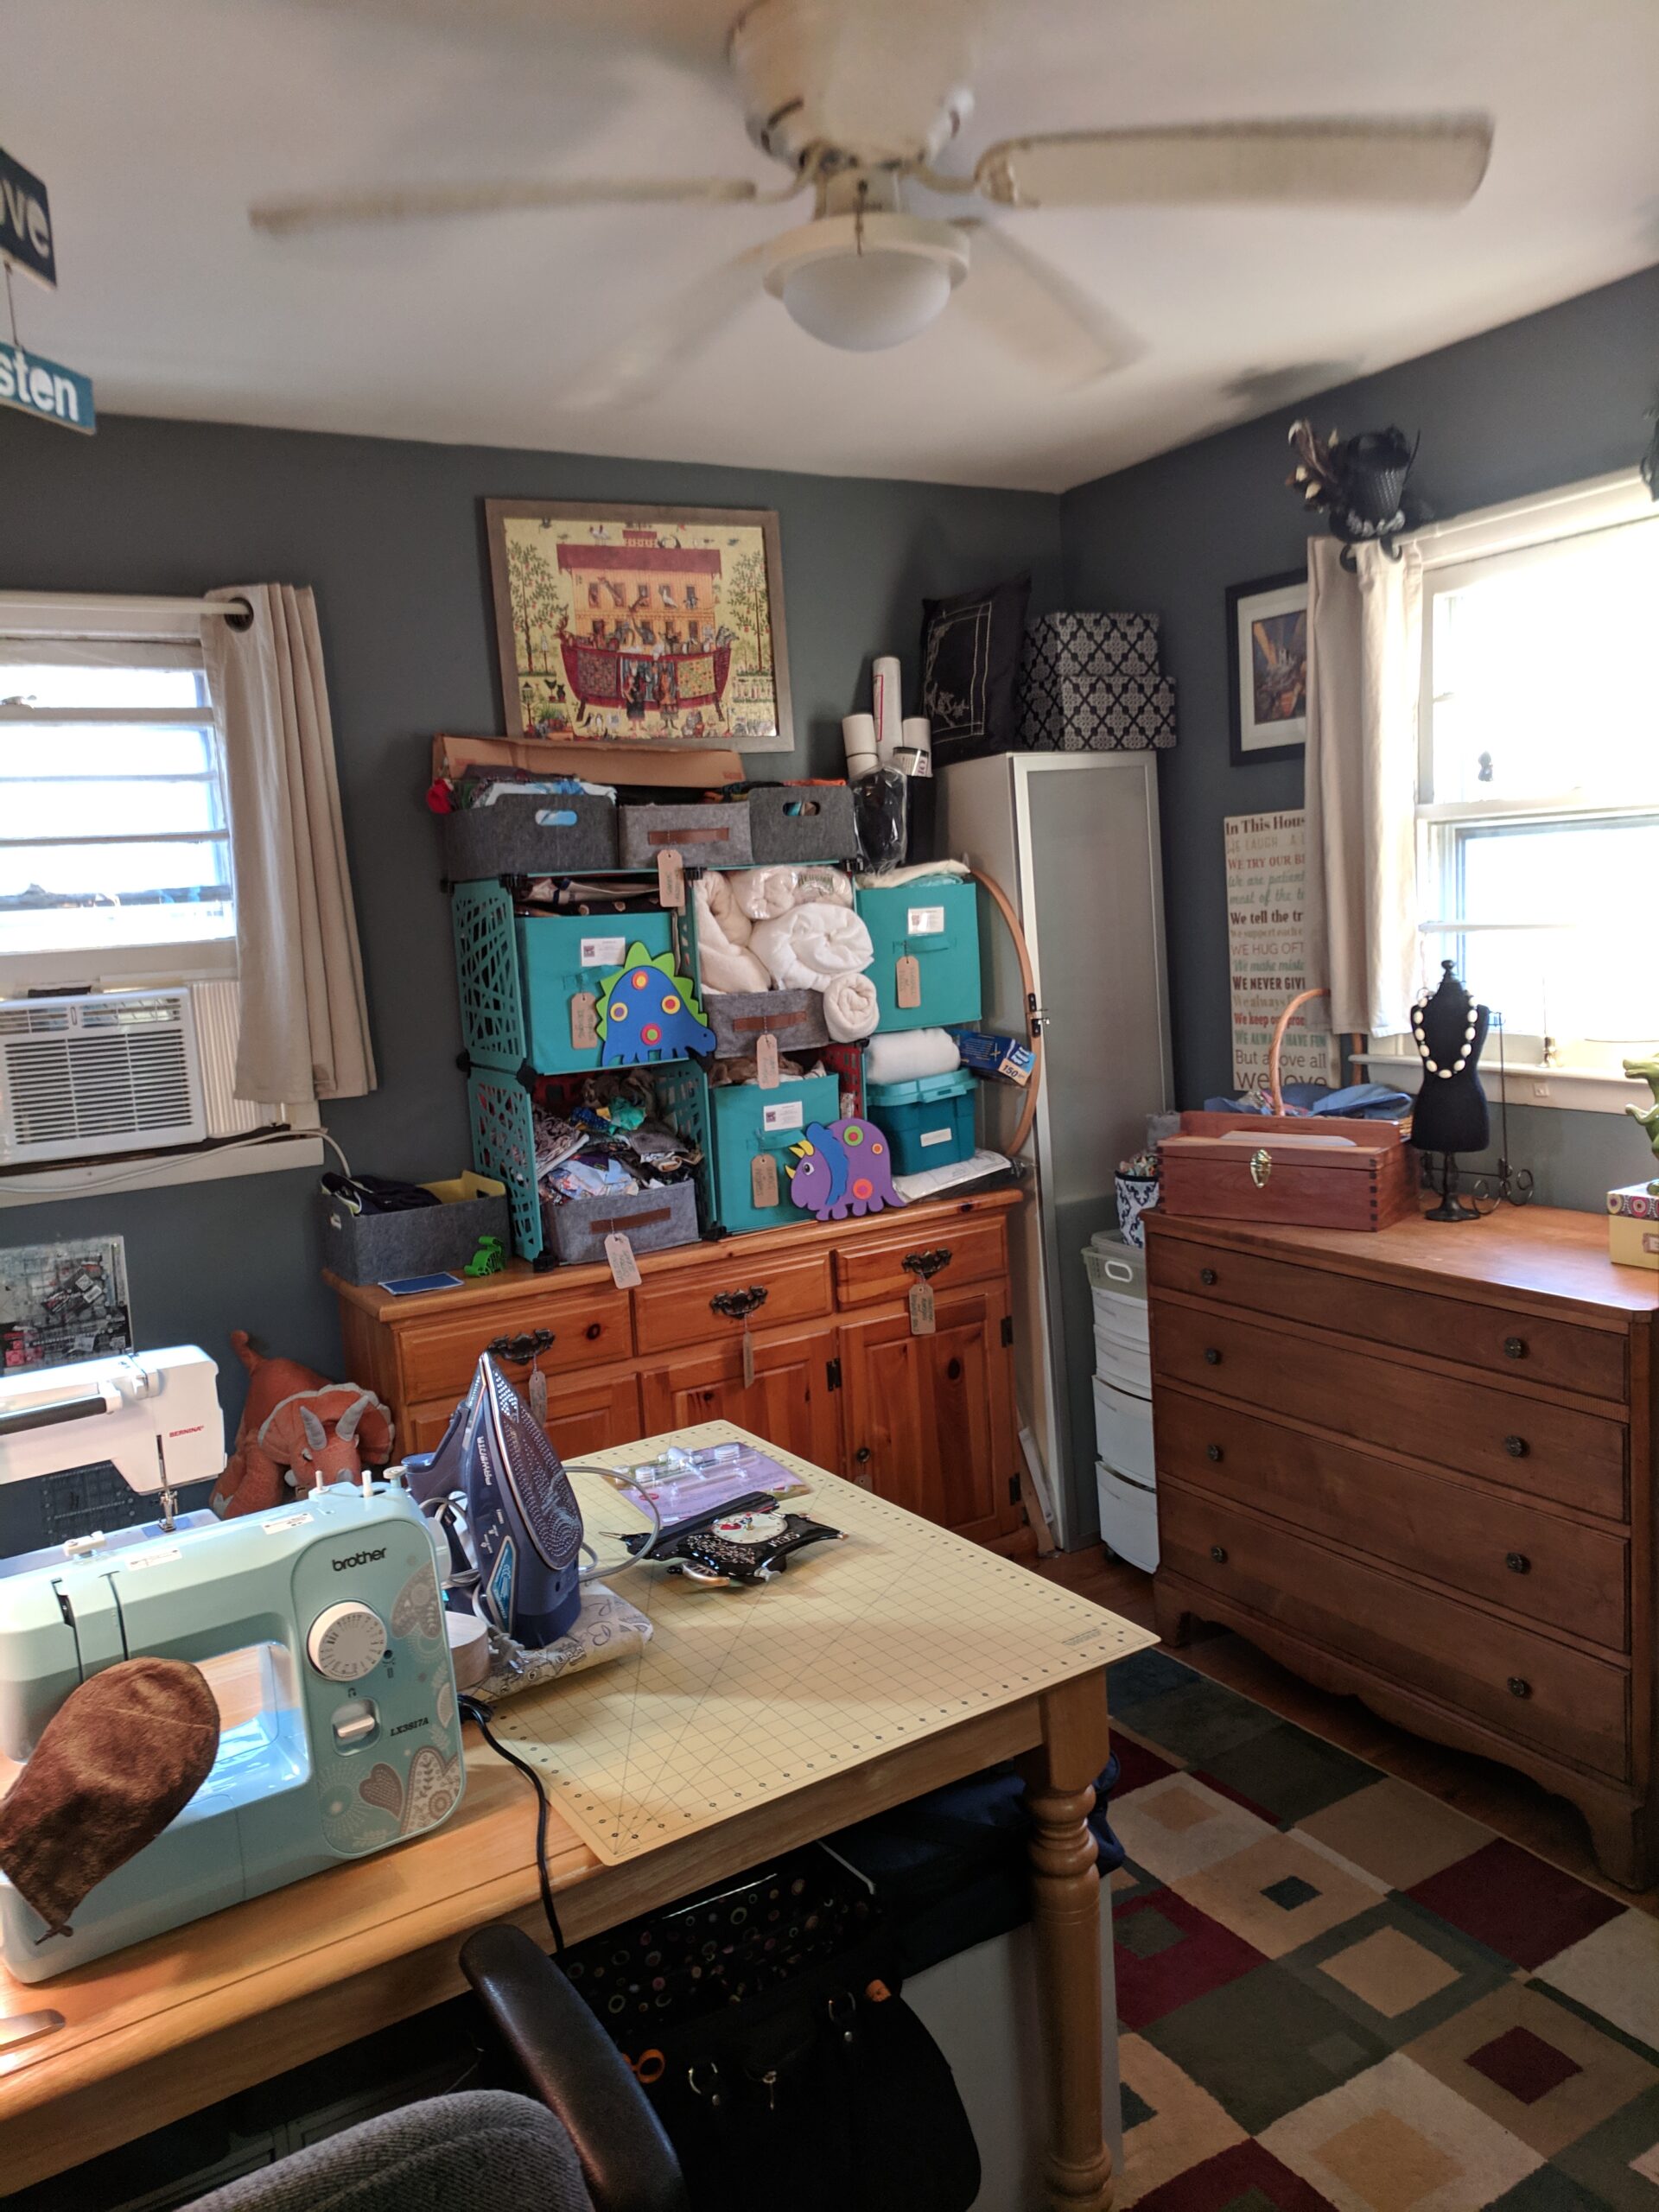
I get a LOT of people asking about my Studio space. I’m going to show off my old Studio here. Remember that what works for one person, may not work for another. I have found that I have adjusted, tweaked, rearranged, added and removed things …
If you’ve been following my Saga of the Quilt Seeds (ooh look! a conveniently placed link to that article right here. lol) you’ll know that I was trying to finish up a large quilt for my cousin’s wedding along with a baby quilt for my …
As you guessed by now, when you get engaged in my family, you get a Quilt. I am so blessed to have a family who loves and appreciates my craft. They love these quilts and treat them as the heirlooms that they were intended to be. I know I am so very lucky in this, as I have heard the horror stories of people buying back their own quilts from thrift stores or recipients that hated the quilt or said they didn’t want it. I couldn’t even imagine that. Like I said I am so very blessed that my family appreciates these.
Love in the Time of Cholera
My cousin Zachary is getting married in a few weeks. I can’t even imagine dealing with a wedding during this pandemic. It’s awful. Everything is upside down. I feel terribly for them.
Best Laid Plans
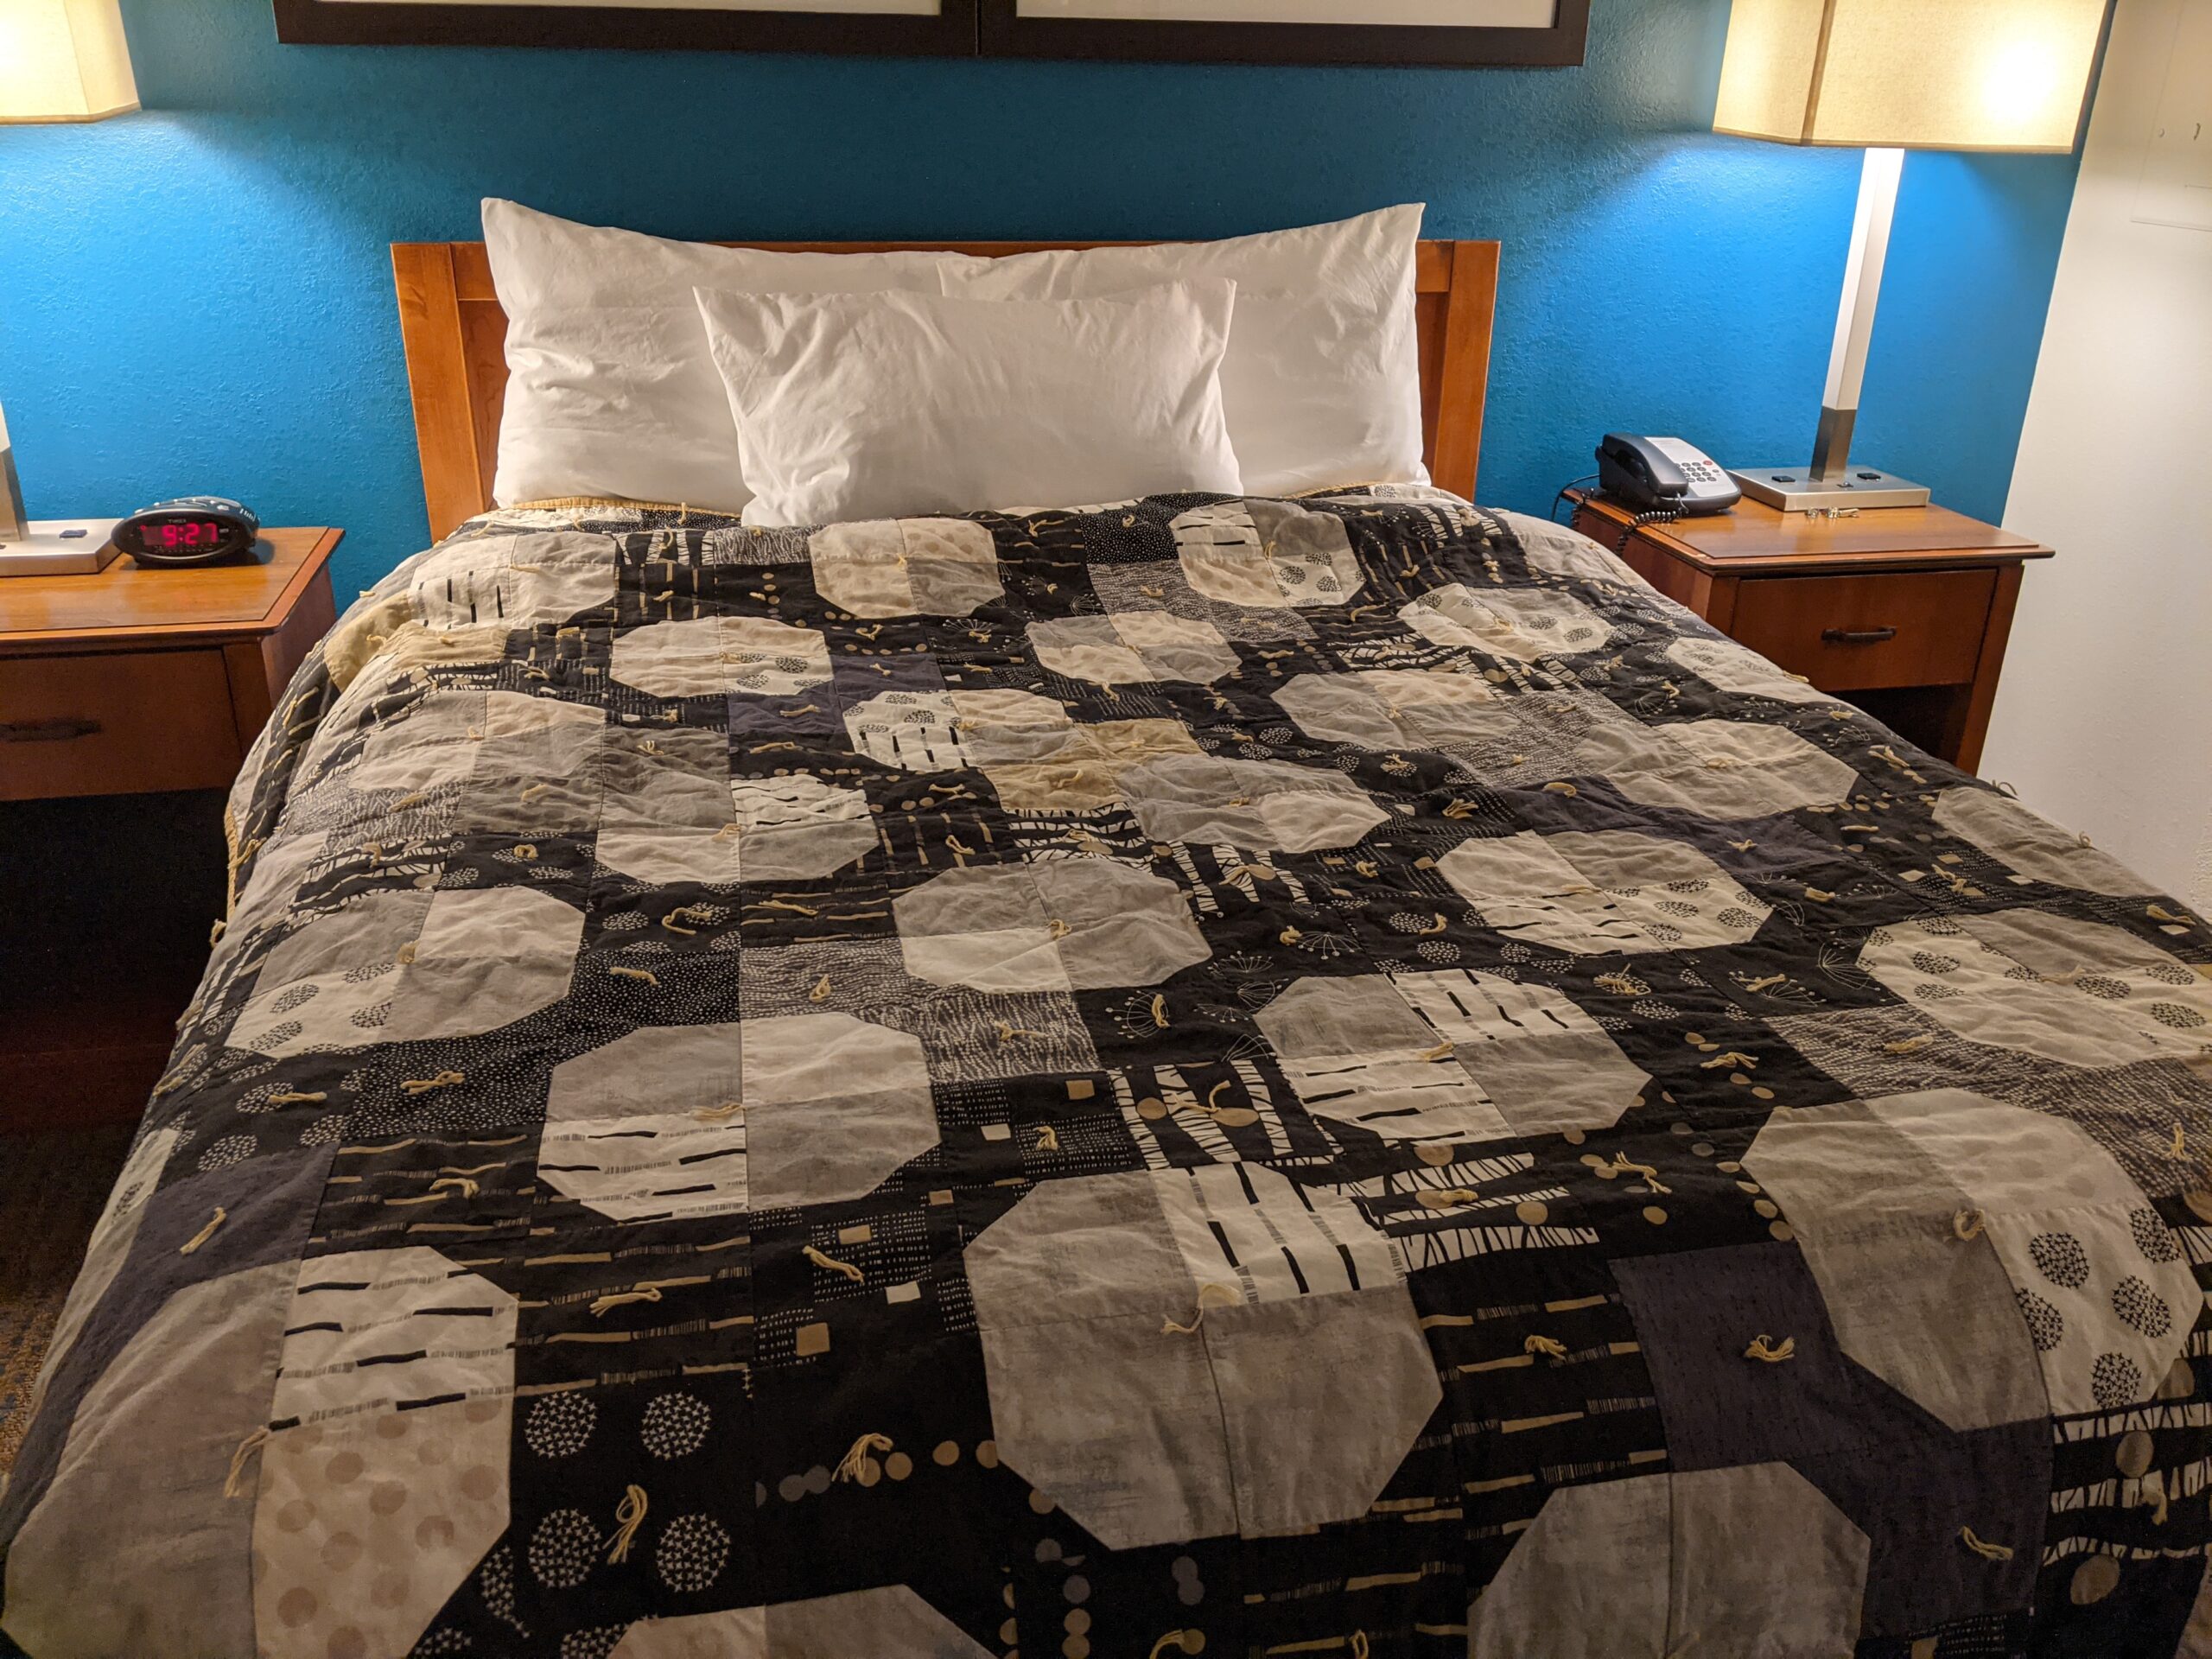
As I’m sure you read in a previous post, it’s been very difficult for me to sew lately. Some of it was simply logistics (we were moving and, miraculously, that means the studio had to be packed up, moved, and unpacked, too.) and some of it was my own mental health. There Wedding Shower was a few weeks ago. The happy couple are so generous with their love. They didn’t mind at all my not quite making the deadline. This is how I solved the problem.
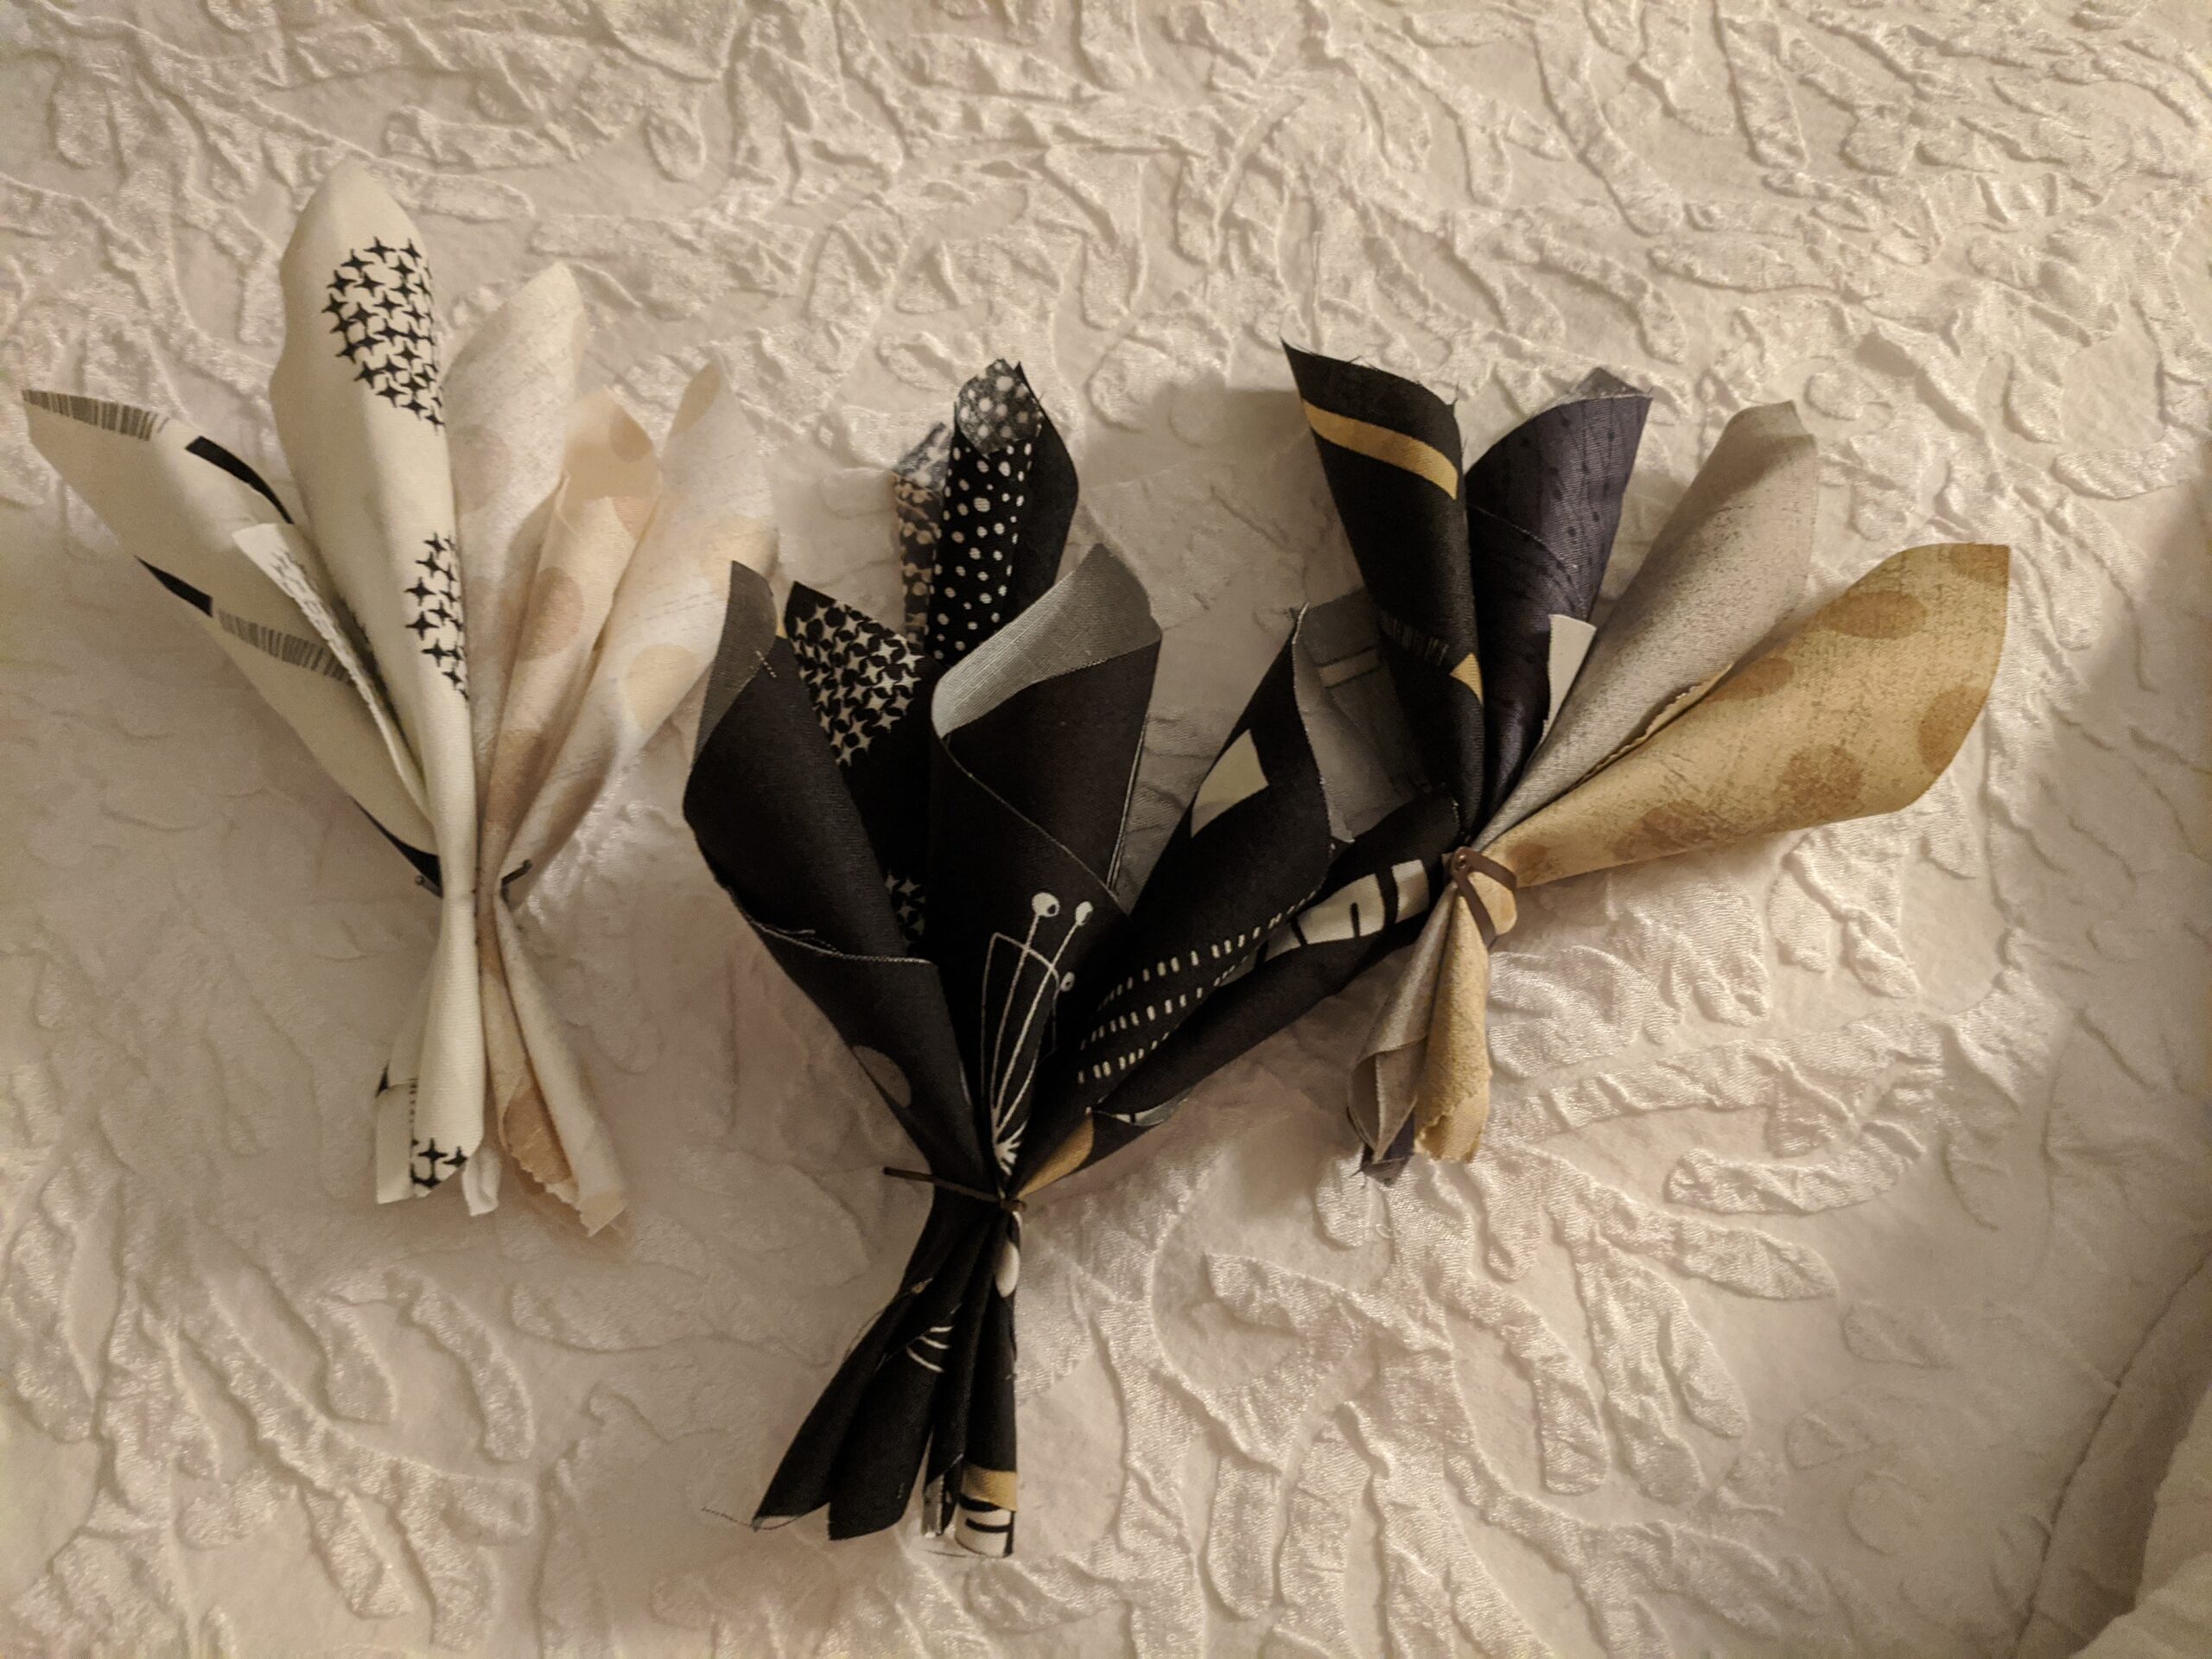
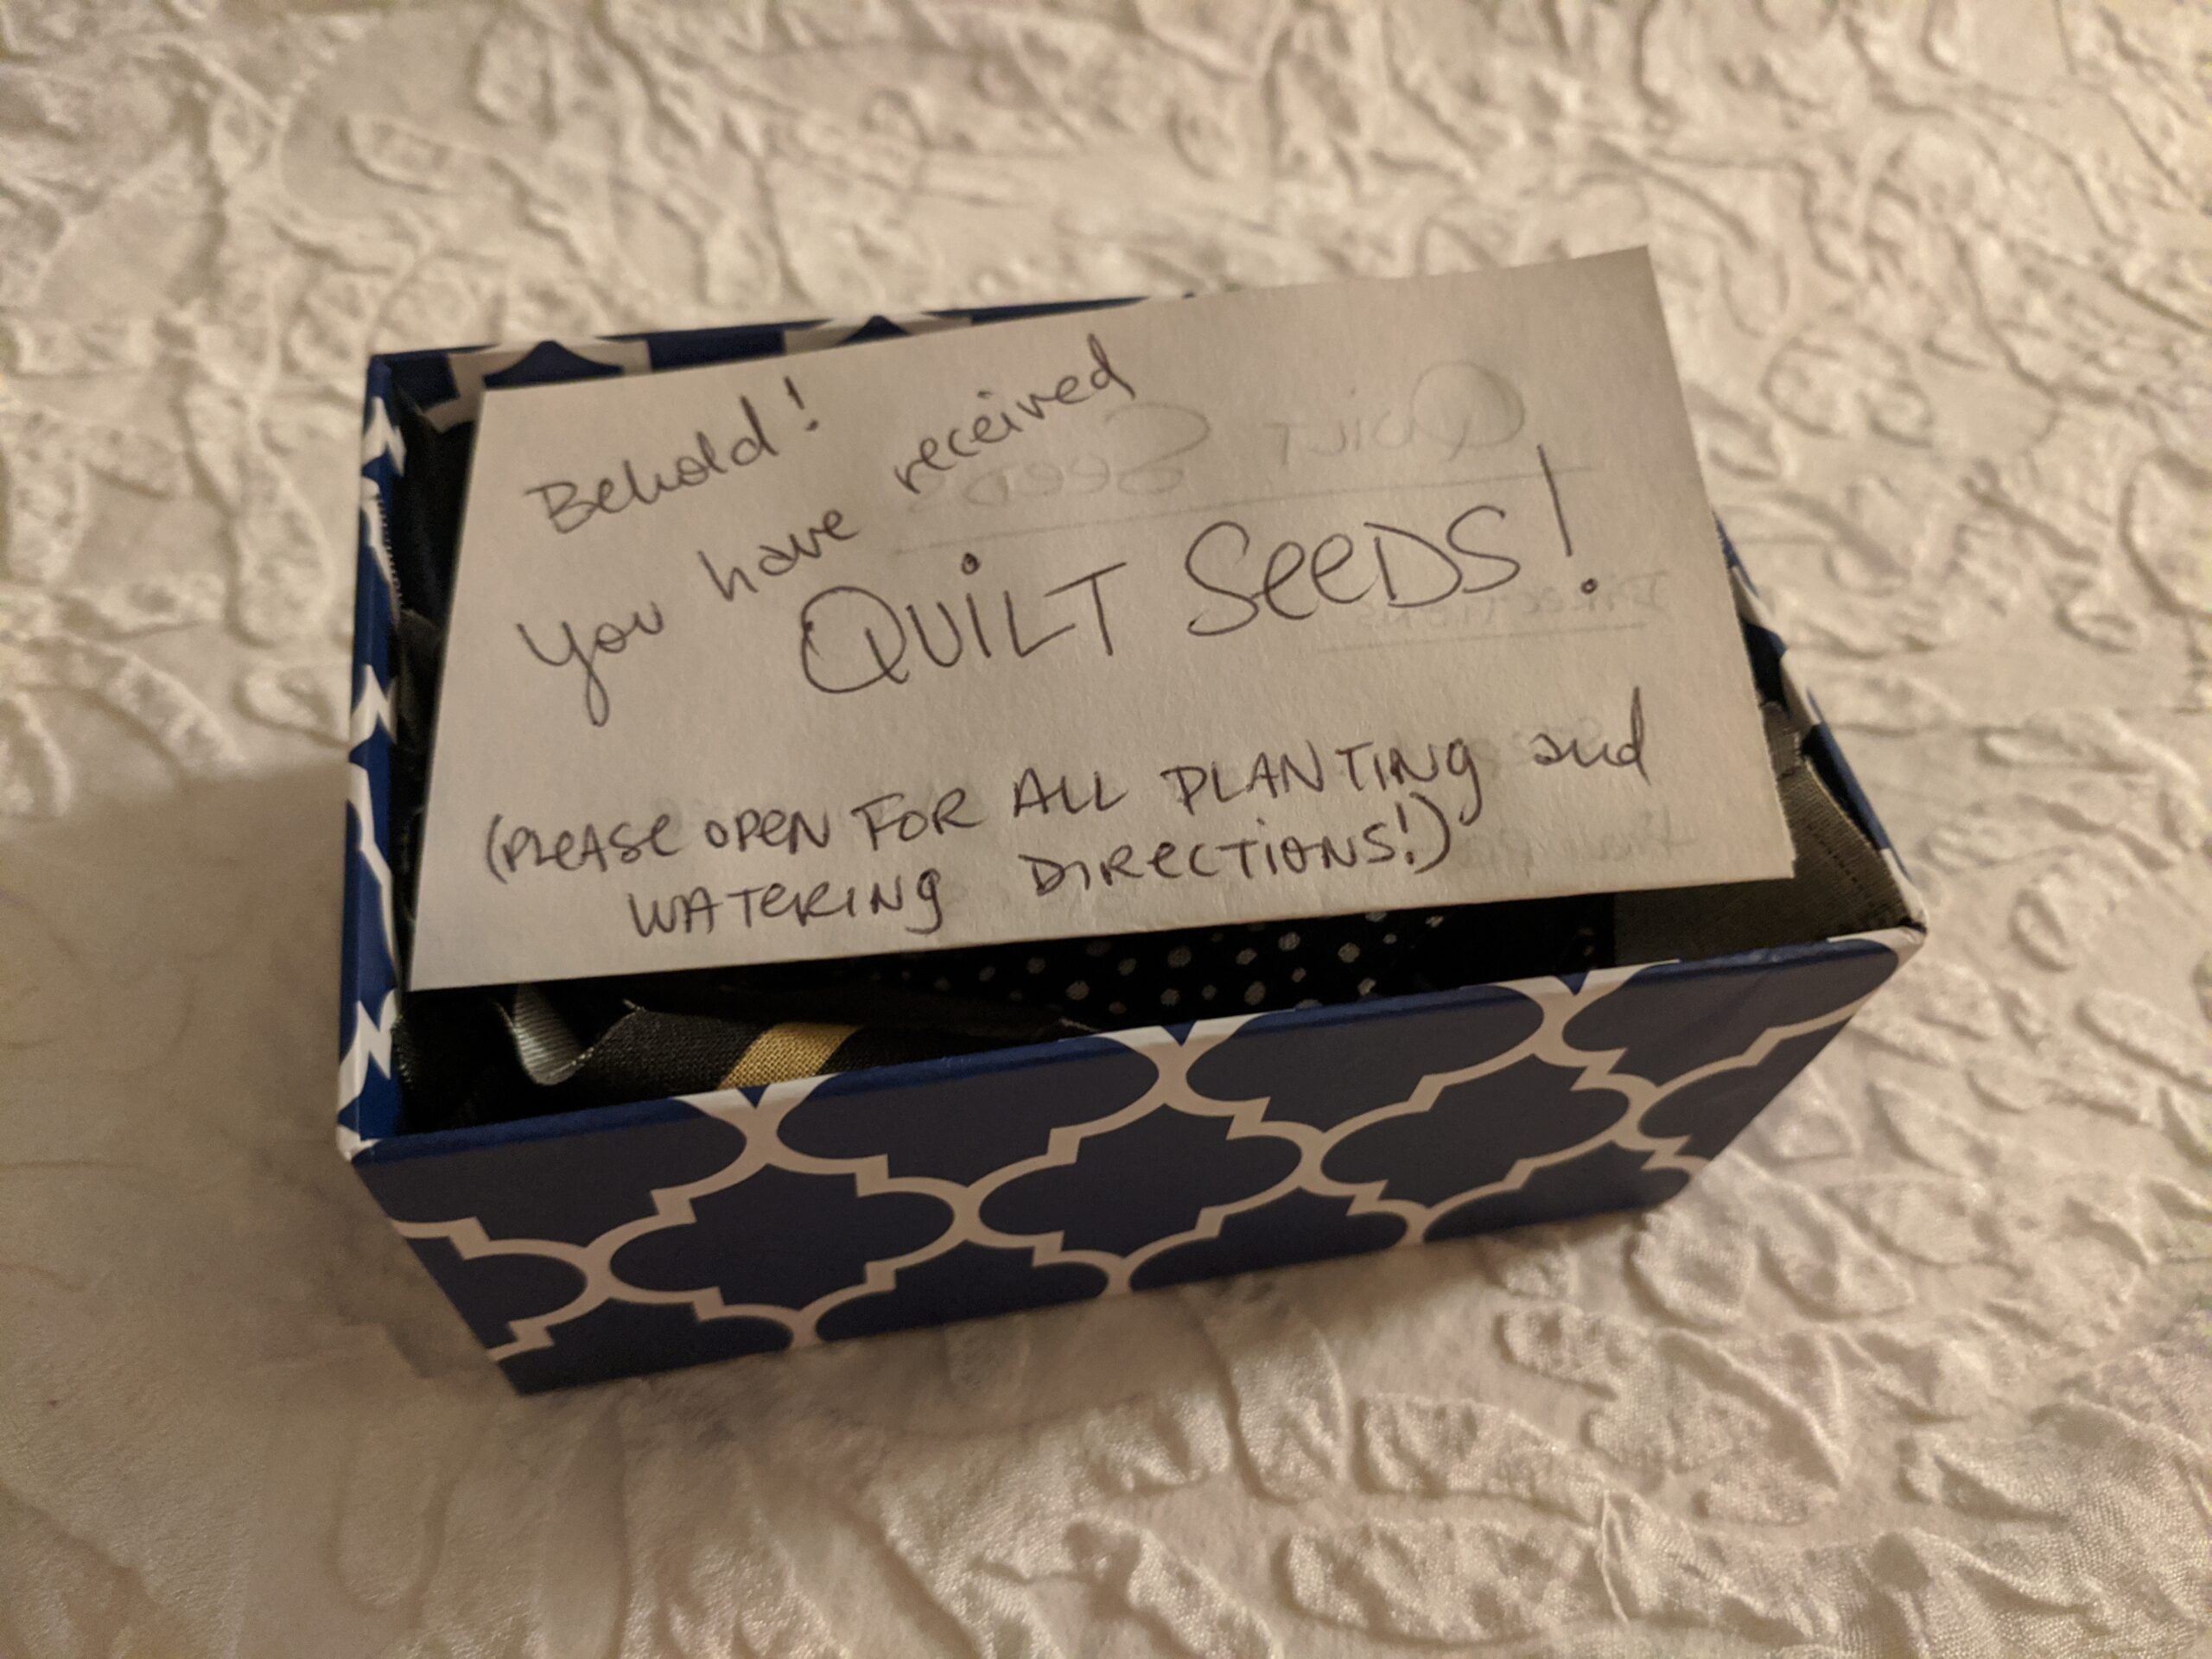
Quilt Seeds
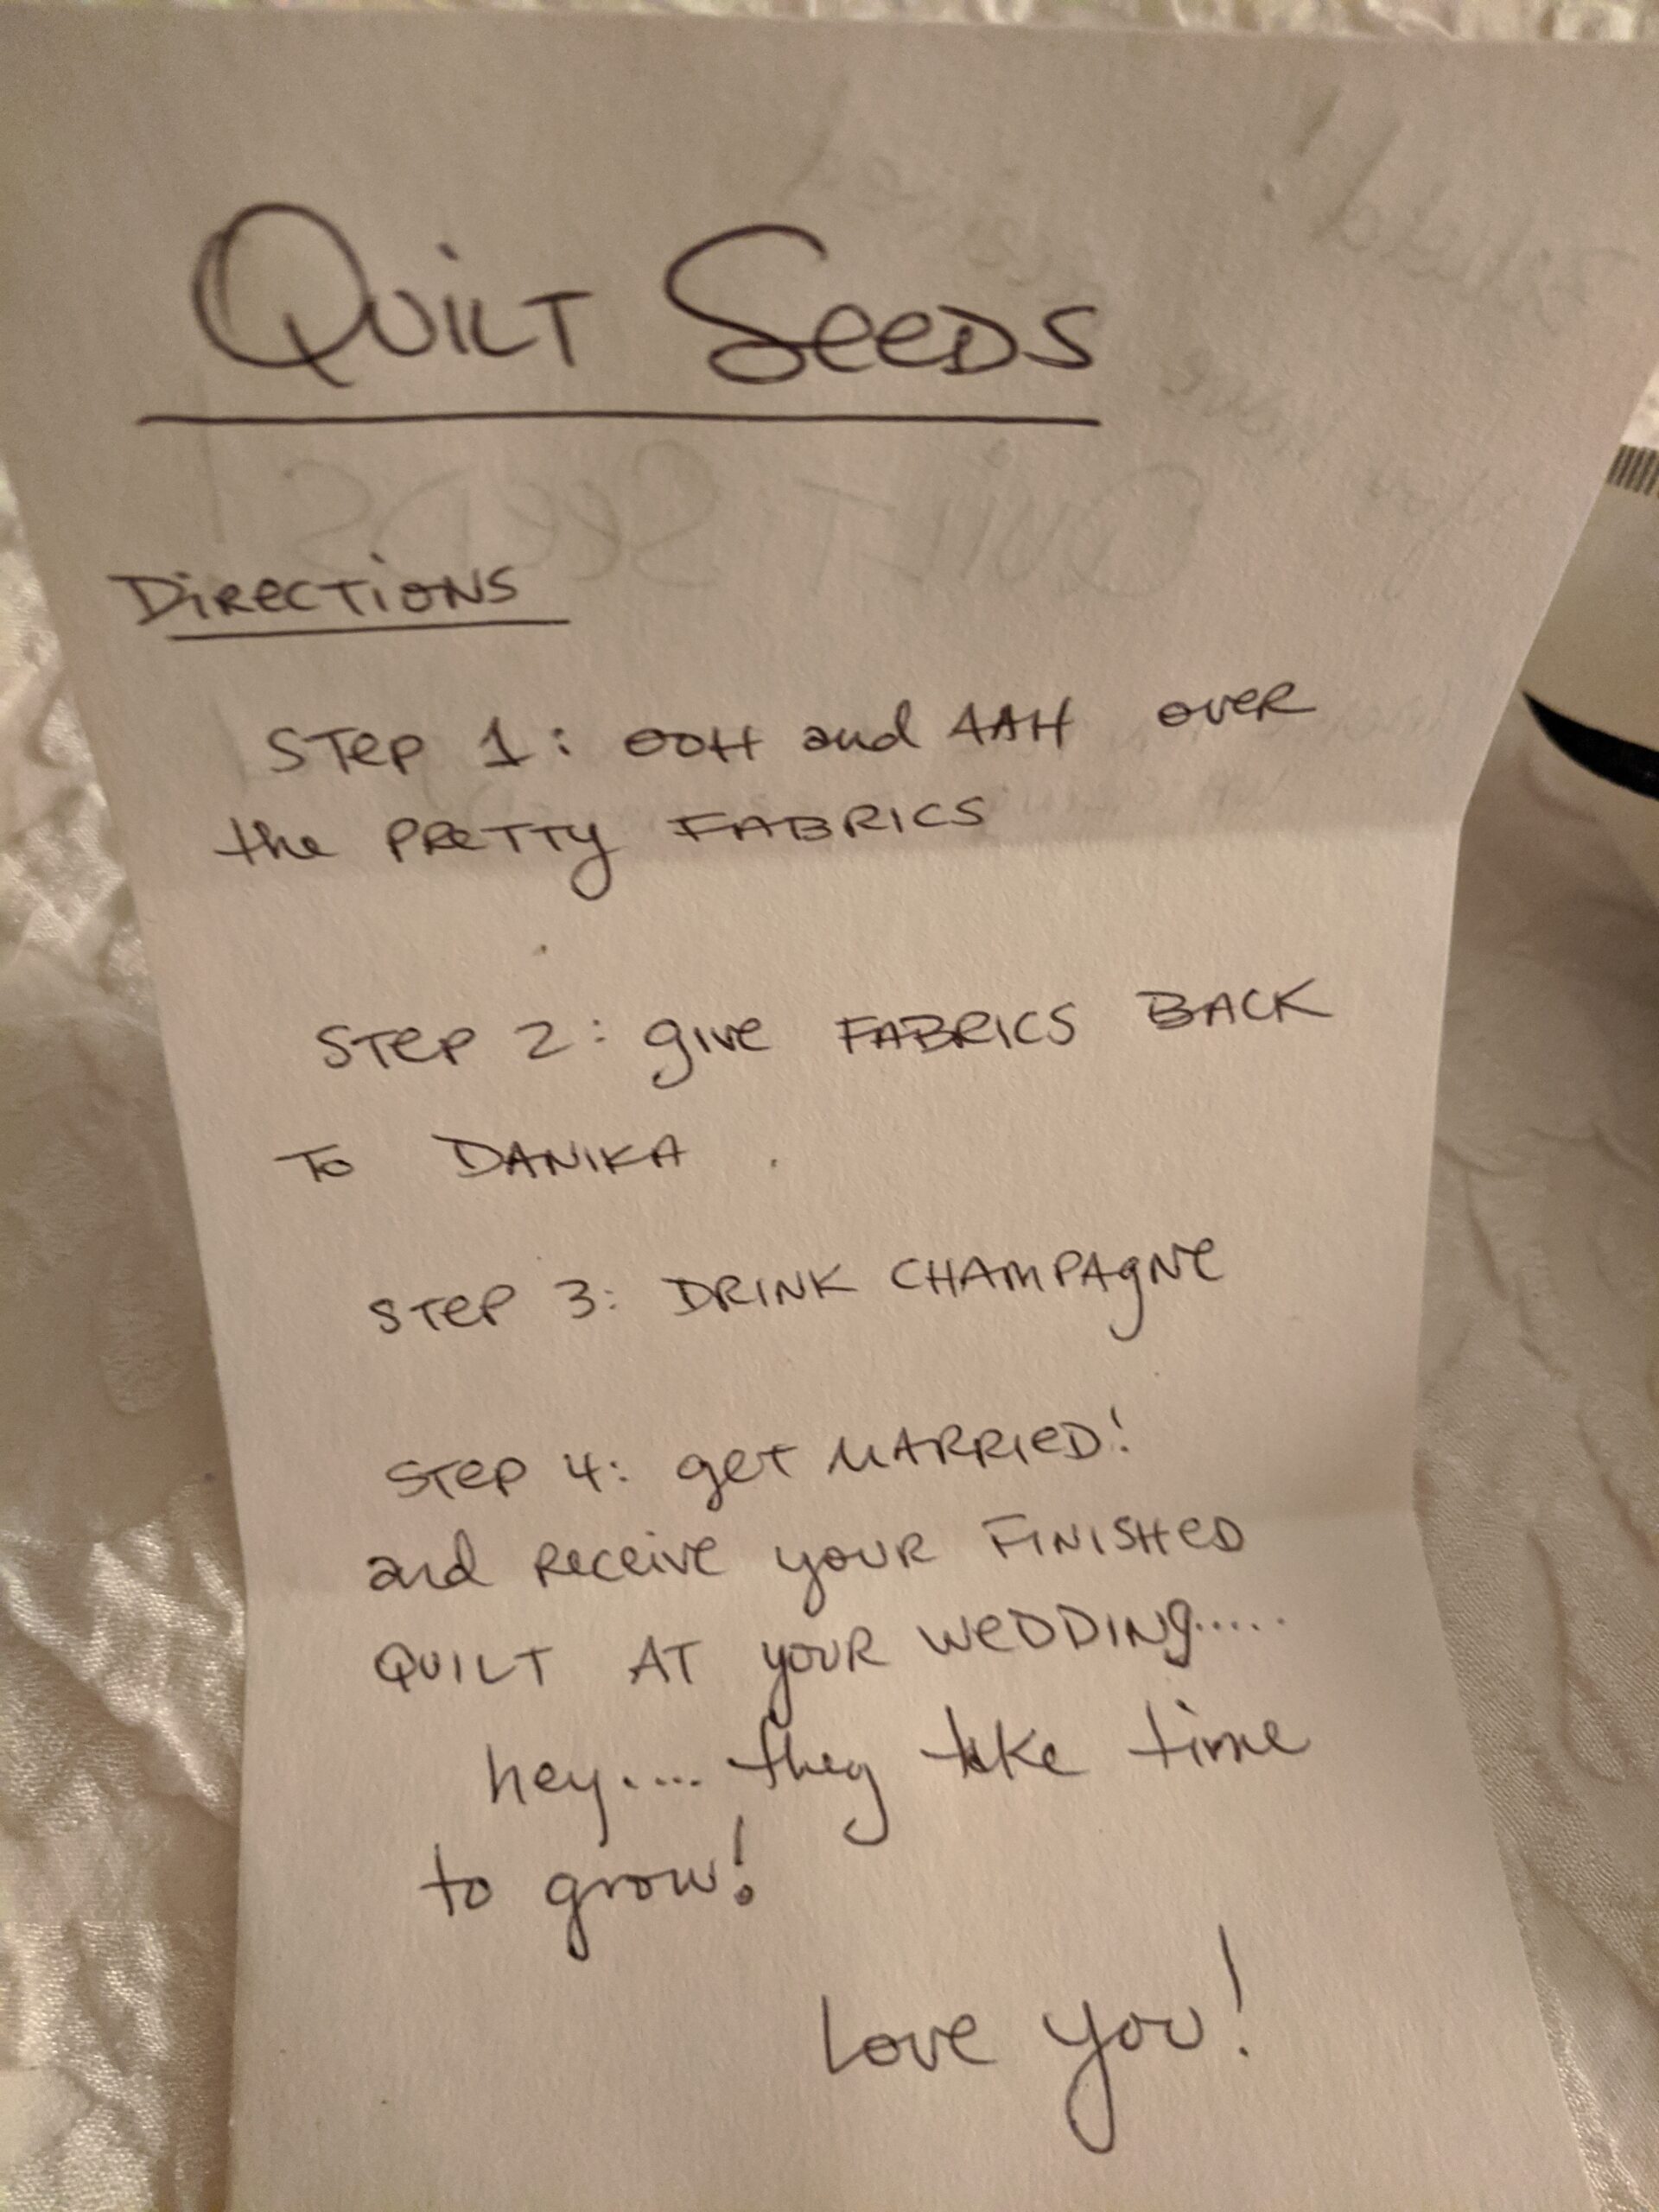
By the time of the shower, all I had gotten to was cutting out the fabric for the quilt. In the hotel room before the Shower, I rolled up a square of each of the fabrics for the quilt into little flowers. I labelled these “Quilt Seeds,” and gave them a bottle of champagne and the following note: “Behold! You have received Quilt Seeds! (Please open for all planting and watering directions!) Directions: Step 1: Ooh and Aah over the pretty fabrics. Step 2: Give fabrics back to Danika. Step 3: Drink Champagne. Step 4: Get Married! And receive your finished quilt at your wedding…hey…they take time to grow! Love you!”
Moving Forward
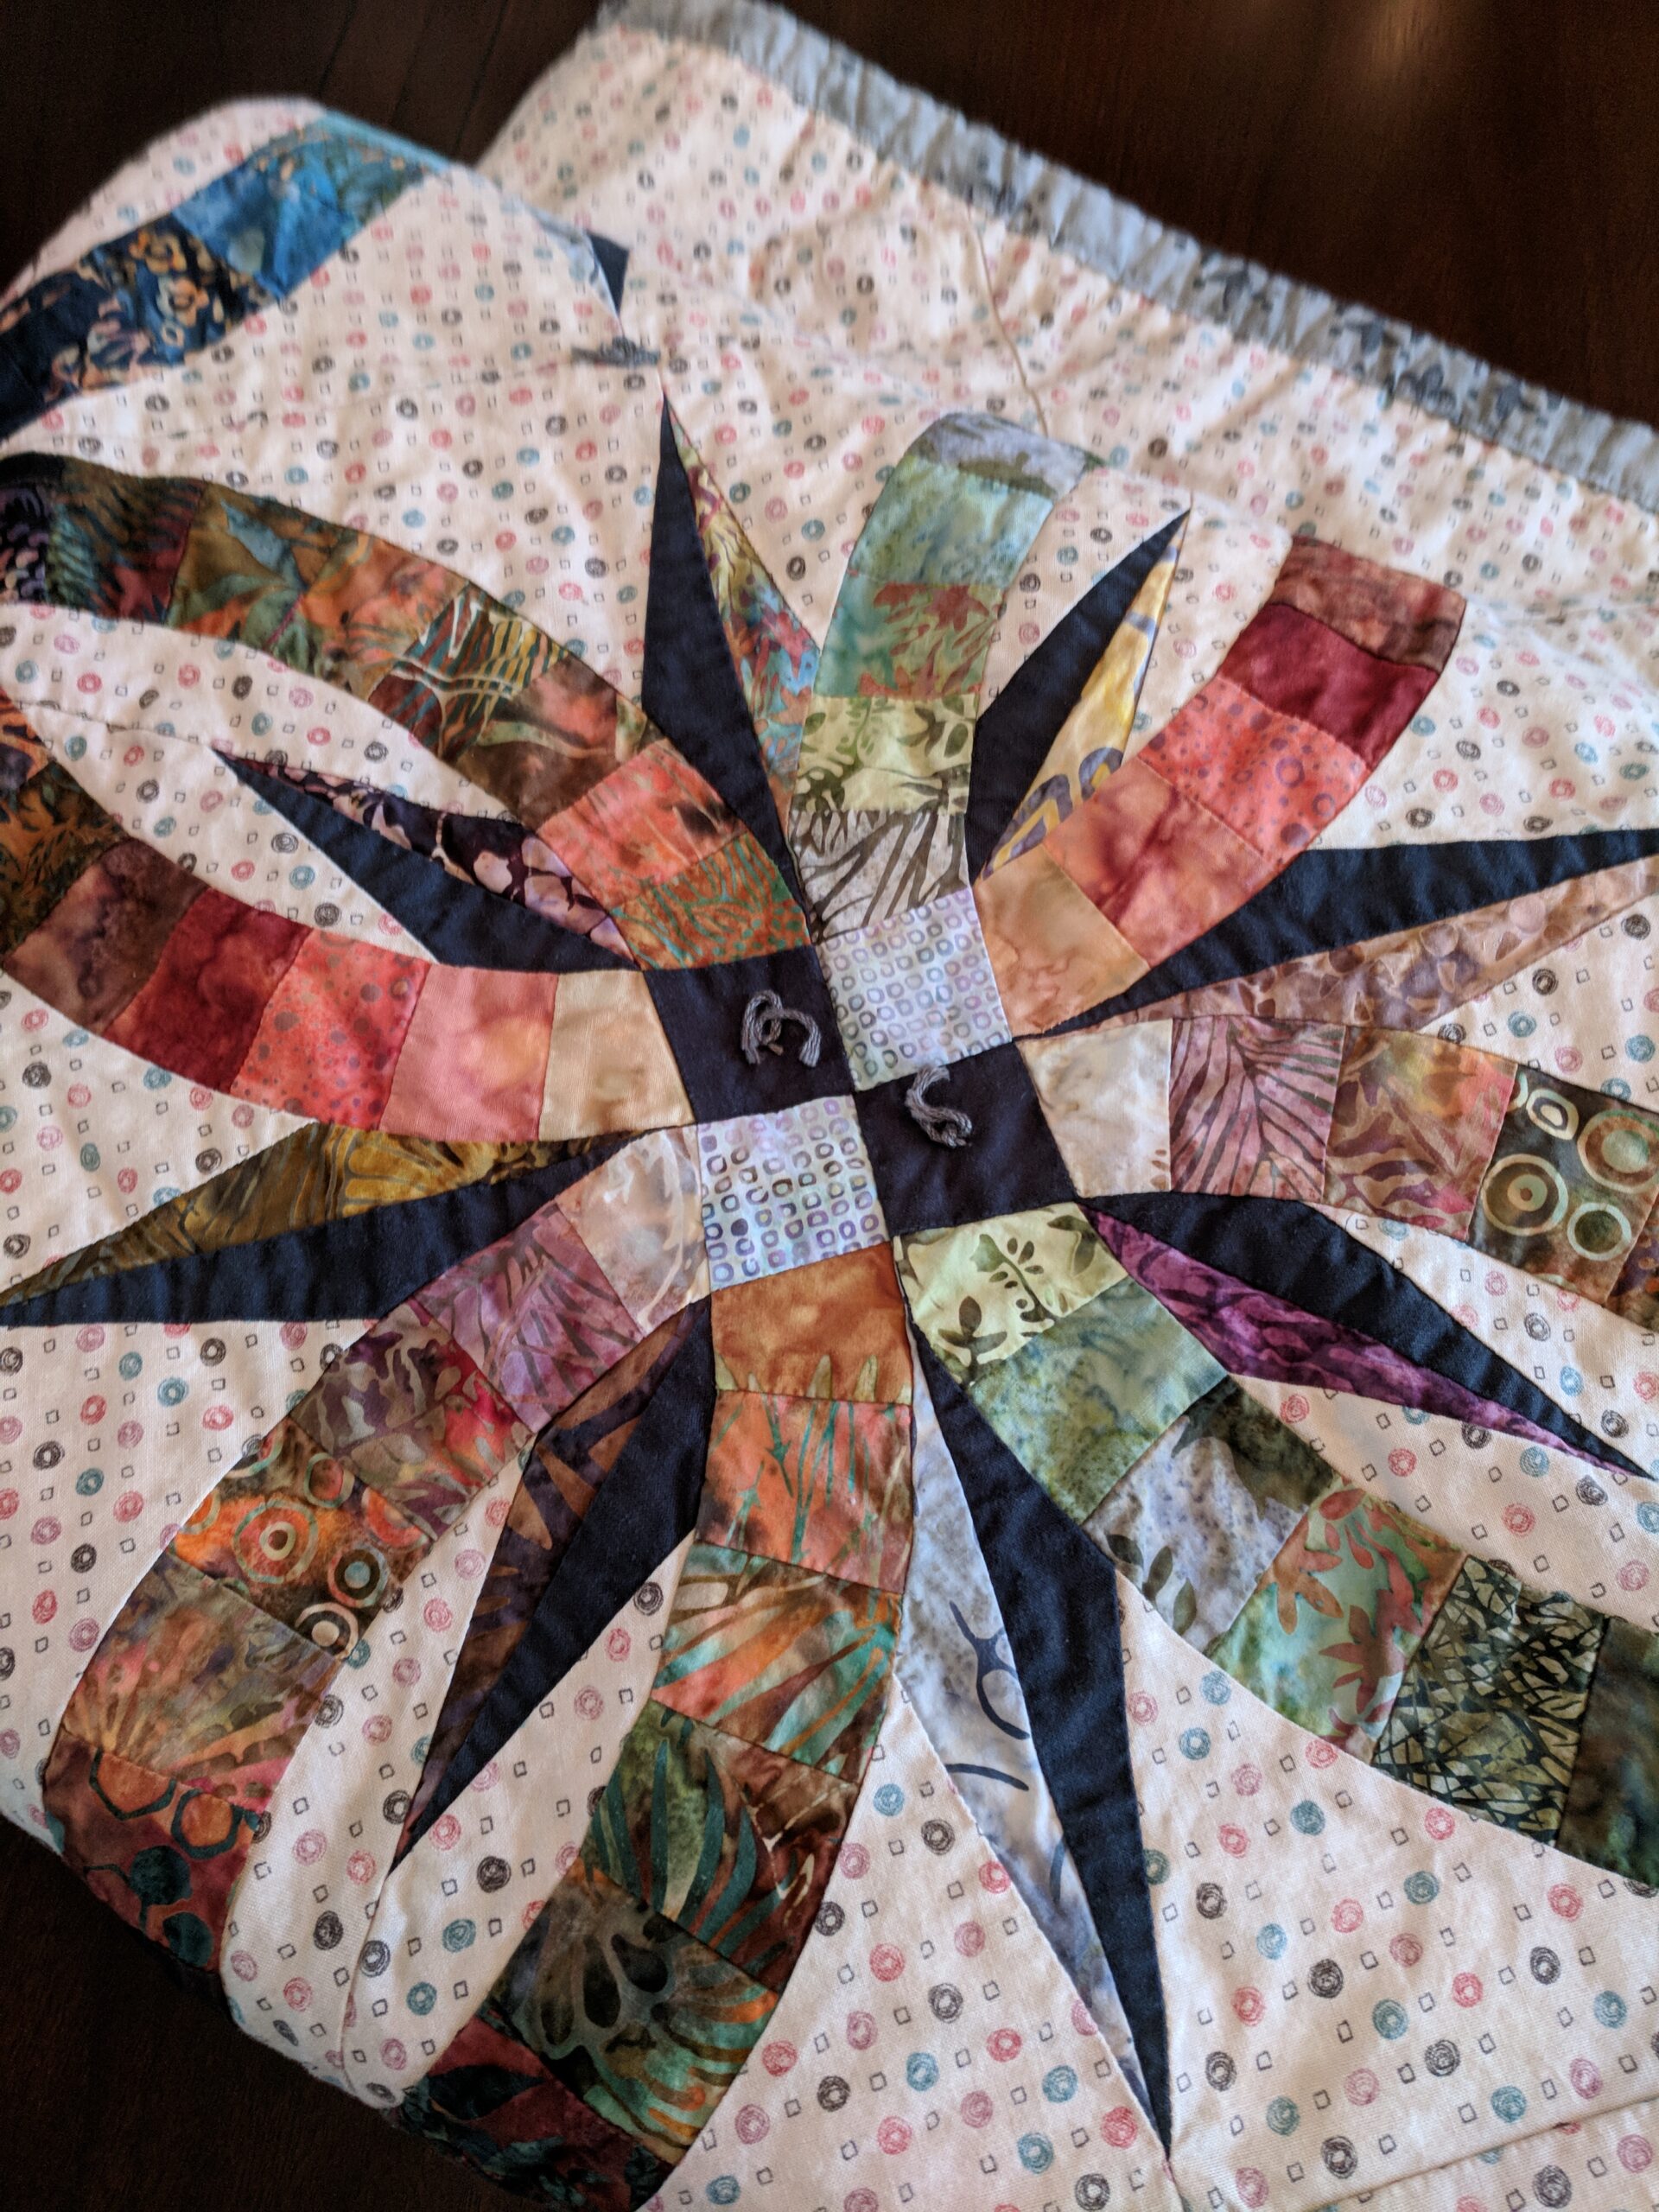
The Quilt is still unfinished. As of right now, I’m about two thirds of the way through finishing the blocks. Then I’ll need to piece the top, sandwich it, tie it, bind it, wash it and pack it up….all before the Wedding on August 15th. I like how it’s turning out, but I wish it was going a bit smoother for me. It’s very hard for me to work on….but as I said before, I’ve been setting very small goals for myself and trying to keep them. I’ll be sure to update you all with the finished product as soon as I get it.
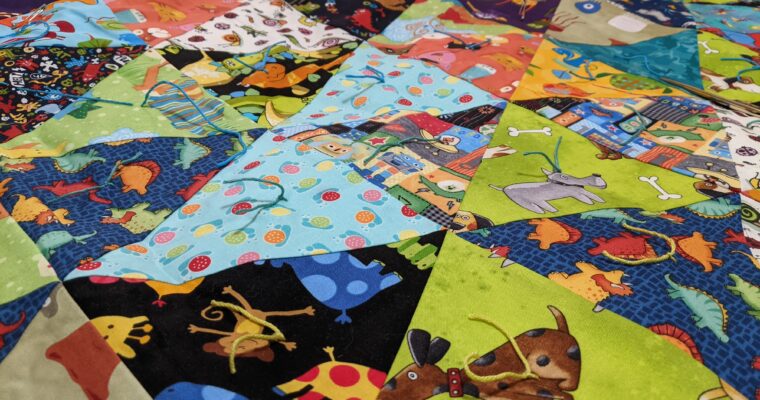
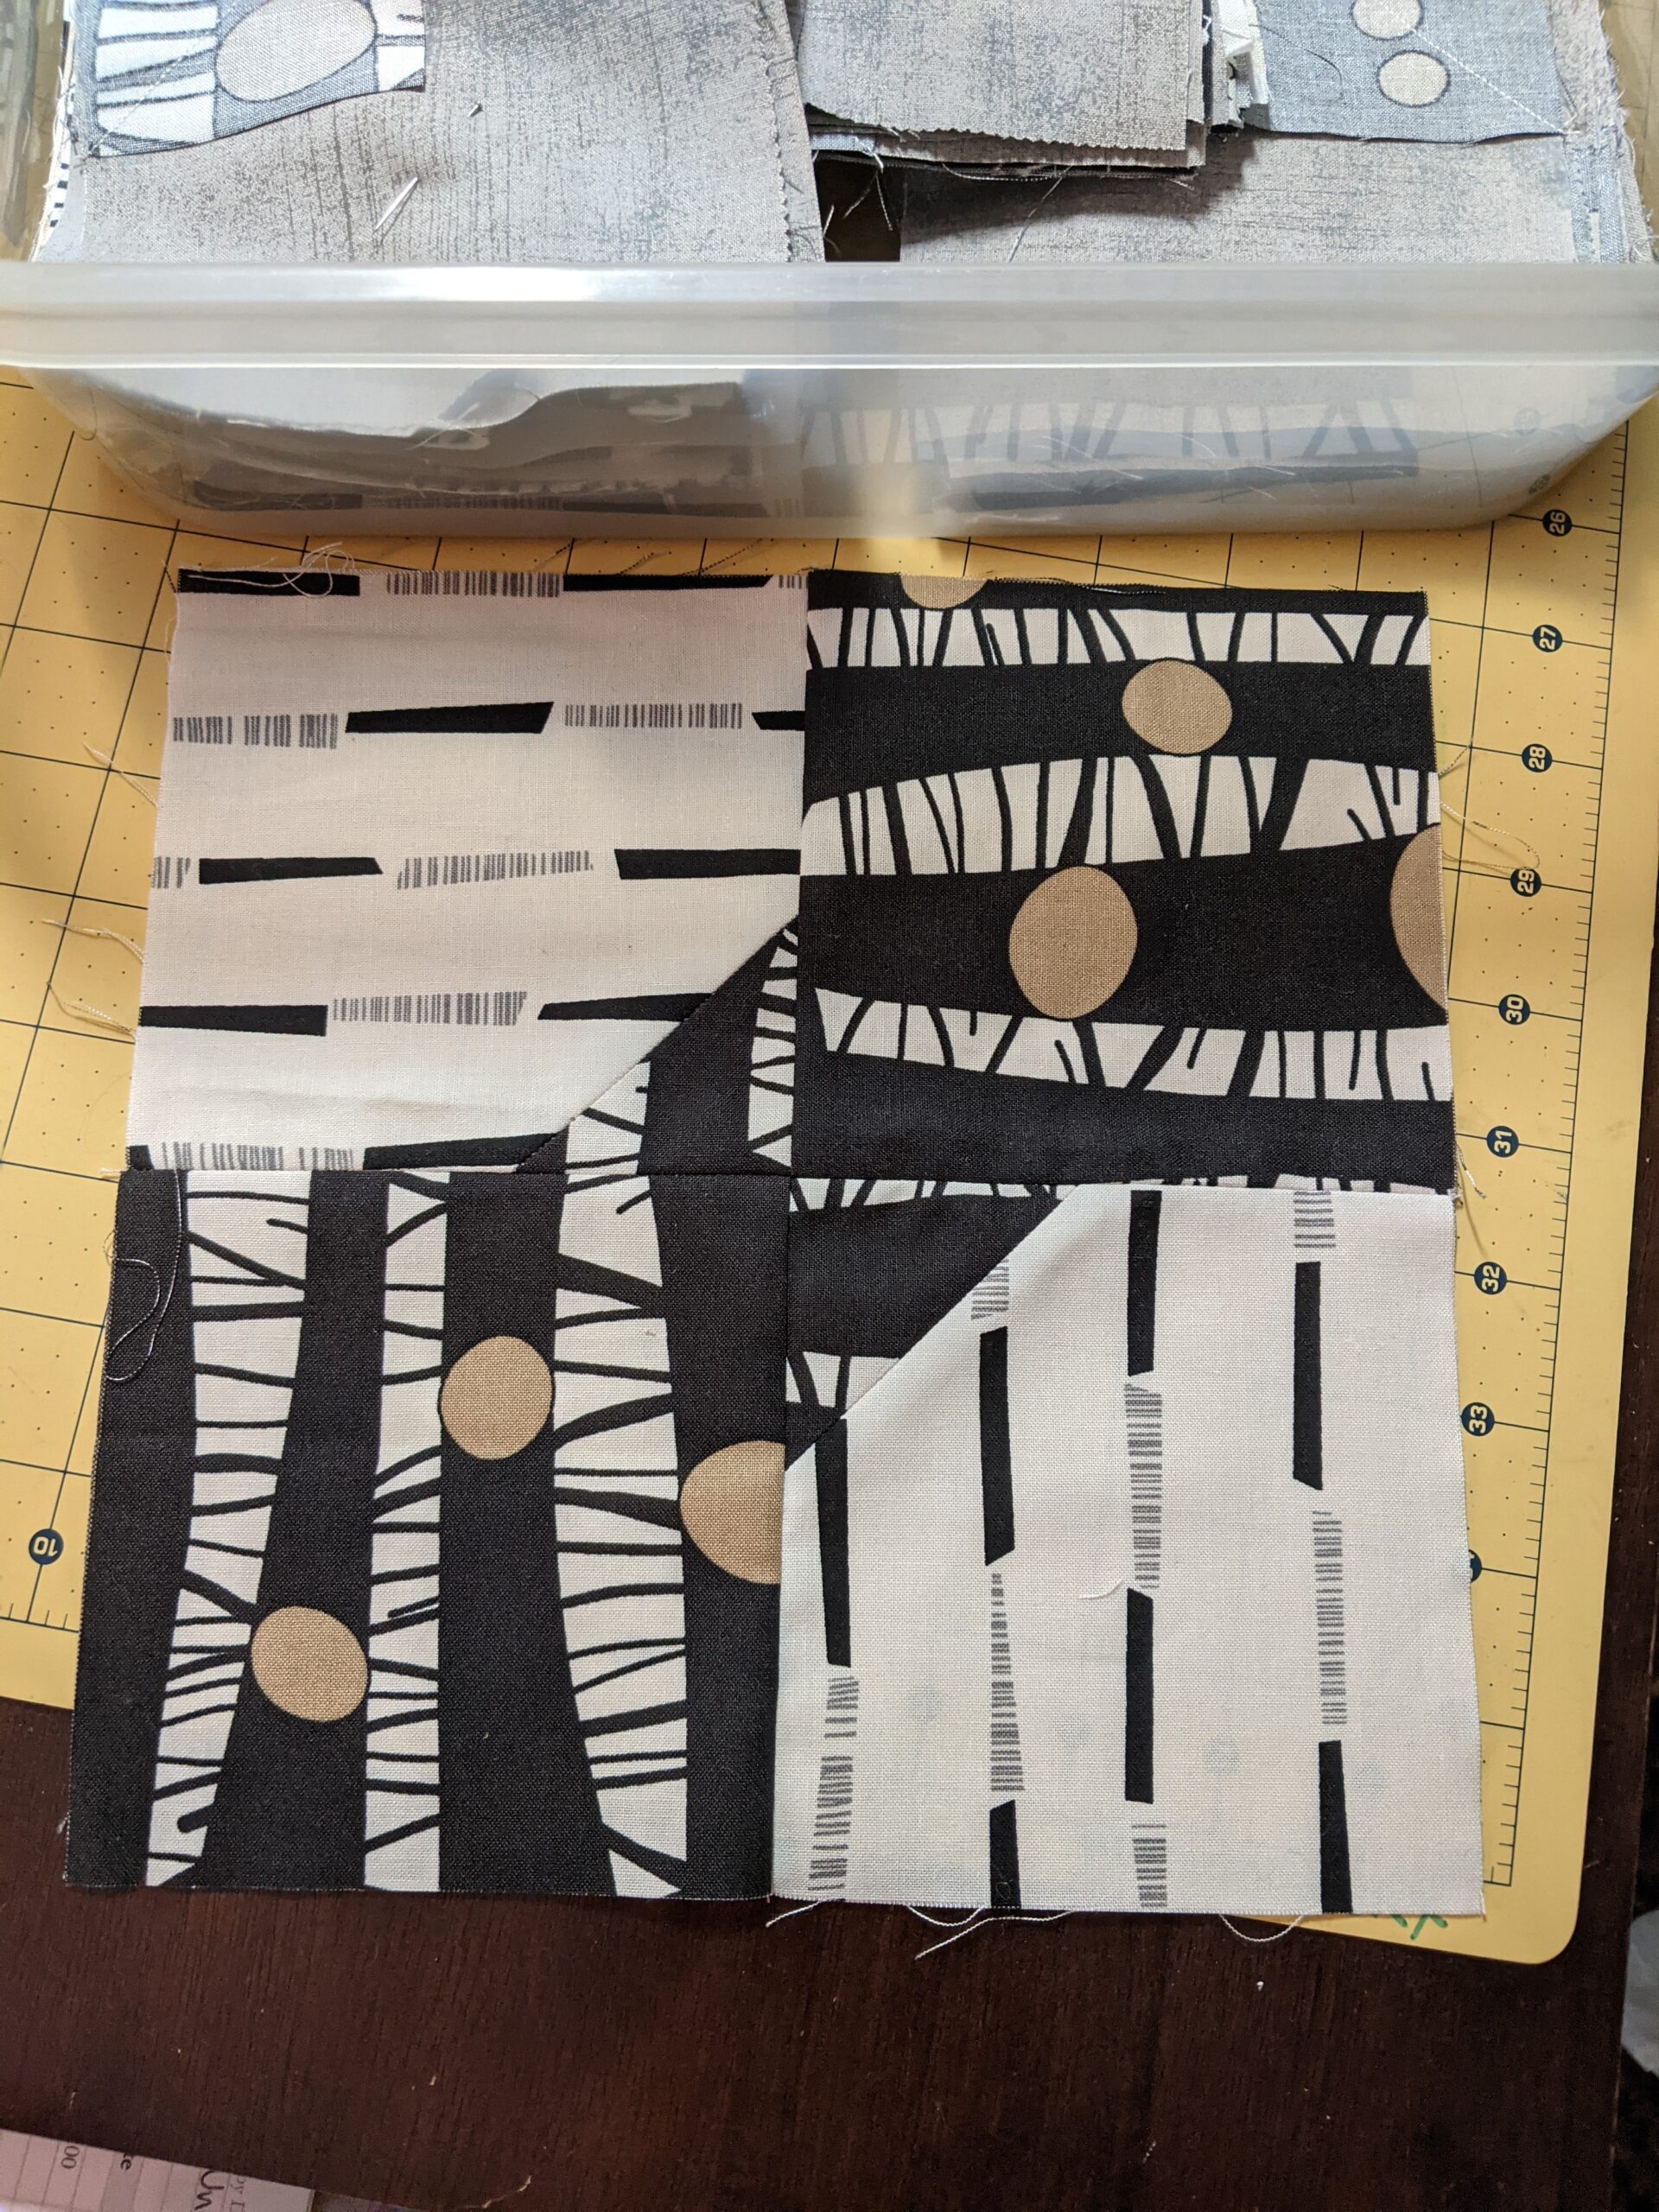
This Quilt is a modern twist on the vintage bowtie quilt block. I’m looking forward to how it will turn out.
Oh yes. The Magnum Opus. Several years ago (maybe ten?) my cousin Mary got engaged (yay!) but wasn’t going to get married until after she finished school. At the time, she was just starting her Master’s program and was planning on getting her Doctorate. For …
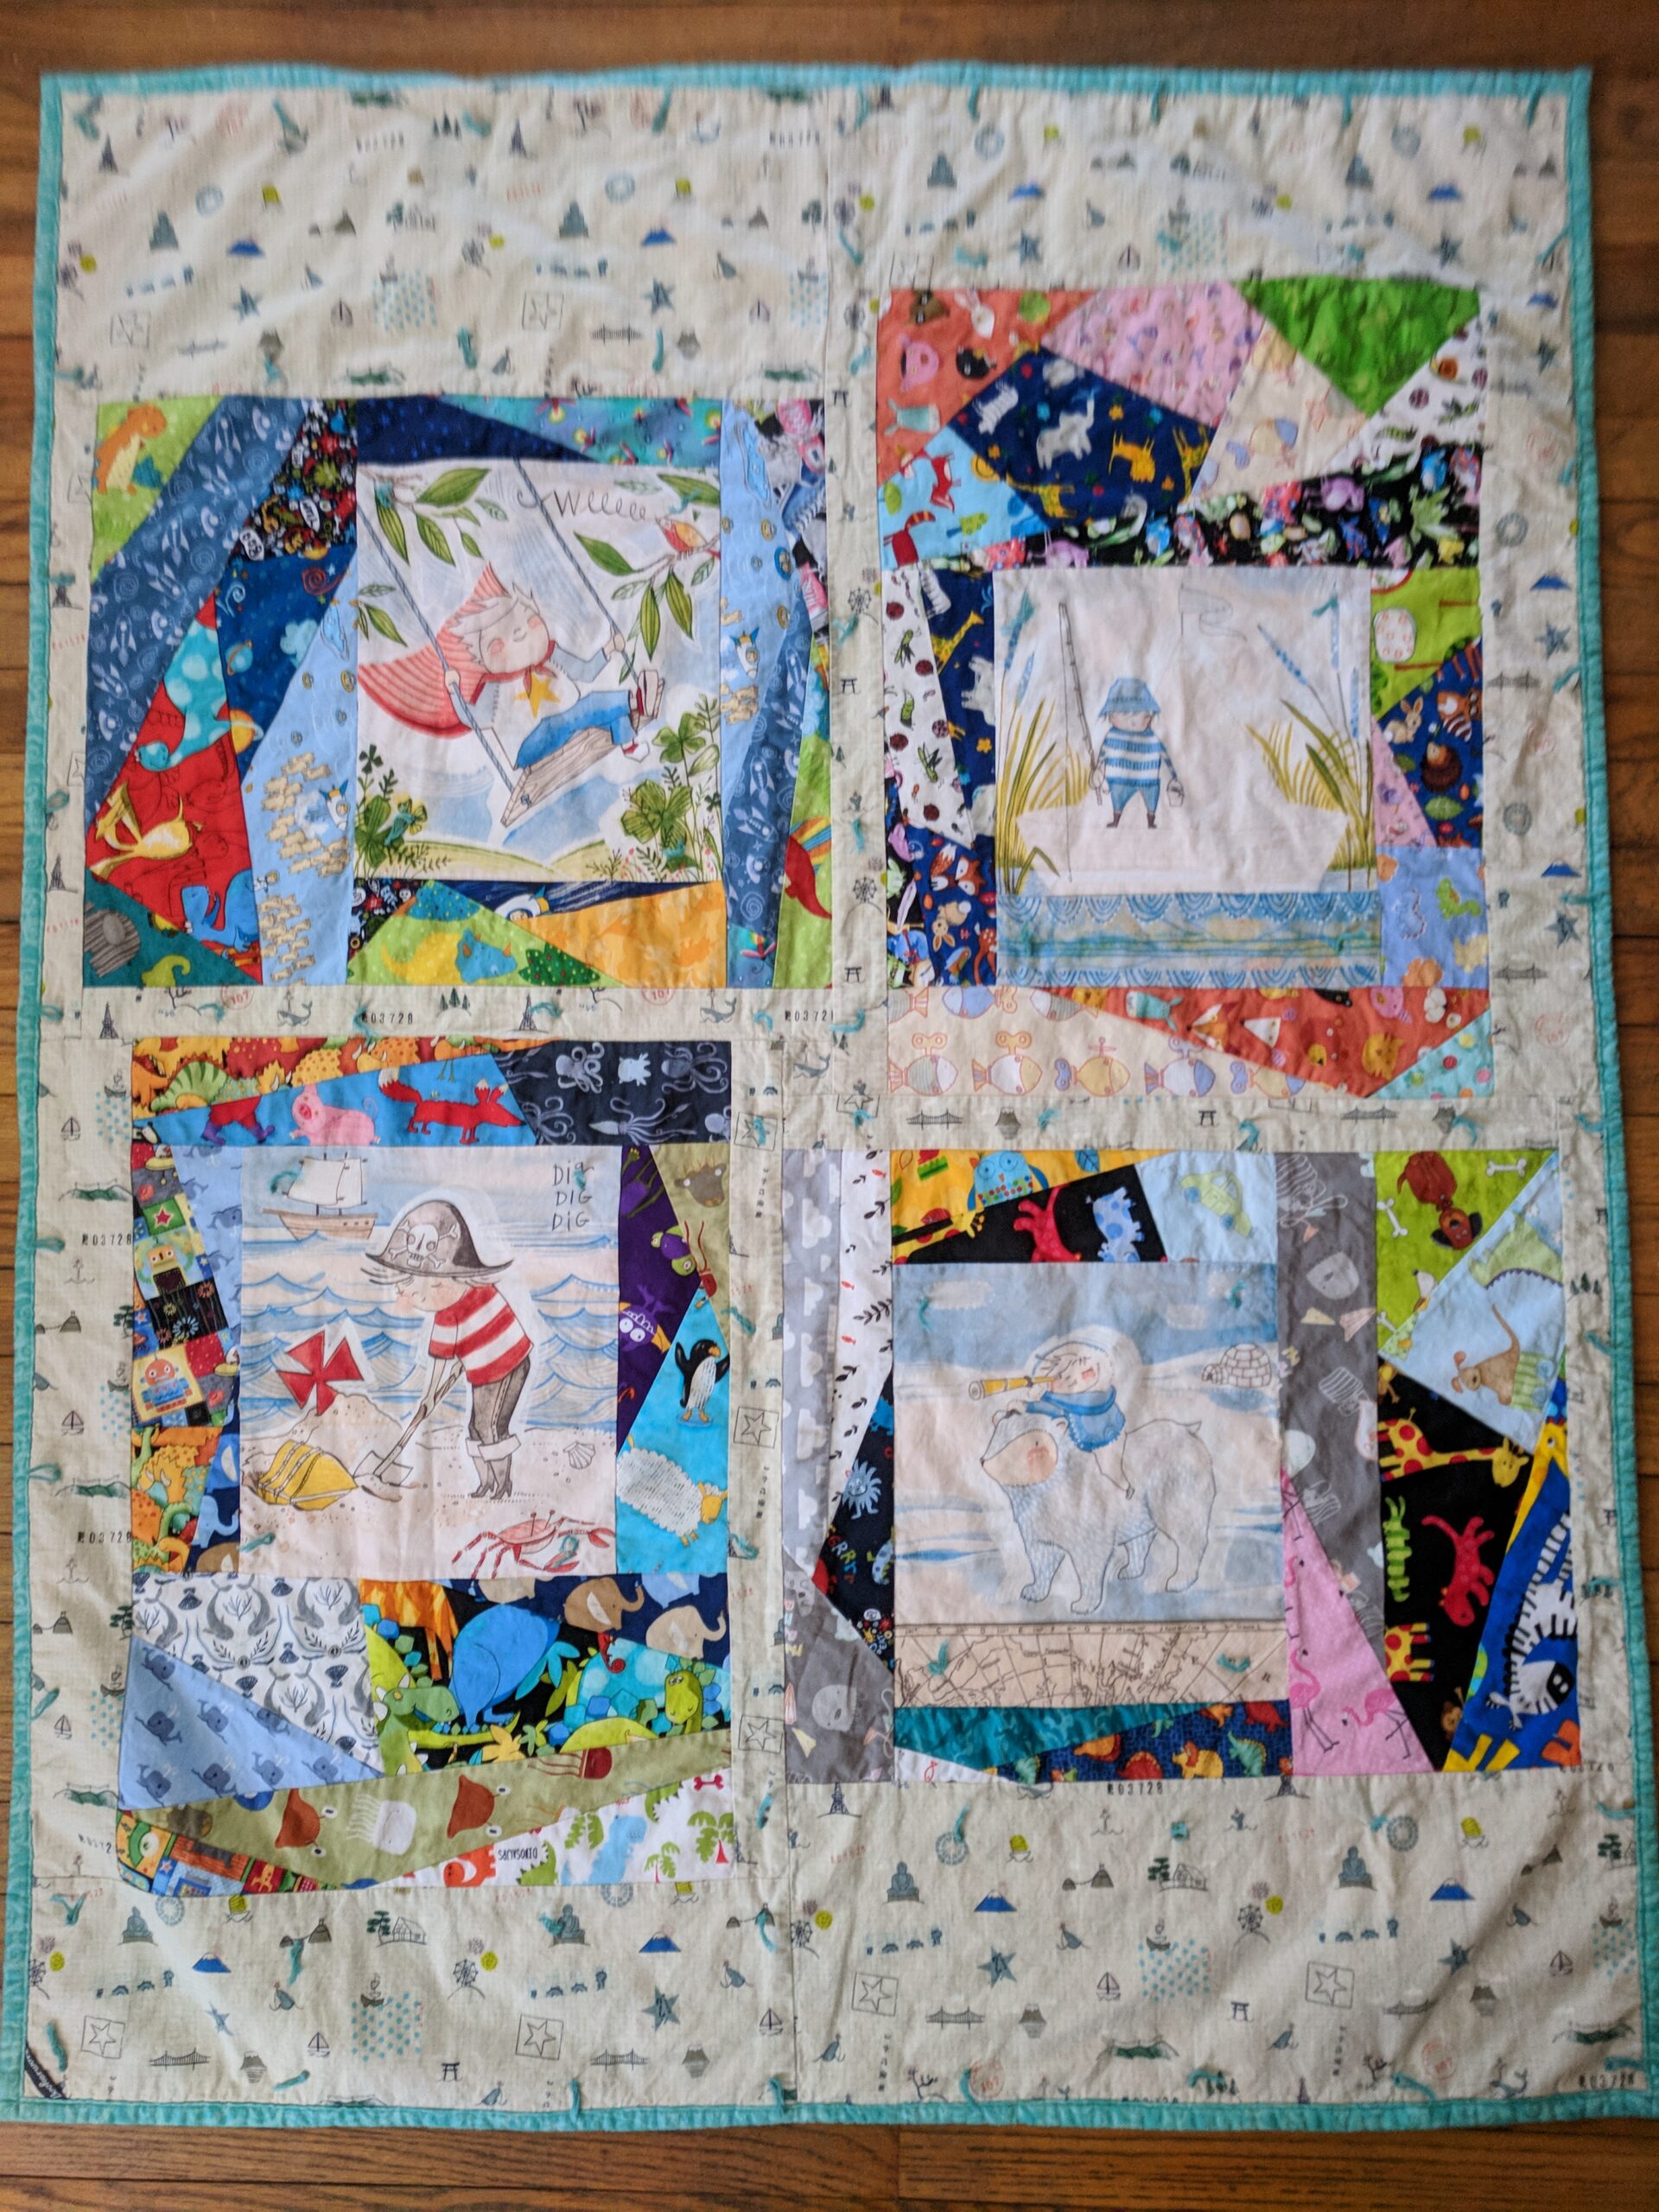
This was a fun one. My two cousins (sisters!) both were having their first babies (both daughters!) about three months apart. How Exciting!!! (I’m not going to tell you how old they are now….so how long ago these quilts were made…..but I will say this: …